So, you’ve decided it’s finally time to bid farewell to that old bathtub faucet? Well, you’re in luck because I’m here to guide you through the process of removing it. Trust me, it’s not as complicated as it may seem.
With a few simple tools and a little bit of patience, you’ll have that old faucet out in no time. So, roll up your sleeves and let’s get started on this satisfying DIY project.
Key Takeaways
- Gather the necessary tools and materials, such as an adjustable wrench, screwdriver, plumber’s tape, replacement faucet, and rust remover if needed.
- Shut off the water supply by locating the main water shut-off valve and turning it clockwise. Use a wrench to close a gate valve if necessary.
- Locate and identify the valve handle near the bathtub, checking for labels or markings and inspecting for damage or corrosion. Consult manufacturer’s instructions or seek professional assistance if unsure.
- Follow the appropriate shut-off method, either using the shut-off valve near the fixture or the main shut-off valve near the water meter. Be prepared and know different shut-off methods for emergencies.
Gathering the Necessary Tools and Materials
Before you start removing the bathtub faucet, make sure you have all the necessary tools and materials on hand. Gathering the necessary tools and materials is crucial to ensure a smooth and successful removal process.
There are a few potential challenges you may encounter, such as rusted or stuck parts, so having the right tools is essential. You will need an adjustable wrench, a screwdriver, plumber’s tape, and a replacement faucet. The adjustable wrench will help you loosen and remove the nuts that secure the faucet in place. The screwdriver will be useful for removing any screws that hold the faucet handle or trim plate. Plumber’s tape is necessary for ensuring a tight and leak-free connection when installing the new faucet.
Lastly, make sure you have a replacement faucet that matches the existing style and dimensions of your bathtub faucet. By gathering these necessary tools and materials, you will be well-prepared to tackle the task of removing your bathtub faucet.
Shutting off the Water Supply to the Bathtub
When it comes to shutting off the water supply to the bathtub, there are a few key points to consider.
First, it is important to know the location and identification of the valves that control the water flow. This includes both the main water shut-off valve for the entire house, as well as any specific valves that may be dedicated to the bathtub.
Secondly, there are multiple shut-off method options available, depending on the type of valves and plumbing system in place. These can include turning a valve handle, using a wrench to close a gate valve, or even shutting off the water supply at the water meter.
Lastly, it is crucial to follow safety precautions while shutting off the water supply to the bathtub, such as wearing protective gloves and eye goggles, as well as ensuring that the shut-off process is performed in a controlled manner to avoid any potential water damage or accidents.
Valve Location and Identification
You’ll need to locate and identify the valve in order to remove the bathtub faucet. The valve is an essential component that controls the flow of water to your bathtub. Here are some steps to help you with valve identification:
- Look for the valve handle near the bathtub. It is usually located on the wall or the side of the bathtub.
- Check for any labels or markings on the valve handle that indicate its purpose.
- Inspect the valve handle for any signs of damage or corrosion.
- Trace the water supply lines from the valve handle to the bathtub faucet to ensure you have identified the correct valve.
- If you’re unsure about the valve’s identification, consult the manufacturer’s instructions or seek professional assistance.
Now that you have successfully located and identified the valve, let’s move on to the next section about shut-off method options.
Shut-Off Method Options
Now that you’ve located and identified the valve, let’s explore the different shut-off method options.
When it comes to valve shut off and turning off water, there are a few methods you can choose from. The most common method is using the shut-off valve located near the fixture. This valve can be turned clockwise to shut off the water supply to the specific fixture, in this case, the bathtub faucet.
Another option is shutting off the main water supply to your house. This can be done by locating the main shut-off valve, usually found near the water meter or where the main water line enters your home, and turning it off.
It’s important to know these shut-off methods and be prepared in case of emergencies. Taking safety precautions while shutting off the water supply is essential to prevent any accidents or damage.
Safety Precautions While Shutting
To ensure your safety, it’s important to be cautious and take necessary precautions while shutting off the water supply. Here are some safety measures to consider:
- Wear protective gloves and goggles to prevent any potential injuries.
- Locate the main water shut-off valve, typically found near the water meter.
- Turn off the water supply by rotating the valve clockwise until it is fully closed.
- Use a wrench if necessary to ensure a tight and secure shut-off.
Once the water is shut off, open a faucet to relieve any remaining pressure in the pipes.
Removing the Decorative Cap or Cover
When it comes to removing the decorative cap or cover on various fixtures, such as a bathtub faucet, there are a few key points to keep in mind.
First, it is important to understand how to locate and remove hidden screws that may be holding the cap in place. This can typically be done by using a screwdriver or a specialized tool designed for hidden screw removal.
Additionally, different covering removal techniques may be required depending on the type of cap or cover being dealt with, including prying, unscrewing, or sliding off the cover.
Hidden Screw Removal
You’ll need to locate and remove the hidden screw in order to proceed with removing the bathtub faucet. Here’s how you can do it:
- Start by examining the faucet closely to identify any potential hidden screws.
- Look for small indentations or slots on the decorative plate or handle that may indicate the presence of a hidden screw.
- Use a flashlight to illuminate the area and make it easier to spot the hidden screw.
- Once you have located the hidden screw, select the appropriate screwdriver for the job. Make sure it fits snugly into the screw head to avoid stripping the screw.
- Carefully insert the screwdriver into the screw head and turn it counterclockwise to loosen and remove the hidden screw.
Covering Removal Techniques
Now that the hidden screws have been successfully removed, it’s time to move on to the next step in the process of removing a bathtub faucet.
In this subtopic, I will guide you through the techniques for removing bathtub grout and repairing bathtub cracks.
To remove bathtub grout, you will need a grout removal tool or a utility knife. Start by scoring the grout lines and then carefully scrape away the grout using the tool. Be cautious not to damage the surrounding tiles while doing this.
Repairing bathtub cracks requires a bathtub repair kit, which can be purchased at a local hardware store. Follow the instructions provided with the repair kit to mix the filler material and apply it to the cracks. Smooth out the filler using a putty knife and allow it to dry completely before sanding and refinishing the surface.
Unscrewing the Handle or Handles
To remove the bathtub faucet, start by unscrewing the handle or handles. This step is crucial in gaining access to the inner components of the faucet. Here is a detailed guide on how to accomplish this:
- Position yourself in front of the faucet, ensuring a comfortable stance and good grip strength.
- Locate the screw or screws securing the handle in place. This can usually be found underneath decorative caps or covers.
- Use a screwdriver or an Allen wrench to loosen and remove the screws.
Once the screws are removed, carefully pull the handle straight outwards, using controlled force to prevent any damage. If the handle feels stuck, try gently rocking it back and forth while applying consistent pressure until it comes free.
Detaching the Escutcheon Plate
To successfully detach the escutcheon plate from the bathtub faucet, there are a few necessary tools needed.
First, a screwdriver with the appropriate head size is essential for removing the screws holding the plate in place.
Additionally, a flashlight may be useful for illuminating hard-to-reach areas and ensuring a thorough inspection.
Finally, a pair of pliers may be required to loosen any stubborn screws or nuts.
However, it is important to note that potential challenges may arise during the escutcheon plate removal process, such as rusted or stripped screws, which may require additional techniques or tools to overcome.
Escutcheon Plate Removal
First, you’ll want to locate the screws on the escutcheon plate for removal. Once you have identified the screws, follow these steps to successfully remove the escutcheon plate:
- Using a screwdriver, gently loosen the screws in a counterclockwise motion.
- Carefully lift the escutcheon plate away from the wall, ensuring not to damage the surrounding tiles or paint.
- Inspect the plate for any signs of wear or damage, as this may indicate the need for escutcheon plate maintenance.
- Clean the area behind the escutcheon plate to remove any dirt or debris that may have accumulated over time.
- If necessary, replace the escutcheon plate with a new one, following proper escutcheon plate installation guidelines.
With the escutcheon plate successfully removed, let’s move on to the necessary tools needed for the next step in removing a bathtub faucet.
Necessary Tools Needed
Now that I’ve successfully removed the escutcheon plate, let’s discuss the necessary tools needed for the next step.
Before we proceed, gather the following materials: an adjustable wrench, pliers, a screwdriver (preferably a Phillips-head), a cloth or rag, and plumber’s tape. These tools will help you with the upcoming steps in the process.
Step-by-step instructions will ensure a smooth experience.
First, turn off the water supply to the bathtub.
Then, use the adjustable wrench to loosen and remove the mounting nut.
Next, disconnect the water supply lines using the pliers.
Once that is done, use the screwdriver to remove any remaining screws holding the faucet in place.
Potential Challenges Faced
Disconnecting the water supply lines may prove to be a bit tricky, so take your time and use the pliers carefully. When attempting to remove a stuck faucet, there are several challenges that you may encounter, especially when dealing with corroded or rusted parts. Here are some potential obstacles you may face:
- Stubborn nuts and bolts that are difficult to loosen
- Corrosion or rust on the water supply lines, making them harder to disconnect
- Sediment build-up within the faucet, causing it to be stuck
- Limited accessibility due to tight spaces or cramped working conditions
- Fragile or brittle parts that may break if excessive force is applied
These challenges require patience and a careful approach to avoid causing further damage.
Now, let’s tackle the first step: disconnecting the water supply lines.
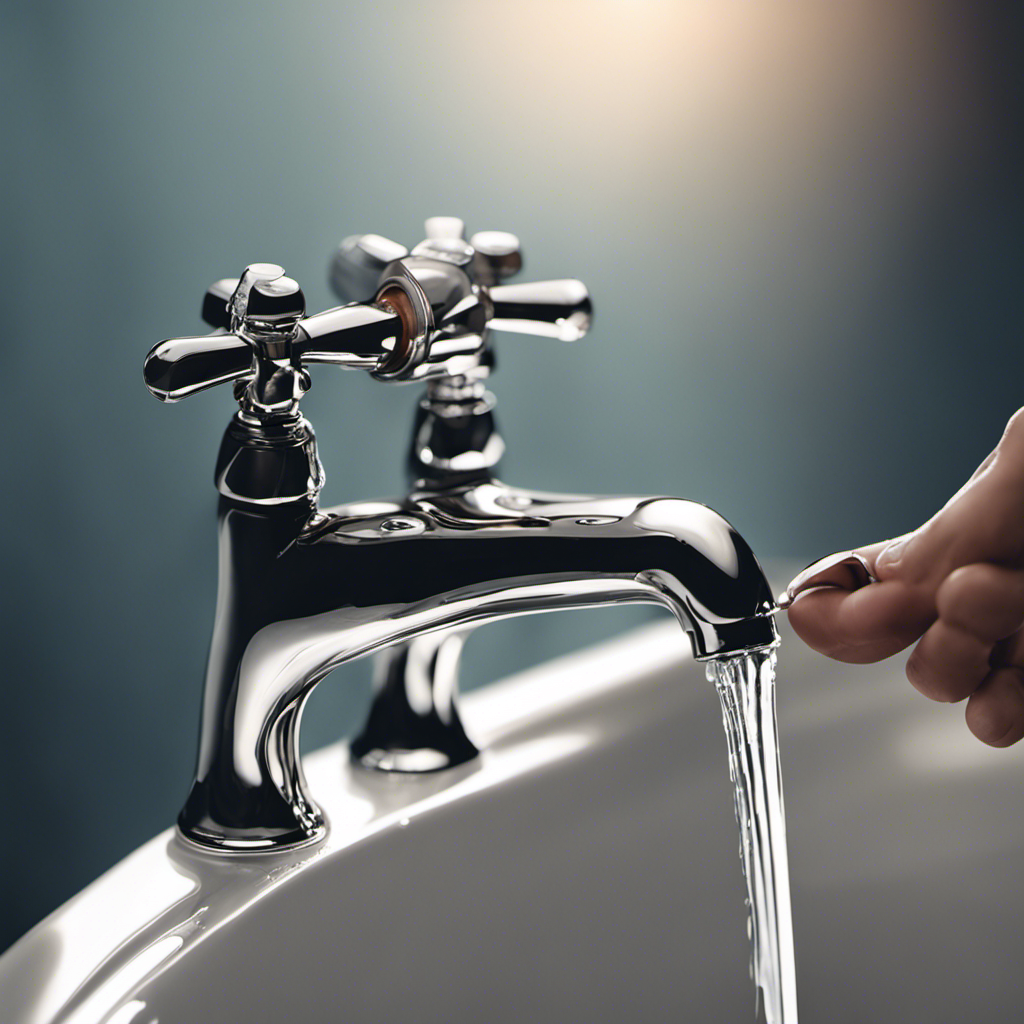
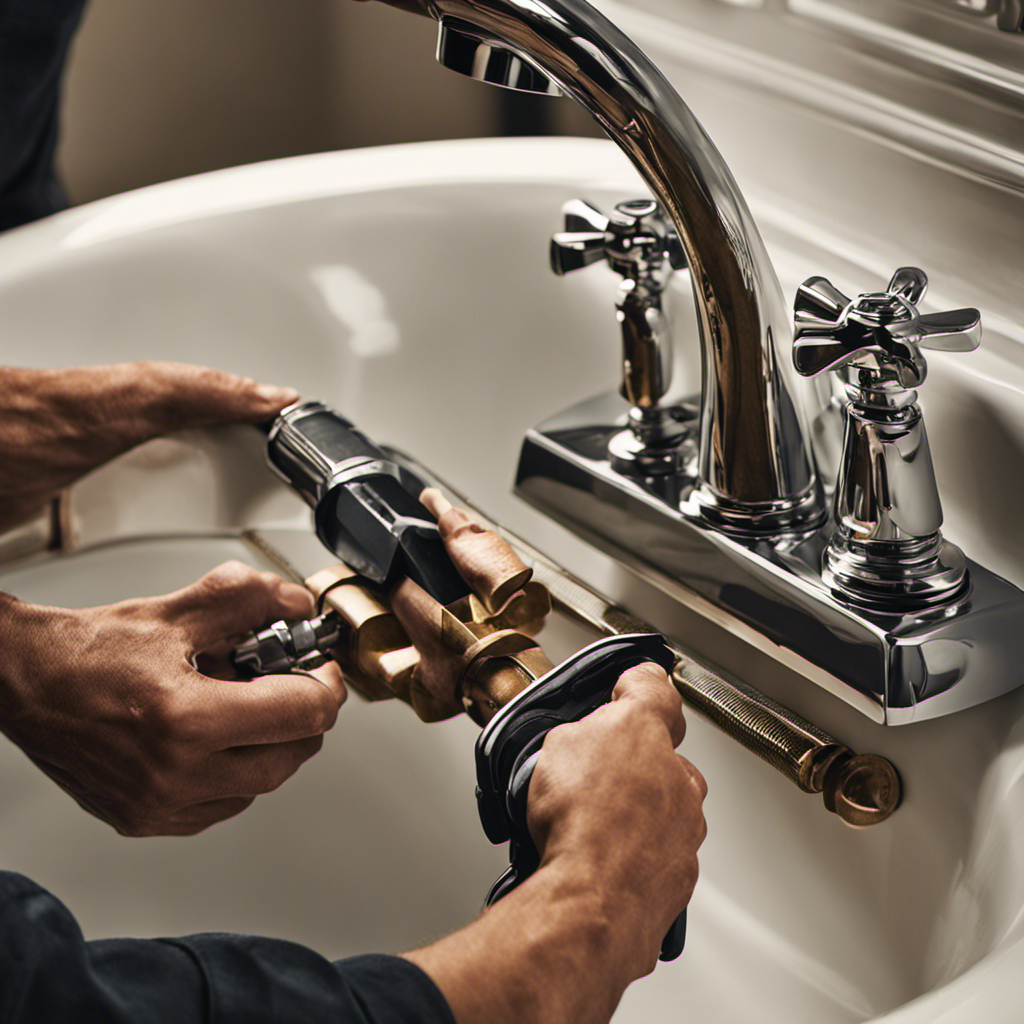
Disconnecting the Water Supply Lines
To remove the bathtub faucet, you’ll need to disconnect the water supply lines.
First, locate the shut-off valves under the sink or near the bathtub. Turn them clockwise to shut off the water supply.
Next, use an adjustable wrench to loosen the nuts connecting the water supply lines to the faucet. Hold the valve steady with one wrench while turning the nut counterclockwise with another wrench.
Once the nuts are loose, carefully remove the water supply lines from the faucet. Be prepared for some water to drip out, so have a towel or bucket ready to catch any spills.
With the water supply lines disconnected, you can now move on to removing the faucet handle and accessing the rest of the faucet assembly.
Loosening and Removing the Mounting Nuts
Once the water supply lines are disconnected, you’ll need to loosen and remove the mounting nuts. This step is crucial in order to successfully remove the bathtub faucet. Here’s how to do it:
- Spray a lubricant, such as WD-40, on the rusted nuts. This will help loosen them and make removal easier.
- Use an adjustable wrench to grip the mounting nuts firmly.
- Rotate the wrench counterclockwise to loosen the nuts.
- If the nuts are stubborn and won’t budge, tap them gently with a hammer to break through the rust.
- Continue turning the wrench until the mounting nuts are completely loosened and can be removed.
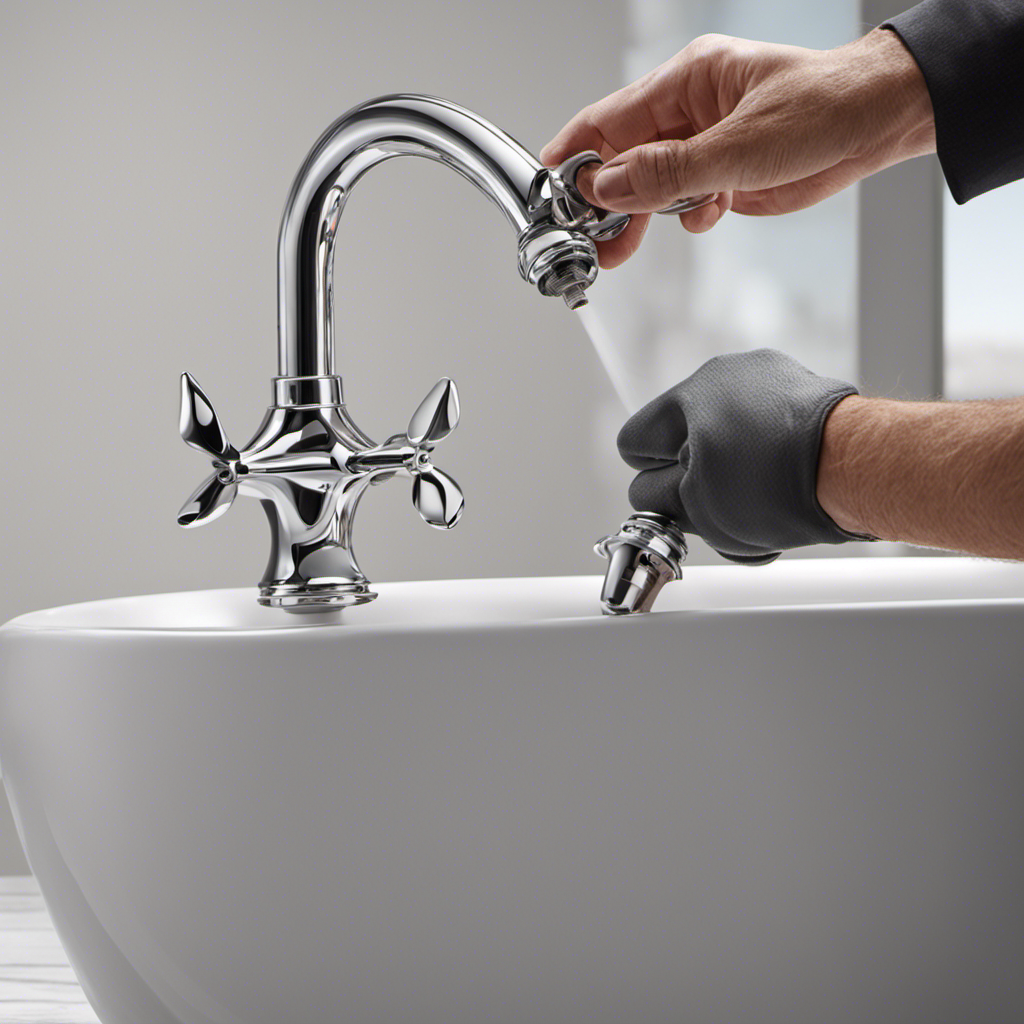
Pulling Out the Old Bathtub Faucet
When you’re ready, you can start by gently pulling out the old faucet from the bathtub.
To remove a stuck faucet, it’s important to troubleshoot any leaks first. Begin by shutting off the water supply to the bathtub. Next, remove the handle and any decorative covers to access the mounting nuts. Use a wrench to loosen and remove the mounting nuts, ensuring not to damage the surrounding area.
Now, grab hold of the faucet and carefully pull it straight out. If the faucet seems stuck, you can use a penetrating oil to help loosen it.
Once the old faucet is out, you can move on to inspecting the faucet seat and replacing it if necessary, which I will explain in the next section.
Inspecting the Faucet Seat and Replacing if Necessary
After removing the old faucet, it’s important to inspect the faucet seat and replace it if necessary. The faucet seat is a crucial component that ensures a leak-free connection between the faucet and the plumbing.
Here are the steps to inspect and replace the faucet seat:
- Use a flashlight to get a clear view of the seat inside the faucet body.
- Look for any signs of corrosion, damage, or mineral buildup on the seat surface.
- Check if the seat is worn out or uneven, which can cause leaks.
- If the seat is damaged or worn, use a seat wrench to remove it from the faucet body.
- Install a new faucet seat by threading it into the faucet body using the seat wrench.
Regularly inspecting and replacing the faucet seat will help maintain a reliable and durable faucet, ensuring a steady flow of water without any leaks.
Cleaning the Area and Preparing for Installation
To prepare for installation, start by cleaning the surrounding area to ensure a smooth and secure attachment. Proper cleaning techniques and surface preparation are essential to ensure a successful installation of a bathtub faucet.
Begin by removing any debris or dirt from the area using a soft brush or cloth. Next, use a mild detergent or cleaning solution to remove any stubborn stains or grime. Rinse the area thoroughly with clean water and dry it completely to prevent any moisture buildup.
Once the surface is clean, inspect it for any cracks, unevenness, or other imperfections that may affect the installation. If necessary, use sandpaper or a leveling compound to smooth out the surface.
Installing the New Bathtub Faucet
Installing the new bathtub faucet is a straightforward process that can be completed with basic tools and some careful attention to detail. Here is a step-by-step guide to help you through the installation process:
- Start by turning off the water supply to the bathtub.
- Remove the old faucet by unscrewing the nuts that hold it in place.
- Clean the area where the old faucet was to ensure a smooth installation.
Choose the right faucet for your bathtub, considering factors such as style, finish, and functionality.
- Install the new faucet by following the manufacturer’s instructions, making sure to secure it tightly and connect the water supply lines.
Remember to use Teflon tape on the threads to prevent leaks and to test the faucet for any issues before fully tightening it.
Frequently Asked Questions
How Do I Choose the Right Replacement Faucet for My Bathtub?
When choosing a replacement faucet for your bathtub, there are several factors to consider. These include the type of faucet, the finish, and the style that matches your bathroom décor. Take your time to explore the available options and find the perfect fit.
Can I Remove a Bathtub Faucet Without Shutting off the Water Supply?
Sure, I can install a new faucet without shutting off the water supply. It’s totally safe and there are absolutely no potential risks involved. Just kidding! Removing a bathtub faucet without shutting off the water supply can cause serious water damage and potential flooding. Don’t do it!
What Should I Do if the Mounting Nuts Are Difficult to Loosen?
If the mounting nuts are difficult to loosen, I would suggest using a lubricant such as WD-40. Spray the lubricant on the nuts and let it sit for a few minutes before attempting to loosen them. This should help to loosen any rust or debris.
Is It Necessary to Replace the Faucet Seat During the Removal Process?
During the removal process of a bathtub faucet, it may be necessary to replace the faucet seat. This is important for maintaining the functionality and preventing leaks in your faucet system.
How Can I Ensure a Proper Installation of the New Bathtub Faucet?
To ensure a proper installation of the new bathtub faucet, follow these steps: turn off the water supply, remove the old faucet, clean the installation area, apply plumber’s tape, and securely fasten the new faucet. Avoid common mistakes like overtightening or improper sealing.
Conclusion
In conclusion, removing a bathtub faucet may seem daunting, but it can be done with the right tools and know-how.
Remember to shut off the water supply before starting. Take your time to carefully remove each component.
Inspect the faucet seat and replace it if necessary to ensure proper functionality.
As they say, "A stitch in time saves nine." So investing the time now to properly remove and install a new bathtub faucet will save you from future headaches and repairs.
Happy DIY-ing!

With an impeccable eye for detail and a passion for bathroom-related, Ava leads our editorial team gracefully and precisely.
Under her guidance, Best Modern Toilet has flourished as the go-to resource for modern bathroom enthusiasts. In her free time, you might find Ava exploring antique shops and looking for vintage bathroom fixtures to add to her collection.