As a homeowner, there’s nothing more frustrating than the constant drip, drip, drip of a bathtub faucet. But fear not, because I’m here to guide you through the process of stopping that annoying drip.
In this article, I’ll show you step-by-step how to:
- Identify the source of the dripping
- Turn off the water supply
- Inspect the cartridge or valve
- Replace any worn-out parts
- Clean and reassemble the faucet
- Test for leaks
So let’s roll up our sleeves and fix that pesky faucet once and for all!
Key Takeaways
- Check the handle, cartridge, O-rings, and faucet body for wear or damage to identify the source of the dripping.
- Turn off the water supply by locating the shut-off valve and closing it clockwise.
- Remove the faucet handle by finding the screw or cap, using a screwdriver or Allen wrench to remove it, and gently pulling the handle straight out.
- Inspect the cartridge or valve for worn-out washers or O-rings, replace them if necessary, and regularly clean and lubricate for proper maintenance.

KOHLER 28214-BL Anthem Shower Digital Control for Personalized Shower Experience with Eco-Mode & Adjustable Dial, Matte Black
DIGITAL CONTROL TOUCH SCREEN: Allows you to control temperature, flow, and up to six shower outlets like a...
As an affiliate, we earn on qualifying purchases.
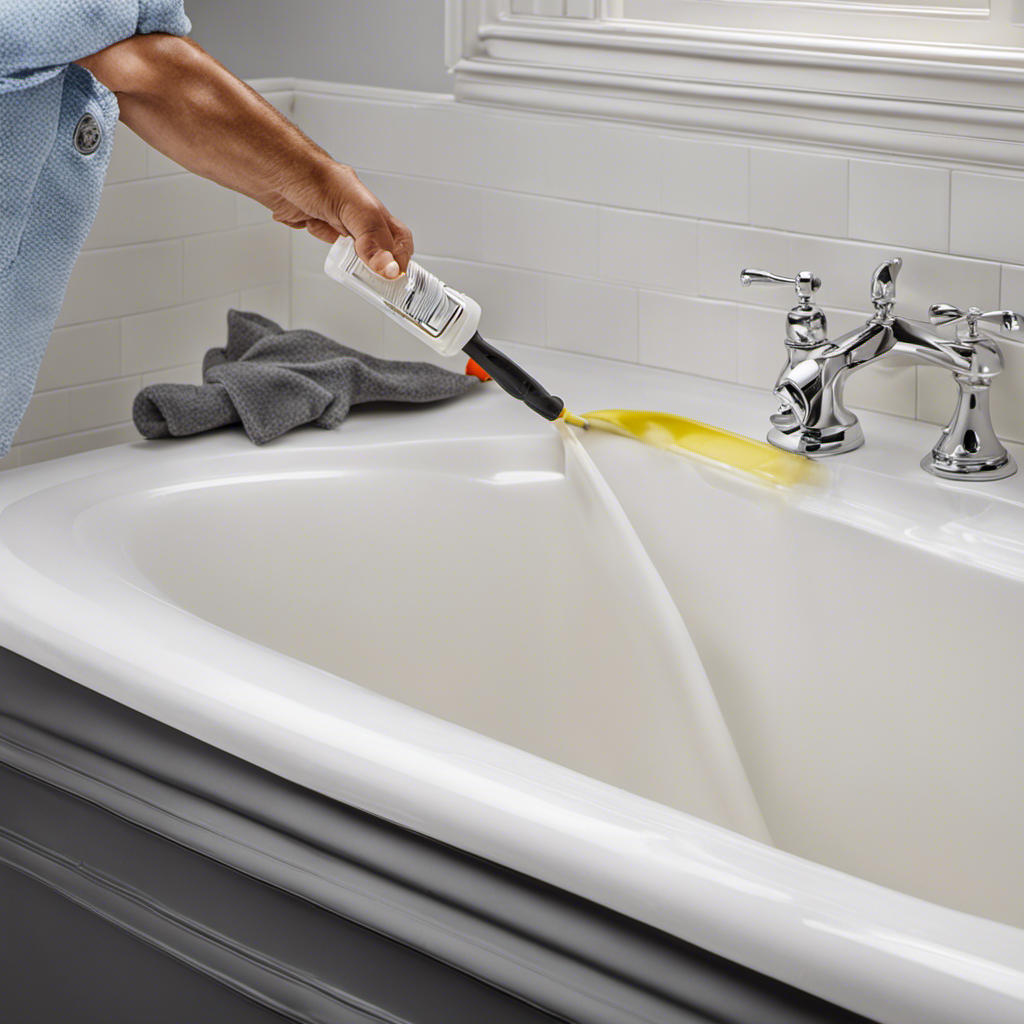
Identify the Source of the Dripping
To fix a dripping bathtub faucet, you’ll need to identify the source of the drip. There are several troubleshooting tips you can follow to determine the common causes of a dripping faucet.
First, check the handle to ensure that it is tightly closed. If the handle is loose, it may be causing the faucet to drip.
Next, inspect the cartridge or valve stem inside the faucet. Over time, these components can become worn or damaged, leading to leaks.
Additionally, check the rubber O-rings and washers for any signs of wear or deterioration. These small components are often the culprits behind a dripping faucet.

Enga 3-Function Shower Mixing Valve, Temperature Display Push-Button Thermostatic Valve with Flow Volume Control, Brushed Nickel
【Digital Temperature Display】This 3-way digital thermostatic shower valve provides precise temperature control, water flow customization, safety features, and...
As an affiliate, we earn on qualifying purchases.
Turn off the Water Supply
Make sure you’ve shut off the water supply before attempting to fix the issue. This is a crucial step to avoid any water leakage or accidents while repairing the faucet handle.
To turn off the water supply, locate the shut-off valve under the sink or near the water main. Turn the valve clockwise until it is fully closed.
Once the water supply is shut off, you can proceed with adjusting the water flow or repairing the faucet handle.
Adjusting the water flow can be done by removing the handle and adjusting the flow restrictor or cartridge inside.
To repair the faucet handle, remove the handle and inspect the components for any damage or wear. Replace any worn or broken parts and reassemble the handle.
Remember to turn the water supply back on once the repairs are complete.
Grohe 29137000 Grohtherm Dual Function Thermostatic Valve Trim, StarLight Chrome
Final installation set for:
As an affiliate, we earn on qualifying purchases.
Remove the Faucet Handle
Before removing the faucet handle, ensure that the water supply is shut off to prevent any accidents or water leakage. Now, let’s move on to the next step in fixing a dripping bathtub faucet – removing the faucet handle. This is where we will identify the problem and begin the process of fixing the dripping. To help you better understand this step, I have created a table below that outlines the process:
| Step | Procedure |
|---|---|
| 1 | Locate the screw or cap on the handle. |
| 2 | Use a screwdriver or an Allen wrench to remove the screw. |
| 3 | Once the screw is removed, gently pull the handle straight out. |

3 Way Shower Mixer Valve Temperature Display with Trim Kit, Digital Shower Diverter Mixing Brass Valve Body for Shower Faucets, Black
[PRECISE CONTROL, PEACE IN MIND] FULAIWANG shower vavle with the digital temperature display, you can keep a close...
As an affiliate, we earn on qualifying purchases.
Inspect the Cartridge or Valve
When it comes to maintaining a faucet, troubleshooting common leaks is an essential skill. By identifying the source of the leak, such as worn-out washers or O-rings, I can effectively address the issue.
Additionally, replacing worn-out parts, like cartridges or valves, is crucial for preventing future leaks and ensuring smooth operation.
Lastly, implementing proper maintenance techniques, such as regular cleaning and lubrication, can extend the lifespan of the faucet and minimize the likelihood of leaks occurring.
Troubleshooting Common Leaks
To fix a dripping bathtub faucet, you can start by checking the condition of the washers and O-rings. These small components are often the culprits behind the annoying leaks. If you notice water dripping from the spout even when the faucet is turned off, it is likely that the washers or O-rings are worn out or damaged.
To troubleshoot this issue, turn off the water supply to the faucet and disassemble the handle. Inspect the washers and O-rings for any signs of wear or tear. If they appear worn or cracked, replace them with new ones of the same size and type.
This simple fix can often solve the problem and stop the faucet from dripping.
Replacing Worn-Out Parts
Now that we have covered troubleshooting common leaks in a bathtub faucet, let’s move on to the next step: replacing worn-out parts. This is often the most effective way to stop a dripping faucet. Here are some troubleshooting tips and an installation guide to help you along the way:
-
Identify the problem: Examine the faucet to determine which part is causing the leak. It could be a worn-out washer, O-ring, or valve seat.
-
Gather the necessary tools: You will need a wrench, screwdriver, pliers, and replacement parts specific to your faucet model.
-
Follow the installation guide: Refer to the manufacturer’s instructions or online resources for a step-by-step guide on how to replace the worn-out part. Make sure to shut off the water supply before starting the installation.
Proper Maintenance Techniques
Regular maintenance is essential to prevent further leaks and extend the lifespan of your faucet. To ensure the proper functioning of your bathtub faucet, follow these maintenance tips.
First, regularly inspect the faucet for any signs of wear and tear, such as loose handles or dripping water. Tighten any loose components and replace any damaged parts immediately.
Additionally, clean the faucet aerator regularly to remove mineral deposits that can obstruct the flow of water and cause leaks.
Furthermore, consider using a lubricant on the moving parts of the faucet to reduce friction and prolong their lifespan.
Finally, be mindful of how you use the faucet, avoiding excessive force or rough handling that can lead to leaks.
Replace Any Worn-Out Parts
When it comes to troubleshooting common leaks in plumbing systems, it’s important to have the proper tools and techniques at your disposal.
One of the most common causes of leaks is a faulty seal or gasket, which can be easily replaced with the right tools.
Additionally, understanding the proper techniques for tightening connections and identifying potential sources of leaks can help prevent future issues.
Troubleshooting Common Leaks
If you’re experiencing a dripping bathtub faucet, there are a few common leaks that you can troubleshoot. Here are three troubleshooting techniques to help you identify and fix the problem:
-
Loose or worn-out washer: The washer inside the faucet handles can become loose or worn over time, causing a leak. To fix this, turn off the water supply, remove the handle, and replace the washer with a new one.
-
Faulty valve seat: The valve seat, located inside the faucet body, can become corroded or worn, leading to leaks. To fix this, use a valve seat wrench to remove the old seat and replace it with a new one.
-
Damaged O-rings: O-rings, which create a watertight seal in the faucet spout, can wear out or become damaged. To fix this, remove the spout and replace the O-rings with new ones.
Proper Tools and Techniques
To properly fix leaks in your bathtub, you’ll need the right tools and techniques.
First, you’ll need a set of adjustable wrenches to loosen and tighten the parts of your faucet. Additionally, having a screwdriver with multiple heads will help you remove any screws or covers that may be hiding the source of the leak. It’s also important to have a pair of pliers to hold and manipulate small parts.
When it comes to techniques, start by turning off the water supply to the faucet. Then, carefully disassemble the faucet, taking note of the order in which the parts are arranged. Inspect each component for any signs of damage or wear. Replace any faulty parts and reassemble the faucet in the correct order.
Clean and Reassemble the Faucet
After turning off the water supply, start by removing the faucet handle to access the inner components. Cleaning and reassembling the faucet is an essential step in faucet repair. Here’s how to do it:
-
Use a mild cleaning product: To remove any dirt or grime from the faucet, apply a mild cleaning product to a clean cloth or sponge. Gently scrub the surface of the faucet, paying attention to hard-to-reach areas.
-
Clean the inner components: Once the faucet handle is removed, carefully clean the inner components using a soft brush or toothbrush. Remove any debris or mineral buildup that may be causing the dripping.
-
Reassemble the faucet: After cleaning, reassemble the faucet by following the reverse steps of disassembly. Make sure all components are properly aligned and tightened. Turn on the water supply to test if the dripping has been resolved.
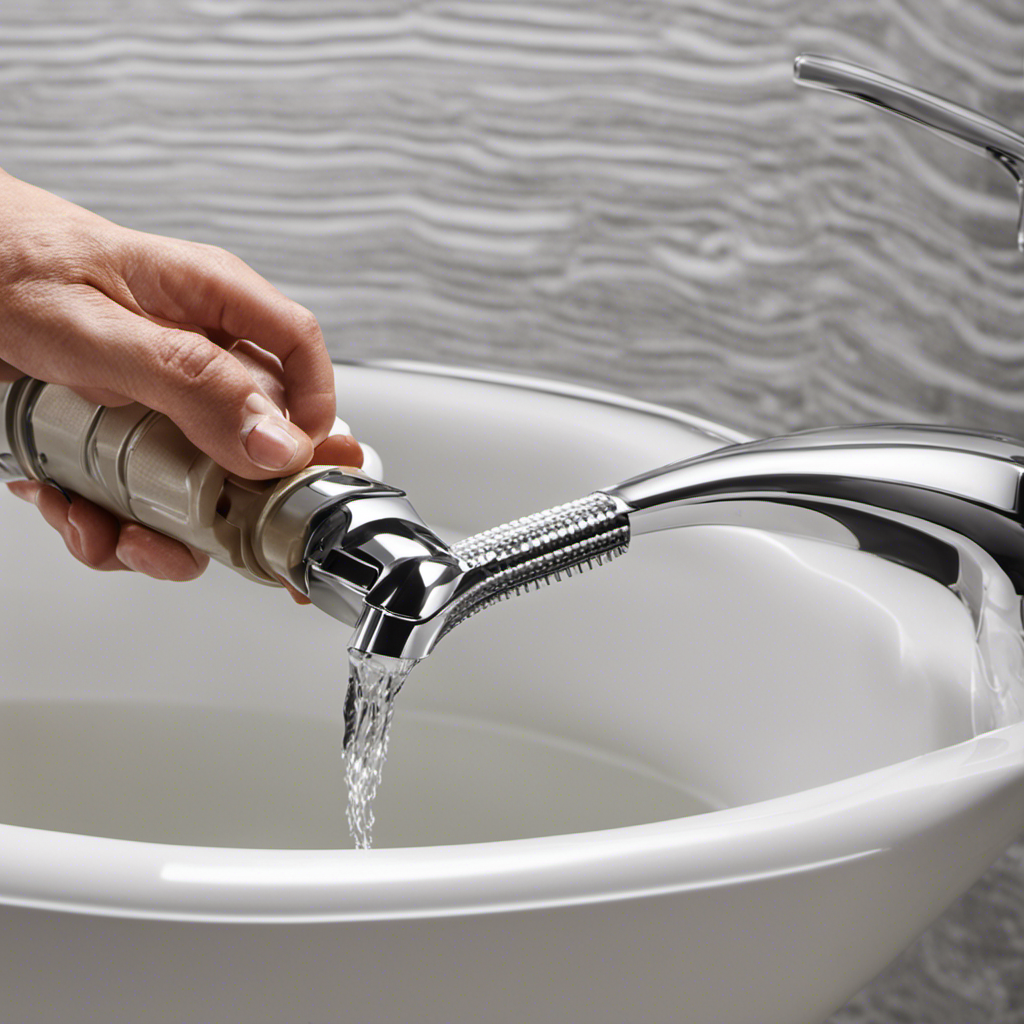
Test for Leaks
Check the water supply connections and inspect the faucet for any signs of leaks. This step is crucial in ensuring the test accuracy and leak prevention.
Begin by examining the water supply lines, ensuring that they are securely fastened and free from any damage or corrosion.
Next, carefully observe the faucet for any visible leaks, such as dripping or pooling water. To test for leaks accurately, turn on the faucet and let the water run for a few minutes.
During this time, closely monitor the faucet and surrounding areas for any signs of water leakage. Pay attention to the base of the faucet, the handles, and any connections.
If you notice any leaks, it is important to address them promptly to prevent further damage and ensure the longevity of your faucet.
Adjust Water Pressure
You’ll want to make sure the water pressure is at a comfortable level before proceeding. Adjusting the water pressure in your bathtub faucet is crucial to prevent any potential leaks or damage to your plumbing system. Here are three important steps to help you adjust the water pressure effectively:
-
Check the main water supply: Locate the main shut-off valve and ensure it is fully open. If it’s partially closed, it can restrict water flow and result in low water pressure.
-
Clean the aerator: Unscrew the aerator from the faucet and clean it thoroughly. Sediment or debris can build up over time, reducing water flow and causing low pressure.
-
Adjust the pressure regulator: If your home has a pressure regulator, locate it near the main water supply and adjust it to increase or decrease the pressure to a comfortable level.
Seek Professional Help if Necessary
If the water pressure in your bathtub cannot be adjusted using the steps provided, it may be time to seek professional help.
Seeking professional advice is important when dealing with complex plumbing issues. While there are potential DIY solutions for some problems, it’s essential to recognize when the situation requires expertise.
A professional plumber has the knowledge and experience to diagnose and fix the underlying cause of the water pressure issue. They can assess the plumbing system, identify any leaks or blockages, and recommend the best course of action.
Attempting to fix the problem without proper training may lead to further damage or create safety hazards. So, if the water pressure issue persists despite your efforts, it’s wise to reach out to a professional for assistance.
Frequently Asked Questions
How Long Does It Typically Take to Fix a Dripping Bathtub Faucet?
Typically, it takes around 1-2 hours to fix a dripping bathtub faucet. The steps involved include turning off the water supply, disassembling the faucet, replacing worn-out parts, and reassembling everything.
Can a Dripping Bathtub Faucet Cause Any Water Damage to the Bathroom?
A dripping bathtub faucet can potentially cause water damage to the bathroom. To prevent this, it’s important to address the issue promptly and fix the faucet. Regular maintenance and inspections can also help prevent future damage.
What Are the Common Reasons Behind a Bathtub Faucet Dripping?
Common causes of a dripping bathtub faucet include worn-out washers, corroded valve seats, or faulty O-rings. Troubleshooting steps involve turning off the water supply, disassembling the faucet, and replacing the damaged components to stop the dripping.
Are There Any Temporary Fixes to Stop a Bathtub Faucet From Dripping Until It Can Be Repaired?
Sometimes, a dripping bathtub faucet can be annoying. Luckily, there are temporary solutions or quick fixes available until it can be properly repaired. Let me share some of these options with you.
Is It Possible to Fix a Dripping Bathtub Faucet Without Turning off the Water Supply to the Entire House?
Yes, it is possible to fix a dripping bathtub faucet without turning off the water supply to the entire house. However, attempting to fix it without professional help could lead to potential risks if not done correctly.
Conclusion
So there you have it, folks! By following these simple steps, you can put a stop to that annoying bathtub faucet drip once and for all.
Just like a skilled plumber, you’ll be able to identify the source of the problem, turn off the water supply, and carefully inspect and replace any worn-out parts.
With a little patience and determination, you’ll have your faucet running smoothly again, like a well-oiled machine.
And remember, if all else fails, don’t hesitate to call in the professionals – they’ll be able to save the day!