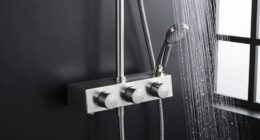
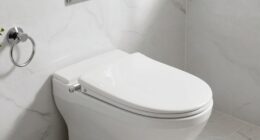
As I stood in the bathroom, a steady drip from the toilet valve echoed in the silence. I knew it was time for a change.
In this article, I will guide you through the process of replacing your toilet valve, step by step. From finding the right replacement valve to testing and adjusting the new one, I will provide you with the technical knowledge and detailed instructions you need to successfully complete this task.
So, let’s roll up our sleeves and get started!
Key Takeaways
- Identify the type of valve currently in use (ball, flapper, or flush valve)
- Choose a high-quality replacement valve for longevity and proper functionality
- Shut off the water supply to the toilet before starting the replacement process
- Use the necessary tools and supplies, such as an adjustable wrench and Teflon tape, for the valve replacement.

Fluidmaster 400H-002 Performax Universal Toilet Fill Valve High Performance Tank and Bowl Water Control, 1-Pack, Multicolor
Fix noisy, or slow filling fill valves with the quietest, most powerful toilet fill valve available
As an affiliate, we earn on qualifying purchases.
As an affiliate, we earn on qualifying purchases.
Finding the Right Replacement Valve
Before you start the process of replacing the toilet valve, make sure you have the right replacement valve. Finding the correct replacement parts is crucial for a successful valve replacement.
To begin, identify the type of valve you currently have. There are different types, such as ball valves, flapper valves, and flush valves. Look for any visible signs of damage or wear on the valve. This will help you troubleshoot common valve issues.
Once you have determined the type and condition of your valve, you can search for the appropriate replacement. Visit your local hardware store or plumbing supply shop, or search online for the exact model or a compatible alternative.
It’s essential to choose a high-quality replacement valve to ensure longevity and proper functionality.

Korky Ultra Standard 2-Inch Universal Toilet Flapper – Long Lasting Rubber – Easy to Install – Made in USA, 100BP
TOILET FLAPPER VALVE FITS MOST POPULAR 2 inch toilet brands including, but not limited to: American Standard, Kohler,…
As an affiliate, we earn on qualifying purchases.
As an affiliate, we earn on qualifying purchases.
Gathering the Necessary Tools and Supplies
First, you’ll need to gather the necessary tools and supplies for the task ahead. Here are the essential items you’ll need:
-
Adjustable wrench: This tool is crucial for loosening and tightening the nuts that hold the valve in place. Make sure to choose a wrench that fits the size of the nuts on your toilet valve.
-
Replacement valve: Choosing the right valve brand is important to ensure a proper fit and long-lasting performance. Look for reputable brands that offer durable and reliable valves.
-
Teflon tape: This can help prevent future valve issues by creating a watertight seal between the valve and the water supply line. Wrap the tape around the threads of the valve before installing it to ensure a secure connection.

DURATECH 10-Inch Adjustable Wrench, Wide Jaw Opening Black Oxide Finish Plumbing Wrench, CR-V Steel, SAE and Metric Scale Marked, Ergonomic Grip
Wide Jaw Opening: Max jaw opening up tp 2-1/32 inch (52 mm) for 10-Inch wrench. Greater jaw capacity,…
As an affiliate, we earn on qualifying purchases.
As an affiliate, we earn on qualifying purchases.
Shutting Off the Water Supply to the Toilet
To shut off the water supply to the toilet, you’ll need to locate the water shut-off valve. This valve is usually located on the wall behind the toilet or near the floor. It is typically a round, metal valve with a lever or handle. Turn the handle or lever clockwise to shut off the water flow to the toilet.
If you are experiencing issues with water pressure, adjusting the valve can help regulate the flow. If the valve is leaking or not shutting off completely, it may be a common valve problem that requires troubleshooting.
Once the water supply is shut off, you can proceed with draining the toilet tank and bowl, which I will explain in the next section.

VOTMELL 4 Rolls 1/2 Inch(W) X 520 Inches(L) Teflon Plumbers Tape,Pipe Sealing & Plumbing Thread Tape,PTFE Water Sealant Seal for Shower Head,White
Teflon tape has a sealing function to prevent the leakage of water or gas.
As an affiliate, we earn on qualifying purchases.
As an affiliate, we earn on qualifying purchases.
Draining the Toilet Tank and Bowl
Once you’ve shut off the water supply to the toilet, you can easily drain the tank and bowl by following these steps:
-
Start by turning off the water supply valve, usually located behind the toilet. This will prevent any water from entering the tank or bowl during the draining process.
-
Next, locate the flush valve at the bottom of the tank. Lift the lid and press down on the flush valve to release any water trapped in the tank. Hold it down until the tank is completely drained.
-
To drain the bowl, use a plunger to force the remaining water out. Place the plunger over the drain hole and vigorously push and pull until the water is gone.
By following these draining techniques, you can ensure a smooth and efficient process. If you encounter any issues, refer to troubleshooting tips or consult a professional.
Now that the tank and bowl are drained, let’s move on to removing the old valve assembly.
Removing the Old Valve Assembly
To remove the old valve assembly from the toilet, there are a few essential tools that I found helpful. You’ll need a pair of adjustable pliers, a screwdriver, and some Teflon tape.
The step-by-step removal process involves:
- Shutting off the water supply.
- Disconnecting the water supply line.
- Unscrewing the valve assembly.
- Finally, replacing it with a new one.
Tools Needed for Removal
You’ll need a pair of pliers and an adjustable wrench to remove the toilet valve. Here are the three essential tools you’ll need for this task:
-
Pliers: These will help you grip and turn nuts and bolts with ease. Make sure to choose a pair with a strong grip and comfortable handles.
-
Adjustable wrench: This versatile tool allows you to tighten or loosen nuts and bolts of different sizes. Its adjustable jaw ensures a secure fit, making it ideal for removing the valve assembly.
-
Screwdriver: While not necessary for removing the valve itself, a screwdriver can come in handy for disconnecting any screws or fasteners holding the valve in place. Choose a screwdriver with the appropriate size and type of head for the task at hand.
Having these tools on hand will make the removal process much smoother and help you avoid any unnecessary complications.
Step-By-Step Removal Process
Now that we have all the necessary tools, let’s dive into the step-by-step installation process for changing a toilet valve. It’s important to follow these instructions carefully to ensure a successful replacement and avoid any potential mishaps.
Here is a table outlining the step-by-step removal process:
| Step | Action |
|---|---|
| 1 | Shut off the water supply to the toilet by turning the shut-off valve clockwise. |
| 2 | Flush the toilet to drain the tank of water. |
| 3 | Disconnect the water supply line from the bottom of the old valve. |
| 4 | Use a wrench to loosen and remove the nut securing the valve to the toilet tank. |
| 5 | Remove the old valve assembly from the tank. |
| 6 | Inspect the valve for any signs of damage or wear. |
| 7 | Troubleshoot common valve issues, such as leaks or inconsistent water flow. |
Installing the New Valve Assembly
When installing a new valve assembly, it’s crucial to ensure proper valve alignment for optimal performance.
This involves aligning the valve body with the water supply line to allow for smooth water flow and prevent leaks.
Additionally, it’s important to tighten valve connections securely using the appropriate tools to prevent any potential water leakage or damage to the valve assembly.
Proper Valve Alignment
Make sure the valve is properly aligned before moving on to the next step. Proper valve alignment is crucial for the smooth operation and longevity of your toilet system. Here are three important steps to ensure the valve is correctly aligned:
-
Check the valve position: Verify that the valve is in the closed position. This prevents water from flowing into the toilet tank during maintenance.
-
Inspect the valve connections: Examine the connections between the valve and the water supply line. Ensure there are no leaks or loose fittings. Tighten any loose connections using a wrench if necessary.
-
Adjust the valve alignment: If the valve is misaligned, loosen the nuts that secure it in place. Gently rotate the valve until it aligns with the desired position. Then, tighten the nuts to secure the valve in place.
Tightening Valve Connections
To ensure a secure connection, you’ll want to tighten the nuts that attach the valve to the water supply line. This step is crucial in preventing any potential leaks or malfunctions in the toilet valve. Adjusting valve tension is a simple yet essential task in maintaining the functionality of your toilet. By tightening the nuts, you can ensure that the valve is properly aligned and sealed, minimizing the risk of leaks. Here is a helpful table to guide you through the process of tightening the valve connections:
| Step | Action |
|---|---|
| 1 | Turn off the water supply to the toilet. |
| 2 | Locate the nuts that connect the valve to the water supply line. |
| 3 | Using a wrench, tighten the nuts in a clockwise direction until they are snug. |
Testing and Adjusting the New Valve
You’ll want to first check if the new valve is functioning properly by testing it and making any necessary adjustments. Here are some testing methods and troubleshooting techniques to ensure the valve is working correctly:
-
Water Flow Test: Turn on the water supply and observe the flow from the valve. It should be steady and without any leaks. If there are leaks, tighten the connections or replace faulty parts.
-
Pressure Test: Use a pressure gauge to measure the water pressure before and after the valve. The pressure drop should be minimal. If there is a significant drop, there may be an issue with the valve’s internal mechanism.
-
Adjustments: If the valve is not shutting off completely or if the water flow is not adequate, adjust the valve’s settings. Follow the manufacturer’s instructions to make the necessary adjustments.
Frequently Asked Questions
How Do I Know if My Toilet Valve Needs to Be Replaced?
If my toilet valve needs to be replaced, I look for signs like constant running water, leaks, or difficulty flushing. Before replacing it, I troubleshoot by checking the water supply, adjusting the float, and inspecting the flapper.
Can I Replace the Toilet Valve Myself or Do I Need to Hire a Professional Plumber?
Yes, you can replace the toilet valve yourself without turning off the water. It’s not difficult, but it does require some basic plumbing knowledge. However, if you’re unsure, it’s always best to hire a professional plumber.
Are There Different Types of Toilet Valves Available? Which One Should I Choose?
There are various types of toilet valves available, each with their own pros and cons. It is important to choose the right one based on factors such as water pressure, flush power, and ease of maintenance.
Is It Necessary to Shut off the Water Supply to the Entire House or Just to the Toilet Before Replacing the Valve?
To replace a toilet valve without a plumber, it is necessary to shut off the water supply. This can be done by shutting off the water to the entire house or just to the toilet.
Can I Reuse Any Parts From the Old Valve Assembly When Installing the New One?
Yes, you can reuse some parts from the old valve assembly when installing the new one. However, it is important to ensure proper installation to avoid any leaks or malfunctions.
Conclusion
In conclusion, changing a toilet valve may seem like a daunting task, but with the right tools and a little know-how, it can be easily accomplished.
As I turned off the water supply and watched the tank drain, I felt a sense of anticipation and excitement.
With each step, from removing the old valve assembly to installing the new one, I could practically hear the sound of progress.
Finally, as I tested and adjusted the new valve, a rush of satisfaction washed over me, knowing I had successfully completed the task at hand.