
When designing your wet room, prioritize slip-resistant flooring with textured finishes that provide good grip across the entire space. Position the drain strategically, preferably at the lowest point or centrally, and make certain the floor gently slopes toward it for efficient water flow. waterproof the area thoroughly using high-quality membranes, sealing all joints and edges. Arrange fixtures to minimize splashing and use glass panels or screens to contain water. For more tips on creating a safe, durable wet room, keep exploring these essentials.
Key Takeaways
- Position drains centrally or at the lowest point, ensuring proper slope for efficient water flow.
- Use high-quality waterproof membranes beneath floors and walls, sealing all joints and edges meticulously.
- Incorporate slip-resistant textured flooring that balances safety and aesthetics across the entire wet area.
- Design the layout to minimize water splashing on non-wet zones, utilizing screens or glass panels with sealed edges.
- Ensure fixtures are strategically placed to promote water containment and ease of cleaning while enhancing safety.
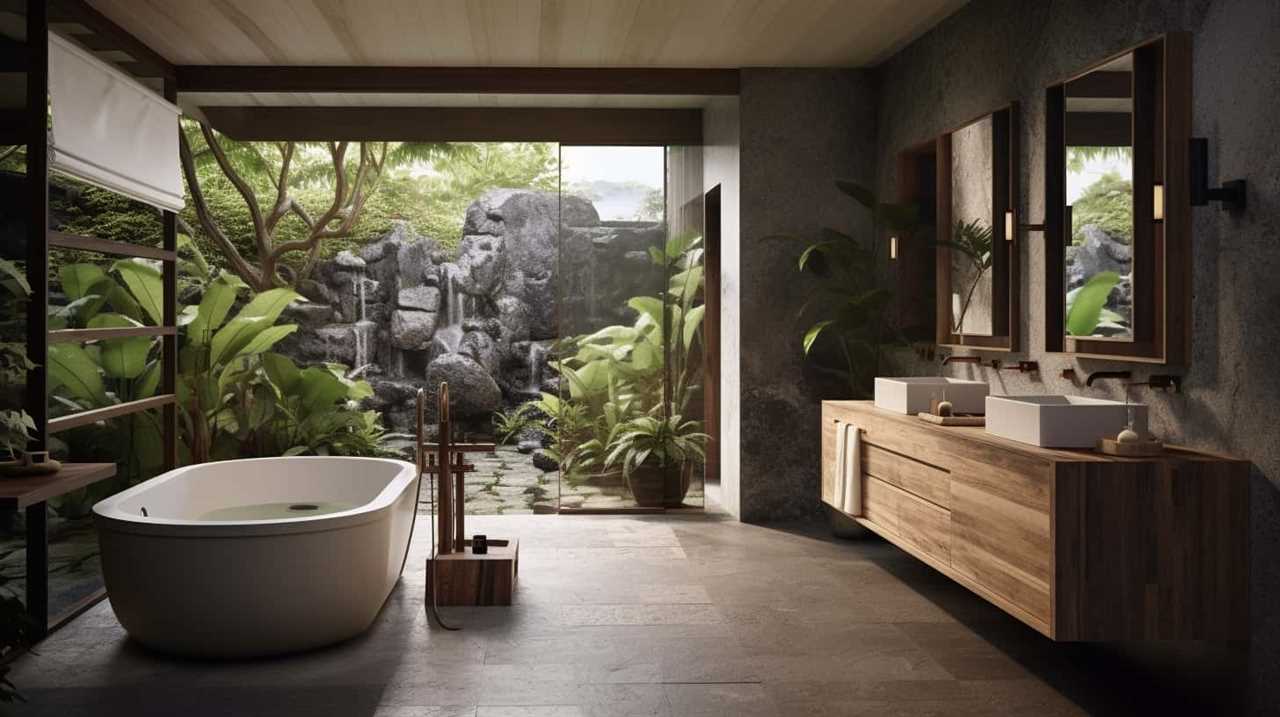
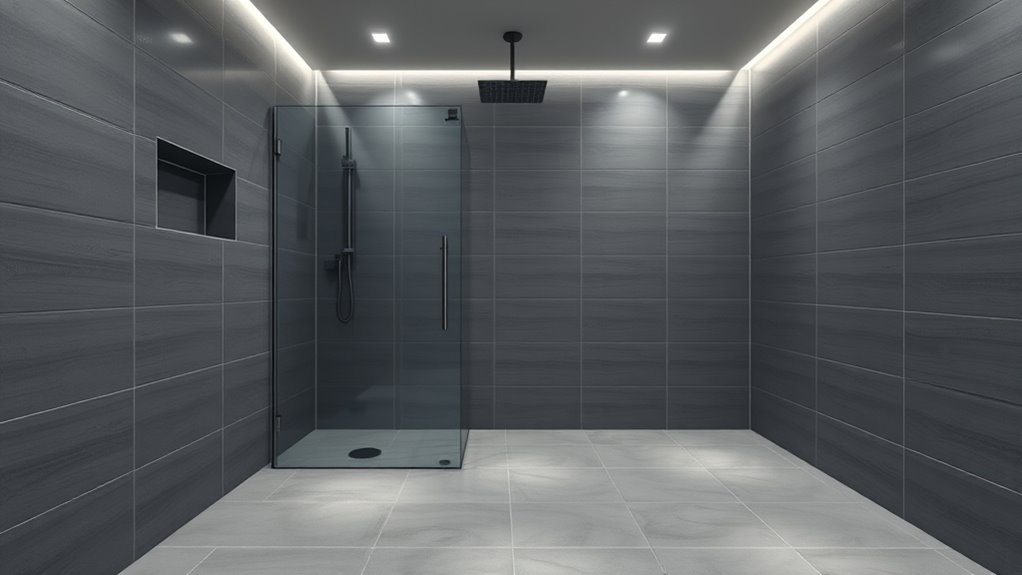
Wet rooms offer a sleek, modern look, but proper waterproofing and thoughtful layout are essential to prevent water damage and guarantee functionality. When designing your wet room, start by selecting slip resistant flooring. This isn’t just about style; safety is paramount. Slip resistant flooring helps prevent accidents, especially when the floor gets wet. Look for textures and finishes that provide good grip without compromising aesthetics. Remember, the entire floor should be consistently slip resistant to reduce the risk of falls. This consideration is crucial because water will always be present, and a safe surface protects everyone using the space.
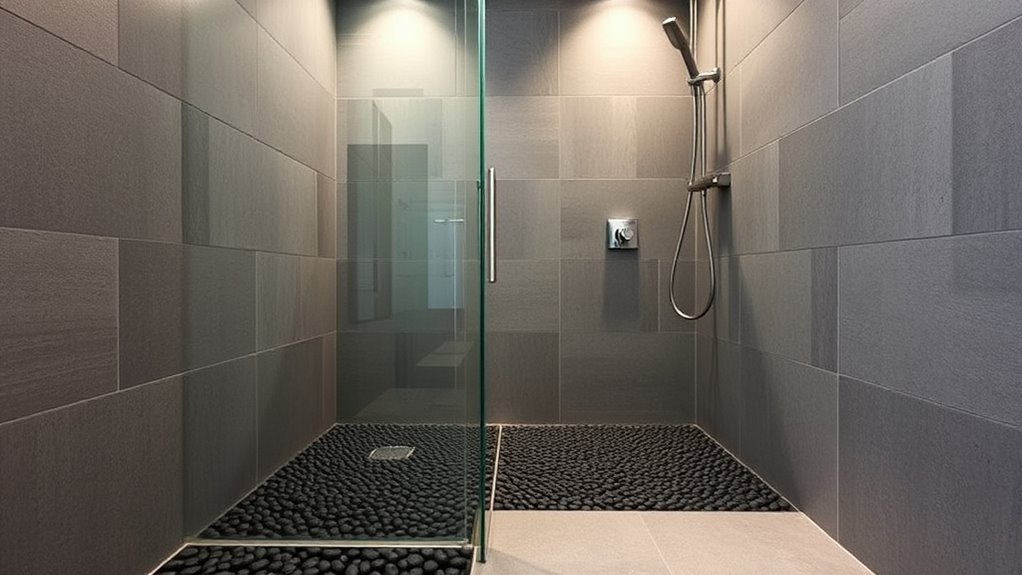
Next, pay close attention to drain placement. Proper drain positioning is vital for effective water flow and drainage. You want the water to move quickly toward the drain, avoiding pooling that can lead to slips or water damage. Typically, drains are best placed centrally or at the lowest point of the floor, allowing water to naturally flow toward it. If your layout allows, consider a linear drain along one side or at the entrance, which can streamline water exit and make cleaning easier. Whatever the placement, it should be integrated seamlessly into your flooring design. Ensure the drain is rated for wet rooms and that the surrounding flooring slopes gently toward it—this gradient prevents water from stagnating and directs runoff efficiently. Proper waterproofing membranes are crucial to create a durable barrier that prevents leaks and water infiltration.
Additionally, waterproofing your entire wet room is non-negotiable. Use high-quality waterproof membranes beneath the flooring and walls to create a watertight barrier. Seamless waterproofing systems help prevent leaks that can cause extensive water damage over time. Be meticulous with joints, corners, and edges, sealing every potential weak point. Proper waterproofing combined with strategic drain placement ensures that water stays contained within the shower area and drains away quickly, protecting your walls, floor, and underlying structure.
Finally, think about the overall layout to maximize space and usability. Position fixtures like the shower, sink, and toilet thoughtfully to avoid water splashing onto non-wet areas. Use screens or glass panels to contain water, but ensure they’re installed with proper seals to prevent leaks. Combining slip resistant flooring with smart drain placement and thorough waterproofing creates a safe, functional, and stylish wet room that stands the test of time. Your focus on these details will pay off with peace of mind, knowing your wet room is both beautiful and resilient.

Commercial Wet Area Mat 3FTX10FT PVC Non Slip Drainage Floor Mat Restaurant Kitchen Bar Swimming Pool Matting for Indoor and Outdoor Water Drain Flooring Mat (Grey)
- Premium Material: Durable, non-toxic PVC construction
- Non-Slip Design: Reduces slips and keeps in place
- Effective Drainage: Perforated holes for quick liquid drainage
As an affiliate, we earn on qualifying purchases.
As an affiliate, we earn on qualifying purchases.
Frequently Asked Questions
What Is the Average Cost of Waterproofing a Wet Room?
The average cost of waterproofing a wet room typically falls between $1,000 and $3,000, depending on size and materials. For accurate budget planning, consider your specific requirements and get detailed cost estimates from professionals. Keep in mind that investing in quality waterproofing guarantees durability and prevents costly water damage later. Always compare quotes and choose experienced installers to get the best value for your budget.
How Long Does Waterproofing Typically Take?
Waterproofing your wet room typically takes about 24 to 48 hours, depending on the products used and the curing process. You should allow sufficient waterproofing curing time before the next step, and it is crucial to schedule a waterproofing inspection to confirm everything’s sealed correctly. Rushing this stage can lead to leaks, so be patient and follow all manufacturer instructions for the best results.
Can I Install a Wet Room in an Existing Bathroom?
Think of your bathroom as a blank canvas waiting for a transformation. Yes, you can install a wet room in an existing bathroom, but it’s like fitting a new puzzle piece—you need to take into account space considerations carefully. A bathroom renovation for a wet room requires planning to ensure proper waterproofing and layout. Measure your space, check plumbing access, and consult professionals to make sure it fits seamlessly without compromising functionality.
Which Waterproofing Materials Are Most Eco-Friendly?
You should opt for eco-friendly membranes like recycled rubber or plant-based options, which provide effective waterproofing with less environmental impact. Pair them with sustainable sealants made from natural or biodegradable ingredients to enhance durability and eco-friendliness. These materials help protect your wet room while reducing your carbon footprint, making your project more sustainable. Always choose products with certifications confirming their eco-friendly claims for the best results.
How Do I Prevent Mold and Mildew in My Wet Room?
To prevent mold and mildew in your wet room, you need proper ventilation strategies, guarantee good airflow, and keep the space dry. Use exhaust fans or open windows after showers, and consider installing a ventilation system. Apply mold-resistant paint on walls and ceilings for added protection. Regularly wipe down surfaces, fix leaks promptly, and maintain low humidity levels to keep mold and mildew from taking hold.
Conclusion
With wise waterproofing and well-woven layouts, your wet room will wow with its waterproof durability and delightful design. By prioritizing proper planning and precise placement, you’ll prevent potential problems and promote peace of mind. Remember, meticulous materials and methodical measures make a massive difference. So, stay savvy, stay safe, and create a beautiful, barrier-proof wet room that boosts your bathroom’s brilliance and beckons envy. Waterproofing and layout are your winning ways—worth every effort!