
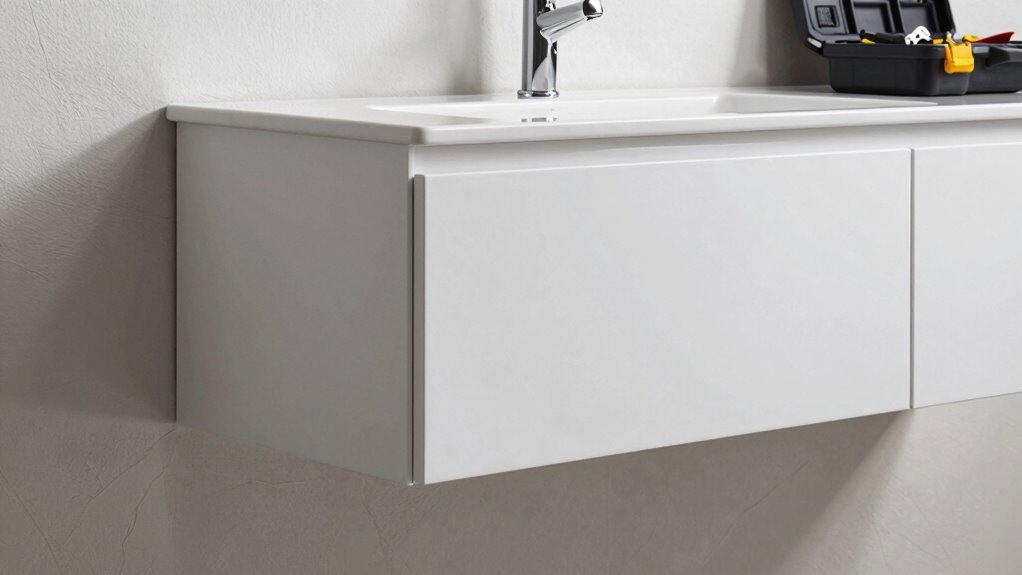
Floating vanities are stylish but can sag if not properly supported. To avoid this, make certain you secure it to strong wall studs using heavy-duty anchors and brackets. Accurate measurements are essential—check the wall’s integrity and use a level during installation. If you skip these steps, you risk not just aesthetics but safety too. Want to know the best practices for installation and maintenance? There’s more valuable information ahead.
Key Takeaways
- Accurate measurement of wall studs is crucial to securely mount floating vanities and prevent sagging over time.
- Use heavy-duty anchors and brackets that match the wall type to enhance stability and support weight.
- Ensure compatibility of materials, opting for sturdy options like steel or high-grade plywood for maximum durability.
- Properly level the vanity before securing to avoid uneven weight distribution and potential sagging.
- Regularly inspect wall supports and tighten screws to maintain structural integrity and prevent future sagging issues.

2-Pack Floating Shower Bench Brackets – 14" L x 2.5" W Heavy-Duty Hidden Countertop Wall Support Brackets, 3/8" Thick, Ideal for Floating Vanity, Cabinets, Granite,Dishwashers, Bin,and Bench Seats
- Heavy-Duty Load Capacity: Supports up to 200 lbs per pair
- Ideal Size and Package Options: 14-inch length with multiple sizes available
- Hidden Modern Design: Creates a sleek, floating appearance
As an affiliate, we earn on qualifying purchases.
As an affiliate, we earn on qualifying purchases.
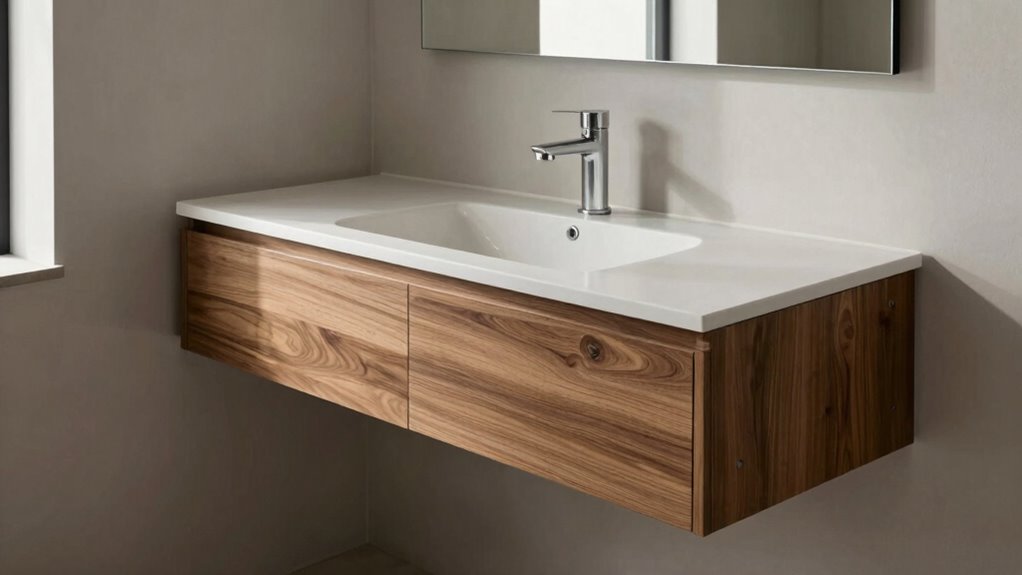
What Makes Floating Vanities Popular in Modern Bathrooms?

Floating vanities have surged in popularity in modern bathrooms, and it’s easy to see why. These sleek designs not only enhance aesthetics but also promote space optimization. When you choose a floating vanity, you create an illusion of more room, making your bathroom feel larger and airier. This aligns perfectly with current design trends that favor minimalism and functionality. You can easily incorporate stylish storage solutions beneath the vanity, keeping the floor clear and clutter-free. Plus, the customizable heights allow you to tailor the look to your preferences, enhancing both comfort and style. With their contemporary appeal and practical advantages, floating vanities have become a go-to choice for those looking to elevate their bathroom experience. Additionally, maximizing natural light can further enhance the overall ambiance and wellness of the space. Incorporating acoustic treatments into the design can also improve the sound quality in your bathroom, creating a serene environment.
Why Wall Support Matters for Your Floating Vanity

When you’re installing a floating vanity, proper wall support is essential for both safety and functionality. Without it, you risk compromising wall integrity and the overall load capacity of the unit. Here’s why you shouldn’t overlook this aspect:
- Safety: A well-supported vanity prevents accidents, ensuring it stays securely mounted.
- Durability: Adequate support enhances the longevity of your vanity, reducing wear and tear over time.
- Aesthetic Appeal: Proper installation maintains the sleek, modern look that floating vanities offer, avoiding unsightly sagging.
How to Avoid Common Installation Mistakes for a Secure Floating Vanity

Installing a floating vanity can elevate your bathroom’s style, but making common mistakes during the process can lead to serious issues later on. To guarantee your floating design stays secure, start by accurately measuring wall studs. Use a stud finder to identify strong points for mounting. Next, choose the right hardware; heavy-duty anchors and brackets are essential for stability. Additionally, using HEPA filters in your home can help maintain a healthier indoor environment while you focus on home improvements. Following proper filtration techniques during installation can also prevent dust and debris from compromising your workspace. Remember, proper wall support is crucial to ensure that your floating vanity can withstand the weight of its components. Floating vanities typically require specific weight limits to ensure safety and functionality. Follow installation tips closely, aligning the vanity level and double-checking before securing it. Don’t rush—take your time to verify everything is fitted properly. Finally, consider the weight of your chosen sink and countertop, as this affects support. By avoiding these common installation mistakes, you’ll enjoy a stylish, secure floating vanity for years to come. Additionally, investing in smart furniture can enhance both functionality and aesthetics in your bathroom remodel.
Choosing the Right Wall Support for Your Vanity

When you’re picking wall support for your floating vanity, you need to take into account the material’s strength and durability. Proper installation techniques are just as essential to guarantee everything stays secure. Additionally, using kitchen ventilation systems can enhance air quality in spaces with high humidity, ensuring a comfortable environment when working on home improvement projects. It’s important to consider generator safety protocols to ensure that any power tools used during installation are operated safely. Poor indoor air quality can exacerbate health issues, making air quality improvements vital during renovations. Let’s explore how to make the best choice for your space. Additionally, considering data storage options can help ensure that any valuable information related to your vanity’s design is safely backed up for future reference. Choosing the right support system is crucial, as anti-fatigue mats can provide comfort during lengthy installations.
Material Strength Considerations
Choosing the right wall support for your floating vanity hinges on understanding material strength. You need to guarantee that the support system can handle the load while maintaining material durability. Here are three key factors to take into account:
- Material Type: Opt for sturdy materials like steel or high-grade plywood that can withstand weight over time. Additionally, considering energy-efficient materials can help enhance durability and performance.
- Load Capacity: Check the load capacity of your chosen support; it must exceed the combined weight of the vanity and any additional items.
- Installation Compatibility: Confirm the material works well with your wall type, as drywall and concrete require different supports. Additionally, ensure that the load distribution techniques are applied to prevent sagging over time.
Proper Installation Techniques
Although selecting the right wall support is essential, proper installation techniques guarantee your floating vanity remains secure and functional. Start by evaluating the wall integrity; it’s important to locate studs or use strong anchors if you’re mounting on drywall. Don’t skip measuring the height and leveling your vanity; even slight misalignments can lead to installation challenges later. Use a level to double-check your work as you secure the vanity. If your vanity has heavy materials or sinks, consider adding extra support. Finally, make sure all screws are tightened properly, as loose fittings can cause sagging over time. By following these steps, you’ll create a stable foundation and enjoy your floating vanity without worry.
Tools You’ll Need for a Secure Installation

To install your floating vanity securely, you’ll need the right tools on hand. Start with essential tools for measuring and marking accurately, as these are vital for a successful setup. Additionally, understanding the importance of color accuracy can help ensure that any paint or finishes you choose enhance the aesthetic appeal of your vanity. Remember that using kitchen appliances efficiently will not only improve your installation process but also ensure your workspace remains organized. Utilizing essential DIY tools can streamline your project and enhance your overall efficiency, especially when you incorporate effective planning to maximize your workflow. Don’t forget to take into account safety precautions to protect yourself during the installation process. Additionally, ensuring proper ergonomic positioning can help prevent discomfort and strain while you work.
Essential Tools Overview
Installing a floating vanity requires a few essential tools to guarantee a secure fit and lasting stability. Having the right installation essentials on hand will make the process smoother and more efficient. Here’s a quick list of what you’ll need:
- Stud Finder: To locate wall studs for secure mounting.
- Level: Confirms that your vanity is perfectly horizontal for both aesthetics and functionality.
- Drill: Essential for making precise holes and securing screws into the wall.
With these essential tools, you’re setting yourself up for a successful installation that minimizes the risk of sagging. Don’t underestimate the importance of preparation; the right tools can make all the difference in achieving that sleek, floating look.
Measuring and Marking Techniques
With the right tools in hand, measuring and marking become your next focus for a successful floating vanity installation. Start by using a level to verify your measurements are accurate. Employ measuring techniques like the “three-point” method, which helps you confirm that your vanity will hang evenly. Once you’ve determined the height, use a pencil to mark the wall where the brackets will go. Double-check your markings by measuring from the floor to the marks to guarantee consistency. For added precision, consider using a stud finder to locate the best points for anchoring. Additionally, ensuring your workspace is well-organized can significantly enhance your installation process. Having an understanding of load-bearing points in your wall can also help prevent any future sagging. Finally, clear any obstacles around your workspace, so everything’s in line for a secure installation. Your careful measuring and marking will set the stage for a flawless finish, as proper space planning is essential for maximizing your living area.
Installation Safety Precautions
Before diving into your floating vanity installation, it’s essential to gather the right tools to guarantee safety and security. Having the proper equipment not only streamlines the process but also makes certain you take necessary safety measures. Here are three must-have tools for your installation:
- Stud Finder: This helps locate wall studs for secure mounting, minimizing the risk of sagging. Choosing the right home security systems can also enhance your installation’s overall safety by ensuring structural integrity. Additionally, homes without security systems are 300% more likely to face issues that could compromise stability.
- Level: A level guarantees your vanity is perfectly straight, which is vital for aesthetics and functionality.
- Drill: A reliable drill makes it easier to secure brackets and anchors, enhancing the overall stability. Additionally, using tools correctly can significantly improve your installation safety precautions, reducing the chance of accidents during the process.
Step-by-Step Guide to Installing Your Floating Vanity
To successfully install your floating vanity, you’ll need to follow a series of clear steps that guarantee stability and style. First, gather your tools: a level, drill, stud finder, and a measuring tape. Measure the desired height for your vanity, ensuring it’s functional for daily use. Use the stud finder to locate wall studs, marking their positions. Next, secure the mounting bracket to the wall, double-checking it’s level. Once in place, lift the vanity onto the bracket, ensuring it’s flush against the wall. Secure it with screws, reinforcing that installation aesthetics are on point. Finally, attach any plumbing and check for leaks. With these steps, you’ll enjoy both beauty and functionality in your bathroom space.
Tips for Reinforcing Wall Support Before Installation
Ensuring your wall support is strong enough before installation is essential for a successful floating vanity. Without proper reinforcement, you risk sagging or damage over time. Here are three effective reinforcement techniques to evaluate:
- Install wall anchors: Use heavy-duty wall anchors to secure your vanity to the studs, providing a sturdy hold.
- Add blocking: If your wall’s structure allows, add wooden blocking between studs for extra support, distributing the weight more evenly.
- Check for level: Make sure your vanity is level during installation. An uneven surface can lead to stress on the wall support and eventual sagging.
Signs of a Sagging Vanity and Solutions?

Even with proper wall support, signs of a sagging vanity can still appear over time. You might notice gaps between the vanity and the wall or uneven spacing at the base. If the vanity feels unstable or wobbly, these are key vanity sagging signs. Water damage or visible cracks in the cabinetry can also indicate issues.
For effective sagging solutions, first, check the wall anchors and verify they’re securely fastened. You might need to reinforce them or replace the mounting brackets. If the vanity is considerably warped, consider consulting a professional for repairs or even replacement. Regular inspections can help catch these issues early, preventing further damage and maintaining your vanity’s aesthetic appeal.
Tips for Maintaining Your Floating Vanity

Maintaining your floating vanity is essential for its longevity and appearance. Regular upkeep not only preserves its beauty but also guarantees it remains functional. Here are some effective maintenance tips to take into account:
- Use Gentle Cleaning Techniques: Opt for mild, non-abrasive cleaners and soft cloths to avoid scratching the surface. Wipe spills immediately to prevent staining.
- Check Wall Supports: Periodically inspect the wall brackets for any signs of wear or loosening. Tightening them can prevent sagging over time.
- Avoid Excessive Weight: Be mindful of how much you place on your vanity. Overloading can lead to structural issues, so keep it organized and clutter-free.
Frequently Asked Questions
Can I Install a Floating Vanity in a Small Bathroom?
Yes, you can install a floating vanity in a small bathroom! It’s a fantastic space-saving solution that adds to your bathroom aesthetics. By mounting the vanity on the wall, you create an illusion of more floor space, making the room feel larger. Plus, you can choose from various styles and finishes that match your decor. Just make sure to properly secure it to support the weight and avoid sagging over time.
What Materials Are Best for a Floating Vanity?
When you’re building a strong foundation, think of a sturdy tree. For your floating vanity, solid wood choices like oak or maple provide durability. You’ll want to avoid particle board, which can sag over time. Don’t forget plumbing considerations—ensure your materials can handle moisture. Using water-resistant finishes can help protect against humidity. Just like a tree’s roots, your vanity needs stability to flourish in your small bathroom.
How Much Weight Can a Floating Vanity Support?
A floating vanity can typically support between 100 to 200 pounds, depending on its design and installation. To guarantee it holds up well, you need to follow proper installation guidelines, focusing on secure wall mounting and weight distribution. Distributing weight evenly across the cabinet helps prevent sagging and damage. If you’re planning to add heavy items, consider reinforcing the support to maintain stability and durability over time.
Are Floating Vanities Suitable for All Wall Types?
Floating vanities aren’t suitable for all wall types. You need to take into account your wall’s material and structure. If you’ve got drywall, it may require additional wall reinforcement for stability. Using proper mounting techniques is essential to guarantee your vanity remains secure. If your walls are made of concrete or brick, it’s usually easier, but still check for adequate support. Always prioritize safety to avoid sagging or damage over time.
Can I DIY My Floating Vanity Installation?
Yes, you can DIY your floating vanity installation, but be prepared for some challenges. Start by measuring your wall and choosing the right support brackets. Follow DIY tips like ensuring you locate studs for secure mounting. Use a level to maintain evenness, and consider having a friend help with lifting. Be mindful of plumbing and electrical fixtures. With careful planning and execution, you’ll create a stylish, functional space on your own!
Conclusion
To summarize, installing a floating vanity can elevate your bathroom’s style, but remember: “A stitch in time saves nine.” Taking the time to guarantee proper wall support and avoiding common mistakes will save you from future headaches. Regular maintenance will keep your vanity looking great and functioning well. So, don’t cut corners—invest in the right tools and techniques for a secure installation, and your floating vanity will be a stunning centerpiece for years to come.