Ladies and gentlemen, prepare to conquer the ever-elusive broken toilet flush button! In this concise guide, we will unveil the secrets to restoring your throne’s flushing power.
With our step-by-step instructions and a dash of determination, you’ll be a master of toilet repairs in no time.
From assessing the problem to testing and adjusting the flush button, we’ve got you covered.
So, roll up your sleeves and let’s get to work on fixing that troublesome toilet flush button!

Key Takeaways
- Examine the functionality of the flush button and check for physical damage or sticking.
- Gather the necessary tools such as a screwdriver, replacement parts, lubricant, pliers, and an adjustable wrench.
- Remove the toilet flush button by locating and loosening the screws holding the button cover in place.
- Evaluate whether repair or replacement is needed for the flush button mechanism and test and adjust the button after fixing it.
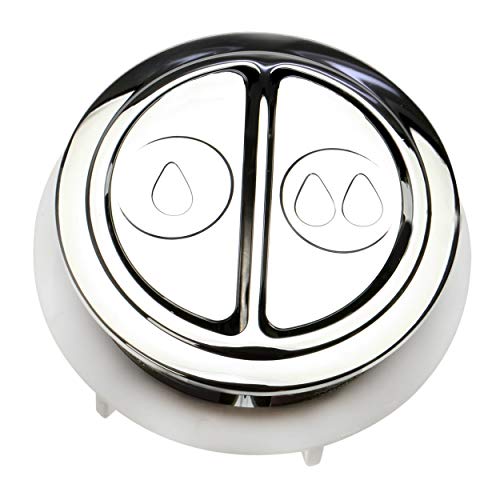
Dual Flush Valve Replacement Button
Genuine replacement buttons for Glacier Bay and other Dual Flush Toilets
As an affiliate, we earn on qualifying purchases.
As an affiliate, we earn on qualifying purchases.
Assess the Problem
To assess the problem with a broken toilet flush button, we need to examine the button’s functionality and determine the cause of the malfunction.
Troubleshooting common toilet flush button issues is a crucial step in fixing the problem. First, check if the button is physically damaged or stuck. If it is, try cleaning or lubricating it to see if that resolves the issue.
Next, ensure that the button is properly connected to the flushing mechanism. Sometimes, a loose or disconnected button can prevent the toilet from flushing properly.
Understanding the mechanics of a toilet flush button malfunction can help in identifying potential issues. It could be due to a worn-out button, a faulty mechanism, or a problem with the flushing system.

Quacc 38 mm Thread Diameter Toilet Tank Button Replacement Dual Round Head Flush Push Button for Bathroom Toilet Water Tank Repair
Our toilet flush buttons are easy to install, can replace the broken or old toilet flush button, saving…
As an affiliate, we earn on qualifying purchases.
As an affiliate, we earn on qualifying purchases.
Gather the Necessary Tools
Now, let’s move on to gathering the necessary tools to fix a broken toilet flush button. Proper toilet flush button maintenance requires a few essential tools to effectively troubleshoot toilet flush button issues. Here’s a list of the tools you’ll need:
- Screwdriver: Look for a screwdriver with a head that matches the screws on your toilet flush button assembly. This will allow you to remove the button cover and access the internal components.
- Replacement Parts: Depending on the issue, you may need to replace certain components of the flush button. This could include the button itself, the spring, or other small parts.
- Lubricant: A lubricant, such as silicone grease, can help ensure smooth movement of the flush button. Apply a small amount to the moving parts to reduce friction and improve functionality.
Quacc 38 mm Thread Diameter Toilet Tank Button Replacement Dual Round Head Flush Push Button for Bathroom Toilet Water Tank Repair
Our toilet flush buttons are easy to install, can replace the broken or old toilet flush button, saving…
As an affiliate, we earn on qualifying purchases.
As an affiliate, we earn on qualifying purchases.
Remove the Toilet Flush Button
To remove the toilet flush button, we’ll need to locate the screws holding the button cover in place. Start by inspecting the button cover for any visible screws or tabs.
Use a flathead or Phillips screwdriver, depending on the type of screws used. Carefully insert the screwdriver into the screw head and turn counterclockwise to loosen the screws.
Once the screws are loose, gently lift the button cover off the flush button assembly. Be cautious not to force or pry the cover as it may cause damage.

If you encounter any difficulties, refer to the manufacturer’s instructions or consult a professional plumber for assistance.
Removing the button cover is an essential step in troubleshooting common toilet flush button issues and performing regular toilet flush button maintenance.
Replace or Repair the Flush Button Mechanism
After removing the toilet flush button, we can now proceed to replace or repair the flush button mechanism. When faced with a broken flush button, it is important to evaluate whether it can be repaired or if a replacement is necessary. To help you make an informed decision, consider the common toilet flush issues and the pros and cons of replacing versus repairing the mechanism.
To assist you in weighing your options, here is a table outlining the key factors to consider:
| Repair | Replace | |
|---|---|---|
| Pros | Less expensive | Ensures long-term solution |
| Can be done without professional assistance | Opportunity to upgrade or enhance functionality | |
| Cons | May not fully resolve the issue | Higher upfront cost |
| May require more frequent maintenance | Professional assistance may be needed |
Test and Adjust the Flush Button
Continuing our evaluation of the broken toilet flush button, we can now test and adjust its functionality. To ensure the proper functioning of the flush button, follow these steps:
- Test button sensitivity: Press the flush button multiple times to determine if it responds consistently. If it feels stiff or unresponsive, it may require adjustment or replacement.
- Troubleshoot button connection: Check the connection between the flush button and the flushing mechanism. Make sure the button is securely attached and aligned correctly. If there are any loose or disconnected wires, reattach them firmly.
- Adjust the button position: If the flush button is misaligned or sticking out too far, it may cause issues. Gently push or pull the button to adjust its position until it sits flush with the toilet surface.
- Retest the flush button: After making adjustments, test the button sensitivity again. Ensure it feels smooth and responsive when pressed. If there are still issues, consider seeking professional assistance or replacing the flush button mechanism.
Frequently Asked Questions
Can I Fix a Broken Toilet Flush Button Without Any Tools?
Yes, we can fix a broken toilet flush button without any tools. There are possible alternatives, such as using a temporary fix or replacing the button with a new one.
How Do I Know if the Problem With My Toilet Flush Button Is Caused by a Faulty Mechanism?
To troubleshoot a faulty toilet flush button, we need to identify common signs of a broken flush button. By observing if the button is unresponsive or loose, we can determine if there’s a faulty mechanism.
Can I Replace the Toilet Flush Button With a Different Brand or Model?
Yes, you can replace the toilet flush button with a different brand or model. However, it’s important to consider the pros and cons of different toilet flush button models before making a decision.

Is It Possible to Adjust the Flush Button to Make It More Sensitive or Less Sensitive?
Adjusting the flush button sensitivity can be tricky, but fear not! We’ll guide you through troubleshooting common toilet flush button issues and show you how to fine-tune its sensitivity to your liking. Let’s get started!
Can I Fix a Broken Toilet Flush Button Even if I Have No Prior Experience With Plumbing Repairs?
Without plumbing experience, potential alternatives for fixing a broken toilet flush button include contacting a professional or using a temporary fix, like manually pulling up the lever. Common mistakes to avoid include damaging the flushing mechanism or causing water leaks.
Conclusion
In conclusion, fixing a broken toilet flush button is a relatively simple process that can be done with basic tools and a little bit of know-how. By following the steps outlined in this article, you can easily assess the problem, remove the flush button, and replace or repair the mechanism.
Interestingly, did you know that a leaking toilet can waste up to 200 gallons of water per day? So it’s important to address any issues with your toilet flush button promptly to avoid unnecessary water wastage.