Are you fed up with a bathroom sink that drains slowly? We have the solution for you!
In this step-by-step guide, we’ll show you how to install a new drain assembly and get your sink flowing smoothly again.
With just a few tools and materials, you’ll be able to tackle this project like a pro. Say goodbye to clogs and hello to a fully functional sink.
Let’s dive in and master the art of installing a bathroom sink drain!

Key Takeaways
- Turn off the water supply before starting the installation process.
- Use plumbers putty to seal the sink drain and ensure a tight connection.
- Use Teflon tape to create a secure seal between different pipe connections.
- Test the drain system for leaks and proper drainage before finishing the installation.

EZ-FLO Pop-Up Lavatory Sink Drain Assembly, Brass Body with Chrome-Plated Finish, 22-Gauge Tailpiece, 10901
BATHROOM SINK DRAIN: Pop-up lavatory drain assembly with chrome-plated finish for a polished look
As an affiliate, we earn on qualifying purchases.
As an affiliate, we earn on qualifying purchases.
Gather the Necessary Tools and Materials
To begin this process, we’ll gather all the essential tools and materials needed to install the bathroom sink drain. It’s crucial to have the right tools and materials to ensure a successful installation without any common mistakes.
First, let’s talk about the importance of proper measurements. Accurate measurements are vital to ensure that the drain fits properly and functions effectively. Taking accurate measurements will prevent leaks and other installation issues. Some common installation mistakes occur when measurements aren’t precise, leading to misalignment or improper fit.
Now, let’s discuss the tools and materials needed. You’ll need a hacksaw, adjustable wrench, pipe wrench, plumber’s putty, drain assembly, P-trap, and Teflon tape.
With these tools and materials in hand, we’re ready to move on to the next step of the installation process.


Harvey's WM Harvey 043010 Stainless Plumbers Putty, 14 oz
Will not support bacteria
As an affiliate, we earn on qualifying purchases.
As an affiliate, we earn on qualifying purchases.
Remove the Old Drain
We will begin by removing the old drain. Before starting, ensure that you have turned off the water supply and placed a bucket or towel underneath the sink to catch any water that may spill.
To remove the old drain, follow these steps:
- Loosen the slip nut connecting the P-trap to the drain pipe using pliers. Carefully remove the P-trap and empty any water into the bucket.
- Next, locate the locknut securing the drain flange to the sink. Use a pipe wrench to loosen and remove the locknut.
- Once the locknut is removed, you can now lift the drain flange out of the sink. Be cautious not to damage the sink surface.
- Properly dispose of the old drain components by placing them in a plastic bag and sealing it. Check with your local waste management regulations for the appropriate disposal method.
During drain removal, common issues may include stubborn locknuts or corroded connections. If you encounter these issues, applying penetrating oil or using a hacksaw to cut through the pipe may be necessary.
With the old drain successfully removed, we can now move on to the next step: installing the new drain assembly.


VOTMELL 4 Rolls 1/2 Inch(W) X 520 Inches(L) Teflon Plumbers Tape,Pipe Sealing & Plumbing Thread Tape,PTFE Water Sealant Seal for Shower Head,White
Teflon tape has a sealing function to prevent the leakage of water or gas.
As an affiliate, we earn on qualifying purchases.
As an affiliate, we earn on qualifying purchases.
Install the New Drain Assembly
After removing the old drain, we can now proceed to installing the new drain assembly. This is a crucial step in ensuring a properly functioning bathroom sink.
To help you avoid common installation mistakes and choose the right drain assembly, here are a few key points to consider:
- Measurements: Take accurate measurements of the sink and drain before purchasing the new assembly. This will ensure a proper fit and prevent any leaks or misalignments.
- Materials: Choose a drain assembly made of durable materials such as stainless steel or brass. These materials are resistant to corrosion and will last longer.
- Installation: Follow the manufacturer’s instructions carefully when installing the new drain assembly. Make sure to use the appropriate tools and tighten all connections securely. This will prevent any future issues and ensure a smooth flow of water.
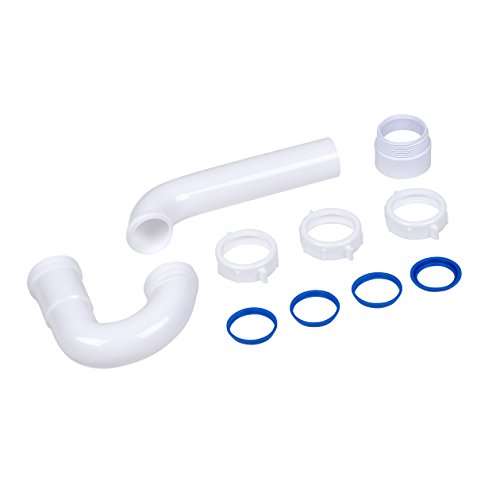
Dearborn P9703WBG 1-1/2" P-Trap with Threaded PVC Adapter, and Reversible J-Bend, Bagged w/ True Blue Washer
Made of PVC for easier cutting and glue applications
As an affiliate, we earn on qualifying purchases.
As an affiliate, we earn on qualifying purchases.
Connect the Drain Pipe to the Sink
To connect the drain pipe to the sink, gather the necessary tools and materials. You’ll need an adjustable wrench, pipe joint compound, plumber’s tape, and a drain assembly kit.
- Start by applying pipe joint compound to the threads of the drain pipe. This will ensure a proper seal and prevent leaks.
- Attach the drain pipe to the sink drain opening, making sure it’s aligned correctly. Use the adjustable wrench to tighten the connections, but be careful not to overtighten and damage the pipes.
- Wrap plumber’s tape around the threads of the drain flange. This will provide an additional layer of sealing and prevent leaks.
- Attach the drain flange to the bottom of the sink, making sure it’s centered and snug.
- Finally, tighten the locknut underneath the sink to secure the drain assembly in place.
Common mistakes to avoid when connecting the drain pipe to the sink include overtightening the connections, using too much or too little pipe joint compound, and not properly aligning the parts. Make sure to follow the manufacturer’s instructions and take your time to ensure a proper and leak-free connection.

Test and Check for Any Leaks
To test and check for any leaks, we’ll need to run water through the drain pipe and observe for any signs of leakage. Properly sealing the bathroom sink drain is crucial to prevent any water leaks that can cause damage to the surrounding area. Here are some important points to keep in mind when testing for leaks:
- Ensure that all connections are tightly secured: Loose connections can result in water seepage, so make sure to tighten all nuts and fittings properly.
- Use a bucket or towel to catch any potential leaks: Place a bucket or towel under the drain pipe to catch any water that may leak during the testing process.
- Run water for an extended period: Allow water to run through the drain pipe for several minutes to thoroughly test for any leaks.
Frequently Asked Questions
How Much Does It Cost to Install a Bathroom Sink Drain?
The cost factors of installing a bathroom sink drain vary depending on whether you choose a DIY approach or hire a professional. Let’s explore the details and steps involved in this process.
Can I Use the Same Drain Assembly for a Different Type of Sink?
Yes, you can reuse the old drain assembly for a different type of sink as long as it fits properly. To choose the right drain assembly for a different sink type, measure the diameter and consult a plumbing expert if needed.
What Should I Do if the Old Drain Is Stuck and Won’t Come Out?
If the old drain is stuck and won’t come out, we can try alternative methods like using pliers or lubricants. If all else fails, it may be best to seek professional assistance.

Is It Necessary to Use Plumber’s Putty When Installing a New Drain Assembly?
Yes, it is necessary to use plumber’s putty when installing a new drain assembly. Plumber’s putty creates a watertight seal and prevents leaks. However, there are alternatives available with their own pros and cons.
How Do I Know if There Is a Blockage in the Drain Pipe After Installation?
To troubleshoot for signs of a blockage in the drain pipe after installation, we can check for slow drainage, gurgling sounds, or foul odors. Using a plunger or drain snake can help clear any obstructions.
Conclusion
In conclusion, installing a bathroom sink drain is a relatively simple task that can be done with just a few tools and materials. By following the step-by-step directions outlined in this article, you can easily remove the old drain, install the new drain assembly, and connect the drain pipe to the sink.
Remember to test for any leaks before finishing the installation. For example, Lisa, a homeowner from Ohio, successfully installed a new bathroom sink drain using these instructions and was able to enjoy a leak-free sink in no time.