Are you ready to turn your bathroom into a pristine paradise? You’ve come to the right place! In this article, we will walk you through the steps of priming your bathroom surfaces to achieve a flawless finish.
With our expert tips and tricks, you’ll have the know-how to prepare your walls and ceiling, apply primer like a pro, and get one step closer to your dream bathroom.
So grab your materials and let’s dive into the world of bathroom priming mastery!
Key Takeaways
- Proper ventilation is important for safety and efficiency.
- Choose the right primer based on surface material and desired outcome.
- Thoroughly clean surfaces with mild detergent and warm water before priming.
- Remove loose paint or debris, sand rough areas, and fill in holes or cracks before applying primer.
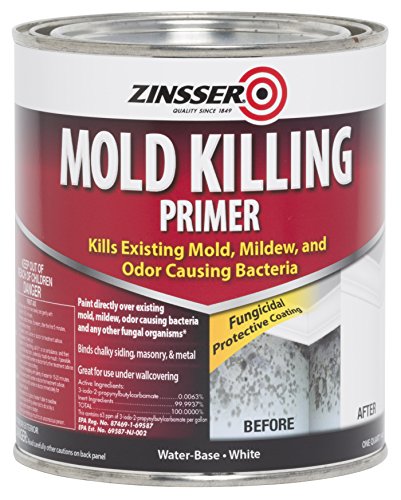
qt Zinsser 276087 White Zinsser, Mold Killing Primer Water-Based Mold Killing Primer
Kills existing mold, mildew, and odor causing bacteria without extensive pre‐cleaning
As an affiliate, we earn on qualifying purchases.
As an affiliate, we earn on qualifying purchases.
Gather All Necessary Materials
First, we need to gather all the necessary materials for priming the bathroom. Proper ventilation is of utmost importance during this process, as it ensures the safety and efficiency of the primer application.

There are different types of bathroom primers available, each with its own unique properties and advantages. It’s essential to choose the right primer based on the surface material of the bathroom walls and the desired outcome. Some common types of bathroom primers include water-based primers, oil-based primers, and shellac-based primers.
Water-based primers are suitable for most bathroom surfaces and offer quick drying times. Oil-based primers are ideal for blocking stains and providing excellent adhesion. Shellac-based primers are best for sealing in odors and preventing mold growth.
qt Zinsser 276087 White Zinsser, Mold Killing Primer Water-Based Mold Killing Primer
Kills existing mold, mildew, and odor causing bacteria without extensive pre‐cleaning
As an affiliate, we earn on qualifying purchases.
As an affiliate, we earn on qualifying purchases.
Prepare the Bathroom Surfaces
To prepare the bathroom surfaces for priming, we need to:
- Thoroughly clean them using a mild detergent and warm water. This step is crucial as it ensures the primer adheres properly to the surfaces, resulting in a smooth and even finish.
When choosing the right primer for bathroom surfaces, it’s important to:

- Select one that’s specifically designed for high moisture areas.
- Look for a primer that’s mold and mildew resistant, as well as water-resistant.
- Opt for a primer that has good adhesion properties to ensure it bonds well with the surfaces.
To achieve a smooth and even primer application, make sure to:
- Remove any loose paint or debris from the surfaces beforehand.
- Sand any rough areas.
- Fill in any holes or cracks with a suitable filler.

RUST-OLEUM 1 qt Zinsser 271009 White Zinsser, B-I-N Advanced Synthetic Shellac Primer Pack of 1
Superior odor sealing
As an affiliate, we earn on qualifying purchases.
As an affiliate, we earn on qualifying purchases.
Apply Primer to the Walls
We typically start by applying primer to the walls. Primer is an essential step in the process of priming a bathroom as it helps to create a smooth and even surface for the paint to adhere to. There are different types of primer available in the market, each with its own unique features and benefits.
Here are some tips for achieving a smooth finish when applying primer to the walls:
- Choose the right type of primer for your specific needs. There are primers designed for different surfaces, such as drywall, wood, or metal. Make sure to select the appropriate primer for the material of your bathroom walls.
- Prepare the walls before applying the primer. This includes cleaning the surface thoroughly to remove any dirt, grease, or old paint. Fill in any cracks or holes with spackle and sand down any rough patches.
- Apply the primer evenly with a brush or roller. Start from the top of the wall and work your way down, making sure to cover the entire surface. Allow the primer to dry completely before applying the paint.

Zinsser 286258 Bulls Eye 1-2-3 All Surface Primer, Quart, Gray
Interior/Exterior use on new or previously painted drywall, concrete, wood, masonry, metal and glossy or difficult surfaces
As an affiliate, we earn on qualifying purchases.
As an affiliate, we earn on qualifying purchases.
Prime the Bathroom Ceiling
To prime the bathroom ceiling, we will start by gathering the necessary materials and preparing the surface. Ceiling preparation is crucial to ensure that the primer adheres properly and creates a smooth, even finish. Begin by removing any debris, such as dust or cobwebs, using a broom or vacuum cleaner. Next, wipe down the ceiling with a damp cloth to remove any grease or stains. Once the surface is clean and dry, it’s time to choose the right primer. Consider factors such as the type of ceiling material, whether it’s painted or unpainted, and any existing issues like water stains or mildew. Refer to the table below for a quick guide on choosing the appropriate primer for your bathroom ceiling.

| Ceiling Material | Primer Type |
|---|---|
| Drywall | Latex |
| Wood | Stain-blocking oil-based |
| Previously painted | Acrylic |
Remember to follow the manufacturer’s instructions for application and drying times.
Clean up and Prepare for the Next Step
Now that we’ve primed the bathroom ceiling, let’s tidy up and get ready for the next step.
Prepping the bathroom walls is an essential part of the process to ensure a smooth and even paint application. Start by removing any loose paint or wallpaper using a scraper or sandpaper. Fill in any holes or cracks with a spackling compound and smooth it out with a putty knife. Once the walls are dry, lightly sand them to create a rough surface for the paint to adhere to.
Additionally, cleaning the bathroom floor is crucial to maintain a clean and professional finish. Sweep or vacuum the floor to remove any dust and debris, and then mop it with a mild detergent to remove any stains or grime. Ensure the floor is completely dry before proceeding to the next step.

Frequently Asked Questions
How Long Does It Take for the Primer to Dry?
The primer drying time can vary depending on factors like humidity and temperature. It’s important to follow best practices for priming a bathroom, including allowing ample time for the primer to dry before applying paint or other finishes.
Can I Use Regular Paint Instead of Primer?
Using regular paint as an alternative primer is not recommended. Primer serves a specific purpose, providing a smooth surface and enhancing paint adhesion. It also seals porous surfaces and prevents stains from bleeding through.
Do I Need to Sand the Walls Before Applying Primer?
Sanding walls before applying primer is necessary to ensure proper adhesion and smooth finish. It helps remove imperfections and promotes better paint coverage. Additionally, primer can help prevent mold growth in bathrooms.
What Type of Primer Should I Use for a Bathroom?
When selecting the right primer for bathroom surfaces, including walls and tiles, it’s important to follow best practices. We can achieve a smooth and long lasting finish by carefully choosing the appropriate bathroom primer.

Can I Skip Priming the Bathroom Ceiling if It’s in Good Condition?
Yes, you can skip priming the bathroom ceiling if it’s in good condition. However, it’s recommended to use a primer and paint in one for the bathroom walls to ensure better adhesion and durability.
Conclusion
In conclusion, by following these precise and informative steps, you can easily prime your bathroom surfaces and achieve a professional finish.
While some may argue that priming is an unnecessary step, the truth is that it provides a solid foundation for paint adhesion and helps prevent moisture damage.
Don’t overlook this crucial step and ensure a long-lasting, beautiful bathroom that will evoke a sense of pride and satisfaction.