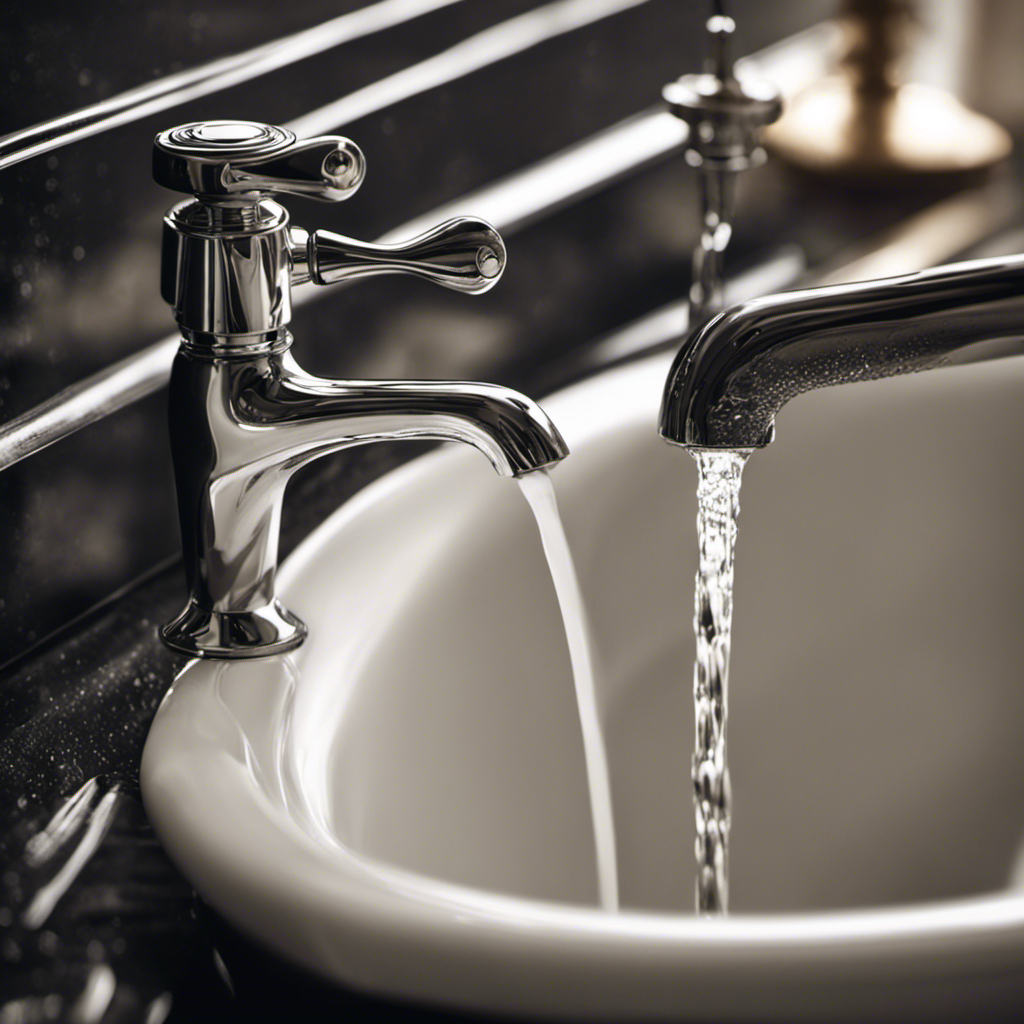

Ever wondered how to change your bathtub faucet? Well, you’re in luck because I’m here to guide you through the process step by step.
Changing a bathtub faucet may seem like a daunting task, but with the right tools and a little know-how, it can be a straightforward DIY project.
In this article, I’ll walk you through everything you need to know, from shutting off the water supply to troubleshooting common issues.
So, let’s dive in and get your bathtub looking and functioning its best!
Key Takeaways
- Shut off the water supply by locating and turning the water shut-off valve clockwise.
- Use the necessary tools to remove the old faucet, including wrenches for loosening and disconnecting plumbing connections.
- Follow step-by-step instructions to install the new faucet securely onto the bathtub.
- Connect the water supply lines carefully, checking for leaks and ensuring a tight connection.
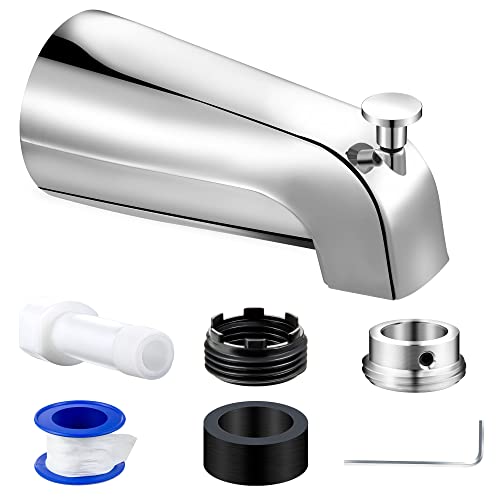
Dreyoo Tub Spout (Universal Fits 1/2" Copper Pipe, 1/2" IPS and 3/4" IPS), Bathroom Bathtub Faucet with Adapters and Hex Wrench (Chrome,Simple)
Universal Diverter Tub Spout: this Dreyoo tub spout with diverter is compatible with 1/2" copper pipe connection, 1/2"…
As an affiliate, we earn on qualifying purchases.
As an affiliate, we earn on qualifying purchases.
Tools and Materials Needed
You’ll need a few tools and materials to change the bathtub faucet. The tools you’ll need include an adjustable wrench, a screwdriver, and plumber’s tape. Additionally, you’ll need a new faucet, which can be purchased at a hardware store or online.
Step by step instructions for changing the bathtub faucet are as follows:
- Turn off the water supply to the bathtub.
- Remove the old faucet by unscrewing the mounting nuts.
- Once the old faucet is removed, clean the area thoroughly.
- Apply plumber’s tape to the threads of the new faucet.
- Install the new faucet by tightening the mounting nuts.
- Turn on the water supply.
It’s important to follow these steps carefully to ensure a successful faucet replacement.

Amazon Basics Plumbing Adjustable Wrench with Soft Grip, Wide Mouth, 6.34 x 2.83 x 0.59 inches (LxWxH)
6 inch (150mm) wide jaw adjustable plumbing wrench with inch/metric measurement scale
As an affiliate, we earn on qualifying purchases.
As an affiliate, we earn on qualifying purchases.
Shutting Off the Water Supply
To prevent any water leakage, make sure to turn off the water supply before proceeding with the necessary steps. Shutting off the water is a crucial step when changing a bathtub faucet. This ensures that water does not flow while you work, preventing any accidental flooding or damage.
Locate the water shut-off valve, typically found near the bathtub or in the basement. Turn the valve clockwise until it is fully closed. It is important to check that the water has stopped flowing by testing the faucet before beginning any repairs or replacements.

D-NYX 1, 4 or 5 Rolls 1/2 Inch(W) X 520 Inches(L) Teflon Plumbers Tape, Duct Sealant Tape for Shower Head, Plumbing Thread Tap, Water Pipe Sealing Plumbers PTFE Thread Seal (1 Pack)
SIZE: Teflon tape roll has a width of 1/2 inch and a length of 520 inches, which can…
As an affiliate, we earn on qualifying purchases.
As an affiliate, we earn on qualifying purchases.
Removing the Old Faucet
Before attempting to remove the old faucet, it’s important to gather the necessary tools for the job. You’ll need an adjustable wrench, a basin wrench, and a screwdriver.
Once you have the tools, you can proceed with the steps to disconnect the plumbing. Start by turning off the water supply to the faucet. Then, use the wrenches to loosen and remove the nuts and connections that hold the plumbing in place.
Tools Needed for Removal
First, gather the tools you’ll need for removing the bathtub faucet. Here’s a list of essential items:
- Adjustable wrench: This versatile tool will help you loosen and tighten nuts and bolts.
- Screwdriver: You’ll need this to remove any screws holding the faucet in place.
- Allen wrench: Some faucets have set screws that require an Allen wrench for removal.
- Plumber’s tape: This will ensure a tight seal when installing the new faucet.
When removing a bathtub faucet, it’s important to consider alternative removal methods. For example, using penetrating oil can help loosen stubborn connections. Additionally, be mindful of common mistakes to avoid during removal.
One common mistake is applying too much force, which can damage the plumbing or cause leaks. Another mistake is not turning off the water supply before starting the removal process, leading to flooding.
Steps to Disconnect Plumbing
When disconnecting the plumbing, make sure you turn off the water supply to prevent any potential leaks or flooding.
To start disconnecting the plumbing, locate the shut-off valves under the sink or near the bathtub. Turn the valves clockwise until they are fully closed. This will stop the flow of water to the faucet.
Next, use a wrench to loosen the nuts connecting the hot and cold water supply lines to the faucet. Be prepared for some water to drip out as you disconnect the lines.
Once the water supply lines are disconnected, use a wrench to loosen the nuts securing the faucet to the bathtub. Remove the old faucet and set it aside.
With the plumbing disconnected and the old faucet removed, you are now ready to prepare the new faucet for installation.
bathtub faucet mounting nuts
As an affiliate, we earn on qualifying purchases.
As an affiliate, we earn on qualifying purchases.
Preparing the New Faucet for Installation
Before diving into the installation process, it’s important to gather all the necessary tools and materials. You’ll need a wrench, plumber’s tape, a screwdriver, and a new faucet, among other things.
Once you have everything you need, it’s crucial to follow proper installation techniques to ensure a secure and leak-free faucet.
Required Tools and Materials
To change the bathtub faucet, you’ll need a few tools and materials. Here’s what you’ll need:
- Adjustable wrench: This handy tool will help you tighten and loosen bolts.
- Screwdriver: A screwdriver is essential for removing screws and fasteners.
- Plumber’s tape: This tape will create a watertight seal and prevent leaks.
- New faucet: Choose from a variety of bathtub faucet styles to suit your taste and bathroom decor.
When it comes to bathtub faucet replacement cost, it can vary depending on the brand and style you choose. On average, you can expect to spend around $100 to $300 for a new faucet. However, keep in mind that this cost may increase if you need to hire a professional plumber for installation.
Proper Installation Techniques
Installing a new faucet in your bathtub requires following proper techniques for a successful and secure installation. It is important to approach the task with knowledge and precision to ensure that your new faucet functions properly and does not cause any leaks or damages.
While it is possible to hire a professional for faucet installation, with the right tools and instructions, you can easily do it yourself. However, if you are unsure about your plumbing skills or lack the necessary tools, it is always better to seek professional installation. They have the expertise and experience to handle any challenges that may arise during the installation process.
Once you have decided to install the new faucet, you can proceed with the necessary steps to complete the task.
Installing the New Faucet
Once you’ve gathered all the necessary tools, you’ll want to start by turning off the water supply to the bathtub. This is crucial to prevent any water leakage or accidents during the installation process.
Here are the steps to follow for installing the new faucet:
- Remove the old faucet by unscrewing the mounting nuts and disconnecting the water supply lines.
- Clean the area around the faucet thoroughly to remove any debris or residue.
- Apply plumber’s tape to the threads of the new faucet to ensure a watertight seal.
- Securely attach the new faucet by tightening the mounting nuts and reconnecting the water supply lines.
Remember to check for any leaks and test the water flow before finishing the installation. If you encounter any issues, such as leaks or difficulty in tightening the mounting nuts, refer to troubleshooting tips or seek professional help.
Connecting the Water Supply Lines
Before connecting the water supply lines, make sure to check for any leaks or damage in the existing plumbing connections. This step is crucial to ensure a smooth and leak-free installation of the new faucet.
To connect the water supply lines, start by applying plumber’s tape to the threaded ends of the water supply valves. This will create a tight seal and prevent any leaks. Then, attach the supply lines to the valves and hand-tighten them. Use a wrench to give them an extra quarter turn for a secure connection.
Once the supply lines are connected, turn on the water supply and check for any leaks. If everything looks good, you’re ready to move on to testing the new faucet.
Testing the New Faucet
After successfully connecting the water supply lines, the next step is to test the new faucet to ensure it is functioning properly. This will help you identify any potential issues or leaks before fully installing the faucet.
Here are some testing techniques and troubleshooting tips to follow:
- Turn on the water supply: Slowly open the shut-off valves to allow water to flow into the faucet.
- Check for leaks: Inspect all connections, including the base of the faucet and the supply lines, for any signs of leakage.
- Test hot and cold water: Turn the handle to both the hot and cold positions to ensure that both sides are working correctly.
- Monitor water pressure: Check if the water pressure is consistent and adequate for your needs.
Troubleshooting Common Issues
If you encounter any issues with your new faucet, there are troubleshooting techniques that can help you resolve common problems.
One of the most common faucet problems is a dripping faucet. This can be caused by a worn-out washer or a faulty valve seat. To fix this, you can replace the washer or clean the valve seat using a wire brush.
Another common issue is low water pressure. This can be caused by a clogged aerator or a problem with the water supply. To fix this, you can remove the aerator and clean it or check the water supply valve to ensure it is fully open.
Lastly, if your faucet is leaking from the base, it could be due to a faulty O-ring. To fix this, you can replace the O-ring using a wrench and some plumber’s tape.
These troubleshooting techniques should help you resolve most common faucet problems.
Maintaining and Caring for Your New Faucet
To keep your new faucet in great condition, remember to regularly clean it with a mild soap and water solution. This will help to remove any dirt or grime that may accumulate over time.
In addition to cleaning, there are a few other steps you can take to care for your faucet finishes and troubleshoot leaks:
- Avoid using abrasive cleaners or scrub brushes, as these can scratch or damage the finish of your faucet.
- Inspect your faucet regularly for any signs of leaks, such as dripping or pooling water. If you notice a leak, it’s important to address it promptly to prevent further damage.
- Check the connections between the faucet and the water supply lines to ensure they are secure and free from leaks.
- If you have hard water, consider using a water softener or installing a water filtration system to prevent mineral buildup and prolong the life of your faucet.
Frequently Asked Questions
How Do I Choose the Right Bathtub Faucet for My Bathroom?
When choosing a bathtub faucet for your bathroom, consider the different faucet types, such as single handle or widespread, and the various finishes available, like chrome or brushed nickel.
Can I Install a Bathtub Faucet Without Professional Help?
I can definitely install a bathtub faucet without professional help. It’s a simple DIY project that can save money. I’ve done it before and it only took a couple of hours.
What Should I Do if the Bathtub Faucet Is Leaking After Installation?
If the bathtub faucet is leaking after installation, there are a few troubleshooting steps you can take. First, check for loose connections and tighten them if necessary. If that doesn’t fix the issue, you may need to replace the faucet cartridge or call a professional plumber for assistance.
How Often Should I Clean and Maintain My Bathtub Faucet?
Cleaning and maintaining your bathtub faucet is crucial to ensure its longevity and prevent any issues. Regular cleaning, at least once a month, with mild soap and water, and periodic maintenance checks can help keep your faucet in optimal condition.
Are There Any Safety Precautions I Should Take When Working With the Water Supply Lines During Installation?
When working with water supply lines during installation, it is crucial to prioritize safety. Be sure to shut off the main water supply, wear protective gear, and use caution when disconnecting and reconnecting the lines to avoid any potential accidents.
Conclusion
Changing a bathtub faucet may seem like a daunting task, but fear not! With the right tools and materials, you’ll be enjoying a new and improved bathing experience in no time.
First, shut off the water supply. This is crucial to prevent any accidents or water damage during the installation process.
Next, remove the old faucet. Use a wrench or pliers to loosen and disconnect any nuts or bolts holding it in place. Be careful not to damage any surrounding fixtures or surfaces.
Once the old faucet is removed, prepare the new faucet. This may involve cleaning or prepping the area where it will be installed. Follow the manufacturer’s instructions to ensure proper installation.
Now it’s time to install the new faucet. Carefully align it with the mounting holes and secure it in place using the provided hardware. Double-check that it is level and secure before moving on.
Don’t forget to connect the water supply lines. Use plumber’s tape to ensure a watertight seal. Tighten any connections, but be careful not to overtighten and cause damage.
After the installation is complete, test the new faucet. Turn on the water supply and check for any leaks or issues. If everything looks good, congratulations! You’ve successfully installed your new bathtub faucet.
However, if you encounter any problems, don’t panic. Troubleshoot any issues by checking for loose connections or faulty parts. It may be necessary to consult a professional if the problem persists.
Lastly, remember to maintain your new faucet properly for long-lasting use. Clean it regularly and address any minor issues promptly to prevent them from becoming major problems.
So go ahead, take the plunge and transform your bathtub into a luxurious oasis! Enjoy your new faucet and the enhanced bathing experience it provides.