
So you’ve noticed a little drip coming from your bathtub faucet, huh? Well, don’t you worry, because I’ve got just the solution for you.
In this article, I’m going to walk you through the process of changing your bathtub faucet stem. It may sound a little intimidating, but with the right tools and a little know-how, you’ll have that leak fixed in no time.
So let’s dive right in and get your faucet working like new again.
Key Takeaways
- Gather the necessary tools and materials such as pliers, adjustable wrench, screwdriver, Teflon tape, and a wrench for showerhead replacement.
- Shut off the water supply by locating the main water valve, turning it off, and opening the faucets to drain any remaining water. Make sure to check for residual water in the pipes and create a safe and dry working environment.
- Remove the old faucet stem by unscrewing the handle, removing decorative caps or covers, loosening the packing nut, and unscrewing the stem from the valve body. Different types of faucet stems may require different removal processes.
- Install the new faucet stem by applying plumber’s tape to the threads, inserting the new stem into the faucet body, hand-tightening it, and securely tightening with an adjustable wrench. Choose the correct type of faucet stem for your specific model.
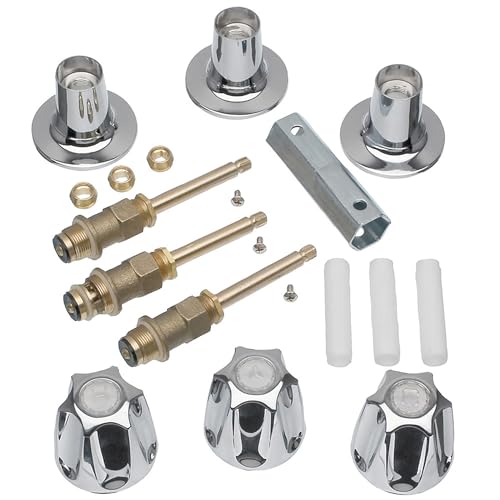
Danco (39619) Bathtub and Shower 3-Handle Remodel/Rebuild Trim Kit for Price Pfister Verve Faucets, Includes 12H-2H, 12H-2C, 12H-18D Stems, Knob Handles in Chrome, Pack of 1
- Manufactured in China: Made in China
As an affiliate, we earn on qualifying purchases.
As an affiliate, we earn on qualifying purchases.
Necessary Tools and Materials
You’ll need a few tools and materials to change the bathtub faucet stem. First, gather a pair of pliers, an adjustable wrench, and a screwdriver. These tools will help you remove the old stem and install a new one.
Additionally, you’ll need some Teflon tape to ensure a tight seal and prevent any leaks.
Now, let’s talk about installing a new showerhead. To do this, you’ll need a wrench to unscrew the old showerhead, and then you can simply screw on the new one.
Lastly, if you’re also replacing a bathtub drain, you’ll need a drain removal tool and possibly a putty knife to remove the old drain and install the new one.
Shutting Off the Water Supply
To stop the water flow, first, make sure that the supply valves are fully closed. This is crucial for preventing any leaks or accidents while working on your bathtub faucet stem.
Here’s how to shut off the main water valve and drain the water supply:
-
Locate the main water valve: It is usually located near your water meter or where the water line enters your house.
-
Turn off the main water valve: Use a wrench or pliers to turn the valve clockwise until it is fully closed.
-
Open faucets to drain remaining water: Open all faucets in your house to allow the water to drain out completely.
-
Check for residual water: Once the water stops flowing from the faucets, check for any residual water in the pipes before starting your faucet stem replacement.
Following these steps will ensure that you have a safe and dry working environment when changing your bathtub faucet stem.
Removing the Old Faucet Stem
Once you’ve located the main water valve and drained the remaining water, it’s time to remove the old faucet stem.
Common problems with bathtub faucet stems include leaks, reduced water flow, and difficulty in turning the handle.
To remove the old faucet stem, start by unscrewing the handle and removing any decorative caps or covers.
Next, use pliers or a wrench to loosen the packing nut and then unscrew the stem from the valve body.
It’s important to note that there are different types of faucet stems, such as compression, cartridge, and ball.
Each type has its own unique features and removal process, so it’s crucial to identify the specific type before attempting to remove it.
With the old faucet stem removed, you’re ready to move on to the next step: installing the new faucet stem.
Installing the New Faucet Stem
Now that you have removed the old faucet stem and identified the specific type, it’s time to install the new one. Proper maintenance is crucial for ensuring the longevity of your faucet and preventing any leaks or damage. Here’s a step-by-step guide to help you with the installation process:
- Gather the necessary tools: adjustable wrench, plumber’s tape, and the new faucet stem.
- Apply plumber’s tape to the threads of the new stem to create a watertight seal.
- Insert the new stem into the faucet body and hand-tighten it.
- Use the adjustable wrench to securely tighten the stem, being careful not to overtighten.
Remember, there are different types of faucet stems, such as compression, ball, cartridge, and ceramic disk. Make sure to choose the correct one for your specific faucet model.
Testing and Finishing Touches
After securely tightening the new stem, it’s important to test the faucet for any leaks or issues.
To do this, turn on the water supply and let it flow through the faucet. Check for any water leakage around the stem or handles. If you notice any leaks, try tightening the stem further or replacing the O-rings.
Another common issue is low water pressure. If you experience this, remove the aerator and clean out any debris that may be obstructing the flow.
Additionally, test the hot and cold water handles to ensure they are working properly and the water temperature is balanced. If you encounter any problems during the testing process, consult the manufacturer’s instructions or seek professional assistance.
Conclusion
After successfully changing the bathtub faucet stem, I felt a sense of accomplishment and relief. The water flowed smoothly from the new stem, filling the tub with a gentle cascade that was both relaxing and refreshing.
The sleek, shiny fixture added a touch of elegance to the bathroom, enhancing the overall ambience. As I stood back and admired my handiwork, I couldn’t help but smile, knowing that I had not only fixed a problem but also created a beautiful upgrade that would be enjoyed for years to come.