Did you know that a faulty bathtub valve can lead to water leaks and even water damage in your home?
In this article, I’ll guide you through the process of changing your bathtub valve step by step.
With the right tools and materials, you’ll be able to shut off the water supply, remove the old valve, and install a brand new one.
By the end, you’ll have a fully functioning bathtub valve that will prevent any future issues.
Key Takeaways
- Choose the appropriate type of valve for your bathtub
- Regularly check for leaks or drips and promptly repair any issues
- Clean and lubricate the valve regularly to prevent sticking or seizing
- Properly shut off the water supply before removing or installing the valve

DANCO Bathtub and Shower 3-Handle Remodel/Rebuild Trim Kit for Gerber Faucets | Knob Handle | 11B-1H, 11B-1C, 11B-4D | Chrome (39617)
TUB AND SHOWER REBUILD KIT FOR GERBER: This Danco remodeling kit is specifically designed to repair your Gerber…
As an affiliate, we earn on qualifying purchases.
As an affiliate, we earn on qualifying purchases.
Gathering the Necessary Tools and Materials
You’ll need a pair of pliers, an adjustable wrench, and Teflon tape to complete this task.
When it comes to choosing the right bathtub valve, it’s important to consider the type of valve that is currently installed in your bathtub. There are several types available, including compression valves, ball valves, and cartridge valves. Each type has its own pros and cons, so it’s essential to do your research and choose the one that best suits your needs.
Additionally, to ensure the longevity and proper functioning of your bathtub valve, here are some tips for maintenance. Regularly check for leaks or drips, and promptly repair any issues. Clean the valve regularly to remove any debris or mineral buildup. Lubricate the moving parts of the valve annually to prevent sticking or seizing.

Eastman 3/8 Inch OD Compression x 5/8 Inch OD Compression Multi-Turn Angle Stop Valve, Brass Plumbing Fitting, Chrome, 04348LF
EASTMAN MULTI-TURN STOP VALVE: Angled shut off valve is designed to control water flow to household plumbing fixtures…
As an affiliate, we earn on qualifying purchases.
As an affiliate, we earn on qualifying purchases.
Shutting off the Water Supply to the Bathtub
To stop the water flow to your bathtub, first locate the main water supply valve. This valve is usually located near the water meter or where the main water line enters your home. Once you have located the valve, follow these steps to shut off the water supply:
- Turn off the bathtub faucet to relieve any pressure in the pipes.
- Use a wrench to turn the valve clockwise until it is fully closed.
- Double-check that the water flow has stopped by turning on a faucet in another part of the house.
By turning off the bathtub faucet and shutting off the water main, you ensure that no water will be flowing through the pipes while you work on replacing the bathtub valve.
Now that the water supply is securely shut off, you can move on to the next step of removing the old bathtub valve.

LASCO 13-1065 Metal Faucet Seat Grinder/Reseater Tool, Used to Resurface Faucet Seats
The product is easy to use
As an affiliate, we earn on qualifying purchases.
As an affiliate, we earn on qualifying purchases.
Removing the Old Bathtub Valve
Once you’ve successfully shut off the water supply, it’s time to start removing the old bathtub valve.
To begin, I recommend gathering the necessary tools: an adjustable wrench, pliers, and a screwdriver.
Start by removing the bathtub handle, which is usually secured with a screw or a small set screw.
Once the handle is off, you will see the valve stem. Use the adjustable wrench to loosen and remove the packing nut that secures the valve stem.
Next, use the pliers to unscrew the valve stem from the valve body. Be cautious not to damage the threads.
Finally, remove the old valve stem and inspect it for any damage or signs of wear. This step is crucial if you’re fixing a leaky bathtub valve.
With the old valve stem removed, you’re now ready to move on to installing the new bathtub valve.
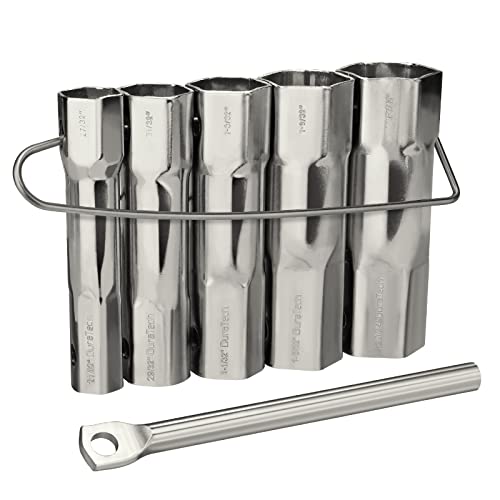
DURATECH Shower Valve Socket Wrench Set with Bar Handle for Removing Tub & Shower Valve,5-Piece, includes 21/32”x 27/32”, 29/32”x 31/32”, 1-1/32” x1-3/32”, 1-5/32”x1-9/32”, 1-11/32”x 1-7/16”
Shower Valve Socket Wrench Set: The Set comes with five double end wrenches, bar handle and a bar…
As an affiliate, we earn on qualifying purchases.
As an affiliate, we earn on qualifying purchases.
Installing the New Bathtub Valve
Now that the old valve stem has been removed, it’s time to install the new one. When installing a new bathtub valve, it’s important to avoid common mistakes that can lead to future problems. Here are some tips to ensure a leak-free installation:
-
Use plumber’s tape: Wrap plumber’s tape around the threads of the valve stem to create a tight seal and prevent leaks.
-
Tighten the connections properly: Use a wrench to tighten the connections just enough to prevent leaks, but be careful not to overtighten, as it can damage the valve or cause leaks.
-
Check for leaks: After installing the new valve, turn on the water supply and carefully inspect for any leaks. If you notice any, tighten the connections or replace the valve stem if necessary.
With these tips, you can install a new bathtub valve without any leaks.
Once the installation is complete, it’s time to move on to the next step: testing the new bathtub valve for proper functionality.
Testing the New Bathtub Valve for Proper Functionality
After installing the new valve stem, you should turn on the water supply and carefully inspect for any leaks. To ensure the proper functionality of the new bathtub valve, it is essential to evaluate the water pressure and troubleshoot common valve issues. Here is a table that outlines the steps to evaluate water pressure and troubleshoot common valve issues:
| Step | Action |
|---|---|
| 1 | Check water pressure at other fixtures in the house. If the pressure is low, there may be a problem with the main water supply. |
| 2 | Test the valve by turning it on and off. If there is a delay in water flow or if it is not shutting off completely, there may be a problem with the valve assembly. |
| 3 | Inspect the valve for any visible leaks or drips. If there is a leak, it may be due to a faulty seal or damaged valve parts. |
Conclusion
In conclusion, changing a bathtub valve may seem like a daunting task, but it can be done easily with the right tools and materials. By following the step-by-step process, you can ensure a properly functioning bathtub valve.
First, shut off the water supply to the bathtub. This is important to prevent any water from leaking while you work on the valve.
Next, remove the old valve. This may involve unscrewing or unfastening different parts of the valve. Make sure to carefully disconnect any water lines and remove any screws or bolts holding the valve in place.
Once the old valve is removed, you can then install the new one. Follow the manufacturer’s instructions for proper installation. This may involve connecting water lines, tightening screws or bolts, and ensuring a secure fit.
After the new valve is installed, turn on the water supply and test the bathtub to ensure it is working properly. If there are any leaks or issues, double-check your installation and make any necessary adjustments.
So next time you encounter a leaky or malfunctioning valve, don’t panic! Just remember these instructions and you’ll be able to tackle the job with confidence. Happy plumbing!