Did you know that a single bathtub leak can waste up to 300 gallons of water per year?
If you’re tired of dealing with the constant drip and want to save both water and money, then you’ve come to the right place.
In this article, I’ll guide you through the step-by-step process of fixing a bathtub leak.
From identifying the source to sealing and waterproofing, you’ll learn everything you need to know to tackle this common household issue head-on.
So let’s get started and put an end to that pesky leak once and for all.
Key Takeaways
- Bathtub leaks can be caused by worn-out caulking, cracked tiles, or damaged pipes.
- Signs of a bathtub leak include water pooling around the base of the tub, dampness, or mold growth.
- Assess the severity of the leak by observing the water flow, checking for water damage, and inspecting for mold or mildew growth.
- Repair cracked or damaged bathtubs by cleaning the area, applying a waterproof sealant, and consulting a professional plumber if needed.
Signature Hardware 312542 Lena 72" Cast Iron Soaking Clawfoot Tub with Pre-Drilled Overflow Hole
Covered under Signature Hardware's 25 year limited
As an affiliate, we earn on qualifying purchases.
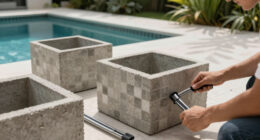
Identifying the Source of the Bathtub Leak
To start fixing a bathtub leak, you’ll need to identify the source of the problem. There are several common causes of bathtub leaks, such as worn-out caulking, cracked tiles, or damaged pipes.
One of the first signs of a bathtub leak is water pooling around the base of the tub or on the surrounding floor. You may also notice dampness or mold growth in the walls or ceiling below the bathroom.
To determine the source of the leak, start by inspecting the caulking around the edges of the tub and the grout between the tiles. Look for any visible cracks or gaps. If the caulking and tiles seem intact, the problem might be with the pipes.
In that case, you may need to call a professional plumber to assess the severity of the bathtub leak and provide a solution.

KOHLER 715-0 Villager 60" x 30-1/4" Alcove Cast Iron Bathtub with Left-Hand Drain and Integral Apron, Safeguard Slip-Resistant Surface, White
Durable cast iron construction ensures long-lasting quality and strength
As an affiliate, we earn on qualifying purchases.
Assessing the Severity of the Bathtub Leak
Determining the seriousness of the bathtub leak can help me understand the necessary steps to resolve it. To assess the severity of the leak, I need to determine the extent of water damage and find temporary solutions. Here is a table that summarizes the steps I can take:
| Steps to Assess the Severity of the Bathtub Leak |
|---|
| 1. Observe the water flow and rate of leakage. |
| 2. Check for any signs of water damage on walls or floors. |
| 3. Inspect the surrounding areas for mold or mildew growth. |
| 4. Measure the amount of water accumulating over a period of time. |
| 5. Assess the impact of the leak on the structural integrity of the bathtub. |

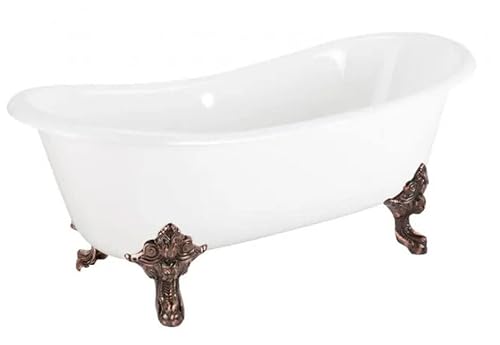
Aqua Eden VCT7DS6731NLW 67-Inch Cast Iron Double Slipper Clawfoot Tub with 7-Inch Faucet Drillings, White
Drilled for deck mount faucets 7" center to center
As an affiliate, we earn on qualifying purchases.
Repairing a Cracked or Damaged Bathtub
Repairing a cracked or damaged bathtub can be done by applying a waterproof sealant or consulting a professional plumber for a permanent solution.
Here’s how you can patch a cracked fiberglass bathtub:
-
Clean the area: Start by thoroughly cleaning the cracked area with a mild detergent and a soft cloth. Make sure the surface is dry and free from any debris.
-
Apply the sealant: Using a waterproof sealant specifically designed for fiberglass, apply a thin layer over the cracked area. Make sure to cover the entire crack and extend the sealant slightly beyond the edges.
-
Smooth and blend: Use a putty knife to smooth and blend the sealant into the surrounding surface. This will create a seamless appearance and ensure a watertight seal.

KOHLER K-26109-LA-0 Entity 60-Inch x 30-Inch Alcove Bath with Integral apron, integral flange and left hand drain, White
Low stepover height allows easy entry and exit
As an affiliate, we earn on qualifying purchases.
Fixing a Leaky Bathtub Faucet or Valve
If your bathtub faucet or valve is leaking, you may need to replace the worn-out washers or seals. Here’s a step-by-step guide on how to fix a leaky bathtub faucet or valve.
-
Troubleshoot the cause of the leak. Check if the leak is coming from the faucet or the valve. This will help you determine the specific parts that need replacing.
-
Turn off the water supply. Locate the shut-off valves under the sink or near the bathtub and close them to stop the water flow.
-
Remove the handle and trim. Use a screwdriver to remove the handle and trim, exposing the cartridge or valve mechanism.
-
Replace the washers or seals. Inspect the washers or seals for any signs of wear or damage. If necessary, replace them with new ones.
-
Reassemble the faucet or valve. Put everything back together in reverse order, making sure everything is tightly secured.
By following these steps, you can successfully fix a leaky bathtub faucet or valve and prevent further water damage.
Remember to turn on the water supply and check for any leaks before using the bathtub again.
Sealing and Waterproofing the Bathtub Surround
To properly seal and waterproof your bathtub surround, you’ll need to apply a layer of silicone caulk along the edges and seams. This will prevent future leaks and ensure that your bathtub remains in good condition for years to come.
Here’s a step-by-step guide on how to seal and waterproof your bathtub surround:
-
Clean the area: Before applying the caulk, make sure the surface is clean and free from any dirt or debris. Use a mild detergent and water to clean the bathtub surround thoroughly.
-
Prepare the caulk: Cut the tip of the caulk tube at a 45-degree angle and insert it into a caulk gun. Squeeze a small amount of caulk onto a scrap piece of cardboard to ensure a smooth flow.
-
Apply the caulk: Starting from one corner, apply a thin and even layer of caulk along the edges and seams of the bathtub surround. Use a caulk smoothing tool or your finger to smooth out the caulk and remove any excess.
Conclusion
In conclusion, fixing a bathtub leak can be a daunting task, but with the right knowledge and tools, it can be as smooth as sailing on calm waters.
By identifying the source of the leak, assessing its severity, and repairing the bathtub or faucet, you can plug the leak and prevent any further damage.
Remember, just like a captain steering a ship, you have the power to navigate through this challenge and ensure a watertight and secure bathtub.