Hey there! So, you’re dealing with a pesky bathtub shower diverter that just won’t cooperate, huh? Well, fear not, because I’ve got your back.
In this article, I’m going to show you step-by-step how to fix that diverter and get your shower back in working order. With a few simple tools and a little elbow grease, you’ll be able to tackle this DIY project like a pro.
So, let’s dive right in and get that bathtub shower diverter fixed once and for all!
Key Takeaways
- Identifying the problem and gathering the necessary tools is crucial before fixing a bathtub shower diverter.
- Removing and inspecting the diverter valve is an important step in the repair process.
- Replacing the diverter valve requires proper installation and troubleshooting for leaks or switching issues.
- Troubleshooting common issues such as low water pressure or a malfunctioning bathtub spout is necessary for a successful repair.
Identifying the Problem
The first step in fixing a bathtub shower diverter is identifying what’s causing the issue. When troubleshooting, there are a few common causes to consider.
First, check if the diverter is clogged with debris or mineral deposits. This can prevent proper water flow and cause the diverter to malfunction.
Another common cause is a worn-out or damaged diverter valve. Over time, the valve can become corroded or worn, leading to leaks or a loss in water pressure.
Additionally, faulty installation or improper maintenance can also contribute to diverter problems. It’s important to inspect the diverter thoroughly and look for any signs of damage or wear.
Gathering the Necessary Tools
Gathering all the necessary tools for this task shouldn’t take too long.
In order to fix a bathtub shower diverter, there are a few common mistakes to avoid and some troubleshooting tips to keep in mind.
First, make sure you have a pair of pliers to remove the diverter valve. This tool will help you grip and twist the valve for easy removal.
Additionally, a screwdriver is necessary to remove any screws holding the diverter in place.
It’s also important to have a replacement diverter valve on hand, as this is often the source of the problem.
Lastly, don’t forget some Teflon tape to ensure a tight seal when reinstalling the new diverter.
Removing the Diverter Handle
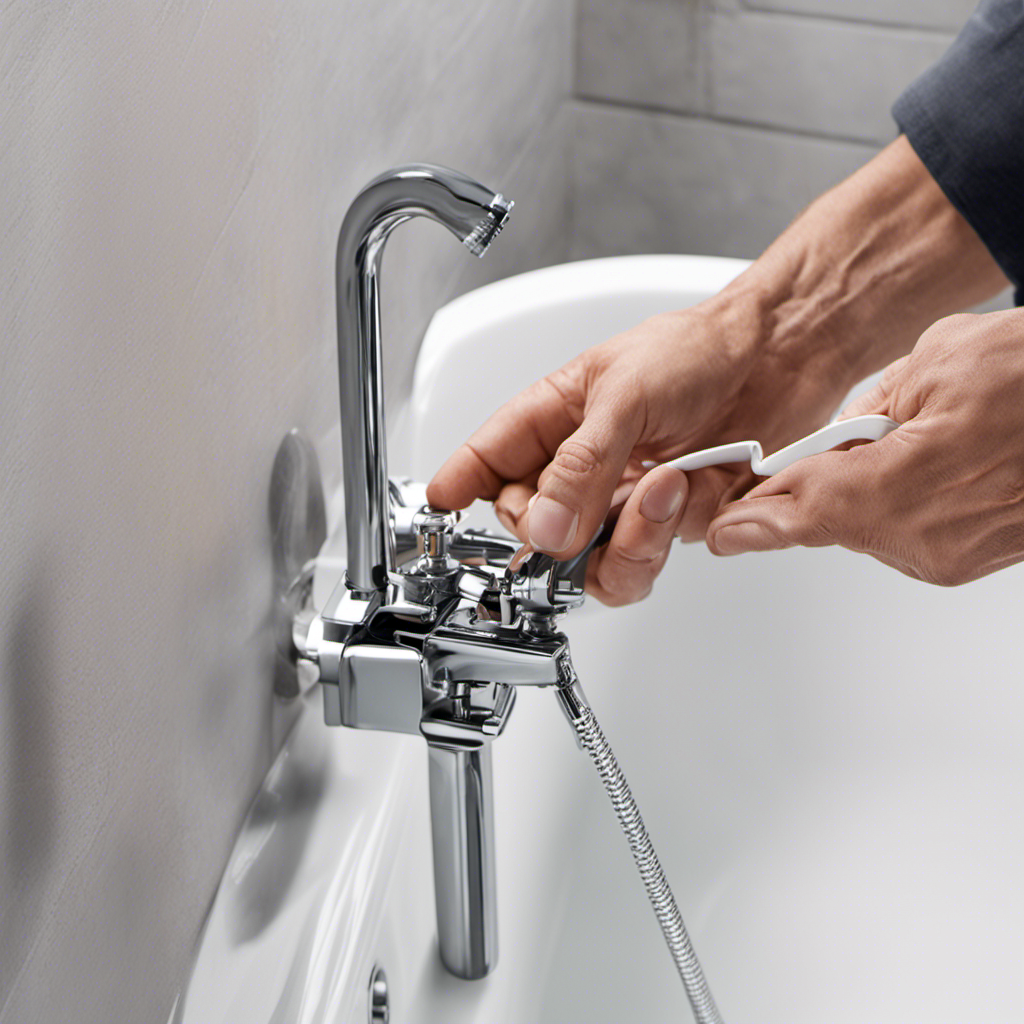
Using a pair of pliers, you’ll need to grip and twist the valve to remove the diverter handle. This step is crucial in replacing the cartridge and troubleshooting leaks in your bathtub shower diverter. Here is a table to guide you through the process:
| Step | Action |
|---|---|
| 1 | Turn off the water supply to the shower. |
| 2 | Locate the diverter handle and remove any decorative coverings. |
| 3 | Use pliers to grip the valve stem beneath the handle. |
| 4 | Slowly twist the valve stem counterclockwise to loosen and remove the diverter handle. |
Inspecting and Cleaning the Diverter Valve
To inspect and clean the diverter valve, you’ll need to remove any debris or mineral buildup that may be affecting its performance.
Start by turning off the water supply to the shower.
Next, locate the diverter valve, which is usually located behind the tub spout or in the wall.
Use a wrench or pliers to unscrew the valve and remove it from the pipe.
Inspect the valve for any signs of damage or corrosion.
If necessary, use a wire brush or vinegar solution to clean away any buildup or debris on the valve.
Once cleaned, reassemble the valve and turn the water supply back on.
Regularly inspecting and cleaning the diverter valve is essential for its proper functioning.
These maintenance tips will help ensure a long-lasting and efficient showering experience.
Replacing the Diverter Valve
When it comes to replacing the diverter valve, it’s crucial to ensure correct valve installation. This involves properly aligning the valve and securely tightening all connections to prevent leaks and ensure optimal performance.
In addition, troubleshooting common issues such as water leakage or difficulty in switching between shower and tub modes is essential to address any potential problems that may arise during the installation process.
To successfully complete this task, it’s recommended to have a set of tools and materials including an adjustable wrench, plumber’s tape, and a replacement diverter valve kit.
Correct Valve Installation
If you want to ensure the correct installation of the valve, make sure you follow these steps carefully.
First, ensure that the valve is the correct size and type for your plumbing system.
Next, clean and prepare the pipe by removing any old sealant or debris.
Apply a thin layer of plumber’s tape to the threads of the valve to ensure a tight seal.
Use a wrench to tighten the valve onto the pipe, being careful not to overtighten.
Finally, test the valve by turning on the water and checking for any leaks.
Proper valve installation is crucial for the smooth operation and longevity of your plumbing system.
Troubleshooting Common Issues
If you’re experiencing any issues, start by checking the valves in your plumbing system. Troubleshooting common issues with a bathtub shower diverter can help you identify and fix the problem quickly. One common issue is low water pressure, which can affect the functionality of your diverter. To diagnose this problem, check the water pressure using a pressure gauge. If the pressure is below the recommended range, you may need to adjust the water pressure regulator or clean any clogged valves. Another common issue is a malfunctioning bathtub spout, which can prevent the diverter from working properly. Check the spout for any debris or blockages and clean or replace it if necessary. Remember to always follow safety guidelines and consult a professional if you’re unsure about any repairs.
| Common Issues | Possible Causes | Solutions |
|---|---|---|
| Low water pressure | Clogged valves or water pressure regulator | Adjust water pressure regulator or clean valves |
| Malfunctioning bathtub spout | Debris or blockages | Clean or replace the spout |
Recommended Tools and Materials
To properly maintain and repair a bathtub shower diverter, it is important to have the right tools and materials on hand. Here are some recommended options:
- Adjustable wrench: for loosening and tightening connections
- Screwdriver: for removing screws and disassembling the diverter
- Plumber’s tape: to ensure a watertight seal on threaded connections
- Replacement parts: such as O-rings or washers, in case they need to be replaced
Having these tools readily available will make the repair process much more efficient. However, if you don’t have these tools, there are alternative solutions for bathtub shower diverter repair. For example, you can use a pair of pliers instead of an adjustable wrench, or a butter knife instead of a screwdriver.
Now that we have the necessary tools and materials, let’s move on to reassembling the diverter handle.
Reassembling the Diverter Handle
Once you have removed the diverter handle, you can easily reassemble it by aligning the screw hole with the stem and tightening the screw securely. To ensure a successful reassembly, make sure you have all the necessary parts, such as the handle, screw, and stem.
First, insert the stem back into the hole, making sure it fits snugly. Then, align the screw hole on the handle with the stem and insert the screw, tightening it securely with a screwdriver. This will ensure that the handle is firmly attached to the stem and will function properly.
Once the handle is reassembled, you can proceed with replacing any other parts or adjusting water pressure as needed.
Testing the Fixed Bathtub Shower Diverter
After successfully reassembling the diverter handle, it’s important to assess the water flow to ensure proper functionality.
Water flow assessment involves testing the diverter handle by diverting the water from the bathtub faucet to the showerhead and vice versa.
Once the assessment is complete, it’s crucial to evaluate the functionality of the repaired bathtub shower diverter to ensure that it’s working efficiently and effectively.
Water Flow Assessment
The first step in assessing the water flow is to check if there is any water coming out of the showerhead when the diverter is engaged. This will help determine if there are any issues with the diverter valve. If there is no water flow, it could indicate a problem with the valve or a blockage in the plumbing system.
To evaluate water pressure, I recommend using a pressure gauge to measure the pressure at the showerhead. This will give you an idea of the overall water pressure in the system.
Additionally, it’s important to check for leaks around the diverter valve or any other connections. Leaks can cause a decrease in water flow and should be addressed promptly.
Functionality After Repair
Now that we’ve completed the repairs, it’s important to test the functionality of the water flow and pressure in the shower. After fixing the bathtub shower diverter, it’s crucial to ensure that the water flows smoothly and that there is an improved water pressure. To assess the functionality, follow these maintenance tips:
| Maintenance Tips |
|---|
| Check the water flow by turning on the shower and observing if it is consistent. |
| Test the water pressure by comparing it to the pressure in other faucets. |
| Listen for any unusual sounds, such as sputtering or hissing, which may indicate a problem. |
| Inspect the showerhead for any blockages or debris that may affect water flow. |
| Finally, monitor the temperature control to ensure it operates correctly. |
Conclusion
In conclusion, fixing a bathtub shower diverter is a simple task that anyone can tackle. By following the step-by-step process outlined in this article, you can easily identify the problem, gather the necessary tools, and successfully replace the diverter valve.
Imagine the satisfaction of stepping into your shower, turning on the water, and feeling the powerful flow cascading down on you, knowing that you have single-handedly fixed your diverter.
So don’t hesitate, grab your tools and get ready to enjoy a perfectly functioning bathtub shower diverter.
