Are you tired of staring at that unsightly chip in your bathtub? Well, fear not, because I have the solution for you.
In this article, I will guide you through the step-by-step process of fixing a chipped bathtub. From assessing the damage to applying a protective coating, I will provide you with all the necessary information to restore your bathtub to its former glory.
So grab your materials and let’s get started!
Key Takeaways
- Assess the size and depth of the chip and inspect for additional damage
- Use the right materials and tools for effective repair and durability
- Thoroughly clean and prepare the chipped area before filling
- Properly sand, buff, and apply a protective coating for a seamless and smooth finish

Tub Repair Kit White, Tub Chip and Bathtub Repair Kit for Enamel, Fiberglass, Acrylic, Porcelain, Patch and Repairs Chips, Crack, Scratches, Rust, Holes on Tubs, Toilet, Sink, Shower, Tray in Bathroom
Permanently Repair Bathtub Chips, Cracks and Holes: For Fiberglass, Enamel, Acrylic; restore a glossy, non-yellowing, leak-stopping and chip…
As an affiliate, we earn on qualifying purchases.
As an affiliate, we earn on qualifying purchases.
Assessing the Damage
First, you’ll want to take a close look at the damage to see how extensive it is. Evaluating the severity of the chip in your bathtub is crucial in determining the best course of action for repair.
Start by examining the size and depth of the chip. Is it a small, surface-level chip, or does it extend deeper into the bathtub’s material?
Next, inspect the surrounding area for any signs of cracking or additional damage. This will help you understand if the chip is isolated or part of a larger issue.
Additionally, try to determine the cause of the damage. Was it due to a heavy impact or wear and tear over time? Understanding the cause can prevent future chips and guide your repair strategy.

J-B Weld 8277 WaterWeld Epoxy Putty Stick – 2 oz.
J-B Weld Waterweld: A Hand Mixable Two Part Epoxy Putty Stick, That Can Cure Under Water And Is…
As an affiliate, we earn on qualifying purchases.
As an affiliate, we earn on qualifying purchases.
Gathering the Necessary Materials
To get started, you’ll need a few materials for the repair job. Here are the key tools you’ll need:
- Safety goggles: Protect your eyes from any potential debris or chemicals.
- Respirator mask: Ensure you don’t inhale any harmful fumes or dust particles.
- Gloves: Keep your hands safe from any sharp edges or chemicals.
- Epoxy putty: This versatile material will help you fill in and repair the chipped area effectively.
When it comes to fixing a chipped bathtub, choosing the right tools is crucial. Safety precautions are of utmost importance to ensure a successful repair and to protect yourself from any harm.
Wearing safety goggles and a respirator mask will safeguard your eyes and lungs from any potential hazards. Additionally, using gloves will protect your hands from any sharp edges or chemicals.
Lastly, epoxy putty is the ideal material for repairing the chipped area, providing a strong and durable fix.
Tub Repair Kit White, Tub Chip and Bathtub Repair Kit for Enamel, Fiberglass, Acrylic, Porcelain, Patch and Repairs Chips, Crack, Scratches, Rust, Holes on Tubs, Toilet, Sink, Shower, Tray in Bathroom
Permanently Repair Bathtub Chips, Cracks and Holes: For Fiberglass, Enamel, Acrylic; restore a glossy, non-yellowing, leak-stopping and chip…
As an affiliate, we earn on qualifying purchases.
As an affiliate, we earn on qualifying purchases.
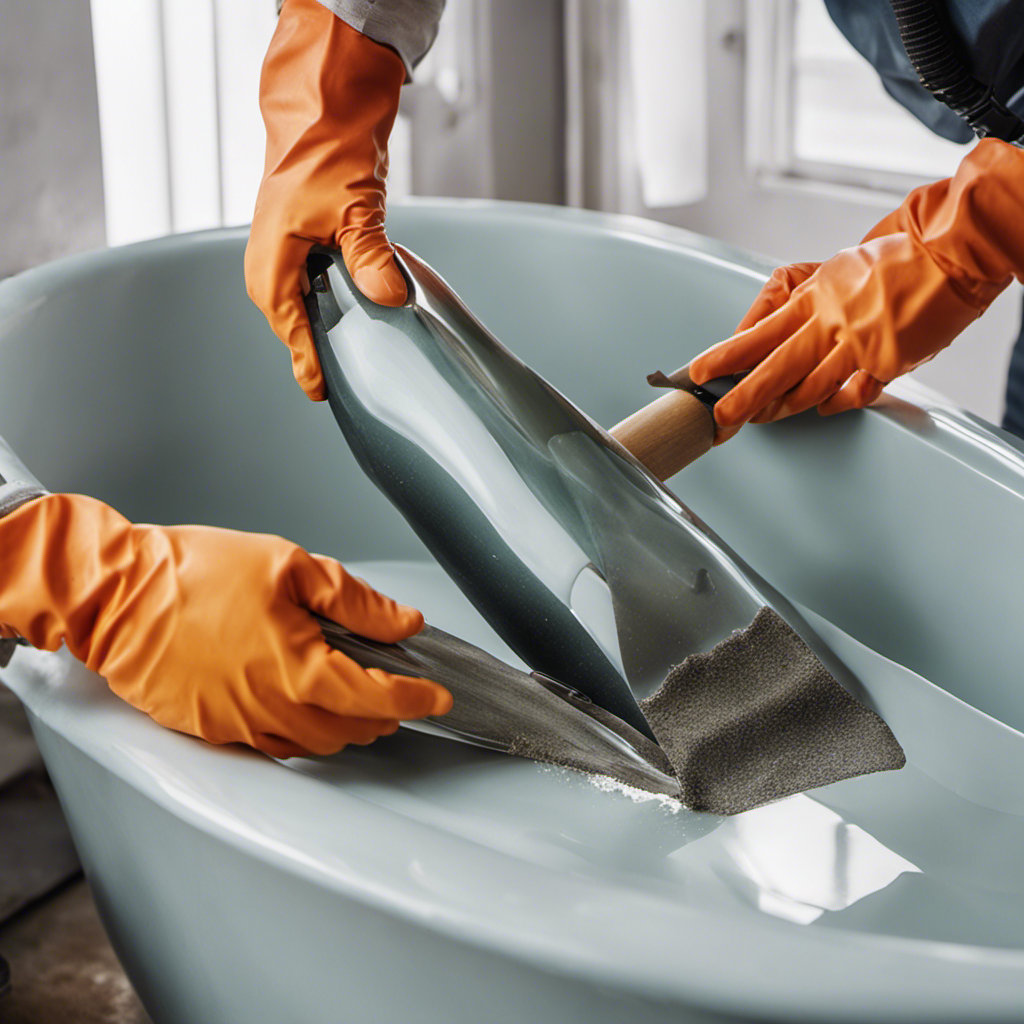
Preparing the Surface
Before starting the repair, make sure to thoroughly clean the surface of the chipped area. This is a crucial step in preventing further damage and ensuring a successful repair.
To prepare the surface, begin by removing any loose or flaking paint or coating using a putty knife or sandpaper. Next, clean the area with a mild detergent and warm water, ensuring that all dirt, grime, and soap residue are completely removed. Dry the surface thoroughly before proceeding with the repair.
Surface preparation techniques are essential for achieving a smooth and durable finish. By taking the time to clean and properly prepare the chipped area, you will enhance the adhesion of the repair material and minimize the risk of future chipping.
Tub Repair Kit White, Tub Chip and Bathtub Repair Kit for Enamel, Fiberglass, Acrylic, Porcelain, Patch and Repairs Chips, Crack, Scratches, Rust, Holes on Tubs, Toilet, Sink, Shower, Tray in Bathroom
Permanently Repair Bathtub Chips, Cracks and Holes: For Fiberglass, Enamel, Acrylic; restore a glossy, non-yellowing, leak-stopping and chip…
As an affiliate, we earn on qualifying purchases.
As an affiliate, we earn on qualifying purchases.
Filling the Chip
When it comes to repairing a damaged surface, there are a few key points to consider.
First, it’s important to properly assess the extent of the damage and determine the best course of action.
Once you have a clear understanding of the problem, choosing the right filler becomes crucial in achieving a seamless repair.
Repairing the Damaged Surface
You can start repairing the damaged surface of your chipped bathtub by gathering the necessary tools and materials. Here are a few techniques and services that can help you fix the problem:
-
Epoxy repair kit: This handy kit contains everything you need to fill and repair the chip, ensuring a durable and long-lasting fix.
-
Sandpaper: Use sandpaper with different grits to smooth out the surface and prepare it for repair.
-
Acrylic paint: Match the color of your bathtub and apply a few coats of acrylic paint to blend the repaired area seamlessly with the rest of the surface.
-
Professional refinishing services: If you’re not confident in your DIY skills or the damage is extensive, hiring a professional refinishing service can provide you with a flawless repair that will make your bathtub look good as new.
With these techniques and services, you can restore the beauty of your chipped bathtub and enjoy a rejuvenated bathroom experience.
Choosing the Right Filler
To choose the right filler for the damaged surface, consider the type of material your bathtub is made of and consult with a professional for expert advice. There are several types of fillers available, each with its own pros and cons. Here is a comparison of different types of fillers:
| Filler Type | Pros | Cons |
|---|---|---|
| Epoxy | Durable and long-lasting | Difficult to match color and texture |
| Acrylic | Easy to apply and sand | Not as durable as epoxy |
| Porcelain | Matches the color and texture of the bathtub | Requires professional installation |
When it comes to matching the color and texture of the bathtub, there are a few tips to keep in mind. First, gather samples of the bathtub material and compare them to the filler options. This will help you find the closest match. Additionally, consider using a filler that can be tinted or painted to match the bathtub’s color. Lastly, consult with a professional who can provide guidance on color matching techniques. Remember, choosing the right filler is crucial for achieving a seamless repair.
Smoothing and Leveling the Surface
Start by applying a thin layer of bathtub repair filler to smooth and level the chipped surface. This step is crucial in achieving a seamless repair that will withstand daily use.
To effectively smooth and level the surface, consider the following techniques:
- Sanding: Use fine-grit sandpaper to gently sand the repaired area, ensuring a smooth finish.
- Feathering: Gradually taper the edges of the repair filler to blend it seamlessly with the surrounding bathtub surface.
- Buffing: Polish the repaired area with a soft cloth to further enhance its smoothness and shine.
- Finishing Touches: Apply a clear sealant or epoxy coating to protect the repaired surface and give it a professional, glossy appearance.
Allowing the Repair to Dry
Once the bathtub repair filler has been applied, it’s important to allow it to dry completely before moving on to the next step. The drying time of the repair filler will depend on the specific product you are using. Typically, it can take anywhere from 24 to 48 hours for the filler to dry completely.
It’s crucial to ensure that the repair is fully dry before proceeding, as any moisture left in the filler can compromise the quality of the repair and lead to further damage. If you are looking for alternative solutions to speed up the drying process, you can use a fan or a hairdryer on a low setting to gently blow air over the repair area. However, be cautious not to overheat the filler as it may cause it to crack or shrink.
Sanding and Buffing the Repair
When it comes to sanding and buffing a repair, it’s important to follow proper techniques for achieving a smooth finish.
I have found that using a fine-grit sandpaper and applying even pressure in a circular motion helps to remove any imperfections and create a level surface.
Once the sanding is complete, buffing the repair with a polishing compound can further enhance the smoothness and shine of the finished surface.
Proper Sanding Techniques
To achieve a smooth surface, it’s important to use the correct sanding techniques when fixing a chipped bathtub. Proper sanding techniques are essential in ensuring that the repaired area blends seamlessly with the rest of the bathtub surface. Here are some key tips to keep in mind when sanding:
-
Use the right sandpaper grit: Choosing the appropriate grit is crucial for achieving the desired result. Start with a coarser grit to remove any rough edges or high spots, then gradually switch to finer grits for a smoother finish.
-
Sand in a circular motion: This helps to evenly distribute the pressure and avoid creating visible lines or scratches on the surface.
-
Keep the sandpaper wet: Using wet sandpaper helps to prevent dust from accumulating and clogging the paper, resulting in a more effective and efficient sanding process.
-
Take breaks and inspect your progress: Regularly stopping to check the surface will ensure that you are achieving the desired smoothness and making any necessary adjustments.
Buffing for a Smooth Finish
Buffing the surface after sanding helps to achieve a smooth finish on the repaired area of the bathtub. When it comes to buffing techniques, there are a few key steps to follow.
First, make sure you have the necessary equipment, including a buffing pad or cloth and a high-quality buffing compound. Apply a small amount of the compound to the pad, and then begin buffing the repaired area using circular motions.
Apply gentle pressure and work in small sections at a time. Keep buffing until you notice the surface becoming smooth and glossy. It’s important to be patient and thorough during this process to achieve the best results.
Remember to clean the area afterwards to remove any residue.
Applying a Protective Coating
Make sure you’re applying a protective coating to seal and protect the repaired area of your chipped bathtub. Applying a protective coating is essential to ensure the longevity of your bathtub repair and maintain its appearance.
Here are some important protective coating application techniques to follow:
-
Thoroughly clean the surface: Before applying the coating, make sure to clean the repaired area thoroughly to remove any dirt or debris.
-
Apply in thin, even coats: To achieve the best results, apply the protective coating in thin and even layers. This will ensure proper coverage and prevent drips or unevenness.
-
Allow sufficient drying time: Give the coating enough time to dry completely between each coat. This will help to avoid any smudging or imperfections.
-
Avoid over-application: It’s crucial not to apply too much coating as it can lead to a thick, uneven finish. Follow the manufacturer’s instructions for the recommended number of coats.
Maintaining and Preventing Future Damage
To maintain the quality and prevent future damage, you should regularly clean and inspect your bathtub for any signs of wear or deterioration. This will help you identify and address any issues before they worsen. In addition to cleaning, there are other steps you can take to protect your bathtub from damage and discoloration. One option is to use a bathtub liner, which provides an extra layer of protection against scratches and stains. A bathtub liner is a cost-effective solution that can be easily installed and removed, making it a convenient choice for preventing damage and maintaining the appearance of your bathtub. By incorporating regular cleaning and the use of a bathtub liner, you can extend the lifespan of your bathtub and keep it looking pristine for years to come.
| Pros | Cons | Maintenance Tips |
|---|---|---|
| Protects against damage | Can be difficult to fit | Clean regularly to prevent dirt buildup |
| Easy to install and remove | May affect the aesthetics | Avoid using abrasive cleaners |
| Cost-effective solution | May reduce the depth of the bathtub | Repair any small damages promptly |
| Available in various colors and patterns | Can trap water and moisture | Consider professional installation for a perfect fit |
Frequently Asked Questions
Can I Use Regular Household Items to Fix a Chipped Bathtub?
Yes, regular household items can be used to fix a chipped bathtub. There are alternatives to professional bathtub repair that can be effective and cost-efficient. Let me share some specific methods with you.
How Long Does It Usually Take for the Repair to Dry Completely?
How long does it usually take for the repair to dry completely? It typically takes around 24 to 48 hours for a bathtub repair to fully dry. Using the best materials ensures a more efficient drying time.
Is It Necessary to Use a Protective Coating After Fixing a Chipped Bathtub?
It’s important to consider the pros and cons of using a protective coating on a chipped bathtub. While it can provide added durability, it may require more maintenance to keep the finish looking good.
Can I Use Any Type of Sandpaper for Sanding and Buffing the Repair?
Yes, you can use different types of sandpaper for sanding and buffing the repair. It’s important to choose the appropriate grit for the job and follow proper sanding techniques to achieve a smooth finish.
What Are Some Common Causes of Chipped Bathtubs That I Should Be Aware of to Prevent Future Damage?
To prevent future damage to your bathtub, it’s important to be aware of common causes of chipped bathtubs. Taking preventive measures and regularly maintaining your bathtub can help avoid chips and prolong its lifespan.
Conclusion
In conclusion, fixing a chipped bathtub is a task that may seem daunting at first, but with the right materials and techniques, it can be successfully accomplished.
Just like a broken piece of pottery can be carefully restored to its former beauty, a chipped bathtub can be repaired and brought back to its original glory.
By following the steps outlined in this article, you can ensure that your bathtub remains in great condition for years to come.
Remember, a little effort and attention to detail can go a long way in maintaining the beauty and functionality of your bathroom.