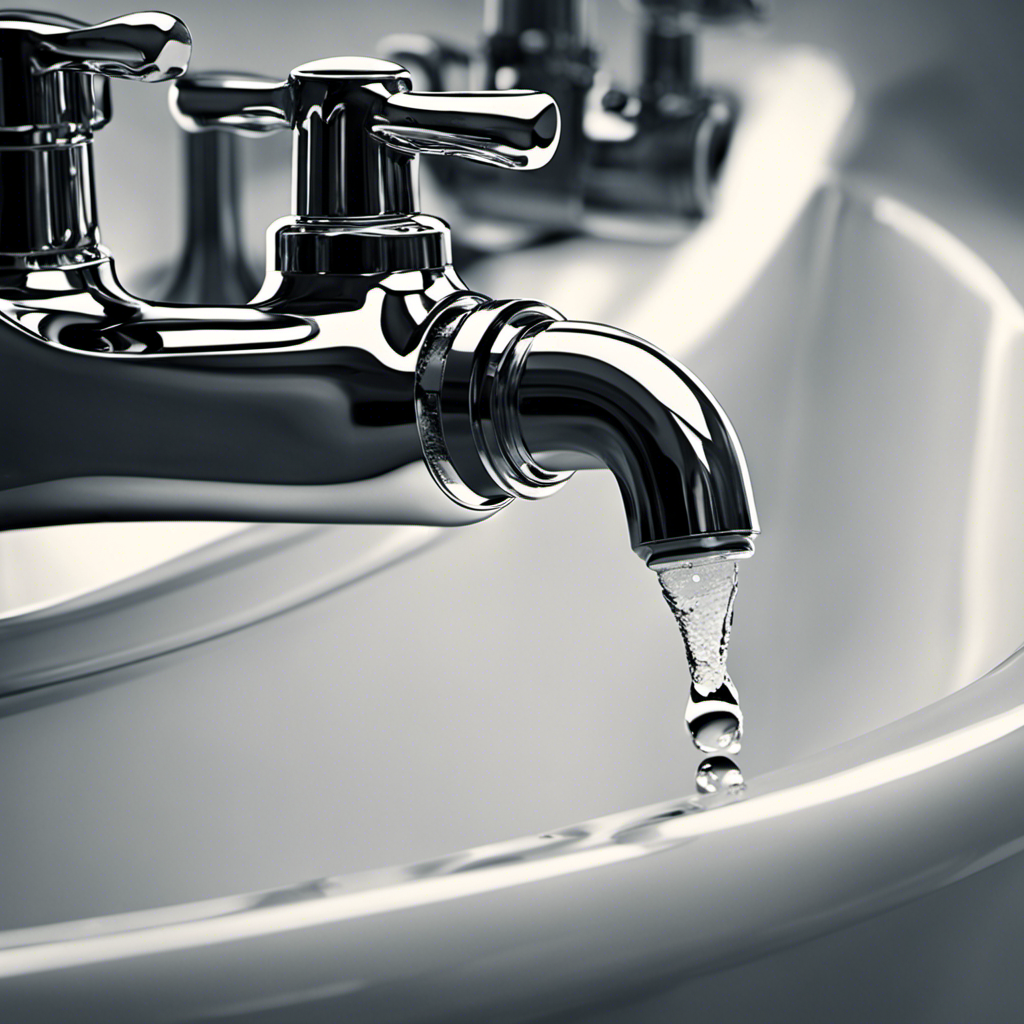

Have you ever dealt with the annoyance of a leaky faucet in your bathtub? Well, I have good news for you – fixing it is easier than you might think!
In this article, I will guide you through the step-by-step process of identifying the source of the leak, gathering the necessary tools and materials, shutting off the water supply, and replacing any worn-out or damaged parts.
By the end, you’ll be able to fix that leaky faucet and enjoy a peaceful, drip-free bath.
So let’s dive in and get started!
Key Takeaways
- Check the faucet handles and base for signs of water dripping or pooling.
- Inspect the cartridge or valve for damage or wear and tear.
- Gather necessary tools such as adjustable wrench, pliers, screwdrivers, replacement washers, O-rings, and plumber’s tape.
- Disassemble the faucet by turning off the water supply, removing the handle, decorative cap, and bonnet nut, and carefully taking out the cartridge or valve.

DANCO Bathtub and Shower 3-Handle Remodel/Rebuild Trim Kit for Gerber Faucets | Knob Handle | 11B-1H, 11B-1C, 11B-4D | Chrome (39617)
EASY UPGRADE – The classic chrome finish will update and complement your existing bathroom decor without any expensive…
As an affiliate, we earn on qualifying purchases.
As an affiliate, we earn on qualifying purchases.
Identifying the Source of the Leak
You’ll need to start by checking the faucet handles for any signs of water dripping or pooling. If you notice water dripping from the handle or pooling around the base, it’s likely that you have a leaky faucet.
Before calling a professional for help, try some troubleshooting techniques to identify the source of the leak. First, turn off the water supply to the bathtub. Next, remove the handle and inspect the cartridge or valve. Look for any signs of damage or wear and tear. If the cartridge or valve is damaged, it may need to be replaced.
If you’re unsure about how to proceed, it’s always a good idea to consult with a professional for repair options. Now that you’ve identified the source of the leak, it’s time to gather the necessary tools and materials to fix the problem.
replacement faucet washers and O-rings
As an affiliate, we earn on qualifying purchases.
As an affiliate, we earn on qualifying purchases.
Gathering the Necessary Tools and Materials
When it comes to fixing a leaky faucet bathtub, there are a few common tools that I always make sure to have on hand.
First, I need an adjustable wrench to loosen and tighten the various nuts and bolts.
I also need a pair of pliers to grip and manipulate small parts.
Lastly, a screwdriver, both flathead and Phillips, is essential for removing and installing screws.
In addition to these tools, I also gather the necessary materials for the repair, such as replacement washers, O-rings, and plumber’s tape.
These items are crucial for ensuring a successful and long-lasting fix.
Common Tools Required
To fix a leaky faucet bathtub, you’ll need a few common tools. Here are the tools you’ll need for basic troubleshooting and step-by-step instructions:
| Tools | Quantity | Description |
|---|---|---|
| Adjustable wrench | 1 | Used to loosen and tighten nuts and bolts |
| Screwdriver (Phillips) | 1 | Used to remove and install screws |
| Allen wrench | 1 | Used to remove and install hexagonal screws |
| Plumber’s tape | 1 roll | Used to create a watertight seal on pipe connections |
| Pliers | 1 pair | Used to grip and turn nuts, bolts, and pipes |
Make sure to gather these tools before starting the repair process. Having the right tools on hand will make the process much easier and efficient.
Materials Needed for Repair
Make sure you have the necessary materials ready for the repair, including an adjustable wrench, screwdriver, Allen wrench, plumber’s tape, and pliers. These tools are crucial in fixing a leaky faucet in your bathtub. With the right materials at hand, you can easily tackle this common household issue.
Here are some repair techniques and troubleshooting tips to help you along the way:
- Inspect the faucet for any visible leaks or damaged parts.
- Turn off the water supply to the bathtub to prevent further water damage.
- Disassemble the faucet and identify the faulty components.
- Replace worn-out washers or O-rings to stop the leakage.
- Apply plumber’s tape on threaded connections to ensure a tight seal.
- Reassemble the faucet and turn on the water supply to test for any remaining leaks.

Amazon Basics Plumbing Adjustable Wrench with Soft Grip, Wide Mouth, 6.34 x 2.83 x 0.59 inches (LxWxH)
6 inch (150mm) wide jaw adjustable plumbing wrench with inch/metric measurement scale
As an affiliate, we earn on qualifying purchases.
As an affiliate, we earn on qualifying purchases.
Shutting off the Water Supply
When it comes to shutting off the water supply, there are a few essential steps that need to be followed to prevent further water damage.
First, locate the main shut-off valve, which is typically located near the water meter or where the main water supply enters your home.
Use a wrench or pliers to turn the valve clockwise until it is fully closed. This will stop the flow of water and prevent any additional damage from occurring.
Essential Shut-Off Steps
Before starting, it’s important to locate the shut-off valves for both hot and cold water. This step is crucial as it allows you to stop the water flow and prevent any further damage. Here are three essential shut-off steps to follow:
-
Turn off the main water supply valve: This valve is typically located near the water meter or where the main water line enters your home. Turning it clockwise will shut off the water supply to your entire house.
-
Locate the shut-off valves under the sink: These valves control the water flow to the faucet. Turn them clockwise to shut off the water supply specifically to the faucet.
-
Check the shut-off valves near the bathtub: These valves are usually located on the wall behind the tub. Turn them clockwise to stop the water flow to the bathtub faucet.
Preventing Further Water Damage
To prevent any additional water damage, it’s crucial to locate and shut off the main water supply valve. This step is essential in preventing long term damage to your bathtub and surrounding areas. Signs of water damage include wet spots, discoloration, or peeling paint on walls and ceilings, musty odors, or warped flooring. By quickly shutting off the water supply, you can minimize the extent of damage and avoid costly repairs in the future. Take a look at the table below for a quick guide on how to locate and shut off the main water supply valve:
| Step | Description |
|---|---|
| Step 1 | Locate the main water supply valve. |
| Step 2 | Turn the valve clockwise to shut off the water supply. |
| Step 3 | Verify that the water is completely shut off by checking the faucet’s flow. |
Now that you have prevented further water damage by shutting off the main water supply valve, it’s time to move on to disassembling the faucet components.
plumber's tape for faucet repair
As an affiliate, we earn on qualifying purchases.
As an affiliate, we earn on qualifying purchases.
Disassembling the Faucet Components
You can start by unscrewing the faucet handle to begin disassembling the faucet components. When it comes to fixing a leaky faucet, it’s important to properly dispose of the old faucet parts. This ensures that no one accidentally uses the damaged parts again. Cleaning the faucet components is also crucial to ensure smooth operation and prevent any further leaks.
Here are three important steps to consider:
- Carefully remove the faucet handle using a screwdriver.
- Use a wrench to loosen and remove the valve stem assembly.
- Take out the rubber O-rings and any other washers that may be causing the leak.
Replacing Worn-Out or Damaged Parts
When replacing worn-out or damaged parts, make sure to carefully inspect the new components before installing them. This is crucial in repairing leaks and troubleshooting issues with your bathtub faucet.
Start by examining the new parts for any visible defects or signs of wear. Check the threads on the fittings to ensure they are clean and undamaged. Inspect the rubber washers for cracks or tears, as these can cause leaks. Verify that the O-rings are in good condition and properly seated.
Additionally, ensure that the cartridges or valves are functioning smoothly and without any obstruction. By thoroughly inspecting the new components before installation, you can prevent further problems and ensure a successful repair.
Testing and Reassembling the Faucet
After inspecting the new components, I carefully reassemble the faucet to test its functionality. I follow these testing techniques and troubleshooting tips to ensure everything is in working order:
-
Check for leaks: I turn on the water and observe if any water is dripping from the faucet or handles. If there are leaks, I tighten the connections or replace faulty parts.
-
Test water pressure: I turn on the faucet and check if the water pressure is consistent. If it’s weak, I clean the aerator or replace it if necessary.
-
Check for proper temperature control: I adjust the faucet handles to test if the water temperature changes accordingly. If there are issues, I inspect the cartridge or valve and make any necessary adjustments or replacements.
Conclusion
In conclusion, fixing a leaky bathtub faucet is a task that can be easily accomplished with the right tools and knowledge. By identifying the source of the leak and gathering the necessary materials, you can successfully shut off the water supply and disassemble the faucet components. By replacing any worn-out or damaged parts, you can ensure a proper fix.
Interestingly, did you know that a leaky faucet can waste up to 3,000 gallons of water per year? So by fixing your leaky faucet, you can not only save water but also reduce your water bill.
Remember to test and reassemble the faucet to ensure it is working properly.