As a homeowner, I know how frustrating it can be when something in your house breaks. That’s why I’m here to help you fix a stripped bathtub faucet handle.
In this article, I will guide you through the process step by step, ensuring that you have all the necessary tools and knowledge to successfully repair or replace the handle.
So let’s get started and restore functionality to your bathtub faucet!
Key Takeaways
- Excessive force when turning the handle can cause stripping.
- Regular maintenance, such as cleaning and lubricating, can prevent stripping.
- Using the correct tools and following instructions during installation is important.
- If repair is not successful, replacing the handle with a compatible one may be necessary.
Identifying the Issue
First, you’ll need to determine if the faucet handle is stripped. A stripped handle is a common issue that can occur due to wear and tear or improper installation. One of the main causes of a stripped handle is excessive force being applied when turning the handle. This can happen if the handle is loose or if the stem inside the handle is worn out. To prevent this issue, it is important to ensure that the handle is properly tightened and not forced when turning.
Regular maintenance, such as cleaning and lubricating the handle, can also help prevent stripping. Once you have identified that the handle is stripped, the next step is to gather the necessary tools to fix it.
Gathering the Necessary Tools
To get started, you’ll need a few tools for this repair.
Common causes of stripped bathtub faucet handles are excessive force applied when turning the handle, worn-out parts, or poor quality materials.
To prevent this issue in the future, it’s important to use gentle pressure when operating the handle and avoid overtightening. Regular maintenance, such as lubricating the handle and checking for any loose parts, can also help extend its lifespan.
Now, let’s move on to removing the stripped handle and replacing it with a new one.
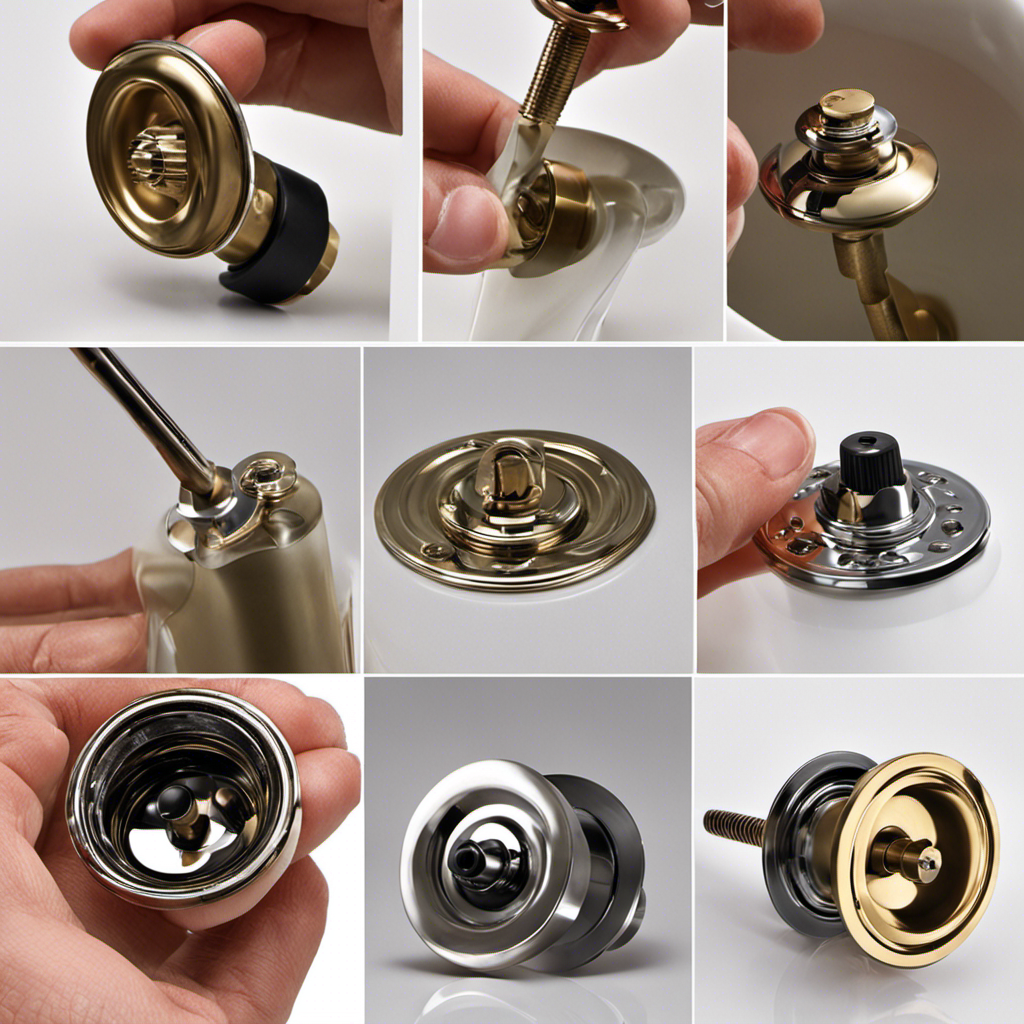
Removing the Stripped Handle
Now, it’s time to take off the worn-out handle and replace it with a new one. Removing a stripped bathtub faucet handle can be a tricky task, but there are a few alternative solutions you can try.
One option is to use a pair of pliers to grip the handle tightly and turn it counterclockwise. Another method is to use a handle puller tool specifically designed for this purpose. These tools provide extra leverage and make the removal process easier.
Common causes of stripped bathtub faucet handles include excessive force, worn-out components, or improper installation. To prevent this issue in the future, it’s important to use the correct tools and follow the manufacturer’s instructions carefully when installing the handle. Additionally, avoiding excessive force when turning the handle can help prolong its lifespan.
With the handle successfully removed, it’s time to move on to the next step: repairing or replacing the faucet handle.
Repairing or Replacing the Faucet Handle
Now that you have successfully removed the handle, let’s focus on repairing or replacing it.
Proper maintenance techniques are essential to prevent stripped bathtub faucet handles. One common cause of stripped handles is excessive force when turning the handle, which can wear down the threads over time. Another cause is the use of improper tools or wrenches that don’t fit properly, leading to damage.
To repair a stripped handle, you can try using a handle puller or a plumber’s wrench to tighten the handle onto the stem. If that doesn’t work, you may need to replace the handle altogether. Make sure to choose a handle that is compatible with your faucet and follow the manufacturer’s instructions for installation.
Regular maintenance and gentle handling will help prevent future stripping issues.
Reassembling and Testing the Faucet
Once you have completed the reassembly, it is important to test the faucet to ensure it is functioning properly. Here are a few steps you can follow to troubleshoot common faucet handle issues:
-
Turn on the water supply: Make sure the water supply valves under the sink are fully open to allow water flow to the faucet.
-
Check for leaks: Look for any water leaks around the base of the faucet handle or under the sink. If there are any leaks, tighten the connections or replace any faulty parts.
-
Test the handle: Turn the faucet handle in both directions to check for smooth operation. Ensure that the handle is securely attached and doesn’t wobble or feel loose.
-
Check water temperature: Adjust the hot and cold water supply to make sure the faucet is providing the desired water temperature.
Conclusion
To wrap things up, fixing a stripped bathtub faucet handle is a straightforward task that anyone can tackle with the right tools and a little know-how.
By carefully identifying the issue, gathering the necessary tools, and removing the stripped handle, you’ll be well on your way to a fully functional faucet.
Whether you choose to repair or replace the handle, reassembling and testing the faucet will ensure that your bath time remains a delightfully smooth and effortless experience.
So go ahead, take charge, and restore your bathtub faucet to its former glory!

With an impeccable eye for detail and a passion for bathroom-related, Ava leads our editorial team gracefully and precisely.
Under her guidance, Best Modern Toilet has flourished as the go-to resource for modern bathroom enthusiasts. In her free time, you might find Ava exploring antique shops and looking for vintage bathroom fixtures to add to her collection.