Are you frustrated with that unsightly deep scratch in your bathtub? Well, you’re not alone. Studies show that 7 out of 10 homeowners have encountered this common issue.
But fear not, because in this article, we will guide you through the step-by-step process of fixing that scratch with ease. By following our expert tips and utilizing the right materials, you’ll have your bathtub looking as good as new in no time.
So let’s dive in and get your bathtub back to its pristine condition!
Key Takeaways
- Evaluate the depth, length, and width of the scratch to determine the severity of the damage.
- Consider DIY methods for minor scratches but seek professional help for deep ones.
- Gather the necessary materials before starting the repair, including sandpaper, a cleaning solution, and a bathtub repair kit.
- Thoroughly clean the surface using the cleaning solution provided in the repair kit before applying the repair solution.

Tub Repair Kit White, Tub Chip and Bathtub Repair Kit for Enamel, Fiberglass, Acrylic, Porcelain, Patch and Repairs Chips, Crack, Scratches, Rust, Holes on Tubs, Toilet, Sink, Shower, Tray in Bathroom
Permanently Repair Bathtub Chips, Cracks and Holes: For Fiberglass, Enamel, Acrylic; restore a glossy, non-yellowing, leak-stopping and chip…
As an affiliate, we earn on qualifying purchases.
As an affiliate, we earn on qualifying purchases.
Assessing the Damage
Now, you’ll want to take a closer look at the scratch to assess the damage. Evaluating options and seeking professional help are important steps in fixing a deep scratch in your bathtub.
Start by examining the scratch carefully. Note the depth, length, and width of the scratch. Is it a surface scratch or does it go deeper into the bathtub material? Consider your options based on the severity of the damage.
For minor scratches, you may be able to fix it yourself using DIY methods. However, for deep scratches or if you’re unsure about the repair process, it’s best to seek professional help.
Transitioning to the next section, once you’ve assessed the damage, you can move on to gathering the necessary materials for the repair.
deep scratch remover for bathtubs
As an affiliate, we earn on qualifying purchases.
As an affiliate, we earn on qualifying purchases.
Gathering the Necessary Materials
To gather the necessary materials, you’ll need sandpaper, a cleaning solution, and a bathtub repair kit.
Choosing the right repair product is crucial for a successful fix. Look for a repair kit specifically designed for bathtub scratches, as it will provide the best results.
Safety precautions during the repair process are also important. Make sure to wear protective gloves and goggles to prevent any harm from the chemicals in the cleaning solution and repair kit. Additionally, ensure proper ventilation in the bathroom by opening windows or using a fan.
When you have gathered the materials and taken the necessary safety precautions, you can move on to preparing the surface for the repair.
bathtub repair kit for deep scratches
As an affiliate, we earn on qualifying purchases.
As an affiliate, we earn on qualifying purchases.
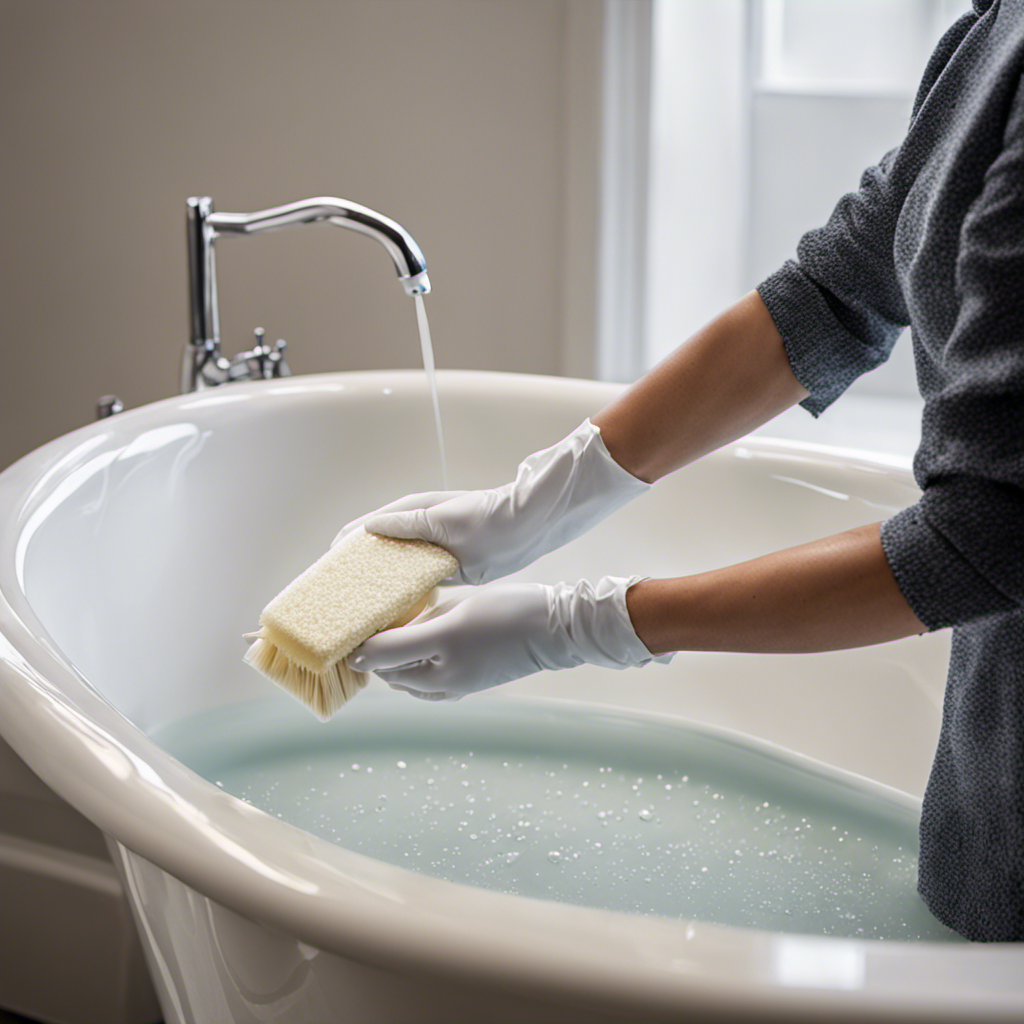
Preparing the Surface
First, you’ll want to start by thoroughly cleaning the surface using the cleaning solution provided in the repair kit. This step is crucial to ensure that the repair solution adheres properly to the bathtub surface.
Begin by rinsing the bathtub with warm water to remove any loose dirt or debris. Then, apply the cleaning solution, following the instructions on the packaging. Use a soft cloth or sponge to scrub the surface gently, paying extra attention to the area of the deep scratch.
Rinse the bathtub thoroughly with water to remove any residue from the cleaning products. After cleaning, allow the surface to dry completely before proceeding to the next step, which involves applying the repair solution.
Tub Repair Kit White, Tub Chip and Bathtub Repair Kit for Enamel, Fiberglass, Acrylic, Porcelain, Patch and Repairs Chips, Crack, Scratches, Rust, Holes on Tubs, Toilet, Sink, Shower, Tray in Bathroom
Permanently Repair Bathtub Chips, Cracks and Holes: For Fiberglass, Enamel, Acrylic; restore a glossy, non-yellowing, leak-stopping and chip…
As an affiliate, we earn on qualifying purchases.
As an affiliate, we earn on qualifying purchases.
Applying the Repair Solution
After thoroughly cleaning the surface, you can now apply the repair solution using the instructions provided in the kit. This step is crucial to ensure the proper application technique and achieve long-term durability of the repair.
Here are some important points to keep in mind:
-
Prepare the repair solution: Mix the components of the repair solution according to the instructions in the kit. Make sure to follow the recommended proportions for best results.
-
Apply the solution: Using a brush or applicator provided, apply the repair solution evenly over the scratched area. Be careful not to apply too much or too little, as it can affect the final outcome.
-
Smooth out the solution: Once applied, use a spatula or scraper to smooth out the repair solution, ensuring a seamless finish. Take your time and be gentle to avoid any further damage.
Finishing Touches
Once you have applied the repair solution, it’s important to let it dry completely before moving on to the finishing touches.
After the solution has dried, it’s time to polish the repaired area to ensure a seamless finish. Polishing techniques can vary depending on the type of bathtub material, but generally, a gentle buffing with a soft cloth or a mild abrasive cleaner can help to smooth out any rough edges or unevenness.
When polishing, be sure to use even pressure and circular motions to blend the repaired area with the surrounding surface.
Additionally, don’t forget the importance of color matching. If the repair solution has altered the color of your bathtub, consider using a color-matching kit to restore the original shade. This will help to achieve a professional and flawless result.
Frequently Asked Questions
Can I Use Regular Household Cleaners to Fix a Deep Scratch in My Bathtub?
You can’t use regular household cleaners to fix a deep scratch in your bathtub. There are specific bathtub repair techniques and alternative methods for fixing scratches that you should consider instead.
How Long Does the Repair Solution Need to Dry Before I Can Use the Bathtub Again?
The drying time for the repair solution will depend on the specific product you use. It’s important to follow the manufacturer’s instructions for the recommended drying time. Alternatively, there may be alternative solutions that require shorter drying times.
Is It Possible to Fix a Deep Scratch in a Bathtub Without Professional Help?
You can definitely fix a deep scratch in your bathtub without professional help. There are alternative repair methods available that are cost effective and can easily be done on your own.
Can I Use a Different Color Repair Solution to Match the Color of My Bathtub?
You can use a different color repair solution to match your bathtub. However, it’s important to consider alternatives to repair solutions, such as hiring a professional or exploring other DIY methods.
How Long Will the Repair Solution Last Before the Scratch Reappears?
To prevent deep scratches in bathtubs, consider using non-abrasive cleaners and avoiding harsh scrubbing. If a deep scratch does occur, alternative methods for fixing it include using a bathtub repair kit or hiring a professional.
Conclusion
In conclusion, you can effectively fix a deep scratch in your bathtub by following the steps outlined in this article.
By assessing the damage and gathering the necessary materials, you are equipped to prepare the surface and apply the repair solution.
Taking the time to complete the finishing touches will ensure a professional and seamless repair.
Remember, it’s important to investigate the truth of any theory before accepting it as fact, as this can evoke various emotions in the audience.