
So, you’ve finally decided to tackle the task of installing a bathtub drain yourself. Don’t worry, I’ve got you covered with this step-by-step guide.
- Gather the tools and materials you’ll need.
- Prepare the bathtub for installation.
- Remove the old drain.
- Measure and cut the new drain pipe.
- Apply plumber’s putty to the drain flange.
- Connect the drain pipe.
- Install the overflow drain assembly.
- Test for leaks.
- Finally, seal and finish the bathtub installation.
Let’s get started!
Key Takeaways
- Choose a high-quality drain kit compatible with the bathtub.
- Clean the bathtub surface and inspect for damage before installation.
- Measure and cut the drain pipe accurately.
- Apply plumber’s putty and secure the drain flange properly.

Brondell Bidet Toilet Seat Non-Electric Swash Ecoseat, Fits Elongated Toilets, White - Dual Nozzle System, Ambient Water Temperature - Bidet with Easy Installation
CLEAN AND REFRESHING: With Brondell’s Ecoseat 101 Bidet, you’ll experience a soothing, freshwater wash that leaves you feeling...
As an affiliate, we earn on qualifying purchases.
Gather the Necessary Tools and Materials
You’ll need to gather the necessary tools and materials for installing the bathtub drain.
Before starting the installation process, it is important to gather everything you will need to ensure a smooth and successful installation.
Here are some tips for selecting the right materials and avoiding common mistakes during bathtub drain installation.
Firstly, make sure to choose a high-quality drain kit that is compatible with your bathtub. Look for durable materials such as brass or stainless steel to ensure longevity. Additionally, consider the type of drain you want, whether it’s a pop-up or a toe-tap drain.
Next, gather the necessary tools, including a wrench, pliers, and a screwdriver. These tools will help you remove the old drain and install the new one. It is important to have the correct tools to avoid any damage to the drain or the bathtub itself.
By selecting the right materials and having the necessary tools, you can ensure a successful and hassle-free bathtub drain installation.
Avoid common mistakes by following these tips and complete the installation with ease.

WITMYA Smart Toilet with Bidet Built In, One Piece Bidet Toilet with Auto Dual Flush, Foam Shield, Modern Elongated Tankless Toilet with Foot Sensor, Heated Bidet Seat, Warm Water & Dryer,LED Display
【Efficient Flush & Energy-Saving Design】There smart toilets feature a highly efficient 1.28 GPF water-saving dual flush system with...
As an affiliate, we earn on qualifying purchases.
Prepare the Bathtub for Installation
To get ready for installation, make sure the area around the tub is clean and free of any debris. Here’s how to prepare the bathtub for installation:
-
Clean the surface: Start by thoroughly cleaning the bathtub surface using a mild detergent and warm water. Scrub away any dirt, grime, or soap scum using a soft cloth or sponge. Rinse the surface with clean water and dry it completely.
-
Inspect for damage: Carefully examine the bathtub for any signs of damage, such as cracks, chips, or worn-out areas. If you spot any issues, it’s essential to address them before proceeding with the installation to ensure a proper fit and prevent further damage.
-
Check the drain area: Remove the drain cover and clean any buildup or debris that may have accumulated over time. Use a brush or a small tool to remove any stubborn clogs. This step will ensure that the drain functions properly and prevents any potential blockages in the future.
By following these steps, you will ensure that your bathtub is clean and in good condition, ready for the installation process.
Regular bathtub cleaning and maintenance will help prolong its lifespan and keep it looking pristine.

LUXE Bidet NEO 120 - Single Nozzle, Self-Cleaning, Non-Electric Bidet Attachment for Toilet Seat, Adjustable Water Pressure, Rear Wash (Blue)
THE ULTIMATE VALUE – With a sleek design and high-quality parts, Our Bidet Attachment will give your bathroom...
As an affiliate, we earn on qualifying purchases.
Remove the Old Drain
To properly remove a bathtub drain, there are a few key points to consider.
First, gather the necessary tools and materials, including a pliers, screwdriver, and drain removal tool.
Next, familiarize yourself with the specific techniques required for your type of drain, such as turning the drain counterclockwise with pliers or using a drain removal tool to loosen and remove the drain.
Proper Drain Removal
Using a pair of pliers, gently grip the drain and twist counterclockwise to remove it from the bathtub.
Proper drain maintenance is essential to prevent common drain issues. Here are three important steps to follow:
-
Inspect the drain for any signs of clogs or debris. If you notice any blockages, use a drain snake or a plunger to clear them.
-
Check the drain’s seal to ensure it is intact and not worn out. If the seal is damaged, replace it to prevent leaks.
-
Clean the drain regularly by pouring a mixture of hot water and vinegar down the drain. This will help dissolve any buildup and keep the drain flowing smoothly.
Tools and Techniques
You’ll need a pair of pliers to grip the drain and twist counterclockwise for removal. Once the drain is removed, it’s important to properly seal the bathtub drain to prevent any leaks or other issues.
Here are some techniques for sealing the drain effectively. First, clean the drain and surrounding area to ensure a tight seal. Apply plumber’s putty around the flange of the drain and press it firmly into place.
Next, attach the drain body to the bottom of the bathtub, making sure it is centered and level. Use a wrench to tighten the drain body securely.

BIGCOW Ultra-Slim Bidet Attachment for Toilet - Dual Nozzle (Frontal & Rear Wash) with Adjustable Cold Water Pressure and Stainless Steel Inlet - Hygienic Solution for Fresh Cleanliness, Silver 1 Pcs
【Dual Spraying Modes】- This toilet bidet offers both rear wash for thorough cleaning and a specially designed frontal...
As an affiliate, we earn on qualifying purchases.
Measure and Cut the New Drain Pipe
First, make sure to measure and cut the new drain pipe to the appropriate length. Proper cutting techniques and measuring accuracy are crucial for a successful installation.
Here are the steps to follow:
- Use a tape measure to accurately measure the length needed for the drain pipe.
- Mark the measurement on the pipe using a pencil or marker.
- Use a pipe cutter or hacksaw to cut the pipe. Make sure to follow the marked line and cut smoothly and evenly.
- After cutting, use a deburring tool to remove any rough edges or burrs from the cut end of the pipe.
- Measure and cut any additional pieces of pipe needed for the drain assembly, such as elbows or connectors, using the same techniques.
Remember to double-check your measurements before cutting to ensure accuracy and avoid any potential issues during installation.
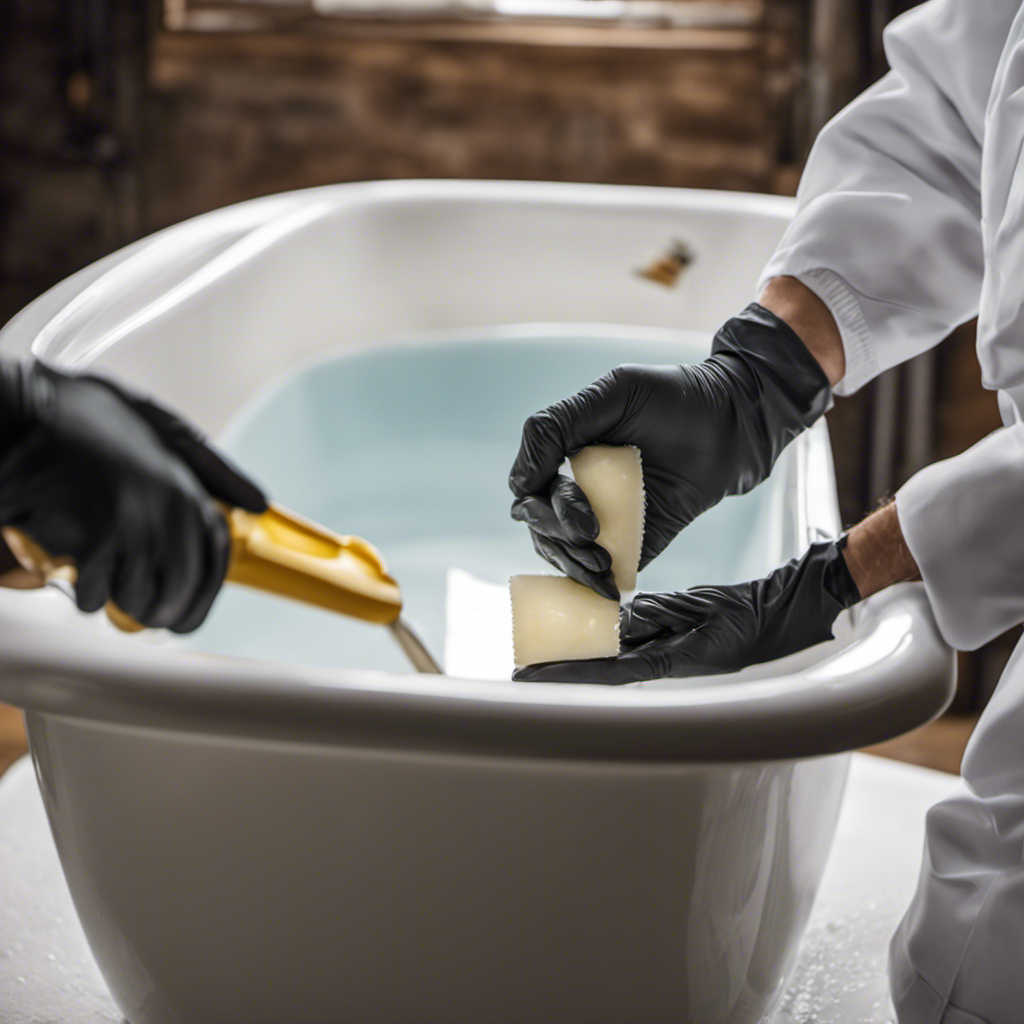
Apply Plumber’s Putty to the Drain Flange
To properly seal the drain flange, apply plumber’s putty in a thin, even layer around the underside of the flange. Plumber’s putty is a commonly used material for sealing drains and preventing leaks.
However, if you don’t have plumber’s putty on hand or prefer to use an alternative, there are other options available such as silicone caulk or rubber gaskets.
Before applying the putty, make sure the surface of the flange is clean and free from any dirt or debris. Then, take a small amount of putty and roll it into a thin rope-like shape. Press the putty onto the underside of the flange, ensuring it covers the entire surface.
If you encounter any issues during the drain flange installation, such as an uneven or unstable fit, double-check the alignment and make any necessary adjustments before proceeding.
Once the putty is applied, you can now move on to the next step: inserting the drain flange into the drain hole.
Insert the Drain Flange Into the Drain Hole
Once the plumber’s putty has been applied, you can now go ahead and insert the drain flange into the hole. To ensure a proper installation, follow these steps:
- Position the drain flange over the drain hole, making sure it is aligned correctly.
- Apply downward pressure to secure the drain flange in place.
- Rotate the drain flange clockwise to engage the threads and tighten it securely.
Proper alignment is crucial to ensure a leak-free seal. Make sure the drain flange is centered and sits flush with the bathtub surface. This will prevent any water leakage and maintain the structural integrity of the bathtub.
To enhance the sealing techniques, consider using a rubber gasket or silicone sealant in conjunction with the drain flange. These additional measures will provide an extra layer of protection against leaks and ensure a watertight seal.
Secure the Drain Flange With a Locknut
To properly secure the drain flange in place, the next step is to use a locknut. The locknut is a small, threaded nut that fits onto the drain flange and helps to keep it securely fastened to the bathtub.
To install the locknut, simply thread it onto the drain flange and tighten it using a pair of pliers or a wrench until it is snug and secure. This step is crucial in ensuring that the drain flange remains in place and prevents any leaks or water damage.
Locknut for Drain Flange
Make sure you tighten the locknut securely to secure the drain flange in place. The locknut is an essential component in plumbing terminology as it helps to create a watertight seal for the drain.
Troubleshooting locknuts can be a common issue when installing a bathtub drain, but with the right technique, it can be easily resolved. Here are three steps to troubleshoot locknuts:
- Check for any debris or obstructions that may be preventing the locknut from tightening properly.
- Ensure that the locknut is fully threaded onto the drain flange and is not cross-threaded.
- Use a pair of pliers or a locknut wrench to apply even pressure while tightening the locknut, ensuring a secure fit.
Securing the Drain
Securing the drain is crucial to prevent any potential leaks during the bathtub drain installation process. Follow these steps to ensure a secure and leak-free drain:
-
Apply plumber’s putty around the underside of the drain flange.
-
Insert the drain flange into the drain hole from above the bathtub, making sure it sits flush with the surface.
-
From underneath the bathtub, place a rubber gasket onto the drain flange, followed by a cardboard friction ring.
-
Thread the locknut onto the drain body and tighten it using pliers or a drain wrench.
-
Check for any signs of leakage by filling the bathtub with water and inspecting the drain area.
-
If there are any leaks, try tightening the locknut further. If the problem persists, consider replacing the gasket or calling a professional for assistance.
Installing Bathtub Drain
When installing the drain, ensure that the drain flange sits flush with the surface of the bathtub. This is crucial for proper drainage and to prevent leaks.
Here are some tips for troubleshooting bathtub drain installation:
- Use a level to ensure that the bathtub is evenly positioned and level before installing the drain.
- Apply plumber’s putty or silicone sealant to the underside of the drain flange to create a watertight seal.
- Tighten the drain flange using a drain wrench or adjustable pliers, making sure not to overtighten and risk damaging the flange or bathtub.
If you encounter any issues during the installation process, such as leaks or difficulty tightening the drain flange, consider seeking professional assistance to avoid further complications.
Following these tips will help ensure a successful bathtub drain installation.
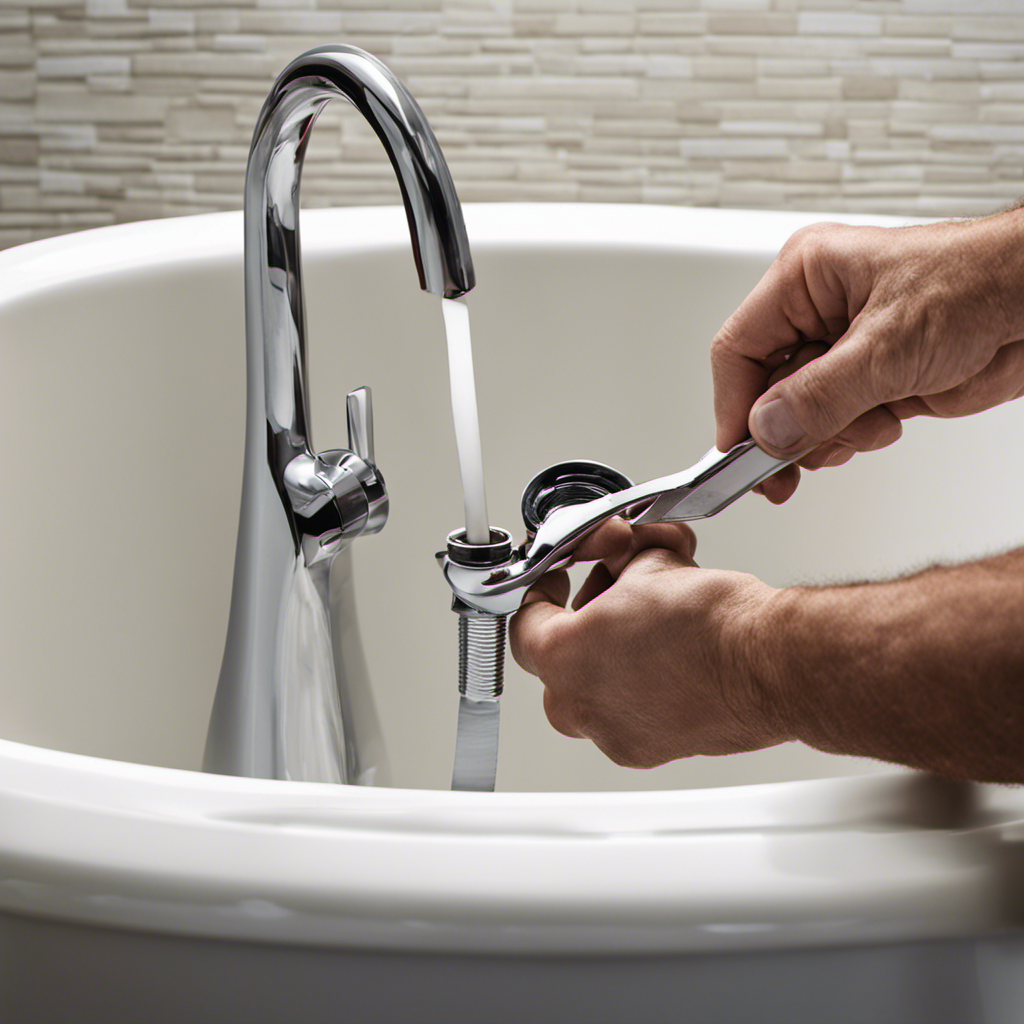
Connect the Drain Pipe to the Drain Flange
First, you’ll need to attach the drain pipe to the drain flange. This step is crucial for the proper functioning of your bathtub drain system. To do this, you will need a few tools such as a hacksaw or PVC cutter, a wrench, and plumber’s tape. Before you begin, make sure you have measured and cut the drain pipe to the correct length using cutting techniques appropriate for the material you are working with.
Once you have prepared the drain pipe, follow these steps to connect it to the drain flange:
- Apply plumber’s tape to the threads of the drain flange to ensure a watertight seal.
- Insert the drain pipe into the drain flange and hand-tighten it.
- Use a wrench to tighten the connection further, making sure not to overtighten and risk damaging the pipes.
- Check for any leaks by filling the bathtub with water and observing if any water escapes from the connection.
Install the Overflow Drain Assembly
When it comes to installing the overflow drain assembly, it’s important to follow the proper assembly steps to ensure a successful installation.
One common installation mistake is not aligning the overflow pipe with the overflow hole in the bathtub, which can lead to leaks and drainage issues.
Another mistake to avoid is not securely tightening the connections, which can also result in leaks and potential damage to the surrounding area.
Proper Assembly Steps
To properly assemble the bathtub drain, you’ll need to connect the rubber gasket and tighten the locknut securely. Here are the step-by-step instructions:
- Start by placing the rubber gasket onto the drain opening in the bathtub.
- Insert the drain assembly into the drain hole, making sure the gasket is properly aligned.
- Thread the locknut onto the drain assembly and hand tighten it as much as possible.
- Use pliers or a wrench to further tighten the locknut, ensuring a secure connection.
Test the drain by filling the bathtub with water and checking for any leaks. If you notice any leaks, tighten the locknut further or adjust the rubber gasket as needed.
By following these steps, you can ensure a properly assembled bathtub drain that will help prevent common drain issues and maintain the functionality of your bathtub.
Now, let’s move on to common installation mistakes to avoid.
Common Installation Mistakes
One common mistake to avoid is not properly aligning the rubber gasket during assembly. This step is crucial to prevent any leaks in your bathtub drain installation.
To ensure proper alignment, start by placing the rubber gasket onto the drain flange. Make sure it is centered and snug.
Next, align the drain flange with the drain hole in the bathtub. Gently push the drain flange into the hole until it sits flush against the surface.
Then, tighten the drain flange using the appropriate tool until it is secure. Double-check the alignment to ensure the rubber gasket is still properly seated.
Test the Bathtub Drain for Leaks
You can quickly test the bathtub drain for leaks by pouring water down the drain and observing for any signs of leakage. Here’s how to do it:
- Fill the bathtub with water to a level just below the overflow drain.
- Slowly release the water by pulling the plug or opening the drain stopper.
- Watch closely for any water escaping from the drain, overflow, or any other areas around the bathtub.
If you notice any leaks during the test, it’s important to troubleshoot and fix them before proceeding with the installation. Common causes of bathtub drain leaks include improper sealing, loose connections, or damaged gaskets. Check the drain flange, overflow gasket, and drainpipe connections for any signs of damage or gaps. Tighten any loose connections and replace any damaged gaskets as needed.
With the bathtub drain tested and any leaks addressed, it’s time to move on to the next step: sealing and finishing the bathtub installation.
Seal and Finish the Bathtub Installation
Once the installation is complete, make sure to seal and finish the bathtub for a polished look. This step is essential to prevent any water damage and maintain the bathtub drain’s functionality.
To seal and finish the bathtub, follow these steps:
-
Clean the surface: Remove any debris, dust, or grime from the bathtub surface using a mild cleaner and a soft cloth. Ensure the surface is completely dry before applying any sealant.
-
Apply the sealant: Choose a high-quality bathtub sealant that is waterproof and durable. Apply the sealant evenly along the edges of the bathtub, focusing on the areas where the tub meets the walls and the drain.
-
Smooth the sealant: Use a putty knife or a sealant smoothing tool to create a smooth and even finish. This will help to prevent any water leakage and provide a professional look.
-
Allow the sealant to dry: Follow the manufacturer’s instructions regarding the drying time of the sealant. It is important to allow the sealant to fully cure before using the bathtub.
-
Inspect and troubleshoot: Once the sealant is dry, inspect the bathtub drain for any leaks or issues. If you notice any problems, such as slow drainage or unpleasant odors, it is important to address them promptly. Refer to the previous subtopic on troubleshooting bathtub drain issues for guidance on how to resolve common problems.
By properly sealing and finishing the bathtub installation, you can ensure its longevity and prevent any future maintenance issues.
Regular bathtub drain maintenance, such as cleaning the drain regularly and avoiding the use of harsh chemicals, will also contribute to the overall functionality and efficiency of your bathtub.
Frequently Asked Questions
How Do I Know if My Bathtub Drain Needs to Be Replaced?
If my bathtub drain needs replacement, I would look for signs like slow drainage, foul odors, or water backing up. I’d unclog it first using methods like plunging or using a drain snake.
Can I Use Any Type of Drain Pipe for My Bathtub Installation?
Yes, you can use different types of drain pipes for a bathtub installation. The installation process involves connecting the drain pipe to the bathtub and ensuring a watertight seal.
What Should I Do if the Drain Flange Does Not Fit Properly Into the Drain Hole?
If the drain flange does not fit properly into the drain hole, there are alternative solutions. One option is to adjust the flange by sanding or trimming it down until it fits snugly. Another option is to use a different sized flange that fits correctly.
How Do I Remove a Stubborn Old Drain From My Bathtub?
To remove a stubborn old drain from my bathtub, I would start by using a drain removal tool. This tool will help me loosen and extract the rusted drain, allowing me to proceed with installing a new one.
Do I Need Any Special Tools or Equipment to Test the Bathtub Drain for Leaks?
To test for bathtub drain leaks, you’ll need a few tools and equipment such as a bucket, water, and a flashlight. Follow these steps to ensure a thorough test and identify any potential leaks.
Conclusion
So, there you have it, a step-by-step guide on how to install a bathtub drain. It may seem like a daunting task, but with the right tools and materials, it can be done.
Remember to measure and cut the new drain pipe accurately, and use plumber’s putty to ensure a tight seal.
Don’t forget to install the overflow drain assembly and test the drain for leaks.
Once everything is in place, seal and finish the bathtub installation.
Now you can enjoy a relaxing soak in your newly installed bathtub.
Happy DIY-ing!