I’ve always been fascinated by the beauty and warmth of wooden furniture, so when I discovered that you can actually make a wooden bathtub, I was intrigued.
Did you know that using a wooden bathtub can provide a soothing and luxurious bathing experience? In this article, I’ll guide you through the process of creating your own wooden bathtub, from selecting the right wood to finishing and sealing it.
Get ready to embark on a unique DIY project that will add a touch of elegance to your bathroom.
Key Takeaways
- Consider durability and resistance to water damage when choosing wood.
- Take into account factors such as size, shape, and material when designing the bathtub.
- Gather the necessary tools and materials before starting the project.
- Construct a solid bathtub frame with proper reinforcement and secure connections.
Selecting the Right Wood for Your Bathtub
When choosing the right wood for your bathtub, it’s important to consider durability and resistance to water damage. Wood treatment plays a crucial role in ensuring the longevity of your bathtub.
Different types of wood have their own pros and cons when it comes to water resistance. Teak is a popular choice due to its natural oils that make it resistant to water damage. However, it can be quite expensive.
Cedar is another option known for its natural resistance to rot and insects. It also gives off a pleasant aroma. However, cedar can be prone to cracking over time.
Redwood is known for its durability and resistance to decay, but it can be costly.
Ultimately, the choice of wood will depend on your budget and personal preferences.
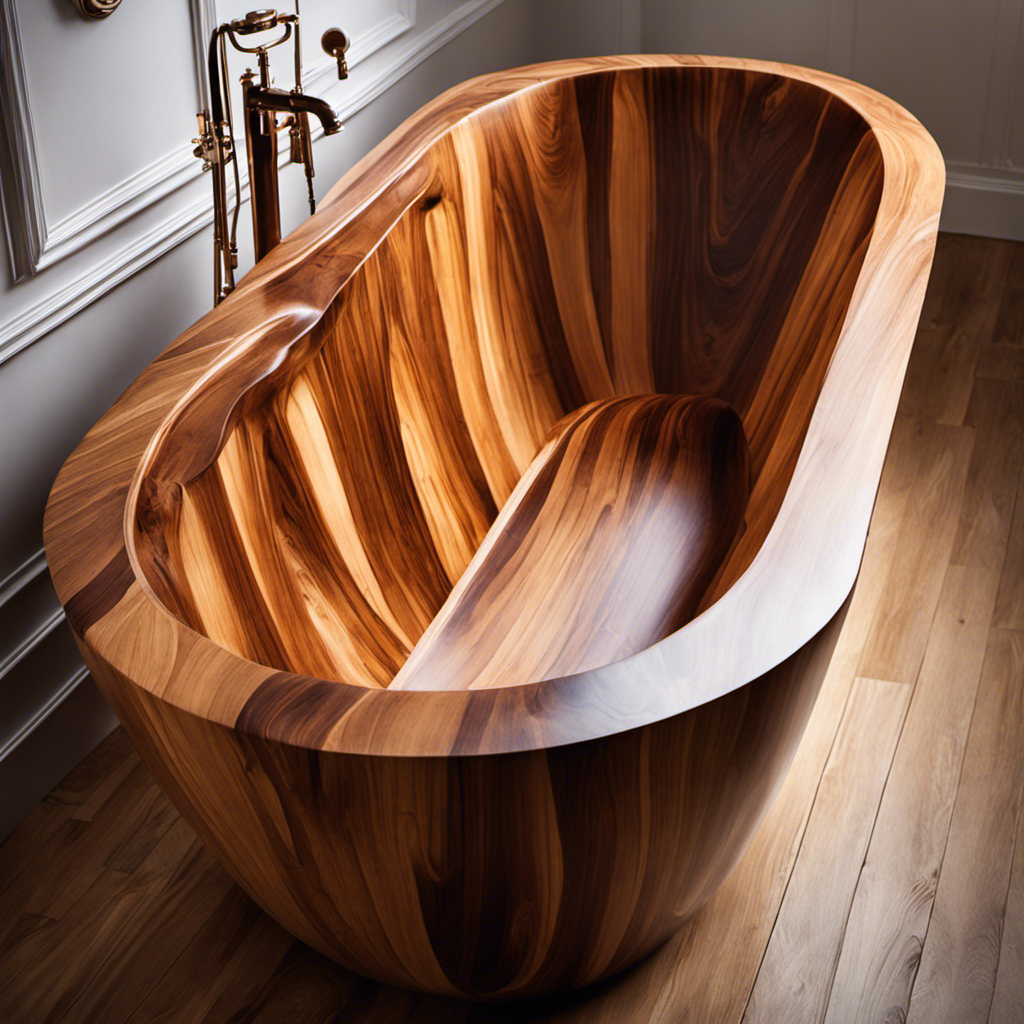
Designing Your Wooden Bathtub
Designing your wooden tub involves considering factors such as size, shape, and material.
When it comes to wooden bathtub aesthetics, it’s important to create a design that not only looks visually appealing but also provides optimal comfort.
The size of the tub should be chosen based on the available space and the needs of the user. A larger tub allows for more relaxation, while a smaller one is more suitable for compact bathrooms.
The shape of the tub can vary from traditional oval or rectangular to more unique and contemporary designs.
As for the material, selecting high-quality wood that is resistant to water damage is crucial.
Additionally, incorporating features like ergonomic seating and adjustable water jets can enhance the comfort and functionality of your wooden bathtub.
Gathering the Necessary Tools and Materials
To gather the necessary tools and materials, you’ll need to make a list of items required for the project. Choosing the right tools is crucial for a successful wooden bathtub construction.
Here are some tools you will need: a circular saw for cutting the wood, a drill for making holes and attaching the pieces together, a measuring tape for precise measurements, and a sander for smoothing the surfaces.
Additionally, gather the materials such as wooden planks, screws, waterproof sealant, and a waterproof liner.
Before starting the project, it is essential to prepare the workspace. Clear the area and ensure there is enough room to work comfortably. Cover the floor with a protective sheet to prevent any damage.
Now that you have your tools and workspace ready, you can move on to constructing the bathtub frame.
Constructing the Bathtub Frame
The first step in building the frame is measuring and cutting the wooden planks to the appropriate size. To ensure the bathtub frame’s stability and longevity, reinforcement is crucial.
I opted for extra support by adding cross-braces between the vertical planks. For this, I used sturdy wooden beams and secured them with screws.
The joinery techniques used in constructing the bathtub frame are essential for its strength and durability. I employed traditional mortise and tenon joints to connect the cross-braces to the vertical planks. This method ensures a secure bond by interlocking the pieces together.
Additionally, I reinforced the joints with wood glue for added strength. These joinery techniques provide a solid foundation for the bathtub frame, ensuring it can withstand the weight and pressure of the water.
Adding the Inner Lining and Waterproofing
When adding the inner lining and waterproofing, you’ll want to ensure that all seams and edges are properly sealed to prevent any water leakage. This step is crucial in making a wooden bathtub that is both functional and long-lasting.
Here are five important things to consider when waterproofing your wooden bathtub:
- Use a waterproofing membrane: Applying a waterproofing membrane on the inside of the bathtub will create an effective barrier against water penetration.
- Seal all joints and seams: Make sure to seal all joints and seams with a waterproof sealant to prevent any water from seeping through.
- Consider alternative materials: If you’re concerned about the durability of wood, you can consider using alternative materials like fiberglass or acrylic for the inner lining.
- Apply multiple coats: Applying multiple coats of waterproofing sealant will provide added protection and enhance the durability of your wooden bathtub.
- Regular maintenance: To ensure the longevity of your bathtub, regularly inspect and maintain the waterproofing to address any potential issues before they become problematic.
Finishing and Sealing the Wooden Bathtub
After applying the waterproofing membrane and sealing all joints, it’s important to finish and seal the wooden bathtub to protect it from moisture and extend its lifespan. Sealing techniques and choosing the right finish are crucial in ensuring the durability and longevity of the bathtub.
There are various sealing techniques available, such as using epoxy resin, polyurethane, or marine varnish. These sealants create a protective barrier that prevents water from penetrating the wood.
When choosing the right finish, it’s important to consider factors such as the desired aesthetic, durability, and ease of maintenance. A popular choice is a marine varnish, which provides excellent weather resistance and durability. Another option is polyurethane, which offers a glossy finish and is easy to clean.
Whichever finish you choose, make sure to apply multiple coats for maximum protection.
Installing and Testing Your Homemade Wooden Bathtub
When it comes to waterproofing my homemade wooden bathtub, durability and maintenance are key considerations.
I want to ensure that my tub is properly sealed to prevent any water damage or leaks.
Additionally, I want it to be durable enough to withstand daily use without any issues.
Lastly, I need to know how to properly maintain and care for the wooden tub to ensure its longevity and keep it looking its best.
Waterproofing the Wooden Tub
To waterproof your wooden tub, you’ll need to apply multiple layers of a sealant or waterproofing product. This is essential to protect the wood from moisture and prevent any damage or rotting. Here are some waterproofing techniques to consider for your wooden bathtub:
- Use a marine-grade sealant: This type of sealant is designed to withstand constant exposure to water and is highly effective in preventing leaks.
- Apply multiple coats: To ensure maximum waterproofing, it’s recommended to apply at least three coats of sealant, allowing each coat to dry completely before applying the next.
- Sand between coats: Sanding the surface between each coat helps to create a smooth and even finish, improving the effectiveness of the waterproofing.
- Consider epoxy: Epoxy is a popular choice for waterproofing wooden tubs as it provides a durable and long-lasting seal.
- Regular maintenance: Periodically inspect and reapply the sealant to maintain the waterproofing and extend the lifespan of your wooden tub.
While wooden bathtubs offer a unique and natural aesthetic, it’s important to be aware of the pros and cons. On the plus side, wooden tubs can provide a luxurious and spa-like bathing experience, and they have excellent heat retention properties. However, they do require more maintenance and care compared to other materials, as they are susceptible to water damage and require regular waterproofing.
Additionally, wooden tubs may be more expensive and may not be suitable for households with high water usage. Overall, the decision to have a wooden bathtub should be based on personal preference and willingness to invest time and effort in its maintenance.
Durability and Maintenance
The durability and maintenance of wooden tubs can vary depending on the type of sealant used and the frequency of reapplication. To extend the lifespan of your wooden tub, it is important to choose a high-quality sealant that is specifically designed for water resistance.
Regularly inspect the sealant for any signs of wear or damage, and reapply as necessary to maintain a strong barrier against water. Cleaning and maintenance are also crucial for preserving the integrity of the wood.
After each use, rinse the tub with warm water and mild soap to remove any soap residue or dirt. Avoid using harsh chemicals or abrasive cleaners that can damage the wood. Regularly oiling the wood with a natural oil, such as linseed oil, can help prevent drying and cracking.
Additionally, make sure to dry the tub thoroughly after each use to prevent water damage. By following these cleaning and maintenance tips, you can ensure the longevity of your wooden tub.
Conclusion
In conclusion, crafting a wooden bathtub is no easy feat, but the rewards are well worth the effort.
As I stand back and admire my creation, I can’t help but marvel at the seamless blend of nature’s beauty and functional luxury.
With the right wood, tools, and techniques, you too can enjoy the exquisite pleasure of soaking in a handcrafted masterpiece.
So take the plunge, and let your imagination flow as you embark on this exhilarating journey of creating your own wooden bathtub.
Trust me, the results will leave you floating on cloud nine.

Liam’s journey with us started as a consumer. Having faced challenges while setting up his own modern bathroom, he delved deep into research.
Recognizing his knack for simplifying complex information and his authentic writing style, we were thrilled to welcome him aboard. Liam’s articles often merge practicality with style, ensuring readers find the perfect fit for their homes. Liam is an avid hiker off-duty and often jokes about finding the best “natural toilets” Mother Earth has to offer.