
So you’ve decided it’s time to say goodbye to your old bathtub, huh? Well, you’re in luck because I’m here to guide you step by step on how to remove it.
Trust me, it’s not as daunting as it may seem. With a few basic tools and a little bit of elbow grease, you’ll have that bathtub out of your bathroom in no time.
Get ready to roll up your sleeves and let’s dive into the world of bathtub removal!
Key Takeaways
- Assess the condition of the bathtub for visible damage and signs of water leakage before proceeding with removal.
- Gather the necessary tools and materials for the removal process to ensure a smooth and efficient operation.
- Turn off the water supply and drain the bathtub properly to prevent water damage or flooding.
- Disconnect and remove all components of the bathtub, including the supply lines, drain stopper, faucet, shower head, and surrounding tile, while ensuring safety and cleanliness in the area for installation.
Assessing the Bathtub’s Condition
Before you start removing the bathtub, it’s important to assess its current condition. This step will help you determine the extent of any damage and identify any potential issues that may arise during the removal process.
Start by evaluating the bathtub for any visible damage, such as cracks or chips in the surface. Additionally, check for any signs of water leakage, such as damp spots or discoloration around the bathtub and surrounding areas.
To ensure a thorough assessment, inspect the plumbing connections and pipes to see if there are any leaks or corrosion.
It is essential to address any existing damage or leaks before proceeding with the removal, as these issues can worsen over time and cause further damage to your bathroom.
Gathering the Necessary Tools and Materials
To start the process, make sure you have all the tools and materials needed. Choosing the right bathtub removal method is crucial for a successful project. Here are some tips for protecting the surrounding area during bathtub removal.
First, gather the necessary tools and materials, such as safety goggles, gloves, a pry bar, a utility knife, a drill, and a bucket. These items will ensure your safety and make the removal process easier.
It’s also important to cover the floor with a tarp or drop cloth to prevent any damage or mess. Additionally, you can use plastic sheets or cardboard to protect nearby walls or fixtures from scratches or debris. By taking these precautions, you can minimize any potential damage and ensure a smooth removal process.
Now that you have everything ready, it’s time to move on to the next step: turning off the water supply.
Turning off the Water Supply
Before attempting any plumbing work, it’s crucial to shut off the water supply to avoid potential leaks or flooding.
The first step is to locate the shut-off valve, which is usually near the main water line or in the basement. Once you’ve found the shut-off valve, turn it clockwise to shut off the water flow and prevent any water from entering the system.
Shutting off Water
Make sure you’ve shut off the water supply before attempting to remove the bathtub. Shutting off the water is an essential step to prevent any water damage or flooding during the removal process. To do this, you need to locate the shut-off valve, which is usually found near the bathtub or in the basement.
Here are the steps to shut off the water:
-
Find the shut-off valve: Look for a small lever or wheel near the bathtub or in the basement. It may be labeled ‘water shut-off’ or ‘main water supply.’
-
Turn off the valve: Use a wrench or your hand to turn the valve clockwise until it stops. This will shut off the water flow to the bathtub.
-
Check for water flow: Turn on the bathtub faucet to make sure the water is completely shut off. If there is no water coming out, you have successfully shut off the water supply.
-
Test the shut-off: Double-check by turning on other faucets in the house to ensure the water is still off.
Finding Shut-Off Valve
You can usually find the shut-off valve near the bathtub or in the basement. To find the shut-off valve, follow these steps:
-
Start by checking the area near the bathtub. Look for a small metal lever or knob on the wall or floor. It is usually located near the plumbing fixtures.
-
If you can’t find the shut-off valve near the bathtub, try checking the basement. Look for a main shut-off valve, which controls the water supply for the entire house. It is usually located near the water meter or where the main water line enters the house.
-
Once you locate the shut-off valve, turn it clockwise to shut off the water supply. You may need to use a wrench or pliers to turn the valve if it’s difficult to move.
-
After shutting off the water, open a faucet to relieve any remaining pressure in the pipes.
Now that you’ve found the shut-off valve and turned off the water, you’re ready to move on to the next step of removing the bathtub.
Turning off Water
Once you’ve located and shut off the shut-off valve, it’s time to relieve any remaining pressure in the pipes by opening a faucet. This step is crucial before proceeding with the removal of a bathtub. By turning off the water supply, you ensure that no water will flow through the pipes while you work, preventing any potential leaks or accidents.
To turn off the water supply, follow these steps:
-
Locate the shut-off valve: Look for a valve near the bathtub or in the basement. It may be labeled as "hot" or "cold" and can be a lever or a wheel.
-
Shut off the valve: Turn the valve clockwise until it stops. This will shut off the water supply to the bathtub.
-
Relieve pressure: Open a faucet near the bathtub to release any remaining water in the pipes. This will prevent any unexpected water flow during the removal process.
By following these steps, you can safely and efficiently turn off the water supply before removing your bathtub.
| Step | Instructions |
|---|---|
| 1 | Locate the shut-off valve near the bathtub or in the basement. |
| 2 | Shut off the valve by turning it clockwise until it stops. |
| 3 | Open a faucet near the bathtub to relieve any remaining pressure in the pipes. |
| 4 | Ensure that the water supply is completely shut off before proceeding with the removal of the bathtub. |
| 5 | Proceed with caution and follow the necessary steps to remove the bathtub. |
Draining the Bathtub
To drain the bathtub, simply pull the lever on the overflow drain. This will allow the water to flow out of the tub and into the drainage system.
Here are some draining techniques to prevent water damage:
-
Start by closing the bathtub’s drain stopper. This will prevent any debris or small objects from falling into the drain and causing clogs.
-
Turn on the faucet and let the water run for a few seconds. This will help flush out any remaining soap or dirt from the tub.
-
Slowly pull the lever on the overflow drain to open it. Make sure to hold onto the lever firmly to prevent it from snapping back.
-
Wait for the water to completely drain out of the tub. You can use a towel or sponge to wipe down any excess water around the edges of the tub to prevent water damage.
Disconnecting the Water Supply Lines
When disconnecting the water supply lines, it’s important to turn off the water valves first. This ensures that no water flows through the lines while you work, preventing any potential leaks or water damage.
Here’s a step-by-step guide on how to properly disconnect the water supply lines:
-
Locate the water valves: Look for the shut-off valves near the bathtub. These are usually located on the wall or floor, close to the bathtub area.
-
Turn off the water valves: Rotate the valves clockwise until they are fully closed. This will shut off the water supply to the bathtub.
-
Test the water supply: To make sure the valves are properly closed, turn on the bathtub faucet. If no water comes out, you have successfully shut off the water supply.
-
Disconnect the supply lines: Use a wrench to loosen the nuts that connect the supply lines to the bathtub faucet. Once loose, unscrew the nuts by hand until the supply lines are completely disconnected.
Removing the Drain Stopper and Overflow Cover
Okay, so now that we’ve successfully disconnected the water supply lines, let’s move on to the next step in removing the drain stopper and overflow cover.
Sometimes, you might run into a stuck drain stopper that refuses to budge. Don’t worry, I’ll show you a simple trick to loosen it up.
Once the drain stopper is out, we can then move on to replacing the overflow cover, which is a relatively straightforward process.
Stuck Drain Stopper
The drain stopper might be stuck, so you’ll need to use some tools to remove it. Here’s what you can do:
-
Start by locating the drain lever or knob. This is usually found near the overflow cover.
-
Once you’ve located the lever or knob, try pulling it up or pushing it down to see if the stopper moves. If it doesn’t, it’s likely stuck.
-
To repair a stuck drain stopper, you’ll need a pair of pliers or a drain key. These tools will help you grip the stopper and give you the leverage needed to remove it.
-
Insert the pliers or drain key into the drain opening and grip the stopper firmly. Then, turn it counterclockwise to loosen it. Keep turning until the stopper comes free.
Replacing Overflow Cover
After successfully removing the stuck drain stopper, the next step in removing a bathtub is to replace the overflow cover. This cover is located near the top of the tub and is responsible for preventing water from overflowing. Here’s how you can replace it:
-
Start by removing any screws or fasteners securing the old overflow cover in place. Use a screwdriver or a wrench, depending on the type of fastener used.
-
Once the cover is loose, carefully pull it away from the tub. Be gentle to avoid damaging the surrounding area.
-
Inspect the new overflow cover to ensure it matches the dimensions and design of the old one.
-
Align the new cover with the opening in the tub and secure it in place with the screws or fasteners.
Troubleshooting common issues during this process may include dealing with rusty or corroded fasteners, which might require additional tools or cleaning agents.
With the overflow cover successfully replaced, we can now move on to detaching the faucet and shower head.
Detaching the Faucet and Shower Head
To detach the faucet and shower head, you’ll need a pair of pliers. Follow these steps to remove them:
-
Turn off the water supply: Locate the shut-off valves under the sink and turn them clockwise to shut off the water flow.
-
Disconnect the water supply lines: Use the pliers to loosen the nuts connecting the supply lines to the faucet. Once loose, unscrew them by hand.
-
Remove the faucet: Look for a retaining nut securing the faucet to the countertop. Use the pliers to loosen and remove it. Once loose, lift the faucet off the countertop.
-
Take off the shower head: Use the pliers to grip the shower head tightly. Then, rotate it counterclockwise to unscrew it from the shower arm.
Loosening and Removing the Bathtub Surround or Tile
Alright, now that we’ve successfully detached the faucet and shower head, it’s time to move on to the next step: removing the bathtub surround or tile.
This is an important part of the process as it allows us to access the bathtub and make any necessary repairs or replacements.
To begin, we need to loosen the bathtub surround by carefully prying it away from the wall using a pry bar or putty knife.
Removing Bathtub Surround/Tile
You can’t remove the bathtub surround until you’ve loosened the caulk. Here’s how to remove the bathtub surround or tile:
-
Start by removing any grout around the edges of the surround using a grout removal tool. Make sure to wear safety goggles and gloves to protect yourself.
-
Once the grout is removed, use a utility knife to cut along the edges of the surround to separate it from the wall. Be careful not to damage the drywall behind it.
-
Next, insert a pry bar or putty knife between the surround and the wall and gently pry it away. Work your way around the entire surround until it is completely free.
-
Finally, inspect the drywall for any damage or holes. If needed, repair the drywall using joint compound and a putty knife. Allow it to dry completely before moving on to the next step.
With the bathtub surround or tile removed, you can now proceed to the next section on loosening the bathtub surround.
Loosening Bathtub Surround
Once the caulk has been loosened, it’s time to proceed with loosening the bathtub surround. To do this, you will need a screwdriver or a drill with a screwdriver bit.
Start by locating any screws that are holding the surround in place. These screws are usually located along the top edge of the surround, near the wall. Use the screwdriver or drill to remove these screws, being careful not to strip them.
Once the screws are removed, gently pull the surround away from the wall. If the surround is still attached, check for any additional screws or fasteners that may be holding it in place. Remove these as well.
With the surround loosened, we can now move on to breaking the seal and loosening the bathtub.
Breaking the Seal and Loosening the Bathtub
To begin breaking the seal and loosening the bathtub, carefully pry off the surrounding caulking using a putty knife. Here’s a step-by-step guide to help you remove the caulk and prepare for lifting and removing the bathtub:
- Start at one corner of the bathtub and insert the putty knife between the caulk and the bathtub surface.
- Gently push the putty knife forward to separate the caulk from the bathtub. Be cautious not to scratch or damage the surface.
- Continue moving along the edge of the bathtub, repeating the process of prying and separating the caulk.
Once you have loosened the caulk all around the bathtub, use a caulk remover tool or your fingers to peel off any remaining caulk residue.
With the caulk removed, you are now ready to move on to the next step of lifting and removing the bathtub.
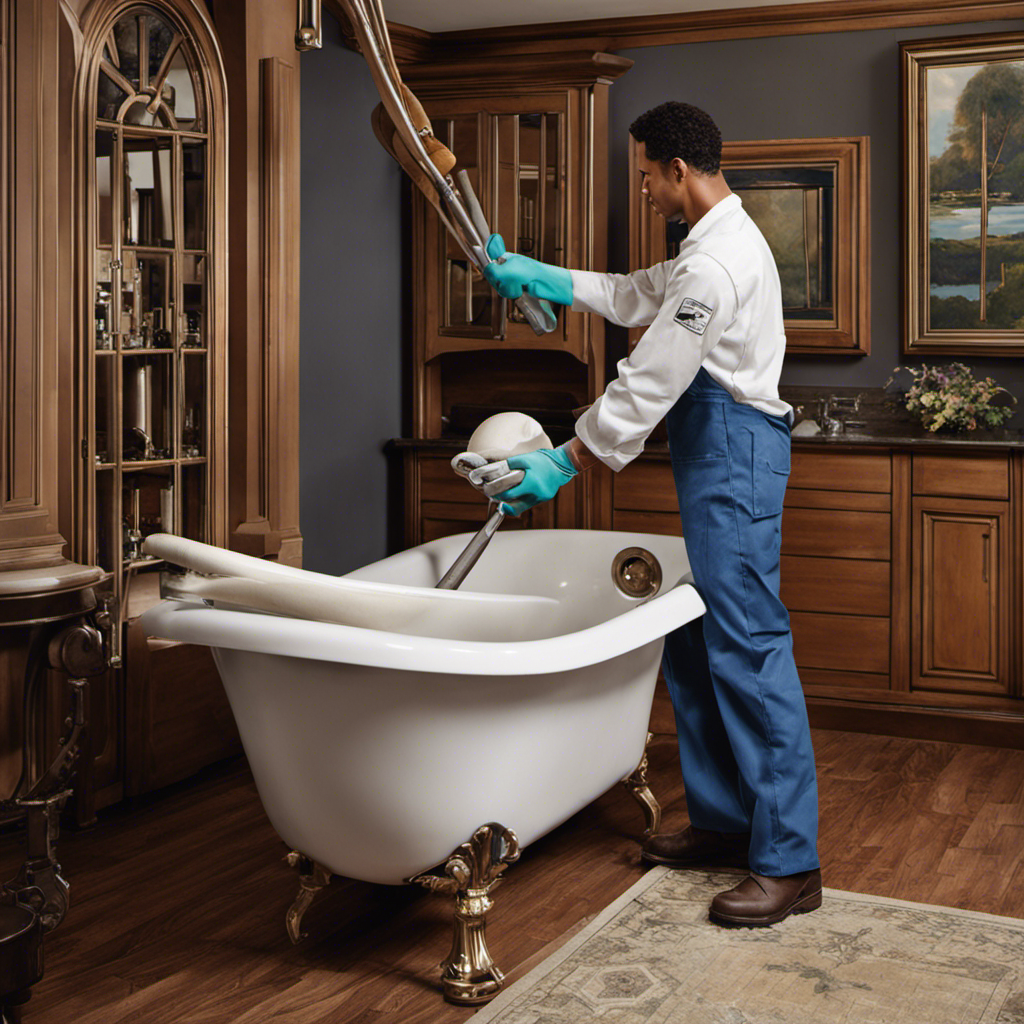
Lifting and Removing the Bathtub
Now that the seal has been broken and the bathtub is loosened, it’s time to lift and remove it. This step requires proper lifting techniques and safety precautions to avoid any injuries. Here’s how to do it:
-
Enlist the help of a strong assistant. Bathtubs can be heavy, so having an extra set of hands is essential.
-
Put on sturdy work gloves and safety goggles to protect yourself during the lifting process.
-
Stand on one side of the bathtub while your assistant stands on the opposite side.
-
Bend your knees and grip the edges of the bathtub securely.
-
Coordinate with your assistant and lift the bathtub slowly and steadily, keeping your back straight and using your legs for strength.
-
Carefully carry the bathtub out of the bathroom, making sure to watch your footing and avoid any obstacles.
Remember to take breaks if needed and listen to your body. Safety should always be the top priority during any DIY project.
Cleaning and Preparing the Area for Installation
After lifting and removing the bathtub, it’s important to clean and prepare the area for installation. Here’s a step-by-step guide on how to do it:
-
Start by cleaning the surrounding walls and floor. Remove any loose debris or dirt using a broom or vacuum cleaner.
-
Next, use a mild detergent or cleaning solution to scrub the walls and floor. Pay attention to any stains or grime that may have accumulated over time.
-
Rinse the area thoroughly with water to remove any residue from the cleaning solution. Use a mop or sponge to ensure all surfaces are clean and free from any cleaning products.
-
Finally, allow the area to dry completely before proceeding with the installation. This will help prevent any moisture-related issues that could affect the new bathtub.
Frequently Asked Questions
How Long Will It Take to Remove a Bathtub?
Removing a bathtub can take several hours, depending on the complexity of the task. It’s important to prepare the area by shutting off the water supply, disconnecting plumbing, and protecting surrounding surfaces. Properly dispose of the removed bathtub according to local regulations.
Can I Remove a Bathtub on My Own or Do I Need Professional Help?
I can remove a bathtub on my own, but it’s important to consider the pros and cons. DIY bathtub removal tips include proper tools and safety precautions. Hiring a professional ensures expertise and saves time.
Are There Any Safety Precautions I Should Take While Removing a Bathtub?
In removing a bathtub, it’s crucial to prioritize safety. Wearing proper safety equipment like gloves and goggles is essential. Taking precautions to prevent damage to surrounding areas, such as using drop cloths, is also important.
What Should I Do if I Encounter Any Plumbing Issues During the Removal Process?
If I encounter any plumbing issues during the removal process, I would first turn off the water supply. Then, I would assess the problem and attempt to troubleshoot it. If it’s beyond my expertise, I’d call a professional to handle plumbing emergencies.
Do I Need to Remove the Bathtub’s Fixtures Before Lifting and Removing It?
Definitely remove the bathtub’s fixtures before lifting and removing it. Failure to do so can cause potential damage to the fixtures and make the removal process more difficult and time-consuming.
Conclusion
Well, there you have it! After carefully assessing the condition of your bathtub and gathering all the necessary tools and materials, you have successfully turned off the water supply and drained the tub.
You skillfully disconnected the water supply lines and loosened and removed the bathtub surround or tile.
And now, the moment of truth has arrived. With anticipation building, you break the seal and loosen the bathtub, ready to lift and remove it from its place.
But wait, there’s more! Don’t forget to clean and prepare the area for installation.
Stay tuned for the next steps in this exciting home improvement adventure!