So, you’ve found yourself in a bit of a predicament with your bathtub drain. No worries, we’ve got you covered. In this article, we’ll show you exactly how to take that stubborn drain out, step by step.
From gathering the necessary tools to identifying the type of drain you have, we’ll guide you through the process with detailed instructions.
By the end, you’ll have a clean and properly functioning bathtub drain. Let’s get started, shall we?
Key Takeaways
- Gathering the necessary tools and materials such as a screwdriver or wrench, pliers, gloves, and a bucket or towel is essential for removing a bathtub drain.
- Identifying the type of bathtub drain (pop-up, toe-tap, or trip lever) is important as different removal techniques may be required.
- Removing the overflow cover plate involves locating and unscrewing the screws, removing the cover, and safely keeping the screws for later use.
- Disconnecting the drain stopper mechanism involves locating the lever or knob, unscrewing or removing the clip, unscrewing the drain assembly, removing the drain stopper, and disconnecting the drain mechanism.

LUXE Bidet NEO 120 - Single Nozzle, Self-Cleaning, Non-Electric Bidet Attachment for Toilet Seat, Adjustable Water Pressure, Rear Wash (Blue)
THE ULTIMATE VALUE – With a sleek design and high-quality parts, Our Bidet Attachment will give your bathroom...
As an affiliate, we earn on qualifying purchases.
Gather the Necessary Tools and Materials
Before you can start taking out the bathtub drain, you’ll need to gather all the necessary tools and materials.
First, you’ll need a screwdriver or a wrench, depending on the type of drain you have. There are different types of bathtub drains, such as lift-and-turn, push-pull, trip lever, and toe-touch. Make sure to identify which type you have before proceeding.
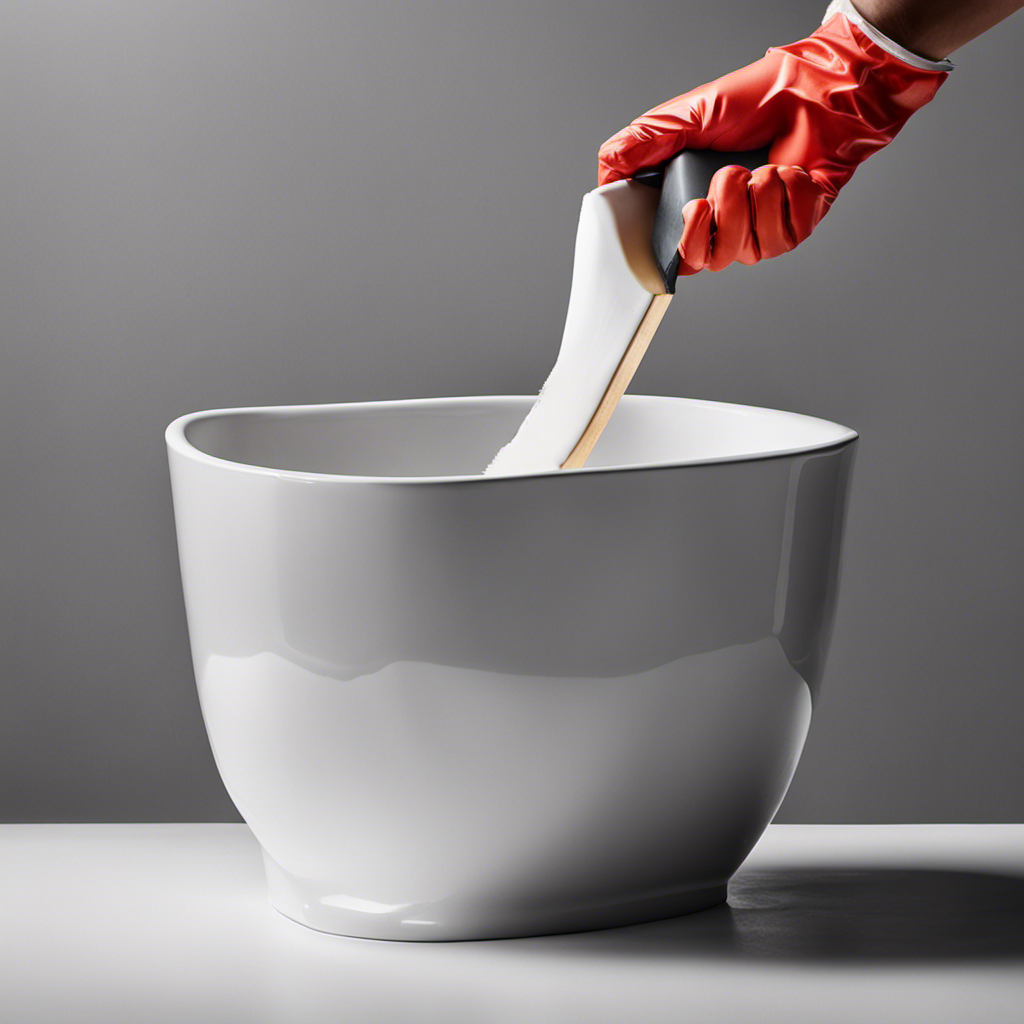
Additionally, you’ll need a pair of pliers to help grip and remove any stubborn parts. It’s also a good idea to have gloves, as well as a bucket or a towel to catch any water that may leak during the process.
Lastly, keep in mind some troubleshooting tips. If the drain is stuck, try lubricating it with some penetrating oil and give it some time to work. If you encounter any difficulties, don’t hesitate to seek professional help.

Brondell Bidet Toilet Seat Non-Electric Swash Ecoseat, Fits Elongated Toilets, White - Dual Nozzle System, Ambient Water Temperature - Bidet with Easy Installation
CLEAN AND REFRESHING: With Brondell’s Ecoseat 101 Bidet, you’ll experience a soothing, freshwater wash that leaves you feeling...
As an affiliate, we earn on qualifying purchases.
Identify the Type of Bathtub Drain
Now that you’ve gathered the necessary tools and materials to take out a bathtub drain, it’s important to identify the type of drain you have. Different bathtub drains require different removal techniques, so knowing the type of drain will help you approach the removal process correctly.
In this discussion, we will explain the different drain types and the corresponding techniques to remove them effectively.
Different Drain Types
There are various types of drains that you might encounter when taking out a bathtub drain. It’s important to identify the type of drain you have before attempting to remove it.
One common type is the pop-up drain, which has a stopper that can be pushed down or pulled up to open or close the drain.
Another type is the toe-tap drain, which is operated by pressing down on the stopper with your foot.
There are also trip lever drains, which have a lever on the side of the tub that you can flip to open or close the drain.
To properly maintain these drains, it’s recommended to regularly clean them with a mixture of vinegar and baking soda to prevent clogs and buildup.
Removal Techniques Explained
If you want to remove a bathtub drain, one technique you can try is using a drain removal tool.
This tool is specifically designed to help you unscrew the drain and pull it out of the tub.
To use the tool, you will need to insert it into the drain and turn it counterclockwise.
Make sure to apply steady pressure while turning to prevent any damage to the drain or surrounding area.
If the drain is difficult to remove, you can try using lubricant to loosen it.
Additionally, if the drain is stuck due to corrosion or buildup, you may need to use a wrench or pliers to help loosen it.
Remember to always exercise caution when attempting to remove a bathtub drain and consult a professional if you encounter any difficulties.

Shower Faucet Set, 12" Ceiling Mount Rainfall Shower System with 2 Rain Shower Head and Multi-function Handheld Head Push Button Diverter Shower Faucet Trim Kit (12", Matte Black)
COMPREHENSIVE SHOWER SYSTEM- This shower faucet set comes with two shower heads that can be used together or...
As an affiliate, we earn on qualifying purchases.
Remove the Overflow Cover Plate
To remove the overflow cover plate, you’ll need a screwdriver. Here’s a step-by-step guide to help you remove and replace the overflow cover easily:
-
Locate the screws: Look for two screws on the overflow cover plate. These are usually located near the top of the bathtub, above the drain.
-
Unscrew the cover: Use a screwdriver to carefully unscrew the screws holding the cover plate in place. Make sure to keep the screws in a safe place, as you’ll need them later.
-
Remove the cover: Once the screws are removed, gently pull the cover plate away from the bathtub wall. Be careful not to damage the surrounding tiles or walls.
Now that you’ve successfully removed the overflow cover, you can proceed with any necessary repairs or replacements. To replace the overflow cover, simply follow these steps in reverse order, ensuring that the cover is securely fastened with the screws.

Smart Toilet with Warm Water Sprayer and Dryer, One Piece Bidet Toilet with Auto Dual Flush Foot Sensor Operation,Heated Seat Smart with Built In Fahrenheit LED Display
4-Level Heated Seat & Multi-Mode Warm Water Bidet - Adjustable seat/water temp with LED display, 3 personalized cleaning...
As an affiliate, we earn on qualifying purchases.
Disconnect the Drain Stopper Mechanism
To remove the drain stopper and disconnect the drain mechanism, start by locating the lever or knob on the overflow cover plate. Use a screwdriver or your fingers to remove the screws or unscrew the knob, allowing you to lift off the cover.
Once the cover is off, you’ll be able to access the drain stopper assembly. Look for a small metal rod or bar that connects the lever to the stopper and unscrew it or remove the clip holding it in place.
With the drain stopper disconnected, you can now proceed to take out the entire drain assembly by unscrewing it counterclockwise using pliers or a drain wrench.
Removing Drain Stopper
First, you’ll need to locate the small lever or knob on the drain stopper. This is usually located near the top of the stopper or on the overflow plate. Once you’ve found it, follow these steps to remove the drain stopper and troubleshoot any clogs:
- Lift the lever or turn the knob counterclockwise to release the stopper.
- If the stopper doesn’t come out easily, try gently pulling it upwards while wiggling it from side to side.
- If the stopper is still stuck, use a pair of pliers to grip the stopper and twist it counterclockwise to unscrew it from the drain.
Disconnecting Drain Mechanism
Now, you can easily disconnect the drain mechanism by unscrewing the connecting nut using a pair of pliers.
When troubleshooting drain issues, it may be necessary to disconnect certain drain parts in order to access and resolve the problem.
To disconnect the drain mechanism, start by locating the connecting nut that holds it in place. This nut is usually located underneath the bathtub, near the drain opening.
Using a pair of pliers, grip the connecting nut firmly and turn it counterclockwise to loosen it. Once the nut is loose, you can remove it completely by continuing to unscrew it.
With the connecting nut removed, you will be able to disconnect the drain mechanism and proceed with any necessary repairs or replacements.
Taking Out Drain
After removing the connecting nut, you can easily detach the drain mechanism for further repairs or replacements. To take out the drain completely, follow these steps:
- Use a screwdriver to remove the screws holding the drain cover in place. Set the screws aside for later use.
- Gently pry the drain cover off using a flathead screwdriver or your fingers.
- Once the cover is removed, you will see the drain flange. Use a drain key or pliers to unscrew and remove the drain flange from the drain pipe.
By following these steps, you can successfully remove the drain from your bathtub.
Now, let’s move on to the next section where we will learn how to unscrew and remove the drain flange.
Unscrew and Remove the Drain Flange
To remove the drain flange, you’ll need to unscrew it from the bathtub. The drain flange is the piece that connects the drain to the bathtub and is usually located in the center of the tub. Here’s a step-by-step guide on how to remove it:
-
Start by removing the drain stopper or strainer from the tub. This will give you access to the drain flange.
-
Use a screwdriver or a drain key to unscrew the drain flange counterclockwise. Make sure to hold the flange securely while unscrewing it to prevent any damage.
-
Once the drain flange is loose, carefully lift it out of the drain hole. You may need to wiggle it back and forth a bit to loosen it completely.
-
After removing the drain flange, you can clean it or replace it with a new one if necessary.
Here’s a table to help you understand the process better:
| Step | Instructions |
|---|---|
| 1 | Remove the drain stopper or strainer |
| 2 | Unscrew the drain flange counterclockwise |
| 3 | Lift the drain flange out of the drain hole |
| 4 | Clean or replace the drain flange as needed |
Remember to be cautious while removing the drain flange to avoid any damage to the bathtub or plumbing system.
Clean the Drain and Surrounding Area
Make sure you clean the drain and the surrounding area thoroughly to ensure proper drainage and prevent any clogs. Here are three important things to keep in mind when cleaning your bathtub drain:
-
Remove any visible hair or debris: Start by using a pair of tweezers or a drain snake to remove any visible hair or debris that may be clogging the drain. Be careful not to push the debris further down the drain.
-
Use a drain cleaner: Once you have removed the visible debris, pour a drain cleaner down the drain to dissolve any remaining buildup. There are various drain cleaners available in the market, so make sure to choose one that is suitable for your specific drain problem.
-
Rinse with hot water: After using a drain cleaner, rinse the drain with hot water to flush out any remaining residue. Hot water helps to break down any remaining buildup and ensures proper flow of water through the drain.
Install a New Bathtub Drain if Needed
If you find that your bathtub drain is not functioning properly, you may need to install a new one. Before doing so, it’s important to troubleshoot common bathtub drain issues to ensure that a replacement is necessary. Here are some common issues and their solutions:
| Issue | Solution |
|---|---|
| Clogged drain | Use a plunger or a drain snake to remove any blockages. |
| Leaky drain | Tighten the drain flange with a drain wrench or replace the gasket. |
| Slow draining | Clean out any debris from the drain and use a drain cleaner if necessary. |
If none of these solutions work and you still experience issues with your bathtub drain, it may be time to install a new one. This process involves removing the old drain and replacing it with a new bathtub liner. It’s recommended to consult a professional or follow a detailed guide to ensure a proper installation.
Reassemble the Drain Components
Once you’ve cleaned the drain and replaced any necessary components, it’s time to reassemble everything. Here’s a step-by-step guide to help you navigate through the reassembling process and avoid common mistakes:
-
Align the drain flange: Place the drain flange back into the drain hole and ensure it is properly aligned with the bathtub surface. This will prevent any leaks or water damage.
-
Tighten the locking nut: Using a drain wrench, tighten the locking nut on the drain flange. Make sure it is securely fastened but be careful not to overtighten, as it may cause damage to the drain or surrounding area.
-
Apply plumber’s putty: Roll a small amount of plumber’s putty into a thin rope and apply it around the underside of the drain flange. This will create a watertight seal between the drain and bathtub.
Test the Drain for Proper Functioning
To ensure everything is working correctly, you should now run some water through the drain and check for any leaks or drainage issues.
Testing the drain for leaks is an important step in the process of troubleshooting common bathtub drain issues. Start by filling the bathtub with water and then pull the plug to see if the water drains properly.
Pay close attention to any signs of slow drainage or water pooling around the drain. If you notice any leaks or drainage issues, it may indicate a problem with the drain assembly or the pipes.
In such cases, it is recommended to seek professional help to fix the problem and ensure proper functioning of the drain.
Frequently Asked Questions
How Long Does It Typically Take to Remove a Bathtub Drain?
Typically, removing a bathtub drain takes about 30 minutes. However, it’s important to know how to properly clean a bathtub drain and avoid common mistakes before attempting the process.
Can I Use Household Cleaning Products to Clean the Drain and Surrounding Area?
You can use household cleaning products to clean the drain and surrounding area. However, avoid using harsh chemicals that can damage the pipes. Also, make sure to follow the instructions on the cleaning product and rinse well afterwards.
Is It Necessary to Hire a Professional Plumber to Remove a Bathtub Drain?
Hiring a professional plumber for bathtub drain removal may seem necessary, but with a little DIY know-how, you can tackle the task yourself. Save money and gain satisfaction by taking on the challenge.
What Should I Do if the Drain Flange Is Stuck and Won’t Unscrew?
To remove a stuck drain flange, try alternative methods before hiring a plumber. You’ll need a pair of pliers, a screwdriver, and penetrating oil. Apply the oil, grip the flange with pliers, and turn counterclockwise to unscrew it.
Are There Any Safety Precautions I Should Take Before Starting the Bathtub Drain Removal Process?
Before starting the bathtub drain removal process, it’s important to take some safety precautions. This includes wearing protective gloves and goggles, ensuring the water and electricity are turned off, and having the necessary tools on hand.
Conclusion
Congratulations on successfully removing your bathtub drain! By following these simple steps, you have taken the time to gather the necessary tools and materials. You have also identified the type of bathtub drain and disconnected the drain stopper mechanism. Another important step you took was unscrewing and removing the drain flange.
After completing those steps, you made sure to clean the drain and surrounding area thoroughly. If needed, you even installed a new bathtub drain.
Once you finished reassembling the drain components, don’t forget to test the drain for proper functioning.
Your diligence and determination have paid off, leaving you with a clean and fully functional bathtub drain.