Are you tired of struggling with a stubborn bathtub faucet? Well, you’ve come to the right place!
In this article, we’ll show you exactly how to take off your bathtub faucet. We’ll guide you through the process step by step, providing detailed instructions and troubleshooting tips along the way.
With the right tools and a little know-how, you’ll have that faucet off in no time.
So, let’s get started and say goodbye to that troublesome faucet once and for all!
Key Takeaways
- The necessary tools for removing a bathtub faucet include an adjustable wrench, screwdriver, pliers, basin wrench, and plumber’s putty knife.
- Before removing the faucet, it is important to turn off the water supply, place a towel or cloth in the tub, wear safety goggles and gloves, and gather all the necessary tools.
- The process of removing a single-handle bathtub faucet involves using an adjustable wrench, pliers, and a screwdriver, as well as following troubleshooting tips for common issues and ensuring a secure installation of the new faucet.
- Removing a double-handle bathtub faucet requires locating and removing the set screw, taking safety precautions, prying off the hot and cold handles, exposing the valve stem, and addressing any stuck or corroded parts during removal.
Tools Needed for Removing a Bathtub Faucet
You’ll need a few tools for removing a bathtub faucet.
The first tool you’ll need is an adjustable wrench. This will allow you to loosen and remove the nuts that hold the faucet in place.
You’ll also need a screwdriver, preferably a Phillips head, to remove any screws that secure the faucet handle or trim plate.
In some cases, you may also need a pair of pliers to grip and turn stubborn nuts.
Another tool that can be helpful is a basin wrench, which is specifically designed to reach and loosen nuts in tight spaces.
Finally, a plumber’s putty knife can come in handy for removing any old putty or caulk that may be adhering the faucet to the bathtub.
With these tools, you’ll be well-equipped for any bath faucet installation or faucet handle replacement task.
Preparing the Bathtub Before Removing the Faucet
Before starting, it’s important to prepare the bathtub for the removal process. This ensures a smooth and safe removal of the rusty faucet.
First, turn off the water supply to the bathtub by closing the main water valve. This prevents any accidental leaks or water damage during the removal.
Next, place a towel or cloth on the bottom of the tub to protect it from any scratches or damages. It’s also a good idea to wear safety goggles and gloves to protect yourself from any sharp edges or debris that may come loose during the removal process.
Finally, gather your tools and make sure you have everything you need before proceeding with the rusty faucet removal techniques.
Taking these safety precautions when removing a faucet ensures a successful and accident-free removal process.
Step-By-Step Guide to Removing a Single-Handle Bathtub Faucet
To successfully remove a single-handle bathtub faucet, there are a few key tools you’ll need:
- Adjustable wrench
- Pliers
- Screwdriver
- Plumber’s tape
Troubleshooting common issues, like stuck handles or leaky valves, may require additional tools or replacement parts.
Once the old faucet is removed, reinstalling the new faucet involves following a step-by-step process and ensuring a secure and leak-free installation.
Required Tools for Removal
The tools needed for removing a bathtub faucet include an adjustable wrench, screwdriver, and pliers. These tools are essential for successfully disassembling the faucet and addressing any issues such as troubleshooting faucet leaks or removing old caulk. Here is a table outlining the required tools:
| Tool | Purpose |
|---|---|
| Adjustable wrench | Loosens and tightens connections |
| Screwdriver | Removes screws |
| Pliers | Grips and turns fittings |
Having these tools readily available will ensure a smooth removal process. The adjustable wrench allows you to loosen and tighten connections, while the screwdriver helps in removing screws. The pliers come in handy for gripping and turning fittings. By using these tools correctly, you can efficiently remove the bathtub faucet and proceed to troubleshoot any common issues that may arise.
Troubleshooting Common Issues
If you’re experiencing leaks or low water pressure, one common issue to troubleshoot is a clogged aerator. This small device, located at the end of your faucet, can become blocked with debris over time, affecting the flow of water.
To fix this problem, follow these steps:
- Turn off the water supply to the faucet.
- Unscrew the aerator by hand or using pliers.
- Rinse the aerator under running water to remove any dirt or sediment.
If the issue persists, it may be necessary to remove the rusty faucet. Before attempting this, it is important to take safety precautions. Turn off the water supply to the entire house and wear protective gloves to avoid injury. Follow the manufacturer’s instructions or consult a professional if you are unsure about removing the rusty faucet.
Reinstalling the New Faucet
Once you’ve purchased the new faucet, begin by gathering the necessary tools for installation. You will need an adjustable wrench, pliers, a screwdriver, and plumber’s tape.
Before reinstalling the new faucet, make sure to clean the area thoroughly and remove any debris.
Start by attaching the mounting nuts to the faucet’s base, making sure they are secure. Next, place the faucet into the mounting holes and tighten the nuts with your adjustable wrench. Be careful not to overtighten, as this can cause damage to the faucet or the plumbing.
Once the faucet is securely in place, connect the water supply lines using your pliers and ensure they are tight.
Finally, turn on the water supply and check for any leaks. Common mistakes to avoid include using too much force when tightening the nuts, not properly aligning the faucet, and forgetting to use plumber’s tape to prevent leaks.
Follow these techniques and avoid these common mistakes for a successful faucet reinstallation.
Step-By-Step Guide to Removing a Double-Handle Bathtub Faucet
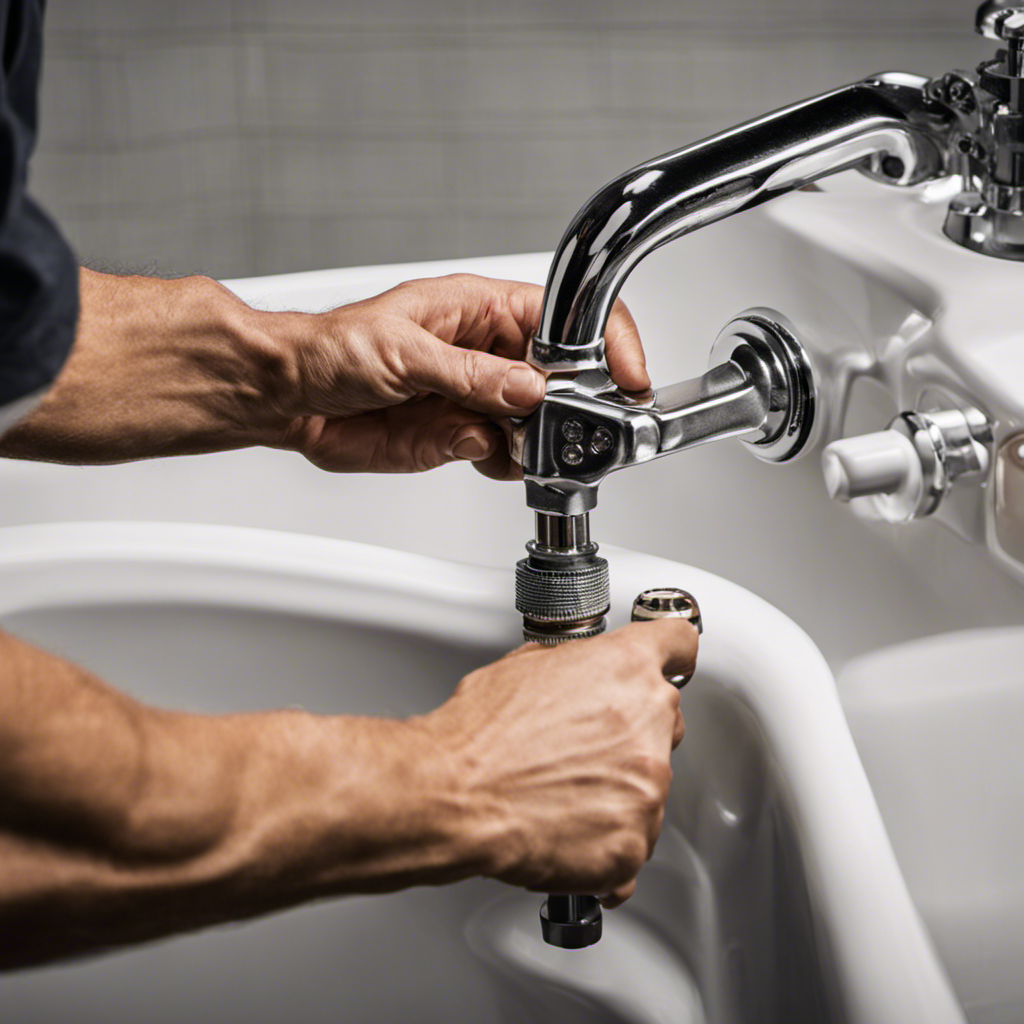
To start removing your double-handle bathtub faucet, first locate the set screw under the hot handle. Use a screwdriver to loosen and remove the set screw. Once the set screw is removed, you can proceed with the removal process.
Here are some safety precautions to keep in mind during the rusty faucet removal:
- Turn off the water supply to the bathtub to avoid any accidental leaks.
- Wear protective gloves to protect your hands from sharp edges or rust.
- Use a flashlight to get a clear view of the faucet and its components.
Now, you are ready to continue removing the faucet. Gently pry off the hot handle using a flathead screwdriver. Repeat the same process for the cold handle. This will expose the valve stem underneath.
Transitioning into troubleshooting common issues when removing a bathtub faucet, it is important to be aware of any stuck or corroded parts that may hinder the removal process.
Troubleshooting Common Issues When Removing a Bathtub Faucet
When troubleshooting common issues with removing a bathtub faucet, it’s important to check for any stuck or corroded parts that could impede the process.
If your bathtub faucet leaks or is loose, there are a few steps you can take to fix the problem.
First, turn off the water supply to the faucet by closing the shut-off valves.
Next, use a wrench to loosen the retaining nut that holds the faucet in place. If the nut is stuck, apply penetrating oil and let it sit for a few minutes before attempting to loosen it again.
Once the retaining nut is removed, carefully pull the faucet away from the wall, making sure to disconnect any water supply lines or connections. If you encounter any resistance, check for any additional screws or fasteners that may be securing the faucet.
Tips for Removing a Stubborn or Stuck Bathtub Faucet
When it comes to removing a rusty faucet, you’ll need to employ specific techniques and tools to ensure a successful removal process.
Firstly, using a penetrating oil can help loosen the rust and make it easier to unscrew the faucet.
Secondly, utilizing a wrench or pliers specifically designed for faucet removal will provide the necessary leverage and grip to loosen and remove the faucet.
Rusty Faucet Removal Techniques
You can easily remove a rusty bathtub faucet using a few simple techniques. Here are some rusty faucet cleaning techniques and tips for preventing faucet rust:
-
Use a mixture of vinegar and baking soda: Create a paste by mixing equal parts of vinegar and baking soda. Apply the paste to the rusty areas of the faucet and let it sit for about 30 minutes. Scrub the rust away using a toothbrush or a scrub brush.
-
Apply lemon juice: Lemon juice is a natural rust remover. Squeeze some lemon juice onto a cloth and rub it onto the rusty faucet. Let it sit for a few minutes and then wipe it off with a clean cloth.
-
Use a rust remover product: There are many rust remover products available in the market. Follow the instructions on the product and apply it to the rusty areas of the faucet. Scrub the rust away using a brush or sponge.
By following these techniques, you can effectively remove the rust from your bathtub faucet and prevent it from coming back.
Now, let’s move on to the tools you will need for removing the faucet.
Tools for Removing Faucet
Now that you have learned about rusty faucet removal techniques, let’s focus on the tools you will need to remove the faucet.
When removing a faucet, it is essential to have the right tools to ensure a smooth and successful process.
First, you will need an adjustable wrench. This versatile tool will allow you to loosen and tighten various nuts and bolts. It is crucial for removing the faucet’s mounting nuts and other connections.
Next, you will need a screwdriver, preferably a Phillips head or a flathead, depending on the type of screws used in your faucet. This tool will come in handy when removing any screws that may be holding the faucet in place.
Finally, you may need a pair of pliers to remove the faucet aerator. The aerator is a small device located at the end of the faucet spout that helps regulate water flow. Using pliers will provide the necessary grip to unscrew and remove it.
Safety Precautions to Follow When Taking off a Bathtub Faucet
First, make sure to turn off the water supply before attempting to remove the bathtub faucet. This is a crucial step to prevent any water damage during the removal process.
Here are some important tips to keep in mind:
- Gather the necessary tools such as a wrench, pliers, and a screwdriver.
- Protect the surrounding area by placing a towel or a bucket underneath the faucet to catch any water that may leak during the removal.
- Use a penetrating oil to loosen any rust or corrosion that may have built up around the faucet connections.
Next Steps After Successfully Removing the Bathtub Faucet
Once the bathtub faucet has been successfully removed, it’s important to inspect the connections for any signs of damage or wear. This will ensure that the replacement faucet can be installed properly and will function without any issues. Take a close look at the threads and seals to ensure they are in good condition. If you notice any signs of damage, it’s recommended to replace them before proceeding with the installation.
After inspecting the connections, it’s time to clean the faucet area thoroughly. Use a mild cleaning solution and a soft cloth to remove any dirt, grime, or residue that may have accumulated over time. Pay special attention to the surface around the faucet holes and the surrounding area. A clean and smooth surface will provide a better seal and prevent any leaks once the new faucet is installed.
To help you visualize the importance of inspecting and cleaning the faucet area, here’s a table that highlights the potential issues and emotions associated with neglecting these steps:
| Neglected Steps | Potential Issues | Emotions evoked |
|---|---|---|
| Not inspecting connections | Leaks, improper installation | Frustration, inconvenience |
| Failure to clean faucet area | Poor seal, dirt buildup | Disgust, dissatisfaction |
Frequently Asked Questions
Can I Remove a Bathtub Faucet Without Any Tools?
Yes, you can remove a bathtub faucet without any tools. However, it is recommended to use alternative methods like calling for professional assistance to ensure that the faucet is removed properly and without causing any damage.
How Do I Remove a Bathtub Faucet if It Is Stuck or Rusty?
If your bathtub faucet is stuck or rusty, removing it can be a challenge. Start by turning off the water supply. Then, try using alternative faucet removal methods like applying penetrating oil or using a wrench. Be careful not to damage the faucet or surrounding plumbing.
What Should I Do if I Accidentally Damage the Bathtub Surface While Removing the Faucet?
If you accidentally damage the bathtub surface while removing the faucet, there are a few steps you can take to repair it. First, assess the extent of the damage. Then, consult a professional for guidance on repairing or replacing the damaged area. Finally, take precautions to prevent further damage while removing the faucet, such as using the proper tools and techniques.
Can I Reuse the Same Faucet After Removing It From the Bathtub?
After removing the bathtub faucet, you may be wondering if you can reuse it. While it is possible to reuse the same faucet, there are alternative options available depending on your needs and preferences.
Are There Any Specific Safety Precautions I Should Take While Removing a Bathtub Faucet?
When removing a bathtub faucet, it’s important to take safety measures and follow precautions to ensure accurate removal. Remember to turn off the water supply, use protective gloves, and refer to the manufacturer’s instructions for guidance.
Conclusion
Congratulations on successfully removing your bathtub faucet!
Now that you’ve completed this task, you can move on to the next steps in your bathroom renovation or repair project.
Whether you are replacing the faucet or simply making repairs, this detailed guide has provided you with the necessary tools and steps to get the job done.
By following the instructions and troubleshooting any issues that may arise, you have taken a proactive approach to maintaining your bathtub and ensuring its functionality.
Keep up the great work and enjoy the satisfaction of a job well done!