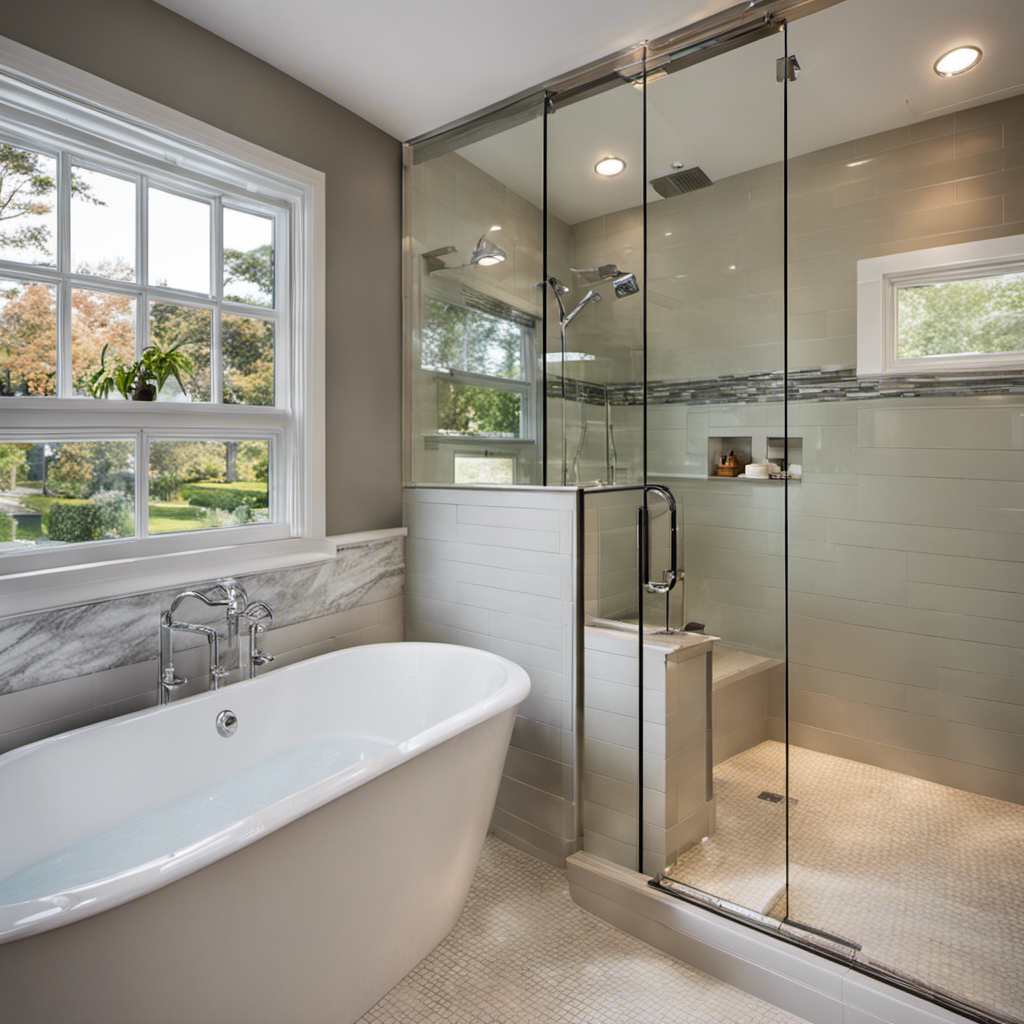

If you’re tired of the outdated bathtub taking up space in your bathroom, it’s time to make a change. Transforming your bathtub into a refreshing shower is easier than you think.
In this step-by-step guide, we’ll show you how to convert your bathtub into a shower, giving your bathroom a modern touch. With a few tools, some DIY savvy, and a little bit of time, you’ll be enjoying a revitalizing shower in no time.
So, let’s dive in and get started on this exciting transformation!
Key Takeaways
- Assess bathroom layout and consider plumbing modifications before starting the bathtub to shower conversion.
- Shut off water supply and disconnect plumbing fixtures before removing the bathtub.
- Choose a shower base that fits the space and ensure proper drainage installation.
- Apply waterproofing membrane, sealants, and choose a barrier (shower curtain or glass enclosure) to prevent water damage and splashing.

Smart Toilet with Warm Water Sprayer and Dryer, One Piece Bidet Toilet with Auto Dual Flush Foot Sensor Operation,Heated Seat Smart with Built In Fahrenheit LED Display
4-Level Heated Seat & Multi-Mode Warm Water Bidet - Adjustable seat/water temp with LED display, 3 personalized cleaning...
As an affiliate, we earn on qualifying purchases.
Assessing Your Bathroom Space
First, you’ll want to take a look at your bathroom space and see if it’s suitable for converting your bathtub into a shower. Assessing your bathroom space is crucial to maximize the available area and ensure a seamless transition.
Start by examining your bathroom layout. Consider if there is enough space for a shower enclosure and if the existing plumbing can be easily modified. Look for any potential obstacles, such as windows or doors, that may affect the installation.
Measure the dimensions of the bathtub and compare them to the required space for a shower. Additionally, consider the overall aesthetic and functionality of your bathroom. Taking these factors into account will help you determine if converting your bathtub into a shower is feasible and worth pursuing.

WITMYA Smart Toilet with Bidet Built In, One Piece Bidet Toilet with Auto Dual Flush, Foam Shield, Modern Elongated Tankless Toilet with Foot Sensor, Heated Bidet Seat, Warm Water & Dryer,LED Display
【Efficient Flush & Energy-Saving Design】There smart toilets feature a highly efficient 1.28 GPF water-saving dual flush system with...
As an affiliate, we earn on qualifying purchases.
Gathering the Necessary Tools and Materials
To get started, you’ll need a wrench, a screwdriver, and a pipe cutter for this project.
Here are the three key items you’ll need for your bathtub conversion:
-
Wrench: A wrench will be essential for loosening and tightening the nuts and bolts that hold the bathtub fixtures in place. Make sure to choose a wrench that fits the size of the fixtures in your bathroom.
-
Screwdriver: A screwdriver will come in handy when removing any screws or fasteners that hold the bathtub in place. Opt for a screwdriver with multiple interchangeable heads to accommodate different types of screws.
-
Pipe cutter: If you plan on rerouting or modifying the existing plumbing, a pipe cutter will be necessary to cut and shape the pipes to fit the new shower configuration.
Now that you have gathered the necessary tools and materials, it’s time to move on to the next step: removing the bathtub.

ELLO&ALLO Stainless Steel Shower Panel Tower System,LED Rainfall Waterfall Shower Head 6-Function Faucet Rain Massage System with Body Jets, Brushed Nickel
LOWER Water Pressure: If the water pressure has decreased, please refer to the manual to clean the water...
As an affiliate, we earn on qualifying purchases.
Removing the Bathtub
Before you start removing the bathtub, there are a few plumbing considerations you need to keep in mind.
First, you’ll need to shut off the water supply to the bathroom to prevent any leaks or spills.
Once the water is turned off, you can begin disconnecting the plumbing fixtures and pipes.
As you remove the bathtub, you should also consider alternative shower installation options, such as installing a shower pan or converting to a walk-in shower.
Plumbing Considerations for Removal
When converting your bathtub into a shower, you’ll need to consider the plumbing requirements for removal. Here are three important things to keep in mind:
-
Removing Pipes: Start by turning off the water supply to your bathtub. Locate the pipes that connect to the faucet and drain. Use a wrench to disconnect these pipes, ensuring that you have a bucket or towels nearby to catch any water that may spill out. Once the pipes are disconnected, carefully remove them from the bathtub area.
-
Water Supply: After removing the pipes, you’ll need to cap off the water supply lines. This will prevent any water from leaking or causing damage. Use pipe caps or compression fittings to securely seal off the supply lines.
-
Hiring a Professional: If you’re unsure about tackling the plumbing aspect of the project, it’s always a good idea to hire a professional plumber. They have the expertise and knowledge to handle the removal of pipes and ensure that everything is done correctly and safely.
Alternative Shower Installation
If you’re looking for an alternative, consider installing a shower stall instead. Converting your bathtub into a shower can be a great way to save space and update your bathroom.
When it comes to shower design, there are plenty of options to choose from. First, measure the space and determine the size of the shower stall that will fit. Next, consider the type of shower door you want, whether it’s a sliding door or a pivot door. Additionally, think about the showerhead and fixtures that will work best for you.

VEVOR Shower Panel Tower System, 6 Shower Modes, LED & Display Shower Panel, Rainfall, Waterfall, 4 Body Massage Jets, Tub Spout, Handheld Shower Head 59" Hose, Stainless Steel Wall-Mounted Shower Set
6-in-1 Shower System: Enjoy 6 invigorating shower modes—rainfall, waterfall, big body massage jets, small body massage jets, bathtub...
As an affiliate, we earn on qualifying purchases.
Installing the Shower Base
When it comes to installing a shower base, there are three key points you need to keep in mind: choosing the right base, proper drainage installation, and securing the shower base.
First, it’s important to select a base that fits the dimensions of your shower space and meets your aesthetic preferences.
Next, you’ll need to ensure proper drainage by installing a drain system that effectively removes water from the shower.
Finally, securing the shower base is crucial to prevent any shifting or movement that could lead to leaks or damage.
Choosing the Right Base
To choose the right base for your shower, start by considering the size and shape of your bathtub. This will help you determine the dimensions and style of the shower base that will fit perfectly in your bathroom.
Here are three shower base options to consider:
-
Acrylic: Acrylic shower bases are lightweight, durable, and easy to clean. They come in a variety of sizes and shapes, including square, rectangular, and neo-angle. Acrylic bases are also known for their slip-resistant surfaces, making them a safe and practical choice.
-
Fiberglass: Fiberglass shower bases are affordable and easy to install. They are available in standard sizes and can be customized to fit your bathtub dimensions. Fiberglass bases are also resistant to stains and scratches, ensuring long-lasting durability.
-
Tile-ready: If you prefer a more customizable option, a tile-ready shower base is a great choice. These bases are designed to be tiled over, allowing you to create a seamless look with the rest of your bathroom. They offer endless design possibilities and can be tailored to your specific style preferences.
Once you have chosen the right base for your shower, the installation steps typically include measuring and marking the area, removing the bathtub, preparing the subfloor, and finally installing and sealing the shower base. Following these steps will ensure a successful and functional shower conversion.
Proper Drainage Installation
For proper drainage installation, make sure you position the shower base in a way that allows water to flow towards the drain.
The first step is to determine the drainage slope. This is crucial because it ensures that water doesn’t accumulate on the shower floor. Ideally, the slope should be 1/4 inch per foot towards the drain.
To achieve this, you can use a level or a laser level to measure and mark the slope.
Once you have determined the drainage slope, the next step is to apply a waterproofing membrane. This membrane acts as a barrier between the shower base and the subfloor, preventing any water leakage.
Apply the membrane according to the manufacturer’s instructions, making sure to cover the entire shower base area.
Now that you have properly installed the drainage slope and waterproofing membrane, you can move on to securing the shower base.
Securing the Shower Base
Now that you’ve determined the drainage slope and applied the waterproofing membrane, it’s time to secure the shower base in place. Follow these steps to ensure a successful shower base installation:
-
Prepare the shower base: Before securing the shower base, make sure it is clean and free of any debris. Check that the drain hole aligns with the drainage slope you’ve created.
-
Apply adhesive: Apply a waterproof adhesive to the subfloor where the shower base will be placed. This adhesive will help secure the base and create a watertight seal.
-
Set the shower base: Carefully place the shower base onto the adhesive, ensuring that it is level and properly aligned with the drain hole. Apply firm pressure to ensure a secure bond between the base and the subfloor.
Plumbing and Drainage Considerations
When converting your bathtub into a shower, you’ll need to carefully consider the plumbing and drainage requirements. This step is crucial to ensure that your new shower functions properly and prevents any water damage.
First, you’ll need to install the necessary plumbing fixtures, such as a showerhead, faucet, and drain. This may involve rerouting the existing plumbing or adding new pipes to accommodate the shower.
Next, it’s important to focus on waterproofing techniques to protect your walls and floors from water damage. Apply a waterproof membrane on the shower walls and floor, ensuring a tight seal around the edges and corners. Additionally, consider installing a sloped shower pan to direct water towards the drain.
Lastly, make sure to test the plumbing and drainage system thoroughly before using your newly converted shower.
Finishing Touches and Cleanup
Once you have completed the installation process, it’s time to add the finishing touches and clean up the area. Here are some cleaning tips and waterproofing options to help ensure your newly converted bathtub to shower project is complete and ready for use:
-
Clean the area thoroughly: Use a mild soap or cleaning solution to wipe down the walls, floors, and fixtures. Pay special attention to any grout lines or caulk seams to remove any dirt or debris.
-
Apply a waterproofing sealant: To protect the walls and floors from water damage, consider applying a waterproofing sealant. This will help prevent moisture from seeping into the walls and causing mold or mildew growth.
-
Install a shower curtain or glass enclosure: Depending on your preference, choose either a shower curtain or a glass enclosure to complete the shower area. Both options provide a barrier to contain water and prevent it from splashing onto the bathroom floor.
Frequently Asked Questions
How Much Does It Cost to Convert a Bathtub Into a Shower?
Converting a bathtub into a shower is a popular choice for modernizing your bathroom. It can cost anywhere from $1,500 to $5,000, depending on factors like materials, labor, and any necessary plumbing adjustments.
Can I Convert Any Type of Bathtub Into a Shower?
Can you convert any type of bathtub into a shower? Yes, you can! Converting a bathtub into a shower is a great way to save space and modernize your bathroom. Let me guide you through the process.
Do I Need to Hire a Professional to Convert My Bathtub Into a Shower?
You don’t necessarily need to hire a professional. Pros of hiring one include their expertise and time-saving. However, DIY conversion can be cost-effective and offer a sense of accomplishment. Follow these tips for a successful bathtub to shower conversion.
How Long Does It Typically Take to Complete the Bathtub to Shower Conversion?
You might be wondering how long it takes to convert a bathtub into a shower. Well, it typically takes a few days, depending on the complexity of the project and any unforeseen challenges. But don’t worry, I’ll share some tips to make the process quick and efficient.
Can I Still Use My Bathroom During the Conversion Process?
During the conversion process, you may not be able to use your bathroom for a short period. However, you can set up a temporary shower to ensure that you still have access to bathing facilities.
Conclusion
In conclusion, converting your bathtub into a shower is a practical and rewarding project that can transform your bathroom space.
By following these step-by-step instructions, you can create a sleek and functional shower area that suits your needs.
Remember, Rome wasn’t built in a day, so take your time and gather the necessary tools and materials.
With a little patience and determination, you’ll soon be enjoying the convenience and luxury of your new shower.
So go ahead, take the plunge and make your bathroom dreams a reality!