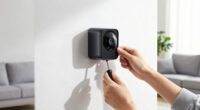
Set up smart home security cameras to monitor selected areas, receive motion alerts, and review live or recorded video from your phone. This guide is for beginners installing indoor or outdoor Wi-Fi cameras in a home with an existing router. You will choose camera positions, connect each camera to its app, tune alerts and privacy settings, and test the finished setup. Allow 1-2 hours, plus extra time if you need to mount outdoor cameras or improve Wi-Fi coverage.

Get home appliances delivered free with Prime
- Fast, free delivery on millions of items
- Prime Video, Amazon Music and more included
- Member-only deals all year

Blink Outdoor 4 and Wired Doorbell 2K+ (Newest Model) — 5 Cameras + Doorbell, Black
- ✔ Included: Five Outdoor 4 cameras and one wired doorbell
- ✔ Camera resolution: Outdoor 4: 1080p HD; doorbell: 2K
- ✔ Field of view: Outdoor 4: 143° diagonal; doorbell: 140° horizontal/vertical
Blink Outdoor 4 and Wired Doorbell 2K+ (Newest Model) – 3 Cameras + Doorbell, Black
- ✔ Included: Three Outdoor 4 cameras and one wired doorbell
- ✔ Camera resolution: Outdoor 4: 1080p HD; doorbell: 2K
- ✔ Field of view: Outdoor 4: 143° diagonal; doorbell: 140° horizontal/vertical
Blink Outdoor 4 and Wired Doorbell 2K+ (Newest Model) – 2 Cameras + Wired Doorbell, Black
- ✔ Included: Two Outdoor 4 cameras and one wired doorbell
- ✔ Camera resolution: Outdoor 4: 1080p HD; doorbell: 2K
- ✔ Field of view: Outdoor 4: 143° diagonal; doorbell: 140° horizontal/vertical
Difficulty: Beginner | Time: 1-2 hours
What You’ll Need
Tools & Materials:
- Smartphone or tablet with the camera maker’s app installed
- Smart home camera, power adapter, and mounting hardware supplied with it
- Home Wi-Fi name and password
- Screwdriver and drill, if the camera needs a fixed mount
- Ladder for high mounting locations, if needed
- MicroSD card or cloud subscription, if required for recording
Knowledge:
- Basic use of a smartphone and Wi-Fi network
- Ability to identify the areas you want to monitor
- Basic wall-mounting skills for cameras that will be fixed in place
Check the camera’s Wi-Fi band, power requirements, weather rating, and recording options before installation. Many cameras connect only to 2.4 GHz Wi-Fi; some require a temporary 2.4 GHz connection during setup. Confirm that the camera is compatible with your phone and that its app is available in your region. For outdoor installation, follow local rules and avoid pointing cameras into private areas where neighbors or passersby expect privacy.
Blink Outdoor 4 and Wired Doorbell 2K+ (Newest Model) — 5 Cameras + Doorbell, Black
This bundle earns the top position for buyers who need to watch several sides of a property. Five Outdoor 4 cameras give us more freedom to cover approaches, yard access points, and detached or less visible areas, while the wired 2K doorbell adds a dedicated view at the front entrance. The two smaller kits use the same general camera-and-doorbell approach, but neither provides the same out-of-the-box reach.The cameras run on two AA lithium batteries apiece, with battery life stated as up to two years. That can simplify installation where outdoor power is inconvenient, though real battery life can vary with activity and conditions. The tradeoff is that the larger bundle only makes sense if we have useful mounting locations and dependable 2.4 GHz Wi-Fi across them. More cameras do not help much in weak-signal zones, and the listed system does not support 5 GHz Wi-Fi.For a front door, the wired requirement is an important dividing line: this is not the fully wireless choice for a home without compatible wiring. Cloud video storage and some advanced alerts may also depend on a Blink plan. Compared with the three-camera option, this is the better fit for larger properties and more perimeter zones; for a compact home, we would avoid paying the setup and management overhead of cameras we do not need.
Pros:
- Five outdoor cameras provide the broadest included coverage in this lineup.
- The bundle pairs 1080p Outdoor 4 cameras with a 2K wired doorbell.
- Outdoor cameras use AA lithium batteries, with stated life of up to two years.
- Weather-resistant cameras include two-way audio and Alexa compatibility.
Cons:
- Cloud video storage and some advanced alerts may require a compatible plan.
- The wired doorbell needs compatible 12–24V AC/DC wiring.
- Five cameras require more suitable mounting points and reliable Wi-Fi coverage.
Best for: Households that want to cover several exterior approaches, entrances, or yard zones with one bundled system.
Not ideal for: Smaller homes with only a few useful camera positions, properties with weak 2.4 GHz coverage, or homes without compatible doorbell wiring.
Bottom line: We recommend this bundle when broad outdoor coverage matters more than keeping the system small and simple.
“We recommend this bundle when broad outdoor coverage matters more than keeping the system small and simple.”
Blink Outdoor 4 and Wired Doorbell 2K+ (Newest Model) – 3 Cameras + Doorbell, Black
For many households, three outdoor cameras are a more practical match than either extreme in this lineup. This kit can cover a front or side approach, a rear entrance, and another priority zone, while keeping the system more manageable than the five-camera bundle. We place it ahead of the two-camera version for buyers who want useful perimeter coverage without filling every possible position.The underlying setup remains familiar: 1080p Outdoor 4 cameras, a 2K wired doorbell, two-way audio, Alexa compatibility, and weather-resistant construction. The battery-powered cameras are easier to place than units that need outdoor electrical outlets, and the listed up-to-two-year battery life can reduce routine battery changes. That figure is a stated maximum rather than a guarantee; frequent activity and other conditions can affect it.The kit does not remove the main compromises shared across these bundles. Doorbell installation requires existing compatible wiring, and the cameras connect over 2.4 GHz Wi-Fi only. Some detection functions and cloud video storage beyond a trial may require a subscription. Compared with the five-camera bundle, this is the more restrained choice for a typical home; compared with the two-camera kit, it offers extra placement flexibility, but only if we have a real use for that third camera.
Pros:
- Three outdoor cameras offer a middle ground between the smaller and larger bundles.
- Includes a 2K doorbell alongside 1080p HD Outdoor 4 cameras.
- Battery-powered outdoor cameras allow flexible placement without nearby outlets.
- Supports two-way audio and Alexa compatibility.
Cons:
- Compatible doorbell wiring is required for installation.
- Cloud storage and some smart detection features may require a plan.
- Wi-Fi connectivity is limited to 2.4 GHz.
Best for: Homeowners who need three outdoor camera positions plus a wired front-door view, without the broadest bundle.
Not ideal for: Buyers who only need two exterior views, need a wireless doorbell, or cannot provide stable 2.4 GHz Wi-Fi.
Bottom line: We see this as the most balanced choice when three outdoor views are useful but five would be excessive.
“We see this as the most balanced choice when three outdoor views are useful but five would be excessive.”
Blink Outdoor 4 and Wired Doorbell 2K+ (Newest Model) – 2 Cameras + Wired Doorbell, Black
This is the most focused option for a buyer who can name the few places that matter most. Two outdoor cameras plus the 2K wired doorbell can cover a front entrance and two exterior zones, making this bundle the easiest of the three to keep compact. It ranks below the three- and five-camera kits for coverage, but that is an advantage if additional cameras would sit unused.Its core camera features align with the larger bundles: Outdoor 4 cameras record in 1080p HD, use two AA lithium batteries each, and connect through 2.4 GHz Wi-Fi. The doorbell adds a higher-resolution 2K front-door view, while two-way audio and Alexa compatibility support everyday monitoring. Battery-powered placement avoids the need to run power to each outdoor camera, although the product details do not specify a battery-life figure for this particular bundle. The Outdoor 4 platform is described elsewhere in the lineup as offering up to two years, but we should treat that as a stated platform estimate rather than a guarantee for every installation.Compared with the three-camera kit, this version gives up one outdoor position, so it is a weaker choice for homes with multiple entry points or a large yard. It still shares the wired doorbell constraint and possible plan requirements for cloud storage and smart detection. Choose it when simple, selective coverage matters more than watching every side of the property.
Pros:
- Compact bundle includes two outdoor cameras and a 2K wired doorbell.
- Outdoor cameras are battery-powered for flexible placement.
- Weather-resistant cameras support two-way audio and Alexa compatibility.
- The smaller camera count can suit limited coverage needs without unused units.
Cons:
- Provides less outdoor coverage than the three- and five-camera bundles.
- The wired doorbell requires compatible existing wiring.
- Cloud storage and smart detection may require a separate subscription.
Best for: People who want a front-door camera and two outdoor views, with no need for a larger perimeter system.
Not ideal for: Larger properties, homes with several vulnerable exterior entrances, or buyers who want a doorbell that installs without wiring.
Bottom line: We would choose this bundle for a clearly defined, small coverage plan rather than a whole-property camera layout.
“We would choose this bundle for a clearly defined, small coverage plan rather than a whole-property camera layout.”
As an Amazon Associate we earn from qualifying purchases.
Before You Start
Choose camera locations before drilling or attaching mounts. Check the live view or temporary placement from each spot, and confirm the camera can reach your Wi-Fi network. Do not mount a camera where it can be reached easily, exposed to excessive heat, or hit by water beyond its weather rating. If you rent, get permission before drilling. Set a strong, unique password for the camera account and turn on two-factor authentication if the app supports it. Read the maker’s instructions for safe power and mounting; do not use damaged cables or adapters.
Step-by-Step Instructions
Step 1: Plan the areas to monitor
List the entrances, rooms, or outdoor zones you want to monitor, then decide what each camera needs to capture. Aim to see faces and activity rather than only the top of a person’s head or a broad, distant view. Place indoor cameras to cover entry points without recording sensitive areas such as bathrooms or bedrooms used for privacy. For outdoor coverage, prioritize your own door, driveway, or yard and keep the view focused on your property.
Tip: Avoid aiming a camera directly at a window. Reflections and changing light can obscure the picture or trigger unwanted motion events.
Check: Each camera has a defined coverage area, a power plan, and a plausible Wi-Fi connection at its planned location.
Step 2: Check Wi-Fi and power at each location
Take your phone to each proposed camera location and check whether it maintains a stable connection to your home Wi-Fi. If the camera maker provides a signal test in the app, use that too. Confirm that a power outlet or approved power source is close enough for the camera’s cable without stretching, pinching, or creating a trip hazard. For battery cameras, check the expected battery life and how you will reach the camera for recharging.
Tip: A phone showing Wi-Fi bars does not guarantee that a camera will connect reliably. Test the camera at the intended location before completing a permanent mount.
Check: The planned site has usable network service and a safe, practical way to power the camera.
Step 3: Prepare the account and recording method
Open the camera maker’s app, create or sign in to your account, and use a unique password that you do not reuse elsewhere. Turn on two-factor authentication where available. Review how the camera stores video: local storage, a cloud plan, or both. If using a memory card, use a supported card and install it as instructed while the camera is unplugged, unless the manufacturer specifies otherwise. Check any subscription fees and how long recordings are retained.
Tip: Do not assume that live viewing includes saved recordings. Confirm the storage method and playback access before relying on the camera for recorded events.
Check: You can sign in securely, know where clips will be stored, and have any required storage or plan ready.
Step 4: Power on and pair the first camera
Plug in or charge the camera as its instructions specify, then open the app and select the option to add a device. Follow the on-screen pairing process, which may involve scanning a QR code, entering a setup code, or connecting temporarily to the camera’s network. Choose the correct home Wi-Fi network and enter its password carefully. Keep the phone near the camera until the app confirms setup; repeat the process separately for each additional camera.
Tip: If setup fails, check whether your router is using a supported Wi-Fi band and security mode. Do not share your main Wi-Fi password through an unofficial app or website.
Check: The camera appears in the app with an online or connected status and shows a live image.
Step 5: Update the camera and name it
With the camera connected to reliable power and Wi-Fi, check the app for a firmware update and install it before mounting. Keep the camera powered on until the update finishes; interrupting power can leave it unusable. Give the camera a clear name based on its location, such as “Front Door” or “Garage,” and set the correct time zone and location if the app requests them.
Tip: Updates can take several minutes. Follow the app’s progress indicator and do not unplug or reset the camera during installation.
Check: The app reports that the camera is online, shows the correct name and time zone, and lists no pending update.
Step 6: Adjust the camera view and mount it
Temporarily position the camera and open its live view. Adjust the angle to capture the intended entrance or zone while excluding private spaces and unnecessary areas. Check that faces are visible at likely approach points and that the image is not blocked by furniture, plants, roof edges, or decorations. When the view is right, use the supplied mount and fasteners. For outdoor cameras, use a location and cable arrangement that match the camera’s weather rating and installation instructions.
Tip: Test the view at night as well as during the day. Infrared night vision can reflect from nearby walls, glass, or eaves and wash out the image.
Check: The mounted camera remains stable and shows the target area clearly in live view, including under low-light conditions.
Step 7: Set motion zones and alert preferences
Open the camera’s detection settings and draw motion zones around the areas you want monitored. Exclude roads, moving trees, neighboring property, or other sources of repeated false alerts where the app permits. Set detection sensitivity to a moderate level, then choose which events should trigger notifications, such as people or motion. Configure alert schedules or privacy modes to match when the home is occupied, and check that notifications are permitted in your phone’s system settings.
Tip: Start with fewer, more targeted alerts. A high sensitivity setting across the full image can produce frequent notifications that are easy to ignore.
Check: The camera detects activity in the selected zone and your phone receives the alert types you chose.
Step 8: Test recording, playback, and account security
Walk through the monitored area or trigger a test event, then open the event list and play the resulting clip. Confirm that the recording includes the approach and enough detail to identify what happened. Check the retention period and storage status. Review shared users and remove anyone who should not have access. If available, enable two-factor authentication, automatic updates, and encryption or privacy controls recommended by the manufacturer.
Tip: Test each camera separately; a working live view does not prove that motion recording, storage, or notifications are working.
Check: A test event is saved and plays correctly, the notification arrives, and the account has only intended users.
Common Mistakes to Avoid
- Leaving a default or reused password on the camera account. — Set a unique password, enable two-factor authentication if offered, and remove unneeded shared accounts.
Troubleshooting
Problem: The camera will not pair with the app or Wi-Fi.
Solution: Move the camera and phone near the router, confirm the Wi-Fi password, and check the camera’s supported band and router security settings. If setup requires 2.4 GHz, connect the phone to that band or follow the maker’s instructions for separating network names. Restart the camera and app, then retry pairing.
Problem: The camera goes offline or live video buffers.
Solution: Check Wi-Fi strength at the camera, restart the router if other devices are also affected, and move the camera closer or add a compatible access point. Confirm that the power connection is secure and that the router can support the number of connected devices.
Problem: You receive too many motion alerts or miss activity.
Solution: Adjust the motion zone to include only the target area, then change sensitivity one level at a time. Check notification permissions, schedules, and event-type filters in both the camera app and phone settings. Walk through the monitored area to test each adjustment.
Problem: Live view works, but no recordings appear.
Solution: Check that recording is enabled, the storage card is supported and recognized, or the required cloud plan is active. Confirm that the camera detects motion and that its time and time zone are correct. Run another test event and inspect the event list.
What Success Looks Like
Your setup is complete when every camera stays online in its intended location, shows a clear view of the selected area, and sends the alerts you configured. A test event should appear in the app as a playable recording, with the correct time and camera name. The account should use a unique password, have only intended users, and avoid recording private spaces or areas outside your property where possible.
Next Steps
Review camera status, storage capacity, and recent recordings weekly for the first month, then check them regularly as part of home maintenance. Clean the lens with a soft cloth when the image becomes hazy, and check outdoor mounts and cables after severe weather. Replace or recharge batteries before they run low. Install firmware updates promptly, review account sharing when household access changes, and revisit motion zones after landscaping or furniture changes. If a camera remains offline after network and power checks, contact the manufacturer or a qualified installer.
Frequently Asked Questions
Do smart home cameras need Wi-Fi?
Most app-connected cameras use Wi-Fi for setup, live viewing, alerts, and cloud storage. Some models can record locally when the internet is unavailable, but features vary. Check the product instructions to learn which functions continue during an internet outage.
Can I install an outdoor camera myself?
Many battery-powered or plug-in models are designed for homeowner installation. Follow the supplied mounting and weather-protection instructions, use suitable fasteners, and avoid electrical work unless you are qualified. Ask a licensed installer to connect a camera to mains wiring or work at a difficult height.
How many cameras should I set up?
Start with the entrances or zones that matter most and add cameras only where they provide a useful view. Place one camera at a time, test coverage and alerts, and avoid overlapping views that add unnecessary notifications or record private areas.
Do I need a subscription to save video?
It depends on the model. Some cameras support local memory cards or a home hub without a subscription; others require a paid cloud plan for event history or advanced features. Verify the included storage and playback limits before purchase or setup.
How can I reduce false motion alerts?
Make motion zones smaller, exclude roads and moving branches, and lower sensitivity if needed. Use person detection or schedules when available, then walk through the target area to confirm that wanted activity still triggers an alert.
NFL season / tailgating Picks
team gear
As an affiliate, we earn on qualifying purchases.