Repairing a leaking toilet might appear to be a challenging endeavor, but worry not! This detailed guide has everything you need to tackle the issue.
In just a few simple steps, you’ll be able to stop that annoying trickle and restore peace to your bathroom.
From checking the flapper valve to inspecting the fill valve, we’ll walk you through each technique to ensure mastery in fixing your toilet.
So roll up your sleeves, grab your tools, and let’s get started!

Key Takeaways
- Checking and cleaning the flapper valve can fix a trickling toilet.
- Adjusting the chain length connected to the flapper can eliminate water waste and improve flushing efficiency.
- Inspecting and adjusting the fill valve is important to prevent trickling in the toilet.
- Regularly checking the water level adjustment and examining/cleaning the overflow tube are necessary for maintaining optimal performance and preventing water wastage.
Check the Flapper Valve
To begin addressing the issue of a trickling toilet, we need to start by checking the flapper valve.
The flapper valve is a rubber mechanism located at the bottom of the toilet tank that controls the flow of water into the bowl. Over time, it can become worn or misaligned, causing water to continuously leak into the bowl.
To check the flapper valve, first, turn off the water supply to the toilet and flush to empty the tank. Inspect the flapper valve for any signs of damage or debris. If it’s dirty or worn, it may need to be cleaned or replaced.
Cleaning the flapper valve can be done using mild cleaning products or DIY solutions.

Once cleaned or replaced, turn the water supply back on and test the toilet to ensure the trickling has stopped.
Adjust the Chain Length
Let’s talk about adjusting the chain length in your trickling toilet.
Shortening the chain length can help eliminate water waste and improve flushing efficiency.
Shorten Chain Length
To fix a trickling toilet, we can shorten the chain length by adjusting it. Here’s a step-by-step guide to help you with this task:

- Start by locating the chain connected to the flapper. The flapper is the rubber valve that covers the hole at the bottom of the tank.
- Determine if the chain is too long by observing whether it gets caught under the flapper or prevents it from fully closing.
- If the chain is too long, use a pair of pliers to remove any excess links. Be careful not to cut the chain too short, as it may prevent the flapper from opening fully.
- Once you’ve shortened the chain, test the toilet by flushing it. Make sure the flapper opens and closes smoothly without any obstruction.
Eliminate Water Waste
We can eliminate water waste in a trickling toilet by adjusting the chain length. Here’s how:
- Lift the toilet tank lid and locate the chain connected to the flush lever.
- Determine the optimal chain length by ensuring that there’s a slight slack in the chain when the flush lever is at rest.
- Adjust the chain length by either lengthening or shortening it as needed.
- If the chain is too long, it may get caught under the flapper, causing the toilet to continuously run.
- If the chain is too short, it may prevent the flapper from fully closing, resulting in water continuously trickling into the bowl.
- Test the toilet by flushing it and observe if the chain length adjustment has resolved the trickling issue.
By making this simple adjustment, you can contribute to water conservation and choose eco-friendly alternatives for a more sustainable bathroom.
Now, let’s move on to the next section and learn how to improve flushing efficiency.
Improve Flushing Efficiency
To improve flushing efficiency, we can adjust the chain length connected to the flush lever of the toilet. This simple adjustment can greatly improve water flow and save water at the same time. Here’s how you can do it:

- Remove the toilet tank lid and locate the chain connected to the flush lever.
- Determine if the chain is too long or too short. If the chain is too long, it may get caught under the flapper, causing a weak flush. If it’s too short, it may not allow the flapper to close properly, resulting in a continuous trickle.
- Adjust the chain length by moving the S-hook or clip to a different link on the chain. Make sure it’s not too tight or too loose.
- Test the flush by pressing the flush lever. If the flushing efficiency has improved, you’ve successfully adjusted the chain length.
By adjusting the chain length, you can improve water flow and optimize the flushing efficiency of your toilet.
In the next section, we’ll discuss how to clean the flapper and valve seat to further fix the trickling issue.
Clean the Flapper and Valve Seat
Let’s talk about how to clean the flapper and valve seat to fix a trickling toilet.
First, we need to consider the options for flapper replacement.
Next, we’ll address common issues with the valve seat.
Finally, we’ll discuss troubleshooting tips for toilet leaks.
Flapper Replacement Options
After diagnosing a trickling toilet, one option for flapper replacement involves cleaning the flapper and valve seat. This can be a cost-effective solution to fix a faulty flapper without having to replace it completely.
Here are three steps to clean the flapper and valve seat:
- Turn off the water supply: Locate the shut-off valve behind the toilet and turn it clockwise to stop the water flow. Flush the toilet to drain the tank.
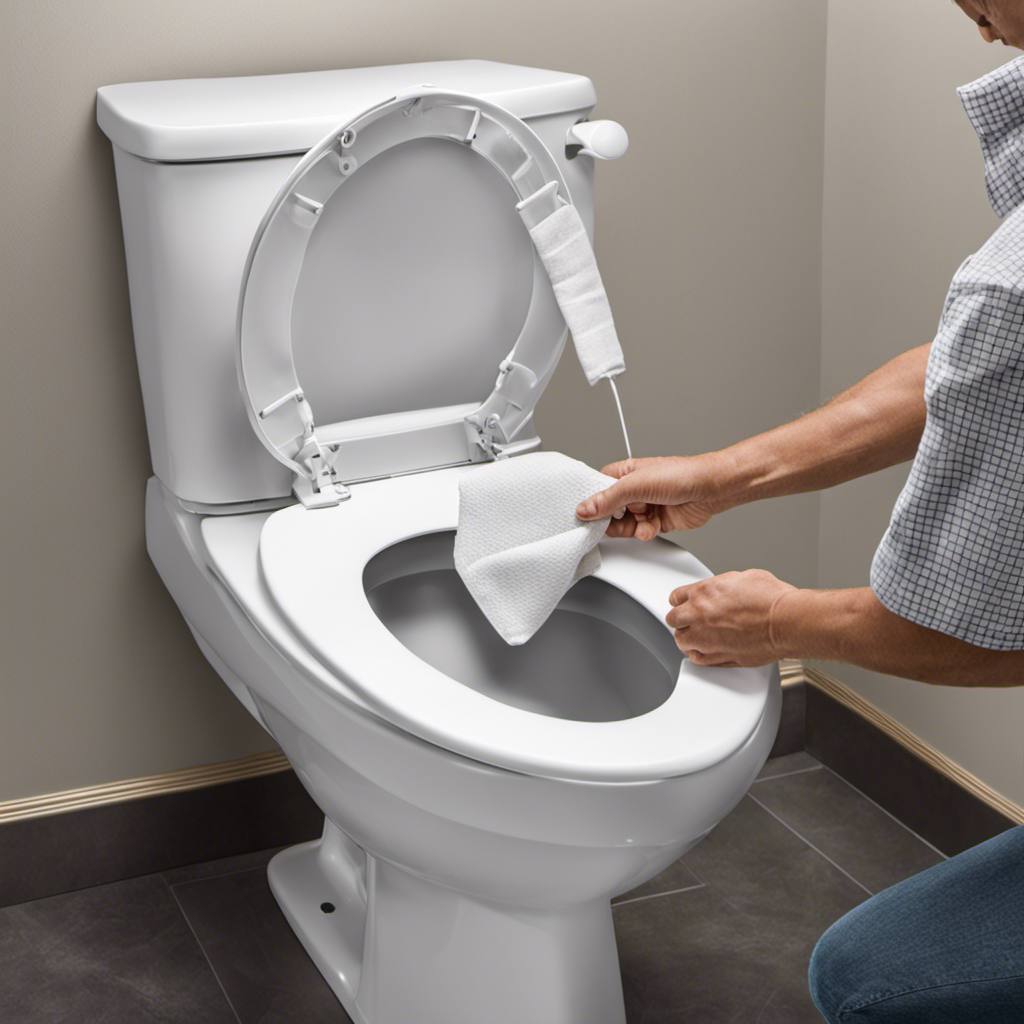
- Remove the flapper: Lift the toilet tank lid and locate the flapper. Disconnect the chain or strap that connects the flapper to the flush handle. Gently lift the flapper off the overflow pipe.
- Clean the flapper and valve seat: Inspect the flapper for any debris or mineral buildup. Use a soft brush or cloth to clean the flapper and the valve seat where it rests. Ensure there are no obstructions or rough surfaces that could prevent a proper seal.
Common Valve Seat Issues
One of the most common valve seat issues we encounter when cleaning the flapper and valve seat is mineral buildup. Over time, minerals like calcium and lime can accumulate on the valve seat, causing it to become rough and uneven. This can prevent the flapper from creating a watertight seal, leading to a trickling toilet. To address this issue, it is important to regularly clean the valve seat to maintain its smoothness and functionality.
Here is a step-by-step guide to cleaning the valve seat:
- Turn off the water supply to the toilet.
- Remove the flapper from the valve seat.
- Inspect the valve seat for any mineral buildup or damage.
- If there is mineral buildup, use a soft brush or cloth to gently scrub the surface.
- If the valve seat is damaged, it may need to be replaced to ensure a proper seal.
By regularly performing valve seat maintenance and repairing a faulty valve seat, you can prevent trickling toilets and ensure efficient flushing.
| Valve Seat Maintenance |
|---|
| Turn off water supply |
| Remove flapper |
| Inspect valve seat |
| Clean or replace as needed |
Troubleshooting Toilet Leaks
To continue addressing the issue of trickling toilets caused by valve seat problems, we can troubleshoot toilet leaks by cleaning the flapper and valve seat. This step is crucial in ensuring proper functioning of the toilet tank and maintaining optimal water pressure.
Here are three steps to clean the flapper and valve seat:
- Turn off the water supply: Locate the shut-off valve near the base of the toilet tank and turn it clockwise to stop the water flow.
- Remove the flapper: Lift the toilet tank lid and locate the flapper, which is connected to the flush valve. Unhook the flapper from the flush valve and set it aside.
- Clean the flapper and valve seat: Use a soft brush or cloth to remove any debris or mineral buildup from the flapper and valve seat. Ensure they’re thoroughly cleaned and free from any obstructions.
Replace the Flapper Valve
When it comes to fixing a trickling toilet, one crucial step is to replace the flapper valve. The flapper valve is responsible for controlling the flow of water from the tank into the bowl. Over time, the flapper valve can become worn out or damaged, resulting in a toilet that continuously leaks water.
To replace the flapper valve, start by turning off the water supply to the toilet. Flush the toilet to empty the tank, and remove the old flapper valve by disconnecting it from the flush handle and the overflow tube.
Install the new flapper valve by attaching it to the flush handle and the overflow tube. Finally, turn on the water supply and test the toilet to ensure it’s no longer trickling.

Inspect the Fill Valve
We regularly inspect the fill valve to ensure proper functioning and prevent trickling in the toilet. Here’s what you need to do:
- Check for leaks: Start by examining the fill valve for any signs of leaks. Look for water dripping or pooling around the valve. If you notice any leaks, it may indicate a faulty valve that needs to be replaced.
- Flush valve maintenance: While inspecting the fill valve, it’s a good idea to also check the flush valve. Make sure it opens and closes smoothly without any obstructions. Clean any debris or mineral buildup that may be affecting its performance.
- Water pressure adjustment: Improper water pressure can cause problems with the fill valve. Check if the water pressure is too high or too low. Adjust the water pressure accordingly using the shut-off valve.
By inspecting the fill valve, performing flush valve maintenance, and adjusting the water pressure, you can ensure that your toilet functions properly.
Now, let’s move on to the next step: adjusting the fill valve height.
Adjust the Fill Valve Height
Let’s now talk about how to adjust the fill valve height to fix a trickling toilet.
The optimal fill valve height is crucial for the proper functioning of the toilet. By troubleshooting the fill valve, we can identify any issues that may be causing the trickling and make the necessary adjustments to ensure a consistent and efficient water flow.
Optimal Fill Valve Height
To achieve the optimal fill valve height, start by adjusting the position of the float. Follow these steps to ensure you have the correct fill valve height:
- Locate the float: The float is usually a plastic or metal device attached to the fill valve. It rises and falls with the water level in the tank.
- Adjust the float height: To increase the water level, bend the float arm downwards. To decrease the water level, bend the float arm upwards. The goal is to have the water level about 1 inch below the top of the overflow tube.
- Test and adjust: Flush the toilet and observe the water level. If it’s too low, adjust the float arm lower. If it’s too high, adjust the float arm higher. Repeat this process until you achieve the optimal water level.
Troubleshooting Fill Valve
After adjusting the fill valve height to achieve the optimal water level, the next step in troubleshooting a trickling toilet is to address any issues with the fill valve itself. Start by troubleshooting float problems. If the float isn’t rising properly or is stuck in the ‘up’ position, it may be preventing the fill valve from closing completely. Check for any obstructions or debris that may be interfering with the float’s movement. Additionally, make sure the float arm is properly attached to the fill valve and isn’t loose or damaged.
Another common issue that can cause a trickling toilet is a problem with the water supply. Check the water supply valve to ensure it’s fully open. If the valve is partially closed, it may not be allowing enough water to enter the tank, causing the fill valve to work improperly. If the water supply valve is fully open and the problem persists, there may be a problem with the water pressure in your home. Consider contacting a plumber to address any issues with the water supply.

Clean or Replace the Fill Valve
We frequently clean or replace the fill valve to fix a trickling toilet. This is an important step in maintaining the proper functioning of your toilet and preventing water wastage.
Here’s how you can clean or replace the fill valve:
- Turn off the water supply: Locate the shut-off valve behind the toilet and turn it clockwise to stop the water flow.
- Clean the fill valve: Remove the lid of the toilet tank and inspect the fill valve. Use a sponge or cloth to wipe away any dirt or debris that may be blocking the valve.
- Replace the fill valve: If cleaning doesn’t solve the problem, it may be necessary to replace the fill valve. Shut off the water supply and flush the toilet to drain the tank. Remove the old fill valve and install a new one according to the manufacturer’s instructions.
Regularly cleaning or replacing the fill valve will help ensure that your toilet functions properly and efficiently.
Check the Water Level Adjustment
One important step in fixing a trickling toilet is checking the water level adjustment. The water level adjustment controls the amount of water in the tank, which in turn affects the flushing power and the proper functioning of the toilet.

To check the water level adjustment, start by removing the tank lid and locating the flapper valve. The flapper valve is typically located at the bottom of the tank and is responsible for controlling the flow of water into the bowl.
Adjust the water level by turning the adjustment screw or moving the float up or down. The goal is to ensure that the water level is approximately 1 inch below the overflow tube. This adjustment will help prevent water from continuously flowing into the bowl and causing a trickling sound.
Examine the Overflow Tube
To examine the overflow tube, we’ll need to remove the tank lid and locate the tube. The overflow tube is a vertical tube connected to the flush valve that prevents the tank from overflowing.
Here are three steps to inspect the overflow tube and ensure proper toilet water level:

- Visual Inspection: Look for any cracks, leaks, or blockages in the overflow tube. Use a flashlight if necessary to get a clear view. If you notice any damage or obstructions, it may affect the water level in the tank and cause a trickling toilet.
- Water Level Test: Flush the toilet and observe the water level in the tank. The water should stop filling up just below the top of the overflow tube. If the water level is too high or too low, it could indicate a problem with the float mechanism or the flush valve.
- Clean or Replace: If you find any debris or buildup in the overflow tube, clean it out using a wire brush or a pipe cleaner. If the overflow tube is damaged or defective, it may need to be replaced to ensure proper functioning.
Test for Other Leaks
To thoroughly address the issue of a trickling toilet, it’s important to test for other leaks on a regular basis. One common cause of a trickling toilet is a faulty flapper valve, but there may be other leaks that need to be addressed as well.
Here are two steps to help you test for other leaks:
- Test for Water Pressure: Start by turning off the water supply to the toilet. Flush the toilet to empty the tank completely. Once the tank is empty, turn the water supply back on. Observe the water flow into the tank. If the water is flowing too forcefully, it could indicate a problem with the water pressure, which may need to be adjusted.
- Check for Cracks in the Toilet Tank: Inspect the toilet tank for any visible cracks. Use a flashlight to thoroughly examine the tank from all angles. Cracks in the tank can cause water to leak out, leading to a trickling toilet. If you notice any cracks, it’s important to replace the tank to prevent further leaks.
Frequently Asked Questions
How Do You Fix a Running Toilet?
To fix a running toilet, we first need to identify the cause. Common toilet problems often include a faulty toilet flapper. To address this, a simple toilet flapper replacement may be necessary.
What Causes a Toilet to Continuously Run?
Toilet tanks continuously run due to problems with the toilet water supply or the toilet tank mechanism. It is important to identify the cause and follow step-by-step instructions to fix the issue.

How Can I Prevent My Toilet From Making a Trickling Sound?
To prevent toilet water wastage and save money on repairs, we’ll share DIY tips to fix a trickling toilet. Follow our step-by-step guide for mastery in DIY toilet repairs. Let’s get started!
Is It Necessary to Call a Professional Plumber to Fix a Trickling Toilet?
We can fix a trickling toilet without calling a professional plumber. There are DIY tricks to fix it, and we should avoid common mistakes. Let’s discuss step-by-step instructions to solve the issue.
What Are the Signs That Indicate a Malfunctioning Flapper Valve in a Toilet?
Signs of a malfunctioning flapper valve in a toilet include water leakage and constant refilling. To fix this, check for any visible damage to the flapper and replace it if necessary.
Conclusion
In conclusion, fixing a trickling toilet is a simple process that can be done by anyone. By checking and adjusting the flapper valve, cleaning or replacing the fill valve, and examining the overflow tube, you can easily resolve the issue.

Remember, a small problem like a trickling toilet can cause inconvenience and frustration, but with these easy steps, you can restore peace and functionality to your bathroom.

With an impeccable eye for detail and a passion for bathroom-related, Ava leads our editorial team gracefully and precisely.
Under her guidance, Best Modern Toilet has flourished as the go-to resource for modern bathroom enthusiasts. In her free time, you might find Ava exploring antique shops and looking for vintage bathroom fixtures to add to her collection.