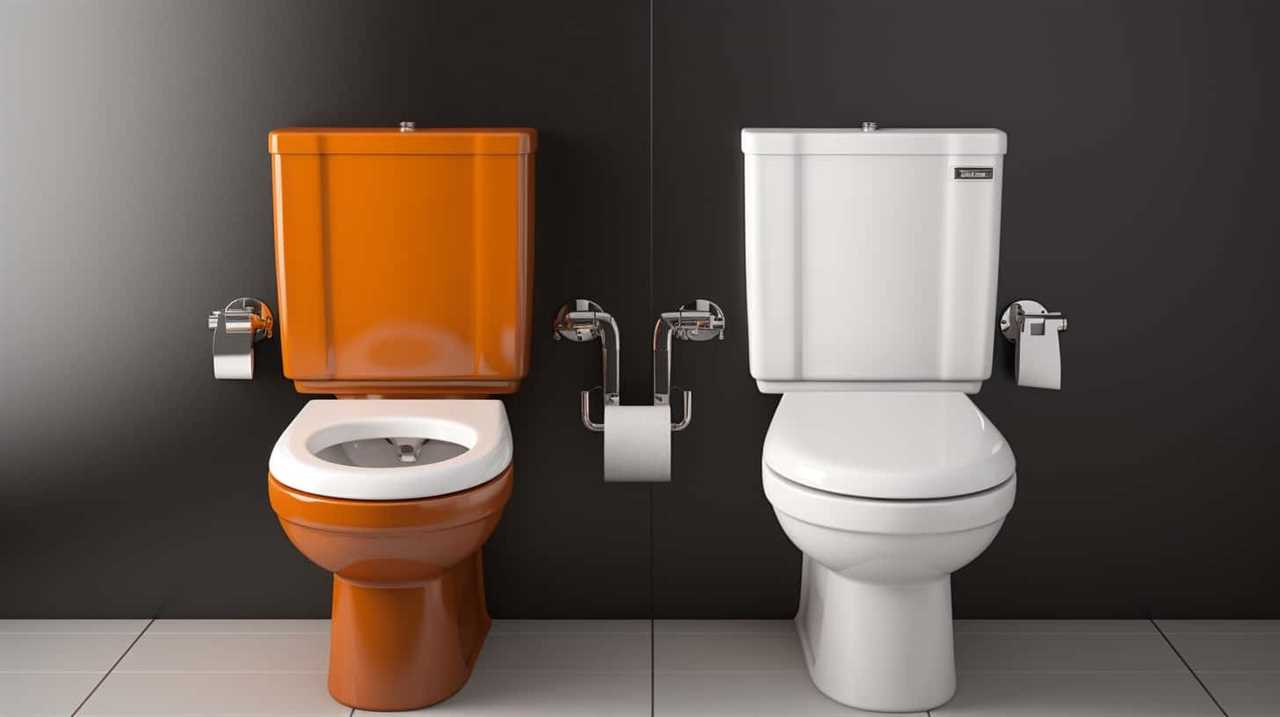
Ever been curious about the process of testing a toilet flush valve? Prepare to plunge into the realm of toilet upkeep and emerge as an expert of the porcelain seat.
In this article, we will guide you through the step-by-step process of testing a toilet flush valve. From gathering the necessary tools to troubleshooting common issues, we’ve got you covered.
So, let’s roll up our sleeves and get ready to ensure a smooth and efficient flush every time.
Key Takeaways
- Testing the toilet flush valve is crucial for ensuring its proper functioning and preventing potential issues.
- Thorough testing allows for identification and troubleshooting of problems.
- Gathering the necessary tools, such as a water pressure gauge, a wrench, and a bucket, is essential for accurate testing.
- Proper tool selection ensures testing accuracy and reliable results.
toilet flush valve testing kit
As an affiliate, we earn on qualifying purchases.
As an affiliate, we earn on qualifying purchases.
Understanding the Importance of Testing
Testing the toilet flush valve is crucial for ensuring its proper functioning and preventing any potential issues. As professionals in the field, we understand the importance of thoroughly testing this component.
By doing so, we can identify and troubleshoot any problems that may arise, ensuring that the toilet operates smoothly and efficiently. One of the first steps in testing the flush valve is gathering the necessary tools. These tools may include a wrench, pliers, a bucket, and a flashlight.
Once the tools are gathered, we can then proceed with troubleshooting any issues that may be affecting the flush valve. This thorough testing process allows us to address any potential problems before they escalate, ensuring that the toilet flush valve functions optimally.

CARBO Instruments 2-1/2" Water Pressure Test Gauge, 0-200 PSI, Red Max Pointer, 3/4" Female Hose Thread, Rust-Free Corrosion-Resistant Case, Brass Connector, for Home, Garden, RV, Indoor/Outdoor
Precision Dual-Scale with Peak Memory: This pressure meter measures 0-200 PSI/0-14 Bar with ±2-1-2% accuracy (ASME B40.1 Grade…
As an affiliate, we earn on qualifying purchases.
As an affiliate, we earn on qualifying purchases.
Gathering the Necessary Tools
Before we can begin testing the toilet flush valve, we need to gather the necessary tools.
The first point to consider is the essential testing equipment, which includes a water pressure gauge, a wrench, and a bucket. Proper tool selection is crucial, as using the wrong tools can lead to inaccurate results or damage to the valve.

Once we’ve the required tools, we can proceed to the next step of the testing procedure.
Essential Testing Equipment
We will gather the necessary tools for testing a toilet flush valve.
To accurately test the flush valve, two essential pieces of equipment are required: a water pressure testing gauge and a water flow measurement device.
The water pressure testing gauge is used to measure the pressure exerted by the water in the plumbing system. This gauge is essential as it allows us to determine if the water pressure is within the acceptable range for proper functioning of the flush valve.
The water flow measurement device, on the other hand, is used to measure the amount of water flowing through the flush valve during a flush. This measurement is crucial in determining if the valve is allowing the correct amount of water to pass through for an effective flush.
With these tools in hand, we can proceed to test the toilet flush valve accurately.
Proper Tool Selection
To gather the necessary tools for accurately testing a toilet flush valve, we’ll continue the discussion from the previous subtopic by focusing on proper tool selection using a compound preposition.
Proper tool selection is crucial to ensure testing accuracy and achieve reliable results. When choosing tools for testing a toilet flush valve, it’s essential to consider their functionality and compatibility with the valve being tested.

Some key tools that are commonly used include:
- A pressure gauge: This allows for measuring the pressure exerted by the water in the flush valve.
- A flow meter: This helps in determining the rate of water flow.
- A wrench: This is necessary for adjusting or removing components if needed.
- A bucket for collecting water: This aids in collecting water during the testing process.
Testing Procedure Steps
When gathering the necessary tools for testing a toilet flush valve, it’s important to carefully select the appropriate tools for accurate assessment.
The first step in the testing procedure is to shut off the water supply to the toilet. This can usually be done by turning the shut-off valve located on the wall behind the toilet in a clockwise direction.
Once the water supply is shut off, the next step is to ensure proper alignment of the flush valve. This can be achieved by removing the toilet tank lid and inspecting the flush valve for any signs of misalignment or damage.
If necessary, the flush valve can be adjusted or replaced to ensure proper functioning.
toilet flush valve repair tools
As an affiliate, we earn on qualifying purchases.
As an affiliate, we earn on qualifying purchases.
Shutting Off the Water Supply
To properly test a toilet flush valve, it’s crucial to shut off the water supply. This step is important to prevent any water flow during the testing process, ensuring accurate results.
There are various methods to accomplish this, such as turning off the water valve located near the toilet or using an alternative water supply, such as a bucket.
Importance of Water Shutdown
We always ensure to shut off the water supply before testing a toilet flush valve. Water shutdown is crucial because it prevents any water flow into the toilet during the testing process. This ensures that accurate results are obtained and prevents any damage to the plumbing system.

Proper tool selection is necessary to shut off the water supply effectively. A shut-off valve, located near the toilet, is typically used to stop the water flow. It’s important to use the appropriate shut-off valve for the specific plumbing configuration. This may require the use of a wrench or pliers to turn off the valve securely.
Alternative Water Supply Methods
To ensure accurate testing of a toilet flush valve, it’s essential to shut off the water supply using alternative methods. In addition to traditional methods such as turning off the main water valve, there are alternative water sources and water conservation techniques that can be employed.
One such method is utilizing rainwater harvesting systems to supply water for flushing the toilet. These systems collect rainwater from rooftops and store it in tanks for later use.
Another option is using greywater, which is water from sources such as showers and sinks that can be recycled for toilet flushing.
By implementing these alternative water supply methods, not only can accurate testing of the toilet flush valve be achieved, but water conservation efforts can also be supported.
This leads us to the next section, which focuses on emptying the tank and preparing it for testing.
toilet water flow measurement device
As an affiliate, we earn on qualifying purchases.
As an affiliate, we earn on qualifying purchases.
Emptying the Tank
To empty the tank when testing a toilet flush valve, simply press and hold the flush handle until all of the water has been released. This step is crucial in order to ensure an accurate assessment of the flush valve’s functionality. It allows for a complete evacuation of water from the tank, allowing us to inspect the flush valve thoroughly.
In some cases, alternative solutions may be required if the standard emptying method fails. Troubleshooting tips include checking for any blockages or obstructions in the flush valve or drain pipe, and ensuring that the water supply to the toilet is turned off before attempting to empty the tank.

With the tank fully emptied, we can now proceed to the next step, which is inspecting the flush valve for any signs of damage or malfunction.
Inspecting the Flush Valve
After emptying the tank, we can now proceed to inspect the flush valve for any signs of damage or malfunction.
The flush valve is a crucial component of the toilet system as it controls the release of water from the tank into the bowl during the flushing process.
To begin inspecting the flush valve, we should first remove the tank lid and visually examine the valve for any cracks, leaks, or buildup of sediment. If any damage or blockage is detected, it may be necessary to clean or replace the flush valve.
Additionally, we should check the valve’s seal and ensure it’s properly seated and not worn or deteriorated.
Troubleshooting the flush valve requires attention to detail and a thorough examination to ensure optimal functionality and prevent any potential issues.
Checking for Proper Alignment
Once we’ve inspected the flush valve for any signs of damage or malfunction, it’s important to check for proper alignment to ensure the optimal functioning of the toilet. Proper alignment of the flush valve is crucial for preventing leaks and ensuring a powerful flush.
To check the alignment, follow these steps:
- Remove the tank lid and locate the flush valve at the center of the tank.
- Visually inspect the flush valve to ensure it’s aligned properly with the overflow tube.
- Use a level to check if the flush valve is parallel to the tank wall.
- If the flush valve is misaligned, gently adjust it until it’s straight and parallel.
- Once the flush valve is properly aligned, test the toilet by flushing and observing for any signs of leaks or improper water flow.
Ensuring the Flapper Is Functioning Correctly
Let’s now turn our attention to ensuring that the flapper valve in the toilet flush valve is functioning correctly. This is an important step in troubleshooting any issues with the toilet’s flushing mechanism.
We’ll discuss three main points: flapper valve troubleshooting, testing the flapper for leaks, and adjusting the flapper chain.
Flapper Valve Troubleshooting
To ensure the flapper is functioning correctly, we’ll need to inspect and test its performance using a simple method. Here are the steps to troubleshoot the flapper valve:
- Visual Inspection: Start by examining the flapper for any signs of wear, cracks, or misalignment. Ensure it’s properly seated on the flush valve opening.
- Water Level Test: Fill a bucket with water and pour it into the toilet bowl until it reaches the normal water level. Observe if the flapper closes tightly after the flush. If it doesn’t, there may be an issue with the flapper’s seal.
- Dye Test: Add a few drops of food coloring or dye into the toilet tank. Wait for a few minutes without flushing. If the colored water seeps into the toilet bowl, it indicates a faulty flapper that needs replacement.
- Chain Adjustment: Check the chain connecting the flapper to the flush handle. Ensure it has enough slack to allow the flapper to close completely.
Testing Flapper for Leaks
To test the flapper for leaks and ensure it’s functioning correctly, we’ll perform a water dye test. This test allows us to detect any leaks in the flapper valve.
First, we’ll turn off the water supply to the toilet. Then, we’ll add a few drops of water dye directly into the toilet tank.
After waiting for a few minutes, we’ll observe if any of the dye has seeped into the toilet bowl. If the flapper is functioning correctly, there should be no dye in the bowl. However, if we find any dye, it indicates a leak in the flapper valve.
In such cases, flapper maintenance is required, which may involve cleaning or replacing the flapper to ensure proper functioning and prevent water wastage.
This water dye test is an effective method for leak detection in the flapper valve.

Adjusting Flapper Chain
To ensure the flapper is functioning correctly, we’ll now focus on adjusting the flapper chain. The flapper chain plays a crucial role in the proper operation of the toilet flush valve. Here are four key steps to adjust the flapper chain and ensure optimal performance:
- Identify the chain length: Start by inspecting the current length of the flapper chain. It should have enough slack to allow the flapper to fully close but shouldn’t be so loose that it gets tangled or caught.
- Adjust the chain length: If the chain is too long, it may prevent the flapper from sealing properly, resulting in water leakage. On the other hand, if the chain is too short, it can prevent the flapper from fully opening, leading to weak flushes. Use pliers to loosen or tighten the chain as needed.
- Test the flapper action: After adjusting the chain length, flush the toilet and observe the flapper’s movement. It should lift fully when flushing and then settle back into place once the water has drained.
- Fine-tune if necessary: If you notice any issues with the flapper’s action or water leakage, adjust the chain length accordingly until the desired performance is achieved.
Testing the Flapper’s Seal
We can test the flapper’s seal by performing a simple water dye test.
To begin, ensure that the flapper is properly aligned with the flush valve seat. Adjust the flapper chain if necessary to achieve the correct alignment.
Next, add a few drops of water dye into the toilet tank. Wait for a few minutes to allow the dye to settle.
Then, flush the toilet and observe the water in the bowl. If the flapper’s seal is intact, the water in the bowl should remain clear.
However, if the dye appears in the bowl, it indicates a leak in the flapper’s seal. In such cases, the flapper may need to be adjusted or replaced to ensure a proper seal and prevent water wastage.
Observing the Water Level
By observing the water level in the toilet tank, we can determine if the flush valve is functioning properly. Proper water level observation is crucial in troubleshooting leaks and ensuring efficient toilet operation. Here are four key points to consider:
- Start by removing the tank lid and flushing the toilet. Observe the water level as the tank refills. It should stop filling when it reaches the designated fill line, typically marked on the inside of the tank.
- If the water level rises above the fill line, the flush valve may be faulty. This can cause constant water flow into the overflow tube, resulting in wasted water and potential leaks.
- On the other hand, if the water level is consistently too low, the flush valve may not be allowing enough water to enter the tank. This can lead to weak flushes and incomplete waste removal.
- Additionally, fluctuations in the water level during or after flushing can indicate a problem with the flush valve’s seals, which may need to be replaced.
Adjusting the Water Level
Now let’s adjust the water level to ensure optimal toilet performance. Proper water level adjustment is crucial for efficient flushing and preventing overflows. Below are troubleshooting techniques for adjusting the water level in a toilet:

| Problem | Cause | Solution |
|---|---|---|
| Low water level | Water supply issue | Check water supply valve and adjust if needed |
| High water level | Faulty fill valve | Replace or adjust the fill valve |
| Inconsistent level | Faulty float mechanism | Inspect and repair or replace the float |
To adjust the water level, start by locating the fill valve, usually located on the left side of the toilet tank. Turn the adjustment screw clockwise to increase the water level or counterclockwise to decrease it. Test the flush after each adjustment until the optimal water level is achieved. Remember, proper water level adjustment is essential for a well-functioning toilet.
Flushing the Toilet
When it comes to flushing the toilet, there are several important points to consider.
First, water pressure and flow play a crucial role in ensuring a proper flush.
Second, using the correct flushing technique is essential to prevent clogs and ensure efficient water usage.

Finally, understanding and addressing common flushing problems, such as weak flushes or incomplete flushes, is crucial for maintaining a functional toilet system.
Water Pressure and Flow
To test the water pressure and flow when flushing the toilet, we can use a simple method. Here’s how:
- Attach a water pressure gauge to the water supply line of the toilet. This gauge will measure the pressure of the water entering the toilet tank.
- Open the water supply valve fully to allow water to flow freely into the tank.
- Flush the toilet and observe the water pressure reading on the gauge. A normal water pressure range for toilets is typically between 20 and 80 psi (pounds per square inch).
- Measure the flow rate of the toilet flush by placing a bucket under the toilet tank’s flush valve and timing how long it takes for the tank to empty. This will give you an idea of how efficiently the toilet flushes.
Proper Flushing Technique
To achieve proper flushing technique, we start by ensuring there’s sufficient water in the toilet tank. The water level should be at least half an inch below the top of the overflow tube. If the water level is too low, it can cause weak or incomplete flushes. On the other hand, if the water level is too high, it can lead to water overflowing from the tank.
Troubleshooting common issues with flushing involves checking if there are any obstructions in the toilet bowl or the drainpipe. If there are, using a plunger can help remove the blockage.
Additionally, it’s important to flush the toilet with enough force to remove waste effectively. This can be achieved by quickly pressing and releasing the flush lever.
Common Flushing Problems
To identify common flushing problems with the toilet, we can test the flush valve using a simple method. Troubleshooting common issues related to flushing is crucial for maintaining the proper functioning of the toilet.
Here are four common flushing problems and their possible solutions:
- Weak Flush: If the flush seems weak and doesn’t clear the bowl effectively, it could be due to a clogged or partially closed valve. To fix this, check for any debris or mineral buildup in the valve and clean it thoroughly.
- Double Flush: A double flush occurs when the water drains partially and then refills the tank, causing the toilet to flush again. This can be caused by a faulty flapper or a loose chain. Adjust the chain or replace the flapper to resolve the issue.
- Phantom Flush: If you hear the toilet randomly flushing on its own, it could be an indication of a leaking flapper. Inspect the flapper for any damage or wear and replace it if necessary.
- Incomplete Flush: When the flush doesn’t completely empty the bowl, it may be due to a low water level in the tank or a problem with the fill valve. Adjust the water level or replace the fill valve to ensure a full flush.
Checking for Proper Water Flow
We can check for proper water flow in a toilet flush valve by observing the strength and consistency of the water stream during a flush.
To perform water flow testing, start by inspecting the toilet valve. Ensure that the valve is clean and free from any debris or mineral buildup that may obstruct the flow of water.
Next, initiate a flush and carefully observe the water stream. A properly functioning flush valve should produce a strong and steady stream of water throughout the flush cycle.
If the water stream is weak or inconsistent, it may indicate a problem with the valve or the water supply. In such cases, further inspection and troubleshooting may be required to identify and resolve the issue.
Moving forward, let’s now discuss how to listen for unusual sounds during a flush to further diagnose potential problems.
Listening for Unusual Sounds
One effective way to detect potential issues with a toilet flush valve is by listening for any abnormal sounds during the flushing process. Unusual sound detection can help in identifying flushing issues early on, allowing for timely repairs and preventing further damage.
Here are four key points to consider when listening for unusual sounds:
- Gurgling noises: If you hear gurgling sounds during the flushing process, it may indicate a clog or blockage in the drainpipe. This can cause improper flushing and potential backups.
- Whistling or hissing sounds: These sounds may suggest a problem with the fill valve or water pressure. It could be due to a faulty valve or a restricted water supply, affecting the flushing performance.
- Dripping or running water: Continuous dripping or running water noises after flushing could indicate a faulty flush valve seal. This can lead to water wastage and higher water bills.
- Loud or banging noises: Loud or banging sounds during flushing may indicate a problem with the flush valve or water hammer. Water hammer occurs when the water flow is abruptly stopped, causing pressure surges that can damage the valve.
Replacing a Faulty Flush Valve
When detecting a faulty flush valve, it’s crucial that we promptly address the issue to ensure optimal toilet functioning.
Replacing a flush valve is a relatively straightforward process that can be done by following a few simple steps.
First, turn off the water supply to the toilet by closing the shut-off valve.
Next, remove the tank lid and flush the toilet to drain the water from the tank.
Disconnect the water supply line from the fill valve and remove the nuts securing the flush valve to the tank.
Carefully lift the old flush valve out of the tank and discard it.

Install the new flush valve by following the manufacturer’s instructions.
Finally, reconnect the water supply line and turn on the water to test the new flush valve.
Troubleshooting flushing issues can often be resolved by replacing a faulty flush valve.
Troubleshooting Common Issues
To troubleshoot common issues with a toilet flush valve, we can start by conducting a series of tests. Here are four troubleshooting techniques to help identify and solve problems related to the flush valve:

- Inspect the water level: Check if the water level in the tank is too high or too low. Adjust the water level to the recommended mark on the fill valve to ensure proper flushing.
- Check for leaks: Look for any signs of water leakage around the flush valve. If there are leaks, tighten the bolts connecting the flush valve to the tank or replace any worn-out gaskets.
- Clean the flush valve: Mineral deposits or debris can cause the flush valve to malfunction. Remove the flush valve mechanism and clean it thoroughly with a brush and vinegar solution.
- Test the flapper: The flapper is responsible for sealing the flush valve and preventing water from continuously running into the toilet bowl. Check if the flapper is worn out or misaligned. If necessary, replace it with a new one.
Conclusion
In conclusion, testing a toilet flush valve is a crucial step in ensuring its proper functioning. By following the outlined steps and using the necessary tools, you can effectively identify any issues and address them promptly.
Just like a conductor fine-tuning an orchestra, testing the flush valve allows you to create a symphony of seamless water flow, ensuring a satisfying and efficient flushing experience.
So, take the time to test your flush valve and keep your bathroom in perfect harmony.