Hey there! Ever had a pesky running toilet that just won’t quit? Well, fear not, because I’ve got the solution for you.
In this article, I’ll show you how to fix a running toilet without a ball float. We’ll dive deep into the nitty-gritty details, providing you with step-by-step instructions on how to identify the issue, gather the necessary tools, and adjust the water level in the tank.
So, let’s get started and put an end to that annoying toilet running once and for all!
Key Takeaways
- Checking the water level and inspecting the valves is crucial in identifying the issue with a running toilet.
- Gathering the necessary tools and materials such as pliers, screwdriver, measuring tape, bucket, and sponge is essential for fixing a running toilet.
- Adjusting the water level in the toilet tank by using the water level adjustment screw on the fill valve is an important step in resolving the issue.
- The flapper valve should be checked for proper sealing and the chain should be inspected before considering replacement.

Korky QuietFILL Platinum Toilet Fill Valve – Universal Fits 99% of Toilets – Easy Height Adjust for Fast Install, 528MP
UNIVERSAL FILL VALVE: This toilet fill valve replaces ballcocks & worn down valves for different types of 2-piece…
As an affiliate, we earn on qualifying purchases.
As an affiliate, we earn on qualifying purchases.
Identify the Issue With the Toilet
To identify the issue with your toilet, you’ll need to first check if the water level is too high. Common causes of a running toilet include a faulty flapper valve, a loose or broken fill valve, or a problem with the flush valve. Troubleshooting techniques for toilet issues involve inspecting these components for any signs of damage or malfunction.
Start by lifting the toilet tank lid and observing the water level. If the water is at or above the overflow tube, that indicates a high water level. This could be due to a problem with the fill valve or the flapper valve not sealing properly. If the water level is normal, you may need to further investigate other components.
Now that you have identified the issue, it’s time to gather the necessary tools and materials.

Korky Ultra Standard 2-Inch Universal Toilet Flapper – Long Lasting Rubber – Easy to Install – Made in USA, 100BP
TOILET FLAPPER VALVE FITS MOST POPULAR 2 inch toilet brands including, but not limited to: American Standard, Kohler,…
As an affiliate, we earn on qualifying purchases.
As an affiliate, we earn on qualifying purchases.
Gather the Necessary Tools and Materials
You’ll need a few tools and materials to get started on this project. Troubleshooting toilet issues can be frustrating, but with the right tools, you can easily fix common toilet problems.
First, you’ll need a pair of adjustable pliers to loosen and tighten nuts and bolts. A flathead screwdriver will come in handy for removing the lid of the toilet tank.
Next, grab a measuring tape to measure the water level in the tank. Additionally, you’ll need a bucket to catch any excess water and a sponge to soak up any remaining water.

Fluidmaster Universal Install/Uninstall Toilet Repair Tool
Fluidmaster’s universal install and uninstall toilet tool makes any toilet repair job simple
As an affiliate, we earn on qualifying purchases.
As an affiliate, we earn on qualifying purchases.
Adjust the Water Level in the Toilet Tank
With the right tools and materials, it’s important to adjust the water level in the toilet tank for optimal performance. This step is crucial in saving water and preventing common toilet tank problems.
To begin, locate the water level adjustment screw usually found on the fill valve. Turn the screw clockwise to lower the water level or counterclockwise to raise it. Ensure that the water level is about half an inch below the top of the overflow pipe.
Adjusting the water level not only prevents unnecessary water waste but also helps maintain the proper functioning of the toilet. Once the water level is set, you can move on to the next step, which is replacing the flapper valve.
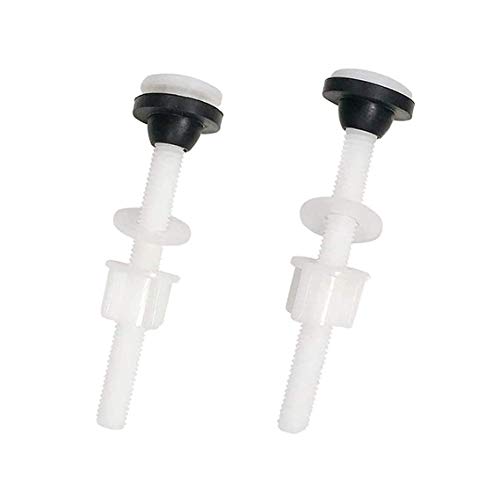
ToToT Set of 2 Toilet Split Fixing Screws for Water Tanks
Corrosion resistant POM plastic screw, no rust, corrosion, mineralization or adhesion
As an affiliate, we earn on qualifying purchases.
As an affiliate, we earn on qualifying purchases.
Replace the Flapper Valve
Once the water level is properly adjusted, it’s important to replace the flapper valve to ensure the toilet functions correctly. The flapper valve is a crucial component that controls the flow of water from the tank into the bowl. If it is worn out or damaged, it can lead to a running toilet or water leakage.
Here are three common flapper valve issues and their troubleshooting solutions:
-
Flapper Valve Doesn’t Seal Properly: This can result in constant water running, wasting water and increasing your bills. To fix this, check if the flapper is clean and not warped. If it is, consider replacing it with a new one.
-
Flapper Valve Chain is Too Loose: A loose chain can prevent the flapper from closing completely. Ensure the chain has a slight slack but doesn’t hang too low. Adjust the chain length or replace it if needed.
-
Flapper Valve Closes Too Slowly: If the flapper closes too slowly, it can cause a continuous flow of water into the bowl. Clean the flapper and the valve seat to remove any debris that might be hindering its proper closure.
Consider these troubleshooting solutions before replacing the flapper valve entirely. However, if none of these solutions work or you prefer flapper valve replacement alternatives, you can explore options like dual flush valves or adjustable flapper valves.
Check and Adjust the Fill Valve
Before replacing the flapper valve, it’s important to check and adjust the fill valve to ensure proper water flow in the toilet tank.
The fill valve is responsible for regulating the water level in the tank after each flush. If the fill valve is not working correctly, it can lead to issues such as low water pressure or a continuously running toilet.
To troubleshoot water pressure problems, start by turning off the water supply to the toilet. Then, remove the cap on the fill valve and use a screwdriver to adjust the water level. Turning the screw clockwise will lower the water level, while turning it counterclockwise will raise it.
Once you’ve adjusted the water level, turn the water supply back on and observe if the water flow is now adequate. If not, you may need to replace the fill valve altogether.
Frequently Asked Questions
How Can I Determine if the Issue With My Running Toilet Is Caused by a Faulty Ball Float?
To determine if a faulty ball float is causing a running toilet, observe if the toilet water overflows when flushed. If it does, it’s likely the flush mechanism is not properly shutting off the water flow.
What Are the Common Tools and Materials Required to Fix a Running Toilet Without a Ball Float?
To fix a running toilet without a ball float, you’ll need a wrench, plunger, and replacement parts. Troubleshooting techniques like adjusting the fill valve or checking for leaks can help resolve the issue efficiently.
Are There Any Specific Steps to Adjust the Water Level in the Toilet Tank?
To adjust the water level in the toilet tank, first, locate the water level adjustment screw. Use a screwdriver to turn the screw clockwise to decrease the water level or counterclockwise to increase it. Regular maintenance is important to prevent running toilets.
How Do I Know if the Flapper Valve Needs to Be Replaced in My Toilet?
I can tell if the flapper valve needs replacing in my toilet by checking for signs like water continuously running, or the toilet not flushing properly. To fix a running toilet without a ball float, I can adjust the chain or replace the flapper valve.
Is It Possible to Check and Adjust the Fill Valve Without Turning off the Water Supply to the Toilet?
Yes, it is possible to check and adjust the fill valve without turning off the water supply to the toilet. By using the water pressure, I can determine if the fill valve needs adjustment or replacement.
Conclusion
So there you have it, folks! By following these simple steps, you can easily fix a running toilet without a ball float.
Remember to identify the issue, gather the necessary tools, adjust the water level, replace the flapper valve, and finally, check and adjust the fill valve.
With a little bit of know-how and some elbow grease, you’ll have your toilet running smoothly in no time. It’s like fixing a leaky faucet – a piece of cake!