
We’ve all experienced that unfortunate moment – when you realize the toilet isn’t flushing and there’s no plunger nearby.
But fear not, because we’re here to teach you a handy trick: how to flush a toilet with a bucket.
With just a few simple steps, you’ll be able to restore order to your bathroom in no time.
So gather your supplies and get ready to become a master of toilet troubleshooting.
Let’s dive in!
Key Takeaways
- Select a sturdy bucket and ensure it is made of durable material
- Find a suitable water source and fill the bucket with enough water
- Locate and close the shut-off valve to stop the water supply to the toilet
- Lift the toilet seat and lid, pour the water into the center of the bowl, and use a plunger if necessary.

LOUPUSUO Smart Toilet with Warm Water Sprayer and Dryer, One Piece Bidet Toilet with Auto Dual Flush Foot Sensor Operation,Heated Seat Smart with Built In Fahrenheit LED Display
Powerful Flushing System: Designed with low water consumption (1.26 gallons per flush), this system ensures efficient and thorough...
As an affiliate, we earn on qualifying purchases.
Gather Necessary Supplies
To gather the necessary supplies, we’ll need a sturdy bucket and a sufficient amount of water.
When selecting a bucket, it’s important to consider alternative bucket sizes depending on the amount of water needed for flushing. A larger bucket may be required for a more thorough flush.
It’s also advisable to choose a bucket with a lid to prevent spillage and maintain cleanliness. Ensure that the bucket is made of durable material to withstand the weight and pressure of the water.
Once the appropriate bucket is selected, fill it with enough water to effectively flush the toilet. Remember to carry the bucket carefully and pour the water into the toilet bowl with precision to ensure an efficient flush.

Loniko Smart Toilet with Bidet Built In, Heated Seat & Dual Auto Flush, Foot Sensor, Tankless Modern Elongated Electric Toilet with Warm Water Wash, Air Dryer, LED Display & 1000g MaP Flush, 1.28 GPF
🧻 [Powerful & Water-Saving Dual Flush System] This one piece smart toilet with bidet built in uses an...
As an affiliate, we earn on qualifying purchases.
Turn off Water Supply to the Toilet
After gathering the necessary supplies, we can now move on to the next step: turning off the water supply to the toilet. This is an important step when using alternative flushing methods or troubleshooting common toilet issues.
Follow the steps below to successfully turn off the water supply:
- Locate the shut-off valve: The shut-off valve is typically located behind the toilet near the floor or on the wall. It’s a small valve with a lever or knob.
- Turn off the water supply: Rotate the lever or knob clockwise until it’s fully closed. This will stop the flow of water to the toilet.
- Test the shut-off valve: To ensure that the water supply is completely turned off, flush the toilet. If no water refills the tank, the shut-off valve is properly closed.

Smart Toilet with Bidet Built in, Elongated Bidet Toilet with Auto Soft Open/Close, Auto Flush, One Piece Toilet with Warm Wash & Dryer, Heated Seat, LED & Night Light, Self-Cleaning, Full/Half Flush
🔥 𝘼𝙡𝙡-𝙞𝙣-𝙊𝙣𝙚 𝙎𝙢𝙖𝙧𝙩 𝙏𝙤𝙞𝙡𝙚𝙩 𝙬𝙞𝙩𝙝 𝘽𝙞𝙙𝙚𝙩: This elongated electric toilet combines a tankless design and one-piece build for...
As an affiliate, we earn on qualifying purchases.
Lift the Toilet Seat and Lid
Now that we’ve turned off the water supply to the toilet, the next step is to lift the toilet seat and lid. This is necessary to gain access to the inner workings of the toilet.

Whether your toilet has a separate lid or a one-piece design, it’s important to handle it with care to avoid any damage or injury.
Additionally, it’s worth considering alternative flushing methods in case the bucket method isn’t feasible in your situation.
Lid or No Lid
We always lift both the toilet seat and lid before flushing a toilet with a bucket. This is important for proper lid placement and lid hygiene. Here are three reasons why lifting the lid is crucial:
- Prevents contamination: By lifting the lid, you ensure that the bucket water only comes into contact with the toilet bowl and not the lid. This prevents any potential contamination from spreading.
- Improves flushing efficiency: When the lid is lifted, it allows for better airflow, which aids in the flushing process. This ensures that waste is effectively flushed away without any residual odor or debris.
- Promotes cleanliness: Lifting the lid allows you to visually inspect the toilet bowl for any dirt or debris. This gives you the opportunity to clean the bowl if necessary, promoting overall cleanliness and hygiene.
Safety Precautions Needed
To ensure safety and prevent contamination, it’s essential that both the toilet seat and lid are lifted before proceeding with flushing a toilet using a bucket. This step is crucial to avoid any potential contact with germs or bacteria that may be present on the surface. Additionally, lifting the toilet seat and lid provides access to the inside of the toilet bowl, allowing for a smoother and more effective flushing process.
When handling the bucket, it’s important to exercise caution to prevent any water spillage. Make sure the bucket is stable and secure, keeping it level to minimize the risk of tipping over. Slowly pour the water from the bucket into the toilet bowl, aiming for the center of the bowl to maximize the flushing efficiency. Avoid pouring the water too quickly, as this can cause splashing and potential water spillage.
Alternative Flushing Methods?
While it’s important to lift the toilet seat and lid for safety and hygiene purposes, it may be necessary to explore alternative flushing methods when these components are unavailable or damaged.
Here are three alternative flushing methods to consider:
- Flush using the water supply valve: Locate the water supply valve behind or near the toilet. Turn it clockwise to shut off the water flow. Then, use a wrench or pliers to loosen the nut connecting the water supply line to the toilet tank. Hold a container beneath the open end of the supply line and slowly turn the valve counterclockwise to release the water into the container. This will create a makeshift flush.
- Use a large container of water: Fill a large container, such as a bucket or trash can, with water. Pour the water into the toilet bowl from a height to create enough force for a flush. Aim for the center of the bowl to maximize effectiveness.
- Gravity flush: If the toilet bowl is already filled with water, simply pour an additional bucket of water into the bowl. The force of gravity will push the water down the drain, effectively flushing the toilet.
In situations where lifting the toilet seat and lid isn’t possible, these alternative flushing methods can help maintain toilet functionality while conserving water.
Now, let’s move on to the next step: filling the bucket with water.

DeerValley Luxury Smart Toilet with Bidet Built in Bubble Wash, Auto Open/Close Lid Water Filter Instant Heated Seat Dryer, Soft-Close Modern Japanese One-Piece Toilet with Night Light for Bathrooms
Advanced Smart Toilet Combo: Experience ultimate hygiene with hands-free automation: The lid auto-opens as you approach and auto-closes...
As an affiliate, we earn on qualifying purchases.
Fill the Bucket With Water
To fill the bucket with water, gather a suitable container and locate a water source nearby. When choosing a container, opt for one that’s clean and large enough to hold an adequate amount of water. Ensure that it’s easy to handle and pour from.
Next, identify a water source, such as a sink, bathtub, or outdoor faucet. Consider using bucket filling techniques that promote water conservation strategies, such as using greywater or collecting rainwater. Once you have found a suitable water source, position the container under the faucet or in the desired area.
Turn on the tap or pour water into the container until it reaches the desired level. Take care not to overfill the bucket, as this may result in spillage during transportation.

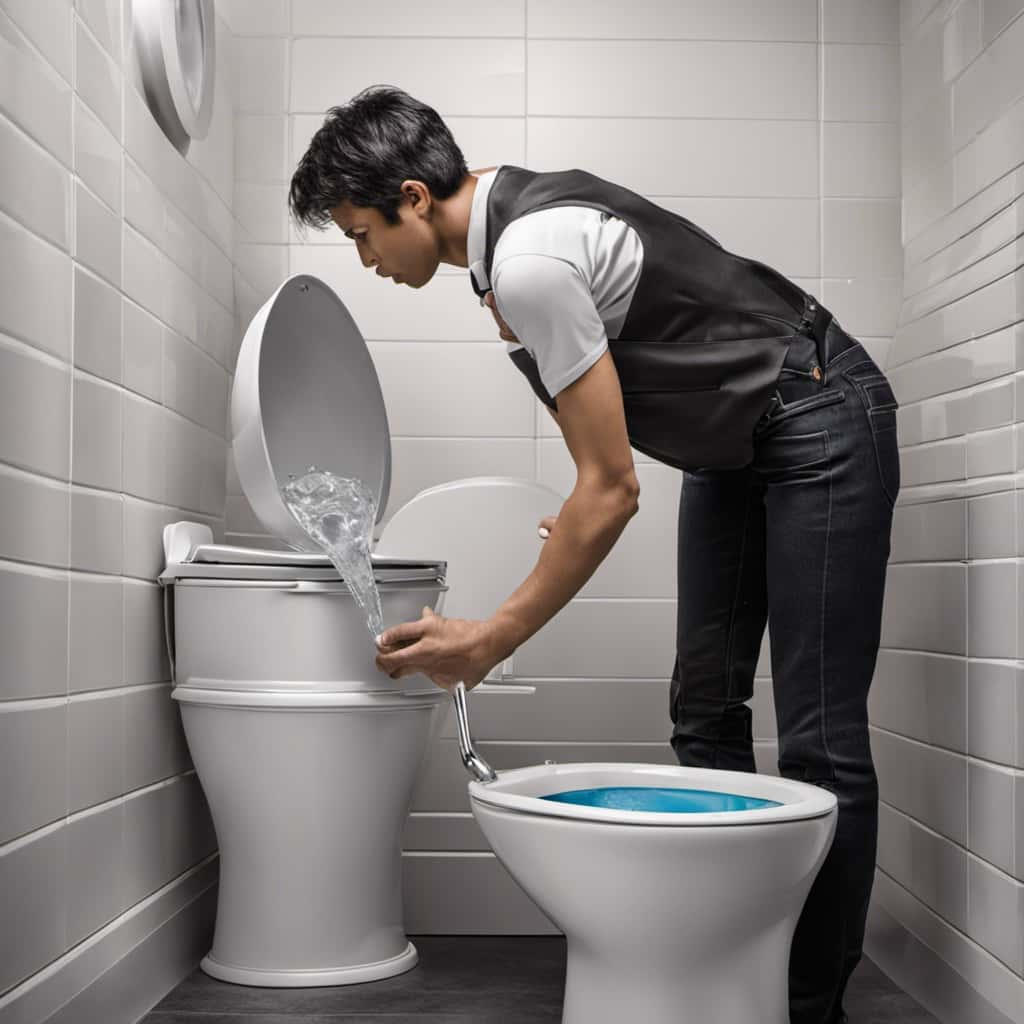
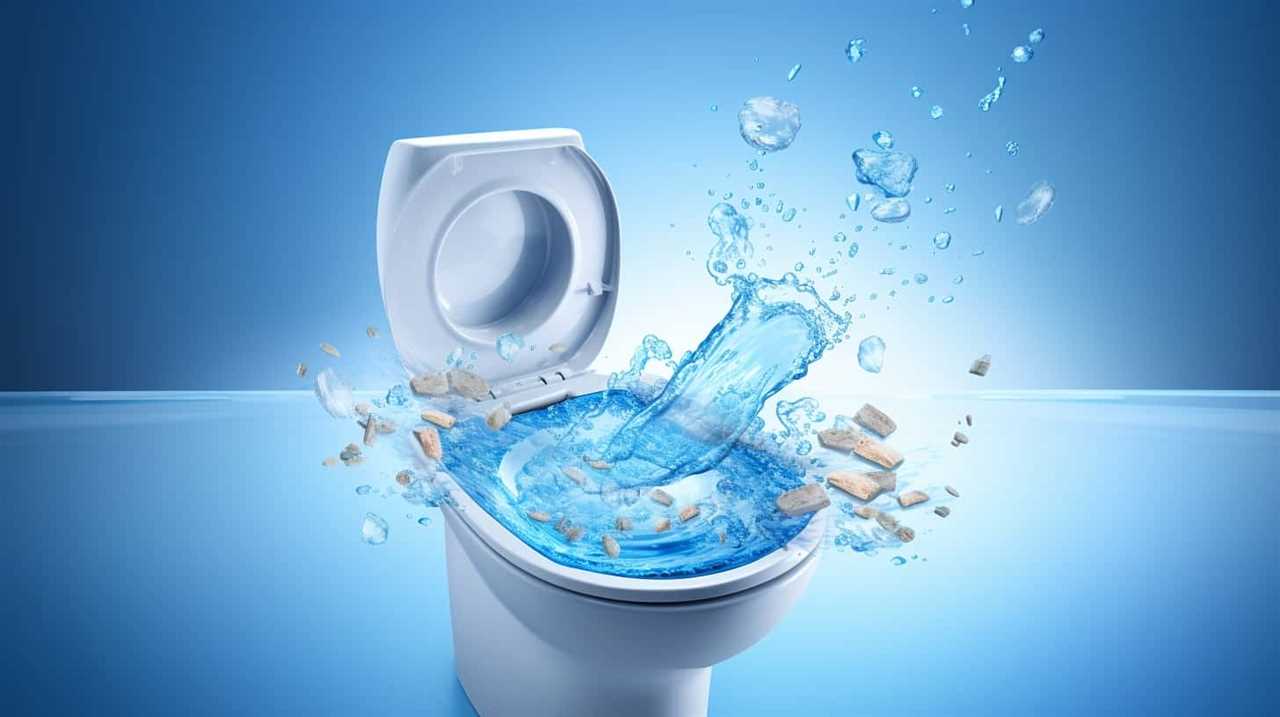
Pour the Water Into the Toilet Bowl
Now that we’ve filled the bucket with water, let’s move on to pouring the water into the toilet bowl.
The amount of water you pour into the bowl is crucial for a successful flush. Be sure to use enough water to mimic the force of a regular flush, but be cautious not to overflow the bowl, as this may cause water to splash out.
Bucket Water Volume Needed
Using a bucket, we pour an adequate volume of water into the toilet bowl to effectively flush it. When determining the bucket water volume needed, several factors must be considered, such as the size of the toilet bowl and the amount of waste present.
To ensure a successful flush, follow these steps:
- Measure the water volume: Fill the bucket with approximately 1.5 to 2 gallons (5.7 to 7.6 liters) of water. This amount should be sufficient for most standard-sized toilets.
- Adjust the water temperature: Ideally, use room temperature water for flushing. Extreme temperatures can cause damage to the toilet bowl or reduce the effectiveness of the flush.
- Consider alternative flushing methods: If you don’t have a bucket available, you can also use a large container or even a trash bag filled with water to create the necessary force for flushing.
Now that we know the appropriate bucket water volume, let’s move on to the next section and address the potential issue of water splashing during the flushing process.
Potential Water Splashing
After measuring the appropriate bucket water volume, we need to carefully pour the water into the toilet bowl to avoid potential water splashing. Start by holding the bucket above the toilet bowl, ensuring a secure grip on the handle.
Slowly tilt the bucket and pour the water into the bowl, aiming for the center. It’s important to pour the water gently to prevent any splashing. Avoid pouring too quickly, as this can cause water to overflow from the bowl.
Maintain control over the bucket throughout the process, ensuring that the water level remains steady. If the bucket water level is close to the rim of the bowl, consider pouring in smaller increments to prevent overflow.

Once the water is successfully poured into the bowl, proceed to the next step: using a plunger if necessary.
Use a Plunger if Necessary
If the bucket method doesn’t effectively flush the toilet, we can resort to using a plunger. Using a plunger can help dislodge the clog and restore the proper flow of water. Here are the steps to use a plunger effectively:
- Position the plunger: Place the plunger over the drain hole, ensuring a tight seal between the plunger and the toilet bowl.
- Apply pressure: Push the plunger down firmly and then pull it up quickly, creating suction and pressure to dislodge the clog.
- Repeat the process: Continue plunging for several times until the water starts to flush properly.
If using a plunger doesn’t resolve the issue, it might be necessary to repeat the process or consider calling a professional plumber for further assistance.
Repeat the Process if Needed
Now that we’ve covered using a plunger, let’s discuss what to do if the toilet still doesn’t flush properly.
In such cases, repeated bucket flushes may be necessary to ensure thorough flushing. This step-by-step process will help you effectively repeat the flushing process using a bucket, ensuring that any remaining waste is properly cleared.
Repeated Bucket Flushes
To ensure proper flushing, we can continue to repeat the process of bucket flushing as necessary. This is especially important when using alternative flushing techniques to conserve water.
Here are three key steps to follow when performing repeated bucket flushes:
- Fill the bucket: Start by filling the bucket with water, ensuring that it’s enough to create a forceful flush.
- Pour the water: Carefully pour the water into the toilet bowl, aiming for the center of the bowl to create a strong flush.
- Repeat if needed: If the initial flush isn’t sufficient, repeat the process by refilling the bucket and pouring the water into the toilet bowl until the waste is completely flushed away.
By following these steps, you can effectively conserve water while still ensuring thorough flushing.
Now, let’s move on to the next section and discuss how to guarantee a complete flush every time.
Ensuring Thorough Flushing
To ensure thorough flushing, we continue to repeat the process of bucket flushing as necessary. If the initial bucket flush didn’t completely clear the waste, there are a few alternative methods and troubleshooting tips you can try.
- Increase the force: When pouring the water from the bucket into the toilet bowl, pour it with more force to create a stronger flush. This may help dislodge any stubborn waste.
- Adjust the water level: If the toilet bowl isn’t filling up enough during the bucket flush, adjust the water level by adding more water to the bucket. This will provide a larger volume of water to create a more powerful flush.
- Repeat the process: If the waste is still not fully flushed after the first bucket flush, repeat the process until the toilet bowl is clear. Be sure to pour the water from a height and with enough force to maximize the flushing effect.
By following these troubleshooting tips and repeating the bucket flushing process when necessary, you can ensure a thorough flush.
Once the waste has been successfully flushed, it’s important to clean up any spills or mess that may have occurred during the process.
Clean up Any Spills or Mess
We should promptly clean up any spills or mess that may occur during the process of flushing a toilet with a bucket. Maintaining cleanliness is essential to prevent stains and ensure a hygienic environment. Here are three effective cleaning techniques to follow:
- Act swiftly: As soon as a spill or mess occurs, immediately grab a pair of gloves and paper towels to prevent any further spread.
- Blot the area: Gently blot the spill or mess with the paper towels to absorb as much liquid as possible. Avoid rubbing, as it can push the stain deeper into the surface.
- Clean with disinfectant: Once the spill is absorbed, use a disinfectant cleaner to sanitize the area thoroughly. Spray the cleaner onto the surface and wipe it clean with a fresh paper towel.
By promptly cleaning up any spills or mess, we can maintain a clean and stain-free environment.
Now, let’s move on to the next step: turning the water supply back on.
Turn the Water Supply Back on
To turn the water supply back on, we’ll need to locate the shut-off valve. The shut-off valve is typically located near the base of the toilet, either on the wall or on the floor.
Before proceeding, it’s important to take safety precautions to avoid any potential water damage or leaks. First, make sure to turn off the main water supply to the house. This will prevent any water from flowing into the toilet while you work.
Next, locate the shut-off valve and turn it clockwise until it’s fully closed. This will shut off the water supply to the toilet. If you encounter any difficulties or the valve is stuck, refer to troubleshooting tips or seek professional assistance.
With the water supply shut off, you can now proceed to the next step: testing the flush.
Test the Flush
After turning the water supply back on and ensuring the shut-off valve is fully closed, we can proceed to test the flush.

To ensure a successful flush, follow these steps:
- Fill the bucket with water: Choose a bucket size that can hold enough water to simulate a normal flush. A larger bucket will provide more water pressure and a stronger flush.
- Check the water temperature: It’s important to use water at room temperature or slightly warm. Extreme cold or hot water can cause damage to the toilet bowl or tank.
- Pour the water into the toilet bowl: Slowly pour the water from the bucket into the bowl. The goal is to create enough force to push the waste down the drain. Observe whether the water level rises and then quickly drains away.
Dispose of the Bucket Water Properly
To properly dispose of the bucket water, it’s important to find a suitable drainage area. Ensure that the area is away from any water sources or plants to prevent contamination. Here are the steps to follow:
- Determine the volume of bucket water: Measure the amount of water in the bucket using a measuring cup or by estimating the volume.
- Locate a suitable drainage area: Look for a designated drain or a spot in your yard where the water can safely flow into the ground without causing any damage.
- Pour the bucket water slowly: Begin pouring the water into the drainage area, making sure not to create any splashing or spills. Pouring slowly will help prevent soil erosion and ensure proper absorption.
- Repeat if necessary: If the bucket water volume is too large for a single pour, repeat the process until all the water has been disposed of.
By properly disposing of the bucket water, you can prevent any potential issues and maintain a healthy and functional toilet system.
Now, let’s move on to the next section to learn how to prevent future toilet issues.

Prevent Future Toilet Issues
By regularly maintaining and inspecting the toilet system, we can prevent future issues from occurring. Here are three key steps to ensure long-term maintenance and avoid toilet problems:
- Check for leaks: Inspect the toilet tank and base regularly for any signs of leakage. Listen for running water or look for water stains around the toilet. If you notice any leaks, promptly address them to prevent further damage.
- Clean the toilet bowl and tank: Regularly clean the toilet bowl and tank to prevent the buildup of mineral deposits, mold, and bacteria. Use a toilet brush and mild cleaning solution to scrub the bowl thoroughly. For the tank, flush it with vinegar or a commercial cleaner to remove any residue.
- Consider alternative solutions: Explore alternative solutions like installing a water-saving toilet or using a dual-flush system. These options can reduce water consumption and minimize the risk of future toilet issues.
Frequently Asked Questions
How Do I Know if I Need to Flush the Toilet With a Bucket?
If a toilet isn’t flushing properly, signs of malfunction can include weak flushes, recurring clogs, or water not draining completely. Alternative methods for flushing without a bucket may be necessary.
Can I Use Any Type of Bucket to Flush the Toilet?
Yes, any sturdy bucket can be used to flush a toilet. However, using a plastic bucket with a handle and a lid is ideal. It provides convenience, hygiene, and prevents spills.
How Much Water Should I Fill the Bucket With?
To achieve optimum water level when using a bucket to flush a toilet, consider the size of the bucket. Larger buckets may require more water to effectively flush, while smaller buckets may not provide enough water for a thorough flush.
What Should I Do if the Water Doesn’t Go Down After Pouring It Into the Toilet Bowl?
If the water doesn’t go down after pouring it into the toilet bowl, you can prevent overflow by controlling the amount of water you pour. Adjust the water level and try again.
How Often Should I Clean up Any Spills or Mess After Flushing the Toilet With a Bucket?
To prevent spills or mess when flushing with a bucket, it is important to clean up immediately. Regular cleaning after flushing can prevent any potential problems.
Conclusion
In conclusion, by following these simple steps, you can easily flush a toilet with a bucket in case of a water supply failure.
Remember to gather your supplies, turn off the water supply, fill the bucket with water, pour it into the toilet bowl, and then turn the water supply back on.

By taking these steps, you can ensure a smooth and efficient flush, preventing any future toilet issues.