
As I tackle the task of replacing a toilet flush handle, I can’t help but marvel at the simplicity of this essential bathroom fixture.
In just a few steps, I will guide you through the process of removing the old handle and installing a new one.
With the right tools and materials, and a bit of confidence, you’ll have a fully functioning flush handle in no time.
So, let’s dive in and make your toilet experience smoother and more efficient.
Key Takeaways
- Shut off the water supply and drain the remaining water before replacing the flush handle to avoid mess or flooding.
- Loosen and remove the small screw attaching the old handle to the toilet tank, using lubricant if necessary.
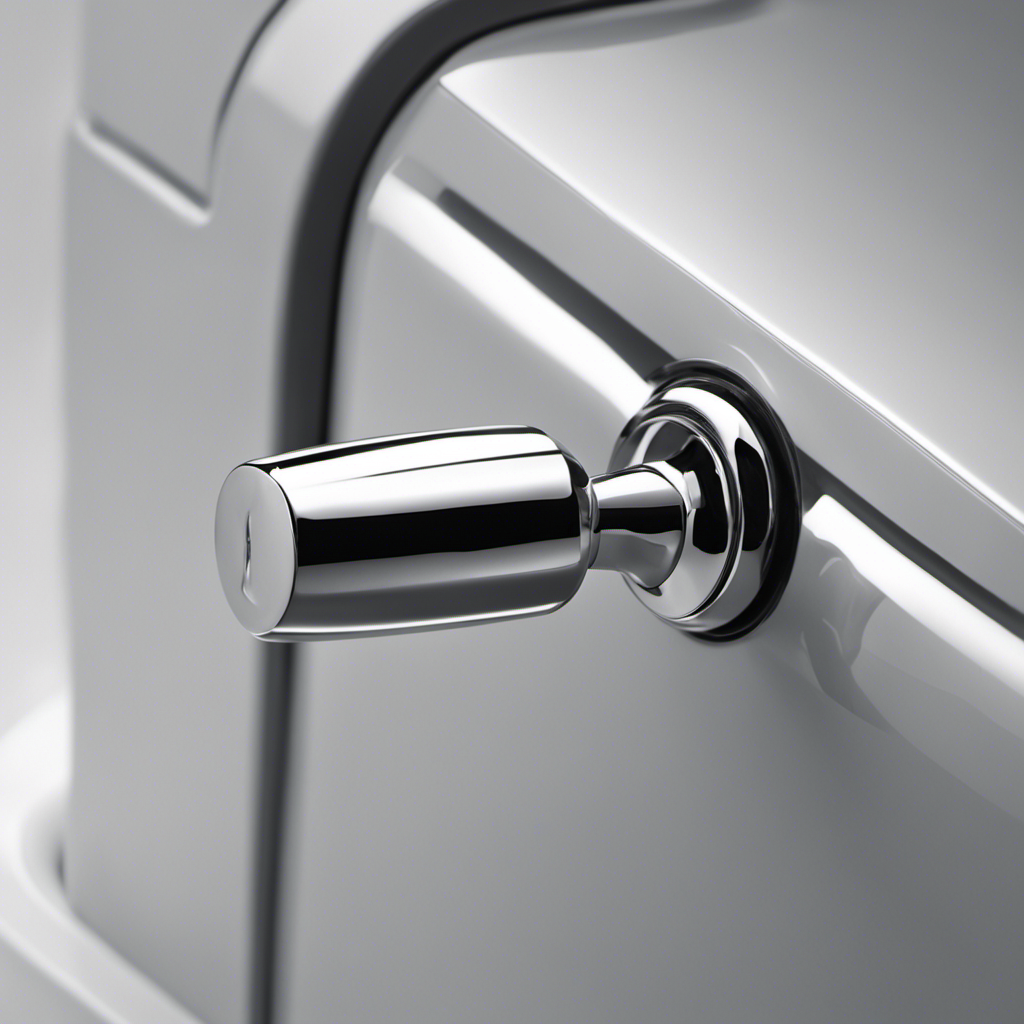
- Align the new handle with the mounting holes on the tank, insert the mounting bolts, and securely tighten them.
- Test the new flush handle by pressing down and flushing the toilet, ensuring firm attachment and smooth flushing.
Tools and Materials Needed
To replace the toilet flush handle, you’ll need a wrench and a new handle. It’s important to have the right tools and materials to ensure a successful replacement.
One common mistake to avoid is using the wrong size wrench, as this can damage the handle or the toilet itself. Make sure to use a wrench that fits the nut securely.
Another mistake is not turning off the water supply before starting the replacement. This can lead to water leakage and potential damage.
When choosing a new handle, there are different types available, such as lever handles, push-button handles, and dual-flush handles. Lever handles are the most common and easy to use. Push-button handles are sleek and modern, while dual-flush handles offer water-saving options. Consider the style, functionality, and durability of the handle before making a decision.
Step 1: Shutting Off the Water Supply
First, you’ll want to locate the valve that controls the water supply to the toilet. This valve is usually located on the wall behind the toilet or under the tank. Shutting off the water supply is an important step to avoid any potential mess or flooding. Here’s what you need to do:
- Locate the water supply valve.
- Turn the valve clockwise to shut off the water supply.
- Flush the toilet to drain any remaining water in the tank.
- Use a towel or sponge to soak up any remaining water in the tank.
Troubleshooting common toilet flush handle problems can range from a loose handle to a broken chain. If you’re experiencing frequent issues, it might be a good idea to consider upgrading to a more modern flush handle design.
Step 2: Removing the Old Flush Handle
After shutting off the water supply, it’s time to remove the old flush handle. First, locate the small screw that attaches the handle to the toilet tank. Using a screwdriver, carefully loosen and remove the screw. Be gentle to avoid stripping the screw or breaking the handle. If the handle is particularly rusted, you may need to use some lubricant, such as WD-40, to help loosen it. Apply the lubricant, wait a few minutes, and then try again.
When removing the handle, it’s crucial to pull it straight out to prevent any unnecessary strain on the mechanism inside the tank. Common mistakes to avoid include using excessive force, using the wrong tools, and not properly supporting the tank while removing the handle.
Step 3: Installing the New Flush Handle
Now that you’ve successfully removed the old flush handle, it’s time to install the new one. Here’s a step-by-step guide to help you install the replacement handle and troubleshoot common issues.
- Align the new flush handle with the mounting holes on the toilet tank.
- Insert the handle’s mounting bolts into the holes and tighten them securely.
- Attach the chain or rod from the handle to the flapper or flush valve assembly inside the tank.
- Test the handle by flushing the toilet to ensure it operates smoothly.
If you encounter any issues during the installation, here are some common troubleshooting tips:
- If the handle feels loose, tighten the mounting bolts further.
- If the handle doesn’t move or feels stuck, check for any obstructions or tangled chains inside the tank.
- If the handle doesn’t return to its original position after flushing, adjust the chain length to ensure proper tension.
Step 4: Testing the New Flush Handle
To make sure everything is functioning properly, try flushing the toilet using the new handle. Testing the new flush handle is an important step in the installation process. This procedure allows you to check if the handle is securely attached and if it effectively flushes the toilet.
Start by pressing down on the handle gently, ensuring that it is firmly in place. If the handle feels loose or wobbly, you may need to tighten the mounting nut or adjust the chain length.
Next, give the handle a firm push to simulate a flush. Listen carefully for any unusual sounds or vibrations, as these could indicate a problem.
If the toilet flushes smoothly without any issues, congratulations! You have successfully installed and tested the new flush handle.
If not, refer to the troubleshooting section to identify and resolve common issues.
Frequently Asked Questions
How Do I Know if My Flush Handle Needs to Be Replaced?
If you’re experiencing issues with your toilet flush handle, there are a few signs to look out for. If it’s loose, sticking, or not flushing properly, it may need to be replaced. Troubleshooting common issues can help determine the problem.
Can I Use Any Type of Flush Handle for My Toilet?
Yes, you can use different types of flush handles for your toilet, but it’s important to ensure compatibility. Some alternative flush handle options include lever handles, push-button handles, and touchless handles.
Is It Necessary to Shut off the Water Supply Before Replacing the Flush Handle?
Yes, it is necessary to shut off the water supply before replacing the flush handle. This ensures that no water will flow while you install the new handle. Here’s how to do it.
What Should I Do if the Flush Handle Is Stuck and Won’t Come Off?
If the flush handle is stuck and won’t come off, there are a few troubleshooting steps you can try. First, check if there are any screws or bolts holding it in place. If not, it may be jammed and require some lubrication or gentle tapping to loosen it.
How Often Should I Replace My Flush Handle?
When to replace a flush handle? If it’s loose, rusted, or not working properly, it’s time for a replacement. Signs of a worn-out handle include difficulty flushing or having to jiggle it.
Conclusion
After successfully replacing the toilet flush handle, I couldn’t help but feel a sense of accomplishment and relief.
The smooth motion of the new handle as it effortlessly flushed the toilet was like a breath of fresh air. No more struggling with a faulty handle or worrying about embarrassing situations.
I was now in control, confident in the reliability of my toilet. With this simple fix, I had transformed a mundane task into a triumph of DIY expertise.

Liam’s journey with us started as a consumer. Having faced challenges while setting up his own modern bathroom, he delved deep into research.
Recognizing his knack for simplifying complex information and his authentic writing style, we were thrilled to welcome him aboard. Liam’s articles often merge practicality with style, ensuring readers find the perfect fit for their homes. Liam is an avid hiker off-duty and often jokes about finding the best “natural toilets” Mother Earth has to offer.