As a seasoned DIY enthusiast, I’m always on the lookout for practical home improvement projects. One task that often gets overlooked is setting the toilet flange.
It may seem like a small detail, but trust me, it plays a crucial role in ensuring a leak-free and stable toilet installation.
In this article, I’ll guide you through the step-by-step process of removing the old flange, preparing the area, and installing a brand new one.
Get ready to tackle this project with confidence and precision!
Key Takeaways
- The right tools and materials are essential for a leak-free and stable toilet flange installation.
- Properly inspect and remove the old flange before installing a new one.
- Clear the area around the flange and ensure a secure and level installation for a watertight seal.
- Test the stability, seal, and functionality of the new flange to prevent leaks and plumbing issues.

One N Done Toilet Flange Repair Kit – Toilet Kit For Low or Broken Flange. Toilet Wax Ring Replacement Kit W/Toilet Flange Extender Kit, Easy Toilet Bolts, & Toilet Caps For Bottom of Toilet. (1 Ea.)
Save Time & Money | No wax ring for toilet required. The One N Done toilet flange repair…
As an affiliate, we earn on qualifying purchases.
As an affiliate, we earn on qualifying purchases.
Tools and Materials Needed
You’ll need a few tools and materials to properly set the toilet flange. These are essential for a successful installation and will ensure that the flange is securely attached to the floor.
One of the most common mistakes people make is not using the right tools or skimping on materials. To avoid this, make sure you have a wrench, a screwdriver, and a level.
Additionally, you’ll need a wax ring, bolts, and a flange repair kit in case you encounter any issues.
Troubleshooting tips include checking for leaks, checking the level of the flange, and ensuring that the bolts are securely tightened.

The Clam 2-Piece Toilet Flange Repair Kit, Fits 4" Drain Pipe, Easy Install, Corrosion Resistant Stainless Steel Finish, Fitted for 1/4 Inch and 5/16 Inch Closet Bolts
The Clam 2-Piece Toilet Flange repair kit has a unique 2-piece design to effectively repair your toilet flange,…
As an affiliate, we earn on qualifying purchases.
As an affiliate, we earn on qualifying purchases.
Removing the Old Toilet Flange
When removing the old flange, make sure to inspect it for any cracks or damages. This step is crucial because a damaged flange can lead to leaks and other plumbing issues.
To begin, shut off the water supply to the toilet and remove the toilet bowl. Next, use a wrench or pliers to loosen the bolts securing the flange to the floor. Once the bolts are removed, carefully lift the old flange out of the drain pipe.
Inspect the flange for any cracks or damages that may have caused the issue. If the flange is repairable, use epoxy or a similar adhesive to fix the damage. However, if the flange is beyond repair, it will need to be replaced with a new one.
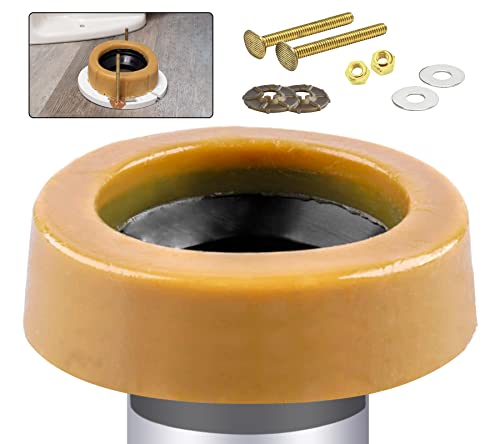
Extra Thick Toilet Wax Ring Kit with Flange and Bolts for Floor Outlet Toilets New Install or Re-seat, Fits 3-inch or 4-inch Waste Lines
Signs of a Bad Toilet Wax Ring?: If you can smell a sewer-like smell coming from your toilet,…
As an affiliate, we earn on qualifying purchases.
As an affiliate, we earn on qualifying purchases.
Preparing the Toilet Flange Area
Before starting, it’s important to clear the area around the flange of any debris or old wax ring residue. This is crucial for ensuring a proper seal with the toilet flange.
When it comes to toilet flange installation, there are some common problems that can arise if not done correctly. One issue is an uneven or unstable flange, which can cause the toilet to wobble or leak. To avoid this, make sure the flange is securely fastened to the floor using screws or bolts.
Another problem is a faulty wax ring seal, which can lead to leaks and odors. To prevent this, choose a high-quality wax ring and ensure it is properly aligned with the flange before installing the toilet. Additionally, applying a thin layer of plumber’s putty around the flange can help create a watertight seal.
One N Done Toilet Flange Repair Kit – Toilet Kit For Low or Broken Flange. Toilet Wax Ring Replacement Kit W/Toilet Flange Extender Kit, Easy Toilet Bolts, & Toilet Caps For Bottom of Toilet. (1 Ea.)
Save Time & Money | No wax ring for toilet required. The One N Done toilet flange repair…
As an affiliate, we earn on qualifying purchases.
As an affiliate, we earn on qualifying purchases.
Installing the New Toilet Flange
To install the new toilet flange, it’s essential to align it properly with the existing drain pipe. Start by removing the old flange if you’re replacing a broken one. Use a hacksaw or reciprocating saw to cut the flange and remove it from the drain pipe.
Next, clean the area around the pipe to remove any debris or old wax. Now, take the new toilet flange and slide it over the drain pipe. Make sure it sits flush against the floor and aligns with the bolt holes in the toilet base.
Use screws or bolts to secure the flange to the floor, ensuring it’s tightly in place. Finally, apply plumber’s putty or silicone caulk around the base of the flange to create a watertight seal.
Troubleshooting common installation issues include making sure the flange is level with the floor and ensuring the bolts align properly with the toilet base.
Securing and Testing the Toilet Flange
Once you’ve aligned the new toilet flange properly and secured it to the floor, it’s time to test its stability and ensure a tight seal. Testing the toilet flange is crucial to avoid any potential leaks or plumbing issues.
Here are some steps to follow for testing and troubleshooting common issues:
-
Water Test: Pour water into the toilet bowl and flush it. Observe if there are any leaks around the base of the toilet or from the flange area.
-
Rocking Test: Apply pressure to the toilet bowl by gently rocking it back and forth. If the flange is secure, the toilet should not move or rock.
-
Odor Test: Check for any foul odors coming from the toilet area. This could indicate a loose or improperly sealed flange.
-
Visual Inspection: Examine the flange for any cracks, damage, or signs of wear. Any issues should be addressed promptly to prevent further problems.
Conclusion
After carefully removing the old toilet flange and preparing the area, the installation of the new toilet flange is crucial for a secure and functional bathroom fixture. With the right tools and materials, this process can be accomplished smoothly. However, ensuring a proper seal and stability is essential to avoid any future plumbing issues.
By following these steps, you can have confidence in a job well done.
Stay tuned for our next article, where we will discuss how to maintain and troubleshoot common toilet flange problems.