Are you tired of a wobbly toilet that just won’t stay put? Well, you’re not alone! Did you know that over 30% of toilets become loose over time?
But don’t worry, because in this article, we’re going to show you exactly how to tighten your toilet to the floor. With a few simple steps and the right tools, you’ll have a sturdy and secure toilet that will stay in place for years to come.
So let’s get started!
Key Takeaways
- Assess the stability and condition of the toilet and floor before tightening.
- Gather the necessary tools such as an adjustable wrench, screwdriver, level, and caulking gun.
- Use the appropriate tools to remove and reinstall the toilet, ensuring proper alignment and a secure seal.
- Tighten the bolts evenly and securely, avoiding overtightening to prevent damage or leaks.

Universal Toilet Tank to Bowl Bolts Kit, Heavy Duty Toilet Bolts, Waterproof Stainless and Rubber Washers Gaskets with Extra Long Nut Screw for Fastening (Silver) (2, Short)
【Reliable Material】Our toilet bolts, nuts and flat washers are made of premium stainless steel, which are anti-corrosion, anti-rust…
As an affiliate, we earn on qualifying purchases.
As an affiliate, we earn on qualifying purchases.
Assessing the Problem
To assess the problem, you’ll need to check if the toilet is wobbling or loose. Start by placing your hands on either side of the toilet bowl and gently rocking it back and forth. If you feel any movement, it indicates that the toilet is not stable and needs to be tightened to the floor.
Next, evaluate the condition of the floor around the base of the toilet. Look for any cracks, soft spots, or water damage, as these can contribute to the instability of the toilet.
Once you have assessed the toilet stability and evaluated the floor condition, you can proceed to gather the necessary tools for tightening the toilet to the floor.

ZZJMCH 12 Pack White Multi Purpose Furniture Plastic Shims for Leveling Extreme Weight Capacity Wedges Easy to Snap Cut-to-fit Size Leveler for Toilet Shims, Doors, Windows, Sheds, Table
Multi Purpose Furniture Plastic Shims Adjustable size: 3.86 x 0.31 inch/ 10 x 0.8 cm, White, (12 Pcs)…
As an affiliate, we earn on qualifying purchases.
As an affiliate, we earn on qualifying purchases.
Gathering the Necessary Tools
I’ll need a few tools to get started on securing the toilet in place. Proper tool maintenance is crucial for successful repairs and troubleshooting common problems. Here are the essential tools you’ll need:
| Tools | Function |
|---|---|
| Adjustable wrench | Tighten or loosen bolts |
| Screwdriver | Remove or install screws |
| Level | Ensure toilet is level |
| Caulking gun | Apply caulk for a secure seal |
To ensure your tools are in good working condition, regularly clean and lubricate them. This will prevent rust and ensure smooth operation. When troubleshooting common problems, always refer to the manufacturer’s instructions for specific guidelines. Remember, a secure toilet is essential for avoiding leaks and maintaining proper functionality. By gathering these tools and properly maintaining them, you’ll be well-prepared to tackle any toilet tightening task.

Oatey Fix-It Stainless Steel Flange Repair Ring, Adjustable Toilet Flange Repair Kit for Broken or Cracked Mounting Flanges, Secure Seal
REPAIRS BROKEN OR DAMAGED FLANGES: Easily fixes broken, cracked, or worn-out toilet mounting flanges without full replacement, restoring…
As an affiliate, we earn on qualifying purchases.
As an affiliate, we earn on qualifying purchases.
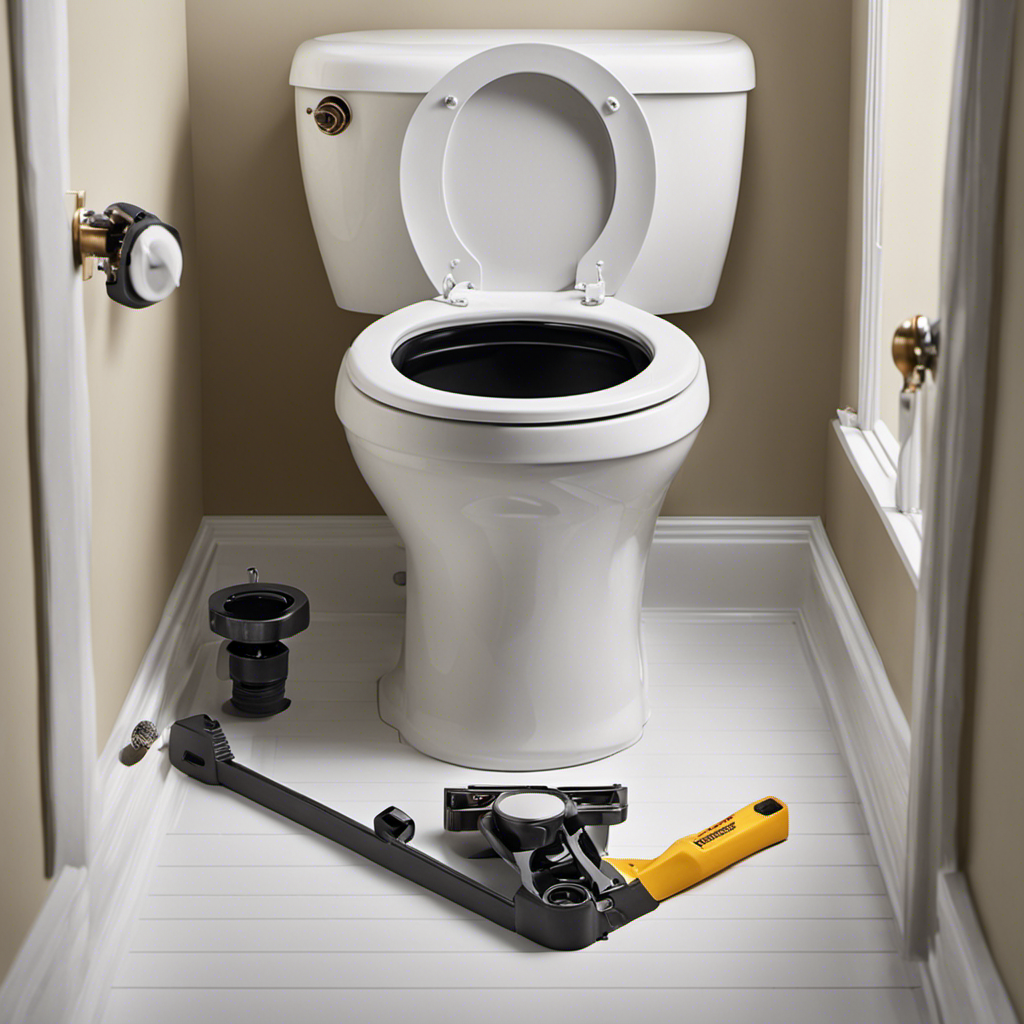
Removing the Toilet
When removing the toilet, it is important to consider proper tool selection, securing bolts tightly, and checking for leaks.
First, make sure you have the necessary tools such as a wrench and pliers to effectively remove the toilet.
Next, ensure that the bolts securing the toilet to the floor are tightened securely to prevent any movement during removal.
Proper Tool Selection
You can use a wrench or pliers to tighten the bolts securing the toilet to the floor. Proper tool selection is crucial for successful tightening. When it comes to tool maintenance, keep your wrench and pliers clean and lubricated to ensure optimal performance. Common mistakes include using the wrong size wrench or pliers, which can lead to stripped bolts or damaged toilet fixtures. To avoid these issues, refer to the table below for the recommended tool sizes for different toilet bolt types:
| Bolt Type | Tool Size |
|---|---|
| Standard | 1/2 inch |
| Hexagonal | 7/16 inch |
| Square | 3/8 inch |
| Wing | 1/4 inch |
| Slotted | Screwdriver |
Securing Bolts Tightly
Using the appropriate tool size and ensuring proper maintenance is essential for securely fastening the bolts.
To secure the bolts tightly, first, make sure the bolts are positioned properly. Align them with the holes on the toilet base and the floor flange.
Next, use a wrench or a socket set with the correct size to tighten the nuts on the bolts. Apply firm pressure until the nuts are snug, but be careful not to overtighten, as this can crack the toilet base.
If you encounter any issues during the tightening process, troubleshooting may be required. Common issues include stripped threads, loose bolts, or a wobbly toilet.
In these cases, consider using a repair kit or consulting a professional plumber for assistance.
Checking for Leaks
To prevent potential issues, it’s important to regularly check for leaks in the plumbing system. Here are some steps to help you effectively troubleshoot toilet leaks and check for water damage:
-
Inspect the Toilet Tank: Start by removing the tank lid and checking for any visible signs of water leaking around the bolts, gaskets, or valves. Look for puddles or water stains on the floor or walls near the toilet.
-
Check the Supply Line: Examine the supply line that connects the toilet tank to the water supply. Make sure there are no cracks, loose connections, or dripping water.
-
Test the Flush Valve and Flapper: Flush the toilet and observe the flush valve and flapper. They should close tightly after the flush. If there is continuous water flow or if the flapper is worn out, it may cause leaks.
Regularly checking for water damage and troubleshooting toilet leaks can help you detect and prevent potential plumbing issues, saving you from costly repairs in the long run.

VortecSys Upgrade Toilet Seat Fitting Tool, Toilet Seat Repair Wrench 10/13/17mm Professional Universal Plastic High-Strength Installation Tool (1 Pack)
【Universal swivel design】Adopting swivel connector design, no need to repeatedly adjust the angle of the wrist, you can…
As an affiliate, we earn on qualifying purchases.
As an affiliate, we earn on qualifying purchases.
Inspecting and Preparing the Floor
First, make sure that the floor is clean and free from any debris. Proper floor preparation is crucial for a successful toilet installation. Start by inspecting the floor for any signs of damage, such as cracks or rot. If there are any issues, you should address them before proceeding. Additionally, ensure that the floor is level to prevent any wobbling or instability. Use a level tool to check for any unevenness and make necessary adjustments.
To help you understand the floor inspection process, here is a table outlining the key steps:
| Step | Description |
|---|---|
| 1 | Clean the floor and remove any debris |
| 2 | Inspect the floor for cracks, rot, or other damage |
| 3 | Level the floor using a level tool |
| 4 | Make necessary adjustments to achieve a level surface |
Reinstalling the Toilet
Now, you’ll want to carefully align the toilet bowl with the bolts on the floor flange. Make sure the wax ring is in place and centered on the flange. Gently lower the toilet bowl onto the wax ring, ensuring a proper seal.
Here are some reinstalling techniques and troubleshooting tips to consider:
- Use a level to ensure the toilet bowl is sitting evenly on the floor.
- Tighten the bolts evenly, alternating between each side, to prevent uneven pressure.
- Check for any leaks by flushing the toilet and inspecting the base for water seepage.
By following these techniques and troubleshooting tips, you can ensure a secure and tight fit when reinstalling your toilet. Once you have completed this step, you can proceed to the next section on securing the toilet to the floor.
Transition: With the toilet bowl now aligned and properly seated on the floor flange, it’s time to secure it firmly to the floor.
Securing the Toilet to the Floor
Once the toilet bowl is properly aligned and seated, it’s important to ensure a secure attachment to the floor. This step is crucial in toilet installation as it prevents common toilet problems such as leaks and wobbling.
To secure the toilet to the floor, start by tightening the bolts that hold the toilet in place. Using a wrench, alternately tighten each bolt until they are snug. Be careful not to overtighten, as this can crack the toilet base.
Once the bolts are secure, check for any movement or wobbling. If there is any, use shims to stabilize the toilet and then retighten the bolts. Ensuring a tight and secure attachment will provide a stable and leak-free toilet.
Now that the toilet is securely attached to the floor, it’s time to test for proper tightness.
Testing for Proper Tightness
To ensure that your toilet is properly secured and functioning correctly, there are a few key points to consider.
First, check for any audible wobbling or rocking when you apply pressure to the toilet. This can indicate that the toilet is not securely fastened to the floor.
Next, visually inspect the base of the toilet for any gaps between the toilet and the floor. These gaps can also indicate a loose connection.
Lastly, check for any water leaks around the base of the toilet, as this can be a sign of improper sealing and may require further attention.
Audible Wobbling or Rocking
If you hear an audible wobbling or rocking when you sit on the toilet, it’s likely that the toilet is not securely tightened to the floor. This can be a cause for concern as it can lead to leaks and potential damage to the plumbing system.
To stabilize a wobbly toilet and prevent toilet movement, follow these steps:
- Ensure that the toilet is properly aligned with the floor flange.
- Tighten the closet bolts by turning them clockwise with a wrench.
- Use plastic shims to fill any gaps between the toilet base and the floor.
By properly securing the toilet to the floor, you can eliminate any wobbling or rocking and ensure a stable and leak-free toilet.
Regularly checking and tightening the toilet’s connections is essential for maintaining a functional and safe bathroom environment.
Visual Inspection for Gaps
Now, let’s move on to visual inspection techniques to identify gaps between your toilet and the floor. Gaps can lead to wobbling and instability, so it’s important to address them promptly.
To visually inspect for gaps, first, ensure the toilet is clean and dry. Then, crouch down and visually inspect all sides of the base where it meets the floor. Look for any noticeable gaps or spaces between the two surfaces. Common causes of these gaps include worn-out wax seals, loose bolts, or an uneven floor.
It’s essential to fix these issues to ensure a secure and stable toilet installation.
In the next section, we will discuss how to address these common causes of gaps and tighten your toilet to the floor effectively.
Check for Water Leaks?
Check if there are any water leaks by examining the area around the base of the toilet. Water leak detection is crucial in troubleshooting leaks and preventing potential damage. Here are three key steps to help you in this process:
-
Look for puddles or dampness: Thoroughly inspect the floor around the toilet for any signs of water accumulation or wetness. Leaks often manifest as small puddles or damp spots.
-
Check for discoloration: Pay attention to any discoloration or stains on the floor or walls near the toilet base. These can indicate water leaks that have been occurring over a longer period.
-
Monitor water meter: To further confirm the presence of a leak, turn off all water sources in your home and observe the water meter. If it continues to run or shows movement, there may be a leak in the toilet or elsewhere.
Conclusion
In conclusion, tightening your toilet to the floor is a simple and important task that ensures stability and prevents leaks. By following the steps outlined in this article, you can easily secure your toilet and have peace of mind knowing it is properly installed.
Did you know that according to a study conducted by the National Association of Home Builders, toilet-related water leaks account for approximately 12% of all household water use? Taking the time to tighten your toilet can help reduce this wastage and save you money on your water bill.