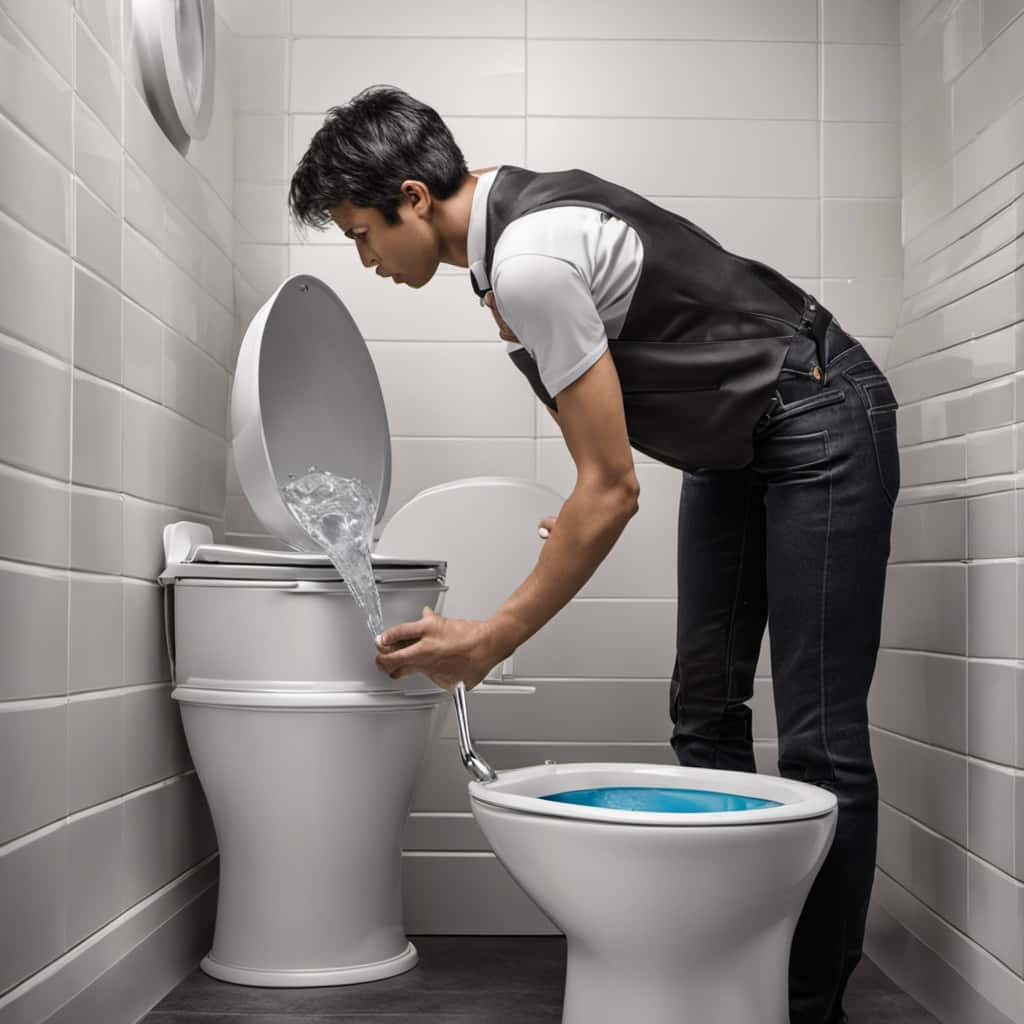
Ever pondered whether detaching a toilet is a challenging job? Let us reassure you, it’s not as intimidating as it might appear.
In this article, we’ll walk you through the step-by-step process of disconnecting a toilet, from shutting off the water supply to testing the flushing mechanism. By the end, you’ll have the knowledge and confidence to tackle this plumbing task with ease.
So let’s dive in and master the art of disconnecting a toilet!
Key Takeaways
- Disconnecting a toilet is a necessary step for thorough maintenance and repair.
- Proper toilet installation is important for stability and functionality.
- Loosening the bolts with a wrench is a key step in disconnecting the toilet.
- Cleaning and inspecting toilet components regularly prevent potential issues and ensure optimal performance.

WORKPRO 3 Piece Groove Joint Plier Set, 12/10/8 Inch Adjustable Water Pump Pliers, Straight Jaw Pliers for Home Repair, Gripping, Nuts, Bolts, Pipe & Fittings
What You Get – Comes with 8-inch groove joint straight jaw, 10-inch groove joint straight jaw, and 12-inch…
As an affiliate, we earn on qualifying purchases.
As an affiliate, we earn on qualifying purchases.
Required Tools for Disconnecting a Toilet
To disconnect a toilet, we’ll need to have a pair of adjustable pliers on hand.
Proper wax ring installation is crucial for preventing common toilet bowl problems.
The first step in disconnecting a toilet is to shut off the water supply by turning the shut-off valve clockwise.
Next, flush the toilet to remove any remaining water in the bowl and tank.
Using the adjustable pliers, loosen the nuts that connect the water supply line to the bottom of the tank and the bolts that secure the toilet to the floor.
Carefully lift the toilet bowl straight up, making sure not to damage the wax ring.
If the wax ring is damaged or worn out, it’s important to replace it before reinstalling the toilet.

Hibbent Extra Thick Toilet Wax Ring Replacement Kit, Universal Toilet Seal Ring with Brass Toilet Floor Bolts and Retainer Washers, PE Flange Fits 3 Inch and 4 Inch Drain Pipes
Universal Toilet Wax Ring: The Hibbent toilet flange is compatible with 3-inch and 4-inch waste lines, suitable for…
As an affiliate, we earn on qualifying purchases.
As an affiliate, we earn on qualifying purchases.
Step 1: Shutting Off the Water Supply
To shut off the water supply when disconnecting a toilet, we need to turn the shut-off valve clockwise. This valve is typically located on the wall behind or beside the toilet. It’s crucial to shut off the water supply before disconnecting the toilet to avoid any water leakage. Once the valve is turned clockwise, it will stop the flow of water to the toilet tank. This step is essential for preventing any water damage and troubleshooting leaks during the disconnection process.
Before starting any work, it’s important to have the required tools handy. You’ll need an adjustable wrench or pliers to effectively turn the shut-off valve. Remember to turn off the valve completely to ensure a successful and mess-free toilet removal.

Winisok 17 Inch Water Meter Key With 4 Way Multi-Functional Utilities Key, Enforced Rebar Water Shut Off Tool Wrench T-handle for Curb Main and Water Meters, Underground Stop or Waste Valves
【17-Inch Extended Length for Effortless Access】 – Our upgraded 17-inch water meter key features a 3/4-inch opening, giving…
As an affiliate, we earn on qualifying purchases.
As an affiliate, we earn on qualifying purchases.
Step 2: Emptying the Toilet Bowl
We begin by draining the toilet bowl, which involves removing the water inside. To do this, you’ll need to turn off the water supply valve, which we discussed in the previous step.
Once the water supply is shut off, you can flush the toilet to remove most of the water. However, there will still be some remaining water in the bowl. To empty it completely, you can use a plunger or a sponge and bucket to soak up the remaining water. Make sure to dispose of the water properly, following local regulations and guidelines for waste disposal. It’s also important to take safety precautions while handling the water, such as wearing gloves and avoiding any contact with your eyes or mouth.
With the toilet bowl emptied, we can now move on to the next step: removing the tank lid.

Amazon Brand | Ring King Toilet Bowl Mop for Deep Clean |Pack of 2 Long Plastic Handled Swab – 13 Inches Soft Toilet Brush for Dead Corner | Silk Scrubber for Toilet Bowl, Washbasin, Bathtub & Tiles
Premium Material Of Toilet Swab: Elevate your bathroom cleaning routine with our Premium Polypropylene Toilet Swab – a…
As an affiliate, we earn on qualifying purchases.
As an affiliate, we earn on qualifying purchases.
Step 3: Removing the Tank Lid
After draining the toilet bowl, the next step is to remove the tank lid. This is an important step in properly disconnecting a toilet and ensures access to the inner workings of the tank for maintenance and repairs.
To remove the tank lid, locate the screws or bolts securing it in place. These are usually located at the back of the tank. Using a screwdriver or wrench, carefully loosen and remove the screws or bolts.
Once the screws or bolts are removed, gently lift the tank lid and set it aside. Be cautious not to damage the lid or any surrounding components.
It’s crucial to perform proper tank maintenance by regularly removing the lid and inspecting for any common tank lid problems, such as cracks or leaks.
Step 4: Disconnecting the Water Supply Line
Once the tank lid has been removed, we can proceed to disconnecting the water supply line. Proper water supply is crucial for the functioning of a toilet, so it’s important to disconnect the water supply line correctly.

To do this, locate the shut-off valve near the toilet and turn it clockwise to shut off the water flow. This will prevent any water from entering the tank during the disconnection process.
Next, use an adjustable wrench to loosen the nut connecting the water supply line to the bottom of the tank. Once the nut is loosened, carefully remove the water supply line from the tank. Be cautious not to damage the threads or any other components during this step.
Step 5: Removing the Toilet Tank
To continue with the process of disconnecting a toilet, we’ll now move on to the next step of removing the toilet tank. This step is crucial in order to access the wax ring and troubleshoot any leaks that may be occurring. Here is a step-by-step guide to removing the toilet tank:
- Turn off the water supply to the toilet by shutting off the valve located behind the tank.
- Flush the toilet to drain any remaining water from the tank.
- Disconnect the water supply line from the bottom of the tank using an adjustable wrench.
Step 6: Disconnecting the Toilet Bowl From the Floor
To disconnect the toilet bowl from the floor, we’ll use our wrench to loosen the bolts securing it in place. Proper toilet installation requires careful attention to this step, as it’s crucial for both the stability and functionality of the toilet.

Common toilet repair issues often stem from improperly installed toilets, so it’s important to ensure that all connections are secure and tight. Using the wrench, we’ll turn the bolts counterclockwise until they’re loose enough to remove. It’s important to note that some toilets may have plastic caps covering the bolts, which can be easily removed by hand.
Once the bolts are loosened, we can move on to the next step, which involves removing the wax ring and preparing for the installation of a new one.
Step 7: Removing the Wax Ring
Now that the toilet bowl has been disconnected from the floor, it’s time to move on to the next step: removing the wax ring.
Proper wax ring removal is crucial to ensure a successful toilet disconnection.

In this discussion, we’ll also explore alternative wax ring options that may be worth considering.
Let’s get started!
Proper Wax Ring Removal
We recommend carefully removing the wax ring during toilet disconnection. Proper wax ring removal is essential to ensure a clean and thorough disconnection process. Here are the steps to follow:
- Prepare the area: Before removing the wax ring, make sure to clean the flange and surrounding area to avoid any debris or residue that may interfere with the removal process.
- Loosen the toilet: Gently rock the toilet back and forth to loosen it from the wax ring. Be cautious not to apply too much force, as this may damage the toilet or flange.
- Remove the wax ring: Once the toilet is loosened, carefully lift it off the flange, exposing the wax ring. Use a putty knife or scraper to scrape off the old wax, ensuring a clean surface for future installation.
Alternative Wax Ring Options
For an easier wax ring removal process, consider using an alternative wax ring option.
Traditional wax rings can be messy and difficult to remove, but alternative materials offer a more convenient and efficient solution.
One popular alternative is the rubber wax ring. Made from a combination of rubber and wax, this option provides a tight seal while also being easier to install and remove.
Another option is the foam wax ring, which is made from a lightweight foam material. It offers the advantage of being able to compress and expand, ensuring a secure fit. However, it may not be as durable as other alternatives.
When considering alternative wax ring options, weigh the pros and cons of each material to determine which one best suits your needs.
Step 8: Cleaning and Inspecting the Toilet Components
After disconnecting the toilet, it’s essential to thoroughly clean and inspect all of its components. Proper cleaning techniques and thorough inspection of toilet parts ensure optimal performance and prevent any potential issues. Here are the steps to follow:
- Clean the toilet bowl: Use a toilet bowl cleaner and a toilet brush to scrub the bowl thoroughly. Pay attention to the rim, under the rim, and the trapway.
- Inspect the flush valve: Check if the flush valve is working correctly by flushing the toilet and observing if it closes properly and stops the water flow.
- Check the fill valve: Ensure that the fill valve is functioning properly by observing if it stops the water flow when the tank is full.
Step 9: Replacing the Wax Ring
Replacing the wax ring involves carefully removing the old ring and installing a new one to ensure a proper seal between the toilet and the floor. Proper wax ring installation is crucial for preventing leaks and maintaining the integrity of the toilet. Common wax ring problems include leaks, foul odors, and unstable toilet fixtures. To help you understand the importance of this step, here is a table summarizing the key steps for replacing the wax ring:
| Step | Description |
|---|---|
| 1 | Shut off the water supply and empty the toilet tank. |
| 2 | Disconnect the water supply line and remove the toilet bolts. |
| 3 | Carefully lift the toilet and remove the old wax ring. |
| 4 | Clean the toilet flange and inspect for any damage. |
| 5 | Install the new wax ring and align it with the toilet flange. |
| 6 | Lower the toilet onto the wax ring and secure it with bolts. |
| 7 | Reconnect the water supply line and turn on the water. |
| 8 | Check for leaks and ensure a proper seal. |
Step 10: Reattaching the Toilet Bowl to the Floor
To reattach the toilet bowl to the floor, we’ll need to use screws and a wrench. Follow these steps for proper toilet installation:
- Position the toilet bowl over the flange and align it with the bolts coming through the floor.
- Press the toilet bowl firmly against the wax ring to create a watertight seal.
- Place washers and nuts onto the bolts and tighten them with a wrench until the toilet bowl is secure.
It is important to avoid common toilet installation mistakes during this step. One common mistake is overtightening the nuts, which can crack the toilet bowl. Another mistake isn’t properly aligning the toilet bowl with the bolts, which can result in an uneven and unstable installation.
Step 11: Installing the Toilet Tank
Now we need to install the toilet tank. Before we start, it’s important to note that there are alternative toilet tank options available in the market that you may consider. However, for the purpose of this guide, we’ll focus on the traditional tank installation process.
To begin, carefully lift the toilet tank and place it onto the bowl. Make sure the tank aligns properly with the mounting holes on the bowl. Once in position, insert the tank bolts through the mounting holes and secure them with the accompanying nuts.
Next, connect the water supply line to the bottom of the tank. Tighten the connection with an adjustable wrench to ensure a snug fit, but be careful not to overtighten and risk damaging the threads.
After installation, it’s crucial to check for any potential leaks. Troubleshooting toilet tank leaks involves inspecting the tank bolts, the connection between the tank and bowl, and the water supply line. If you notice any leaks, tighten the connections or replace any faulty parts.

Step 12: Reconnecting the Water Supply Line
After successfully installing the toilet tank, we can now move on to reconnecting the water supply line. This step is crucial to ensure that the toilet functions properly and doesn’t leak. Here are the key steps to follow for reconnecting the water supply line:
- Replace the water supply line if necessary: Inspect the existing supply line for any signs of damage or wear. If needed, replace it with a new one to prevent leaks.
- Connect the supply line to the fill valve: Take the threaded end of the supply line and screw it onto the fill valve located at the bottom of the toilet tank. Ensure it’s tightened securely but not over-tightened.
- Check for leaks: Once the supply line is connected, turn on the water supply and carefully inspect the connection for any leaks. If you notice any leaks, tighten the connection further or consider replacing the supply line.
Step 13: Filling the Toilet Tank and Checking for Leaks
Let’s begin by filling the toilet tank and checking for leaks. Proper toilet tank maintenance is essential to prevent leaks and ensure the efficient operation of your toilet. To help you understand the process better, here is a table summarizing the steps involved in filling the toilet tank and checking for leaks:
| Step | Description |
|---|---|
| 1 | Turn on the water supply valve to fill the tank. |
| 2 | Watch the water level rise in the tank. |
| 3 | Check for any visible leaks around the tank, supply line, and valve. |
| 4 | Listen for any unusual sounds indicating a potential leak. |
Step 14: Testing the Flushing Mechanism
Now that we’ve successfully filled the toilet tank and checked for leaks, it’s time to move on to testing the flushing mechanism.
This step is crucial to ensuring the proper operation of the toilet. By testing the flushing mechanism, we can verify that it functions correctly and troubleshoot any flushing issues that may arise.

Flushing Mechanism Functionality
Testing the flushing mechanism is an essential step in ensuring the functionality of the toilet. By conducting this test, you can identify any potential issues with the flushing mechanism and address them promptly.
Here are three common flushing mechanism problems to look out for during the testing process:
- Weak Flush: If the toilet flushes weakly or incompletely, it could indicate a problem with the water pressure or the flush valve. Check the water supply and the flush valve for any blockages or malfunctions.
- Continuous Running: If the toilet continues to run even after flushing, it could be due to a faulty fill valve or a flapper that doesn’t seal properly. Inspect these components and replace them if necessary.
- No Flush: If the toilet doesn’t flush at all, it could be caused by a clog in the trap or a malfunctioning handle mechanism. Clear any clogs and ensure the handle is properly connected to the flushing mechanism.
Proper Toilet Operation
After identifying and troubleshooting any flushing mechanism problems, we can now move on to properly testing the toilet’s functionality.
Testing the flushing mechanism is an essential step in ensuring the proper operation of a toilet. To begin, flush the toilet and observe the water flow. It should flow smoothly and quickly into the bowl, creating a strong siphon effect. If the water flow is weak or sluggish, there may be an obstruction in the pipes or a problem with the flapper valve.

Additionally, check the refill process to ensure that the tank fills up properly and stops at the correct water level. If there are any issues, such as continuous running or incomplete filling, adjustments may be needed.
Regular testing and maintenance of the flushing mechanism can help prevent common toilet problems and ensure optimal performance.
Troubleshooting Flushing Issues
To troubleshoot flushing issues, we’ll continue our discussion by examining the functionality of the toilet’s flushing mechanism. Follow these steps to identify and fix common toilet problems:
- Check the water level: Ensure that the water level in the tank is at the recommended mark. If it’s too low, adjust the fill valve to increase the water level.
- Inspect the flapper: A faulty flapper can cause a running toilet. Check for any damage or debris that may prevent it from sealing properly. If necessary, replace the flapper.
- Test the flush handle: Make sure the flush handle is properly connected to the flushing mechanism. If it’s loose or not engaging, tighten or adjust it as needed.
Frequently Asked Questions
How Do I Know if It’s Necessary to Disconnect a Toilet?
To determine if it’s necessary to disconnect a toilet, consider factors such as persistent clogs or the need to replace the toilet seat. Knowing how to fix a clogged toilet and replace a toilet seat can help inform your decision.

What Are the Common Reasons for Disconnecting a Toilet?
Common problems that may require disconnecting a toilet include clogs, leaks, and repairs. Troubleshooting tips can help identify the issue and determine if disconnecting is necessary. It’s important to follow proper procedures to ensure a successful disconnection.
Can I Disconnect a Toilet Without Shutting off the Water Supply?
Disconnecting a toilet without shutting off the water supply can be tricky. It’s important to remember that plumbing is a delicate art, and troubleshooting toilet repairs requires precision. Let us guide you through the process.
Is It Possible to Disconnect a Toilet Without Removing the Tank Lid?
Disconnecting a toilet without removing the tank lid can be challenging, but with the right tools and techniques, it is possible. We will share toilet troubleshooting tips and DIY upgrades to enhance your toilet without the need for disconnecting.
How Do I Test the Flushing Mechanism After Disconnecting and Reconnecting the Toilet?
Testing the flushing mechanism after disconnecting and reconnecting the toilet is crucial for troubleshooting. We recommend filling a bucket with water and pouring it into the bowl. If it flushes properly, you’ve successfully reconnected the toilet.
Conclusion
Disconnecting a toilet may seem like a daunting task, but with the right tools and steps, it can be done easily.
By following the outlined directions, you can confidently shut off the water supply, remove the tank lid, disconnect the water supply line, and install the toilet tank.
Don’t forget to fill the tank, check for leaks, and test the flushing mechanism.
With these practical tips, disconnecting a toilet will no longer be a challenging feat.
So go ahead and tackle that toilet disconnect with confidence!