I’ve uncovered the key to a smooth bathroom makeover: universal toilet tank replacement. It’s akin to locating the elusive piece that completes the puzzle flawlessly. Thanks to this brilliant approach, upgrading your toilet becomes a breeze, eliminating any concerns about matching parts.
In this article, I’ll guide you through the process of choosing the right universal tank, removing the old one, and maintaining the new one for long-lasting performance.
Get ready to transform your bathroom with ease and mastery.
Key Takeaways
- Ease of installation
- Compatibility with a wide range of toilets
- Improved water efficiency
- Simplifies plumbing and DIY projects
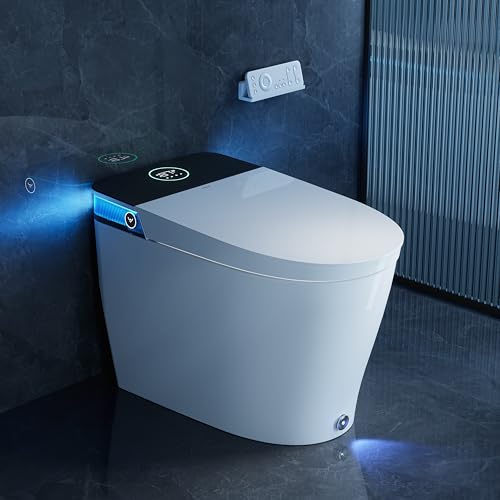
HOROW T38 Artistic Smart Toilet, Bidet Toilet with Powerful Flush, Auto Open/Close Lid, Instant Warm Water, Elongated Heated Seat, Dryer, Night Light, Deodorization
For Low Water Pressure: Smart toilet built-in water tank and pump bring efficient and powerful flushing performance. The...
As an affiliate, we earn on qualifying purchases.
Benefits of Universal Toilet Tank Replacement
One of the main benefits of universal toilet tank replacement is the ease of installation. Universal toilet tanks are designed to be compatible with a wide range of toilets, making the installation process much simpler and faster. This is especially beneficial for individuals who aren’t experienced in plumbing or DIY projects, as it eliminates the need to find a specific tank that matches the existing toilet model.
Another advantage of universal tank replacement is the increased availability of replacement parts. Since universal tanks are designed to fit multiple toilet models, it’s easier to find replacement parts in case of any future maintenance or repairs. This not only saves time but also reduces the hassle of searching for specific parts that may be discontinued or hard to find.

Furthermore, universal toilet tank replacement can also lead to improved water efficiency. Many universal tanks are designed with water-saving features, such as dual-flush mechanisms or adjustable flush settings. By upgrading to a universal tank, homeowners can reduce their water consumption and contribute to water conservation efforts.

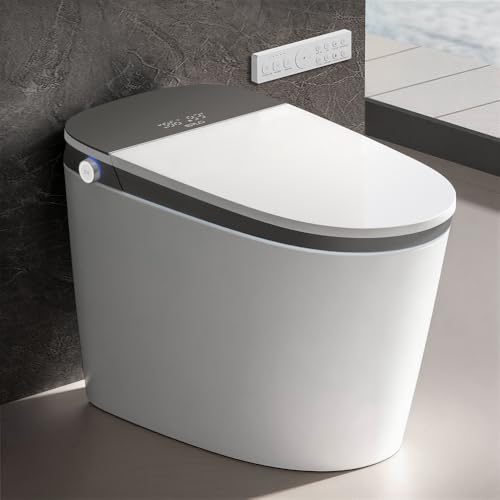
Luxury Smart Toilet with Foam Shield Auto-Open/Close Lid,One Piece Bidet Toilet Heated Seat for Bathrooms, Multiple Cleaning Modes,Aromatic Spray,Air Purification,Smart Foot Sensor
Surrounding Ambient Lighting Design: Full-range atmospheric lighting around the toilet lid brings a new level of visual aesthetics,...
As an affiliate, we earn on qualifying purchases.
Understanding Your Toilet Tank’s Compatibility
To determine if a universal toilet tank is compatible with your existing toilet, I recommend checking the specifications of both the tank and the toilet. This will help ensure a proper fit and avoid any potential issues.
Here are the key factors to consider when assessing toilet tank compatibility:
- Size: Measure the dimensions of your current toilet tank, including the height, width, and depth. Compare these measurements with the dimensions of the universal tank to determine if they match.
- Mounting Holes: Check the number and placement of the mounting holes on your existing toilet bowl. The universal tank should have corresponding holes that align properly with the bowl.
- Flush Mechanism: Examine the flushing mechanism of your current toilet. Ensure that the universal tank has a compatible flushing mechanism, such as a flapper or a dual-flush system.
- Water Supply: Verify the location and size of the water supply line connection on your toilet. Ensure that the universal tank has a compatible water supply connection.
- Toilet Design: Consider the overall design and style of your toilet. Choose a universal tank that complements the aesthetics of your bathroom.

Casta Diva Smart Toilet with Bidet Built in, Auto Open/Close Lid,1000g MaP Flush, Heated Seat & Foam Dispenser, Foot Sensor Auto Flush, Blackout Flush, Bidet Toilet with Tank Built in (CD-K030PRO)
Powerful Flush Toilet: MaP flush performance scores at 1,000 grams —the Casta Diva K030PRO smart toilet with tank...
As an affiliate, we earn on qualifying purchases.
Choosing the Right Universal Toilet Tank
To ensure you find the right universal toilet tank, consider the specific requirements of your existing toilet. Start by measuring the dimensions of your current tank, including its length, width, and height. This will help you determine the appropriate size of the replacement tank. Additionally, take note of the flush valve size and the location of the water inlet. These factors will affect the compatibility of the new tank with your toilet.
Once you have gathered this information, it’s time to read toilet tank reviews to find the best options available. Look for tanks that have positive feedback regarding their durability, flushing power, and ease of installation. Pay attention to any negative reviews that mention compatibility issues or difficulties during installation.
When it comes to installation tips, it’s important to follow the manufacturer’s instructions carefully. Ensure that all the necessary components, such as the fill valve and flush valve, are included with the tank. If any parts are missing or damaged, contact the manufacturer for replacements.
Before beginning the installation process, turn off the water supply to the toilet. Drain the remaining water from the tank and disconnect the water supply line. Remove the old tank and install the new one according to the instructions provided. Double-check all connections and make sure everything is secure before turning the water supply back on.
EPLO Smart Toilet Bidet with Auto Open Close,1000 Gram MaP Flush Score,Foam Dispenser, ADA Comfort Height, Moving Dryer,Auto Flush,Heated Seat,One Piece Elongated Toilet with Tank Built in U8MAX
Exceptional Flush Toilet - Featuring an industry-leading MaP flush performance score of 1000 grams, the EPLO U8MAX delivers...
As an affiliate, we earn on qualifying purchases.
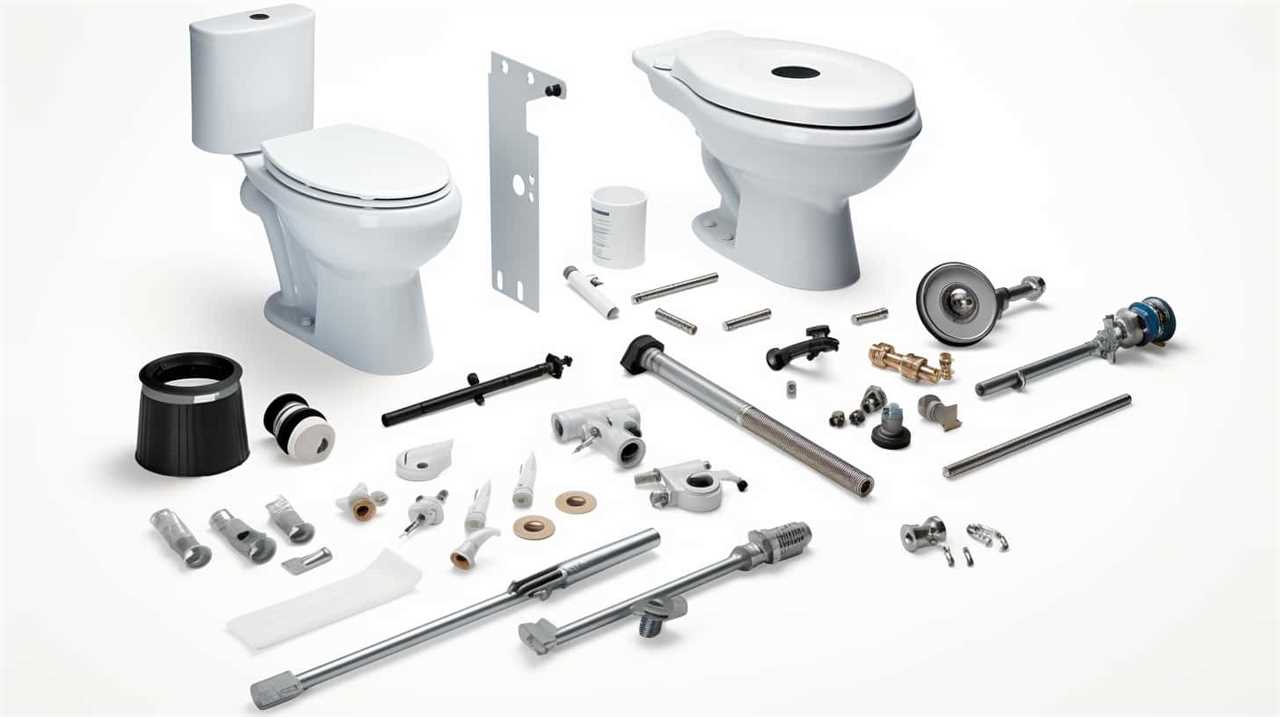
Tools and Materials Needed for Installation
When it comes to installing a universal toilet tank, having the right tools is essential. Some necessary tools include an adjustable wrench, a screwdriver, and pliers. These tools will help you properly remove the old tank and install the new one.

In addition to the tools, it’s important to have the recommended materials on hand, such as a wax ring, bolts, and a water supply line. Having these tools and materials ready will ensure a smooth and successful installation process.
Necessary Tools Explained
I need several tools and materials for the installation of a universal toilet tank replacement. Here is a list of the necessary tools:
- Adjustable wrench: This tool is essential for loosening and tightening nuts and bolts.
- Screwdriver: A screwdriver with both flathead and Phillips head options will be needed to remove and install screws.
- Channel locks: These pliers provide a strong grip and are useful for holding parts in place during installation.
- Teflon tape: This tape is used to wrap around threaded connections to prevent leaks.
- Rags: Having some rags on hand will help with any spills or cleanup during the installation process.
Recommended Materials for Installation
To successfully complete the installation of a universal toilet tank replacement, I will need several tools and materials. The following table provides a concise list of the recommended tools and materials needed for the installation process:
| Tools | Materials |
|---|---|
| Adjustable wrench | Universal toilet tank replacement kit |
| Screwdriver | Wax ring |
| Pliers | Toilet tank bolts |
Using an adjustable wrench, screwdriver, and pliers, I will be able to remove the old tank and install the new one with ease. Additionally, I will need a universal toilet tank replacement kit, which includes all the necessary components for the installation. A wax ring is also required to create a watertight seal between the toilet and the floor. Lastly, toilet tank bolts are essential for securely attaching the tank to the bowl.

Now that we have the recommended tools and materials, let’s move on to the next section, which provides a step-by-step guide to removing the old tank.
Step-By-Step Guide to Removing the Old Tank
To begin the process of removing the old toilet tank, it’s crucial to select the proper tools for the job. This includes a wrench or adjustable pliers to loosen and disconnect the water supply line, as well as a screwdriver to remove any bolts or screws securing the tank to the bowl.
Additionally, safety precautions such as turning off the water supply and wearing gloves should be taken to ensure a smooth and accident-free removal process.
Proper Tool Selection
To remove the old toilet tank, gather the necessary tools for the task. Here are the tools you’ll need:

- Adjustable wrench: This tool will help you loosen and tighten nuts and bolts securely.
- Screwdriver: Choose a flathead or Phillips head screwdriver, depending on the type of screws used in your toilet tank.
- Pliers: Pliers will come in handy for gripping and turning small parts.
- Bucket or container: Have a bucket or container nearby to catch any water that may spill during the removal process.
- Towel or rag: Keep a towel or rag handy to wipe up any spills or drips.
Remember, proper tool maintenance and storage is essential for their longevity. After using the tools, clean them thoroughly and store them in a dry place.
Regularly inspect your tools for any damages or wear and tear and replace them if necessary. By taking care of your tools, they’ll be ready for any future plumbing tasks.
Safety Precautions
I’ll carefully dismantle the old toilet tank, making sure to disconnect all the necessary parts for a safe removal.
Before starting the process, it’s important to take certain safety measures to avoid accidents or damage.
First, ensure that the water supply to the toilet is shut off completely. This can typically be done by turning the valve clockwise.
Next, flush the toilet to drain the tank and remove any remaining water. To prevent any potential leaks or spills, place a towel or bucket underneath the tank.
Use a wrench to disconnect the water supply line from the bottom of the tank.
Finally, carefully remove the tank bolts and washers that connect the tank to the bowl.

Preparing the Area for the New Tank
Before installing the new tank, it’s important to prepare the area properly. Here are the steps you need to follow:
- Turn off the water supply: Locate the shut-off valve near the base of the toilet and turn it clockwise until it stops. This will prevent any water from flowing into the tank during the installation process.
- Drain the tank: Flush the toilet to remove as much water as possible from the tank. If there’s still water left, use a sponge or a towel to soak it up.
- Remove the old tank: Start by disconnecting the water supply line from the bottom of the tank. Then, remove the bolts that secure the tank to the bowl. Carefully lift the tank off the bowl and place it aside.
- Clean the surface: Wipe down the area where the tank was attached to the bowl using a mild detergent and a clean cloth. This will ensure a clean and smooth surface for the new tank.
- Inspect and replace parts: Take a moment to inspect the rubber gasket between the tank and the bowl. If it’s worn or damaged, replace it with a new one. Additionally, check the bolts and washers and replace any that are rusted or corroded.
Installing the Universal Toilet Tank
Now that the area has been properly prepared, I can proceed with installing the universal toilet tank.
To ensure proper installation, it’s important to follow these techniques. Firstly, place the tank onto the bowl, ensuring that the gasket is properly aligned.
Next, insert the bolts through the mounting holes and tighten the nuts securely. It’s essential to evenly tighten the nuts to prevent any leaks.

Once the tank is securely attached to the bowl, connect the fill valve to the water supply line. Make sure to tighten the connection with a wrench, but be careful not to overtighten it, as this can cause damage.
After connecting the fill valve, attach the flapper chain to the flush lever, ensuring that there’s enough slack for proper operation.
Lastly, turn on the water supply and check for any leaks. If there are any leaks, try tightening the connections further or replacing any faulty parts.
Troubleshooting tips include checking the alignment of the tank and bowl, ensuring the gasket is properly seated, and checking for any cracks or damage in the tank.
With proper installation techniques and troubleshooting tips in mind, we can now move on to connecting the water supply lines.
Connecting the Water Supply Lines
To ensure a proper hose connection, it’s important to follow the manufacturer’s instructions and use the correct size and type of hose.
Additionally, leak prevention measures should be taken to avoid any water damage. This includes using thread seal tape or plumber’s putty on the connections and checking for any leaks or drips after installation.
Proper Hose Connection
First, I attach the water supply lines by securing them tightly to the appropriate valve connections. When it comes to hose installation, it’s crucial to ensure hose compatibility with the toilet tank.

Here are the key steps to properly connect the water supply lines:
- Identify the hot and cold water supply valves.
- Attach the corresponding hoses to the valves, ensuring a snug fit.
- Use adjustable pliers to tighten the connection without overtightening.
- Check for any leaks by turning on the water supply and inspecting for drips or seepage.
- If leaks are detected, tighten the connections further or replace the hoses if necessary.
Leak Prevention Measures
Continuing the discussion on proper hose connection, I’ll now address leak prevention measures when connecting the water supply lines.
To ensure a leak-free installation, it’s crucial to follow these steps.
- First, inspect the water supply lines for any signs of damage or wear. Replace them if necessary.
- Next, apply plumber’s tape to the threads of the water supply valve to create a tight seal.
- When connecting the supply lines, hand tighten them firmly, and then give them an additional quarter turn using an adjustable wrench.
After installation, perform a thorough leak detection test by turning on the water supply and checking for any drips or leaks.

If leaks are detected, promptly address them to prevent any further damage.
Adjusting the Water Level and Flush Settings
I adjusted the water level and flush settings using the provided instructions. Here’s what you need to know about adjusting the flush mechanism and exploring water-saving options:
- Flush mechanism adjustment:
The first step in adjusting the flush mechanism is locating the adjustment dial, usually found on the top of the fill valve. By turning the dial clockwise or counterclockwise, you can adjust the amount of water released during each flush. This allows you to optimize the flush for your specific needs. - Water level adjustment:
To adjust the water level in the tank, locate the water level adjustment screw, typically located on the fill valve. By turning the screw clockwise or counterclockwise, you can raise or lower the water level in the tank. It’s important to find the right balance, ensuring enough water for an effective flush without wasting excess water. - Water-saving options:
Many universal toilet tank replacements offer water-saving options. These can include dual-flush mechanisms that allow you to choose between a partial flush for liquid waste and a full flush for solid waste. Some models also feature adjustable flush settings that allow you to control the amount of water used per flush. - Testing and fine-tuning:
After making adjustments, it’s crucial to test the flush to ensure it’s working properly. Flush the toilet multiple times to observe the water level, flush strength, and any potential leaks. Fine-tune the settings as needed to achieve optimal performance. - Consulting the manufacturer:
If you encounter any difficulties or have questions about adjusting the water level and flush settings, consult the manufacturer’s instructions or customer support for guidance. They can provide specific recommendations based on the model you’re using.
Testing for Leaks and Proper Functionality
To ensure proper functionality and detect any leaks, it’s important to conduct a thorough test of the toilet after adjusting the water level and flush settings.
Testing for leaks is crucial to prevent water waste and promote water conservation. One way to test for leaks is by using food coloring. Simply add a few drops of food coloring to the toilet tank and wait for about 30 minutes without flushing. If the water in the toilet bowl changes color, it indicates a leak.

Another method is the dye tablet test, where a specially designed tablet is placed in the tank. If the tablet dissolves and colors the water, there may be a leak.
Additionally, it’s important to check the toilet’s flush functionality. Ensure that the toilet flushes properly and the water drains efficiently without any blockages.
Regular maintenance and testing can help identify and fix any issues, ensuring that the toilet operates efficiently and conserves water.
Troubleshooting Common Installation Issues
When troubleshooting common installation issues, it’s important to address any potential problems that may arise during the process. Here are some key points to consider when troubleshooting leaks and other installation problems:

- Check for loose connections: Ensure that all connections between the toilet tank and the water supply line are securely tightened. Loose connections can cause leaks.
- Inspect the gasket: The gasket between the tank and the bowl is essential for preventing leaks. If you notice any cracks or damage, replace the gasket.
- Adjust the water level: If the water level in the tank is too high or too low, it can cause issues with flushing and leaks. Adjust the water level using the fill valve adjustment screw.
- Examine the flush valve: The flush valve is responsible for regulating the water flow during flushing. If the valve isn’t functioning properly, it can lead to leaks or incomplete flushing. Clean or replace the flush valve if necessary.
- Check the flapper: The flapper is another component that can cause leaks if it’s worn out or damaged. Inspect the flapper for any signs of wear and tear and replace it if needed.
Maintenance Tips for Your New Toilet Tank
When it comes to maintaining your new toilet tank, proper cleaning techniques are essential. Regularly cleaning the tank will help prevent the buildup of mineral deposits and bacteria growth.
Additionally, being aware of common troubleshooting issues, such as leaks or flushing problems, will allow you to address any potential problems early on and ensure the longevity of your toilet tank.
Proper Cleaning Techniques
I regularly clean my new toilet tank to ensure proper maintenance and functionality. Here are some proper cleaning techniques to keep your toilet tank in top shape:
- Use a mild cleaning solution: Avoid harsh chemicals that can damage the tank. Instead, opt for a mild detergent or vinegar solution.
- Clean the tank regularly: Aim to clean the tank at least once a month to prevent buildup and maintain hygiene.
- Pay attention to corners and crevices: Use a soft-bristle brush to reach into hard-to-reach areas and remove any grime or residue.
- Avoid abrasive materials: Scrubbing the tank with abrasive materials can scratch the surface. Stick to non-abrasive tools like microfiber cloths or sponges.
- Rinse thoroughly: After cleaning, make sure to rinse the tank thoroughly to remove any cleaning solution residue.
Common Troubleshooting Issues
To continue the discussion from the previous subtopic, a common troubleshooting issue that can arise with a new toilet tank is a slow-filling tank. This can be caused by various factors, such as a malfunctioning fill valve or a clogged water supply line.

To address this problem, start by checking the water supply valve to ensure it’s fully open. Next, inspect the fill valve for any signs of damage or debris buildup. If necessary, clean or replace the fill valve. Additionally, check the water supply line for any obstructions or leaks. If there’s a toilet tank leak, it’s important to fix it promptly to avoid wasting water.
Another common issue is flushing problems, which can be caused by a faulty flapper or a weak flush valve. Inspect and replace these components as needed to ensure proper flushing performance.
Regular maintenance and prompt troubleshooting can help keep your new toilet tank functioning smoothly.
Upgrading Your Toilet’s Look With Accessories
Enhancing the appearance of my toilet is easily achieved by adding accessories. By incorporating these simple additions, I can transform my toilet into a stylish and organized space. Here are five toilet accessories that can upgrade the look of my toilet:

- Toilet tank decorations: Adding decorative items like stickers or decals to the outside of the toilet tank can instantly add a touch of personality and style to the bathroom.
- Toilet lid cover: A toilet lid cover not only adds a layer of comfort but also serves as an opportunity to enhance the overall aesthetic of the toilet. With various colors and patterns available, I can choose one that complements my bathroom decor.
- Toilet paper holder: Upgrading to a stylish and functional toilet paper holder can instantly elevate the look of my toilet. Opting for a sleek design or a unique material like brushed nickel or ceramic can add a touch of elegance.
- Toilet brush holder: Keeping the toilet brush hidden and organized is essential for maintaining a clean and visually appealing bathroom. A stylish toilet brush holder can be both functional and decorative.
- Toilet tank organizer: Utilizing a toilet tank organizer can maximize the storage space in my bathroom. With compartments for toiletries or magazines, this accessory helps keep the area clutter-free and organized.
Exploring Additional Features and Options
When considering the upgrade of my toilet, exploring additional features and options opens up a world of possibilities. With advancements in technology and design, toilets are no longer just a functional item in the bathroom. They can now be customized to suit individual preferences and enhance the overall bathroom experience.
One of the additional features that can be considered is a bidet function. This option provides a gentle stream of water for cleaning purposes, eliminating the need for toilet paper. It promotes better hygiene and reduces the environmental impact of excessive paper usage.
Another feature to consider is a heated seat. This provides a comfortable and luxurious experience, especially during colder months. The temperature can be adjusted to suit personal preferences, ensuring maximum comfort.
Customization options for toilets also include adjustable water pressure and temperature settings. This allows users to personalize their experience and find the perfect balance of cleansing and comfort.

Other features to explore include night lights, motion sensors, and automatic flushing mechanisms. These additions not only add convenience but also contribute to a more hygienic and efficient bathroom experience.
Final Thoughts and Considerations
As I consider the final thoughts and considerations for a universal toilet tank replacement, I realize the importance of making an informed decision. To help you with this process, here are some installation tips and final thoughts to keep in mind:
- Compatibility: Ensure that the universal toilet tank replacement is compatible with your existing toilet bowl. Check the specifications and measurements carefully to avoid any compatibility issues.
- Water Efficiency: Consider choosing a universal toilet tank replacement that’s designed to be water-efficient. Look for models with dual flush options or low-flow technology to help conserve water and reduce your utility bills.
- Installation Difficulty: Evaluate the level of difficulty involved in installing the universal toilet tank replacement. If you aren’t comfortable with DIY projects, it may be best to hire a professional plumber to ensure proper installation.
- Warranty: Check the warranty provided by the manufacturer. A longer warranty period indicates confidence in the product’s quality and durability.
- Maintenance: Consider the maintenance requirements of the universal toilet tank replacement. Opt for models that are easy to clean and have accessible parts for any future repairs or replacements.
Frequently Asked Questions
Can I Install a Universal Toilet Tank Replacement on Any Type of Toilet?
Yes, you can install a universal toilet tank replacement on most types of toilets. However, there may be compatibility issues with certain older or unique models that have non-standard dimensions or mounting systems.
Universal toilet tanks offer several benefits over specific brand/models. They’re designed to fit a wide range of toilets, making it easier to find a replacement. Additionally, they often come with adjustable features and improved water-saving capabilities, making them a cost-effective and eco-friendly choice for homeowners.
How Long Does It Typically Take to Remove an Old Toilet Tank and Install a New Universal Tank?
Removing an old toilet tank and installing a new universal tank typically takes around 1-2 hours.
To ensure a hassle-free replacement, it’s important to choose the right universal toilet tank replacement. Start by measuring the dimensions of your current tank and checking if the new tank is compatible.
Additionally, gather the necessary tools such as a wrench and screwdriver. Follow the manufacturer’s instructions carefully for a successful installation.
Remember to turn off the water supply and empty the tank before beginning the process.

Are There Any Special Considerations or Modifications Needed When Installing a Universal Toilet Tank Replacement in an Older Bathroom?
When installing a universal toilet tank replacement in an older bathroom, there may be some special considerations and modifications needed. Older bathrooms may have different plumbing configurations or outdated fixtures that could affect the installation process.
It’s important to carefully assess the existing setup and make any necessary adjustments to ensure a proper fit and functioning. Additionally, you may need to update other components, such as the flush valve or fill valve, to ensure compatibility with the new tank.
What Are Some Common Signs That Indicate It’s Time to Replace a Toilet Tank?
Some common signs that indicate it’s time to replace a toilet tank include leaks, cracks, and frequent clogging. These signs of toilet tank wear can lead to water damage and higher water bills.
Upgrading to a universal toilet tank replacement offers several benefits, such as improved water efficiency, enhanced flushing power, and compatibility with various toilet models.

It’s important to consider these signs and benefits when determining if it’s time for a toilet tank replacement.
Can I Install a Universal Toilet Tank Replacement Myself, or Do I Need to Hire a Professional Plumber?
I can definitely install a universal toilet tank replacement myself. It’s a DIY project that doesn’t require professional help.
However, there are some benefits to hiring a professional plumber. They have the expertise and tools to ensure the installation is done correctly and efficiently. Plus, they can address any potential issues that may arise during the process.
Ultimately, the decision to DIY or hire a plumber depends on your comfort level and confidence in your plumbing skills.

Conclusion
In conclusion, upgrading your toilet tank to a universal replacement offers numerous benefits, such as improved functionality and compatibility. By following the step-by-step guide and using the necessary tools and materials, you can easily remove the old tank and install the new one.
Don’t forget to maintain your new tank regularly to ensure its longevity. Additionally, consider enhancing your toilet’s appearance with accessories and exploring additional features for a personalized touch.
Remember, with a universal toilet tank replacement, the possibilities are endless!