
Are you tired of dealing with a constantly running toilet? Are you fed up with the water level being too low or too high? Well, fret no more! In this article, we will guide you through the process of changing the inside of your toilet, from replacing the flapper valve to installing a new fill valve.
With just a few simple steps, you’ll have your toilet working like new again.
So, let’s dive in and discover the secrets to a perfectly functioning toilet!
Key Takeaways
- Shut off the water supply to the toilet before making any changes to prevent leaks and troubleshoot water supply issues.
- Prevent water flow by turning the water shut-off valve clockwise and test the water flow by flushing the toilet.
- Remove the tank lid to access the inside of the toilet tank for maintenance tasks and troubleshoot the flapper valve.
- Replace the flapper valve by turning off the water supply, disconnecting the old valve, installing the new valve, and reconnecting the chain or strap.

Fluidmaster K-400H-039 High Performance Toilet Fill Valve with 2-Inch Adjustable Toilet Flapper Kit
Made in Mexico
As an affiliate, we earn on qualifying purchases.
As an affiliate, we earn on qualifying purchases.
Tools and Materials Needed
You’ll need a few tools and materials to change the inside of a toilet. For toilet repair and maintenance, gather the following items:
- A pair of pliers
- A wrench
- A screwdriver
- A bucket
- A sponge
- Gloves
- Replacement parts such as a fill valve and a flapper
These tools will help you effectively fix any issues with the toilet’s inner workings. The pliers and wrench are necessary for loosening and tightening connections, while the screwdriver is essential for removing screws. The bucket and sponge are useful for catching any water spills and cleaning up afterward. Don’t forget to wear gloves to protect your hands from any dirt or bacteria.
Once you have these tools and materials ready, you can proceed to shut off the water supply to the toilet.

Fluidmaster 400H-002 Performax Universal Toilet Fill Valve High Performance Tank and Bowl Water Control, 1-Pack, Multicolor
Fix noisy, or slow filling fill valves with the quietest, most powerful toilet fill valve available
As an affiliate, we earn on qualifying purchases.
As an affiliate, we earn on qualifying purchases.
Shutting Off the Water Supply
To shut off the water supply to your toilet, you’ll need to locate the water supply valve. This valve is typically located on the wall behind the toilet. Turning this valve clockwise will shut off the water flow and prevent any further water from entering the toilet.
Water Supply Valve
The water supply valve controls the flow of water into the toilet. It is an essential component that ensures the proper functioning of your toilet.
If you are experiencing issues with your toilet’s water supply, troubleshooting the water supply valve can help identify and resolve the problem. Here are some steps you can take to troubleshoot the water supply valve:
-
Check for leaks: Inspect the valve for any signs of water leakage. Tighten any loose connections or replace damaged parts.
-
Adjust water pressure: If the water pressure is too high or too low, it can affect the toilet’s performance. Use the valve to adjust the water pressure to the desired level.
-
Clean the valve: Over time, sediment or debris can accumulate inside the valve, affecting its functionality. Clean the valve by removing any build-up.
-
Replace the valve: If troubleshooting doesn’t resolve the issue, you may need to replace the water supply valve with a new one.
Shutting off Water
When shutting off the water, make sure to locate the water shut-off valve and turn it clockwise to stop the flow. This step is crucial in preventing leaks and troubleshooting issues with the water supply.
The water shut-off valve is typically located near the base of the toilet or on the wall behind it. Once you have found the valve, use a wrench or pliers to turn it clockwise. This will close the valve and stop the water from flowing to the toilet.
It is important to shut off the water before performing any repairs or maintenance on the toilet to prevent water flow and avoid potential water damage.
Now that the water is shut off, you can proceed with the next steps to prevent water flow.
Prevent Water Flow
You can prevent water flow by locating and turning the water shut-off valve clockwise. This is an important step when fixing leaks or troubleshooting toilet problems.
Here is a step-by-step guide to help you prevent water flow:
-
Locate the water shut-off valve: The valve is usually located behind the toilet or on the wall near the base of the toilet. It may be a round handle or a lever.
-
Turn the valve clockwise: To shut off the water flow, turn the valve clockwise until it stops. This will cut off the water supply to the toilet.
-
Test the water flow: After turning off the valve, flush the toilet to ensure that the water flow has been successfully prevented.
-
Keep the valve accessible: In case of emergencies or future repairs, make sure the shut-off valve remains easily accessible.

Fluidmaster K-400H-021-P8 PerforMAX 2-Inch Everything Toilet Repair Kit, Multicolor
The Everything Kit includes everything you need to fix your toilet in one trip and one purchase
As an affiliate, we earn on qualifying purchases.
As an affiliate, we earn on qualifying purchases.
Removing the Tank Lid
To remove the tank lid, simply lift up on the handle and carefully set it aside. Now that you have access to the inside of the toilet tank, you can perform various maintenance tasks to keep your toilet functioning smoothly. One common issue that may arise is a faulty flapper valve, which can cause water leakage or inconsistent flushing. To troubleshoot this problem, first, ensure that the flapper is properly connected to the chain and the flush lever. If it appears worn or damaged, it may need to be replaced. Another important maintenance task is cleaning the tank lid to prevent buildup of mineral deposits and bacteria. Use a mild cleaner and a soft cloth to gently wipe down the lid, both inside and out, to ensure a clean and hygienic toilet.
| Column 1 | Column 2 | Column 3 |
|---|---|---|
| Step 1 | Lift up on the handle to remove the tank lid. | |
| Step 2 | Check the flapper valve for any visible damage or misalignment. | |
| Step 3 | Ensure that the flapper is properly connected to the chain and flush lever. | |
| Step 4 | If necessary, replace the flapper valve. | |
| Step 5 | Clean the tank lid using a mild cleaner and a soft cloth. |
Fluidmaster 400H-002 Performax Universal Toilet Fill Valve High Performance Tank and Bowl Water Control, 1-Pack, Multicolor
Fix noisy, or slow filling fill valves with the quietest, most powerful toilet fill valve available
As an affiliate, we earn on qualifying purchases.
As an affiliate, we earn on qualifying purchases.
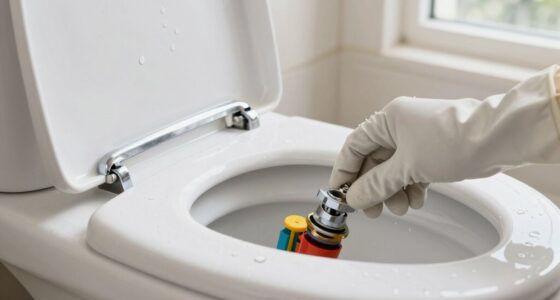
Replacing the Flapper Valve
When it comes to replacing the flapper valve in your toilet, there are several steps you need to follow.
First, you’ll need to turn off the water supply to the toilet and drain the tank.
Then, you can remove the old flapper valve by disconnecting it from the flush valve and lifting it out.
Finally, you can install the new flapper valve by positioning it properly over the flush valve and reconnecting it.
Common issues with flapper valves include leaking, sticking, or not sealing properly, which can lead to water wastage and a constantly running toilet.
Flapper Valve Replacement Steps
First, make sure the water supply to the toilet is turned off before attempting to replace the flapper valve. This is an important step to prevent any water damage or flooding.
Once the water supply is off, you can proceed with the flapper valve replacement. Here are the steps to follow:
-
Remove the tank lid and locate the flapper valve. It is usually at the bottom of the tank, connected to the flush valve.
-
Disconnect the chain or strap connecting the flapper valve to the flush handle. This will allow you to remove the old flapper valve.
-
Install the new flapper valve by attaching it to the flush valve. Make sure it is properly aligned and securely attached.
-
Reconnect the chain or strap to the new flapper valve, ensuring that there is enough slack for proper operation.
Common Flapper Valve Issues
One of the most common issues with flapper valves is that they can become warped or damaged over time. This can lead to leaks and other toilet problems.
To diagnose leaks, start by adding a few drops of food coloring to the toilet tank water. Wait for about 15 minutes without flushing. If the water in the toilet bowl changes color, it indicates a leak from the flapper valve.
Troubleshooting toilet problems related to flapper valves can be done by checking for debris or mineral buildup, as this can prevent the valve from closing properly.
If you are experiencing any of these issues, it may be time to consider installing a new fill valve.
Installing a New Fill Valve
To install a new fill valve, you’ll need to turn off the water supply to the toilet. Follow these steps for a successful installation:
-
Shut off the water supply: Locate the shut-off valve usually located behind or near the toilet. Turn the valve clockwise to shut off the water supply.
-
Empty the tank: Flush the toilet to empty the tank completely. Use a towel or sponge to soak up any remaining water.
-
Remove the old fill valve: Disconnect the water supply line from the fill valve. Unscrew the nut holding the fill valve in place. Lift the old fill valve out of the tank.
-
Install the new fill valve: Place the new fill valve in the tank. Tighten the nut to secure it in place. Reconnect the water supply line.
Testing and Adjusting the Water Level
After installing the new fill valve, you’ll need to test and adjust the water level in the tank. This is an important step to ensure that your toilet is functioning properly and efficiently. There are different testing methods and adjusting techniques that you can use to achieve the desired water level.
One common testing method is the overflow tube method. Here’s how it works:
- Fill the tank with water.
- Observe the water level in the tank.
- If the water is above the overflow tube, it means the water level is too high. Adjust the float or the fill valve to lower the water level.
- If the water is below the overflow tube, it means the water level is too low. Adjust the float or the fill valve to increase the water level.
Another testing method is the dye method. Here’s how it works:
- Add a few drops of food coloring or dye into the tank.
- Wait for a few minutes.
- If the colored water appears in the bowl, it means there is a leak. Adjust the flapper or the flush valve to fix the leak.
Conclusion
In conclusion, by following these simple steps and using the right tools, you can easily change the inside of your toilet.
Don’t worry if you’re not a plumbing expert – this guide has provided clear and detailed instructions to help you complete the task successfully.
While it may seem daunting at first, with a little patience and care, you’ll be able to shut off the water supply, replace the flapper valve, install a new fill valve, and adjust the water level in no time.
Remember, practice makes perfect, so don’t be discouraged if it takes a few tries to get it right.
Happy toilet fixing!