Keeping your KitchenAid Professional 600 mixer clean is essential for maintaining its performance and extending its lifespan. Proper cleaning prevents buildup, ensures food safety, and keeps your appliance looking its best.
In this guide, you’ll find practical, step-by-step instructions to clean your mixer thoroughly without damaging it, along with helpful tips and safety warnings.
Key Takeaways
| Regular Cleaning Prevents Buildup | Clean after every use to remove food residues and prevent crust formation. |
| Use Gentle Cleaning Methods | Avoid abrasive cleaners to prevent damage to the finish and components. |
| Disassemble Carefully | Remove attachments and detachable parts before cleaning. |
| Dry All Parts Thoroughly | Ensure all components are dry before reassembling to prevent rust. |
| Check for Wear or Damage | Inspect parts periodically for cracks or wear to ensure safety. |

Stainless Steel Flat Beater for KitchenAid 4.5-5 Qt Tilt-Head Stand Mixers, Fits Classic, Classic Plus, Artisan Series, Heavy Duty Replacement for K45SS, KSM75, KSM150, Dishwasher Safe
🌟【Heavy-Duty Durability】Engineered for superior strength and longevity, this replacement paddle is built to handle heavy-duty mixing tasks. From...
As an affiliate, we earn on qualifying purchases.
Gather Necessary Supplies
- Soft cloths or sponges
- Warm water and mild dish soap
- Cleaning brush or toothbrush
- Dishwasher (if parts are dishwasher safe)
- Dry towels or cloths
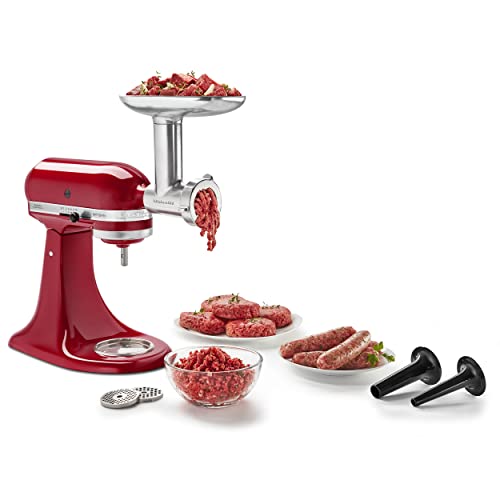
KitchenAid Stand Mixer Attachment, Food Grinder KSMMGA, Metal Food Grinder
Connect to any household KitchenAid Stand Mixer power hub and use the power of the motor to run...
As an affiliate, we earn on qualifying purchases.
Disassemble the Mixer
- Unplug the mixer from the power outlet.
- Remove all attachments, including the Stainless Steel Flat Beater.
- Detach any removable shields or covers if applicable.
Clean the Attachments and Mixer Body
- Wash the Stainless Steel Flat Beater in warm, soapy water, using a brush to scrub away stubborn residues.
- Check if the beater is dishwasher safe (it is), and place it in the dishwasher if preferred.
- Wipe the mixer body with a damp cloth—avoid excess water near the motor housing.
- Use a cleaning brush to reach crevices or hard-to-clean areas.
Dry and Reassemble
Thoroughly dry all parts with a clean towel or cloth to prevent rust or corrosion.
Reattach the cleaned beater and any other components, ensuring they are securely fitted.
Plug in the mixer only after all parts are dry and reassembled.
Maintenance Tips and Warnings
- Regularly inspect the beater and other attachments for signs of wear or damage.
- Avoid using abrasive cleaners or scouring pads that can scratch the surface.
- Never submerge the motor housing in water or any liquid.
- Clean the mixer after each use to prevent buildup and maintain hygiene.
The Products in This Guide

Stainless Steel Flat Beater
- ✔ Material: Stainless Steel
- ✔ Dishwasher Safe: Yes
- ✔ Compatibility: 4.5-5 Qt Tilt-Head Mixers

KitchenAid Stand Mixer Attachment
- ✔ Material: Metal
- ✔ Chill Required: Yes
- ✔ Includes: Grinding plates
Stainless Steel Flat Beater
This Stainless Steel Flat Beater is engineered for heavy-duty mixing tasks and fits KitchenAid 4.5-5 Qt tilt-head stand mixers perfectly. Its solid stainless steel construction ensures longevity and resistance to chipping or cracking.
Pros:
- Heavy-duty durability
- Dishwasher safe
- Perfect fit for multiple models
- No paint chipping
Cons:
- May require manual cleaning for stubborn residues
- Not suitable for use with non-compatible mixers
Best for: Heavy-duty mixing tasks like cookie dough and mashed potatoes
Not ideal for: For mixers outside the 4.5-5 Qt tilt-head series or light mixing tasks
Bottom line: A durable, dishwasher-safe beater ideal for heavy-duty baking and mixing.
KitchenAid Stand Mixer Attachment
This Metal Food Grinder attachment expands your KitchenAid stand mixer’s capabilities, making it easy to process meats, vegetables, and more with various grinding plates included.
Pros:
- Versatile food processing
- Sturdy metal construction
- Includes multiple grinding plates
- Easy to attach/detach
Cons:
- Requires pre-chilling for best results
- Additional storage space needed
Best for: Making fresh ground meats, vegetables, and sausages
Not ideal for: For light mixing or baking tasks
Bottom line: A versatile attachment perfect for fresh, homemade ground foods.
Frequently Asked Questions
Can I put the Stainless Steel Flat Beater in the dishwasher?
Yes, the Stainless Steel Flat Beater is dishwasher safe, making cleanup quick and easy.
How often should I clean my mixer?
It’s best to clean your mixer after each use to prevent buildup and ensure optimal performance.
What should I do if my beater is bent or damaged?
Inspect the beater regularly and replace it if you notice any bending, cracks, or damage to prevent contamination or further damage.
Are all attachments dishwasher safe?
Not all attachments are dishwasher safe; check the manufacturer’s instructions for each component.
Keep Your KitchenAid Mixer in Top Shape
Regular, proper cleaning of your KitchenAid Professional 600 ensures it remains efficient and lasts for years to come. By disassembling carefully, using gentle cleaning methods, and drying thoroughly, you protect your investment and keep your kitchen running smoothly.
With these simple steps, maintaining your mixer becomes a quick and easy routine, helping you achieve perfect results every time.
Affiliate disclosure: As an Amazon Associate we earn from qualifying purchases. Prices and availability are accurate as of the time of publishing.