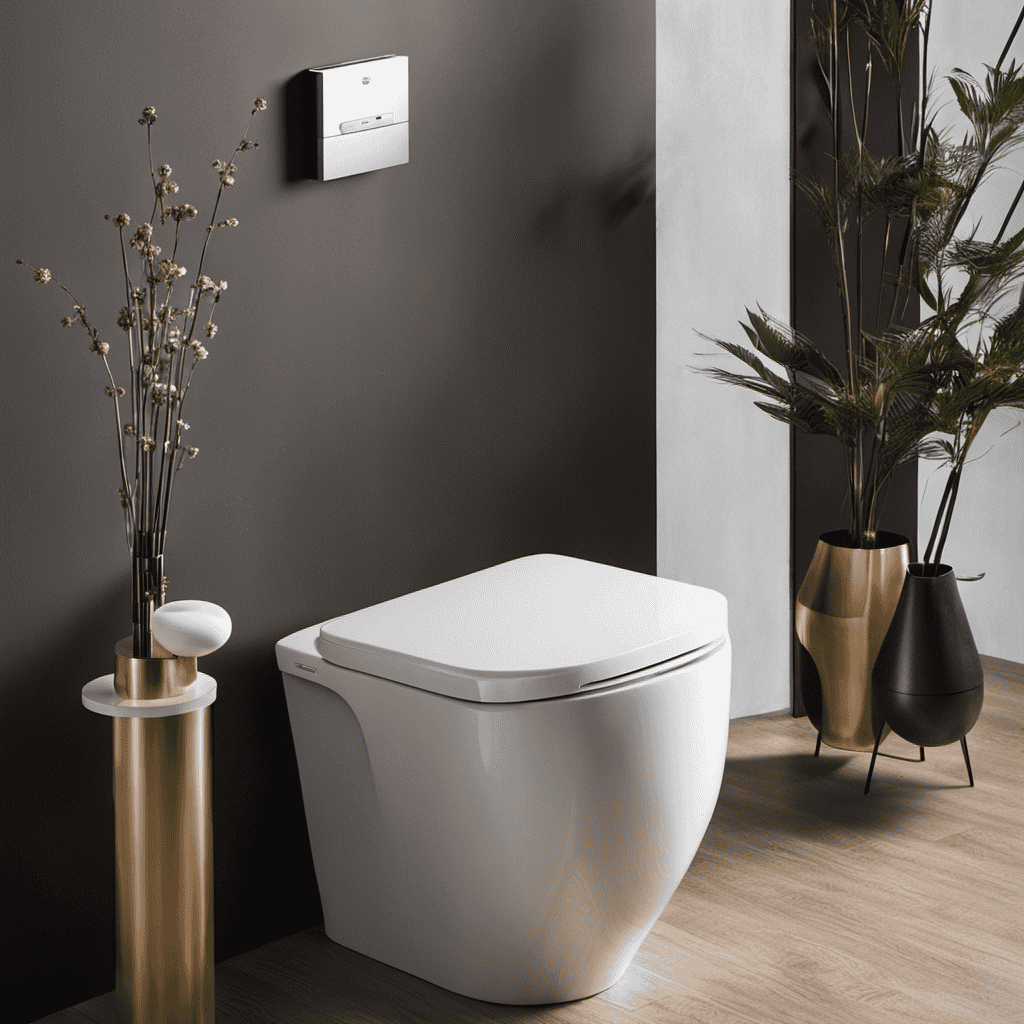
I’ve always been fascinated by the sleek and space-saving design of wall mounted toilets. So, when it came time to upgrade my bathroom, I decided to take on the challenge of installing one myself.
In this article, I’ll guide you through each step of the process with precision and detail. From choosing the right toilet to testing the final installation, you’ll be equipped with the knowledge and confidence to tackle this project head-on.
Let’s get started!
Key Takeaways
- Consider factors such as size, design, and flushing mechanism when choosing a wall mounted toilet.
- Measure the available wall space accurately and remove any existing fixtures before installation.
- Gather necessary tools and materials such as screwdriver, adjustable wrench, and mounting hardware.
- Follow the manufacturer’s instructions carefully, ensure proper alignment and leveling, and reinforce the wall if needed.
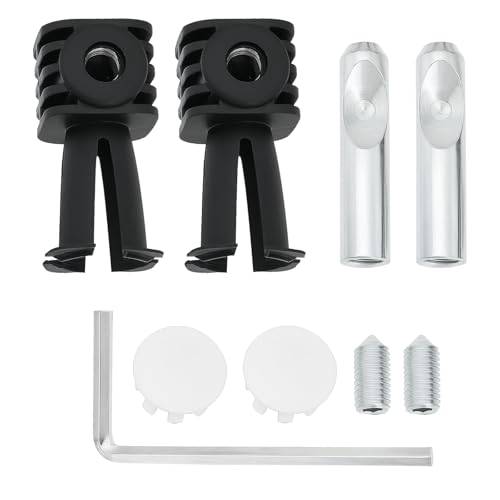
LT Easiyl 1 Set of Wall Hung Toilet Fixing Bolts Kit Compatible with Geberit Compatible with Grohe 38.8×75.5mm Wall-Mounted Toilet Anchor Kit
Compatibility: Compatible with Geberit and compatible with Grohe wall-hung toilets, this fixing bolt kit ensures secure installation with…
As an affiliate, we earn on qualifying purchases.
As an affiliate, we earn on qualifying purchases.
Choosing the Right Wall Mounted Toilet
When choosing a wall mounted toilet, you’ll want to consider factors such as size, design, and flushing mechanism.
Size is important because you need to ensure that the toilet fits properly in your bathroom space. Measure the area where you plan to install the toilet and choose a model that matches those dimensions.
Design is another crucial factor to consider, as you want the toilet to blend seamlessly with your bathroom’s aesthetic. Additionally, pay attention to the flushing mechanism. Some wall mounted toilets offer dual flush options, allowing you to conserve water.
Regarding toilet seat options, most wall mounted toilets don’t come with a seat included, so make sure to select a compatible seat that suits your preferences.
As for installation tips, it’s essential to follow the manufacturer’s instructions carefully and use the appropriate tools for a secure and sturdy installation.
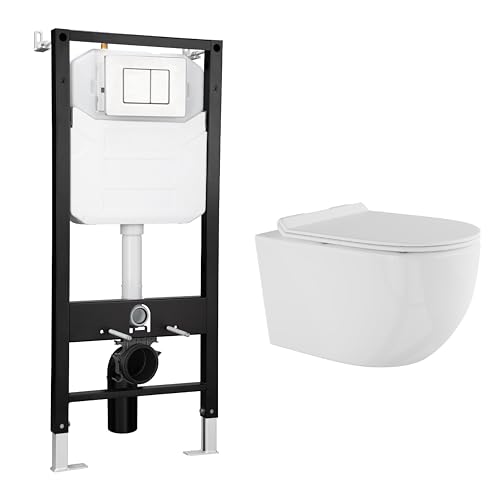
Eridanus Wall Hung Toilet with Tank, 2×6 In-Wall Toilet Tank Carrier, Wall Mounted Toilet Combo Set, Dual-Flush Plate Included, Floating Bowl With Soft-Close Seat, Glossy White, 2 Separate Packages
【Please Note】Toilets and tanks are shipped in two separate packages and may not arrive at the same time.
As an affiliate, we earn on qualifying purchases.
As an affiliate, we earn on qualifying purchases.
Preparing the Bathroom for Installation
When preparing a bathroom for installation, there are two key points to consider: measuring the available wall space and removing old fixtures.
To ensure a proper fit, it’s crucial to accurately measure the dimensions of the wall where the new fixtures will be installed. This will help determine the appropriate size and placement of the new fixtures.
Additionally, removing any existing fixtures, such as toilets or sinks, is necessary to create a clean slate for the installation process.
Measuring Wall Space
To properly install a wall mounted toilet, it’s important to measure the available wall space. Measuring accuracy is crucial in ensuring a successful installation.
Start by using a tape measure to determine the exact dimensions of the wall where the toilet will be mounted. Measure the distance from the floor to the desired height of the toilet. This will help you determine the appropriate mounting height.
Next, measure the width of the wall to ensure it can accommodate the toilet. Consider space optimization when measuring. Take into account any obstacles such as pipes or electrical outlets that may affect the installation.
Removing Old Fixtures
Before starting the removal process, it’s important to turn off the water supply to the fixtures. This step is crucial to prevent any water leakage or damage.
When it comes to removing old fixtures, there are a few common toilet installation mistakes to avoid. Firstly, make sure to have the necessary tools handy, such as an adjustable wrench and a screwdriver.
Secondly, take your time and be patient, as rushing the process may lead to accidents or damage. If you encounter stubborn fixtures that are difficult to remove, here are some tips to help you out.
Apply penetrating oil to loosen any stuck nuts or bolts. Use a wrench or pliers with a firm grip to apply steady pressure while turning. If all else fails, consult a professional plumber for assistance.

4 Pack Universal Toilet Seat Bolts and Hinge Screws, Top Mounting Fixings Kit with Expanding Rubber Top Nuts, Replacement Screws for 14-16mm Hole Toilet Seat Repair
Universal Toilet Seat Bolts Replacement Kit: 4 pack toilet seat bolts with top fix hinge screws, rubber expansion…
As an affiliate, we earn on qualifying purchases.
As an affiliate, we earn on qualifying purchases.
Gathering the Necessary Tools and Materials
First, you’ll need to gather all the necessary tools and materials for installing a wall mounted toilet. This step is crucial to ensure a smooth and successful installation process. Here is a table outlining the essential items you’ll need:
| Tools | Materials |
|---|---|
| Screwdriver | Wall-mounted toilet bowl |
| Adjustable wrench | Mounting hardware |
| Level | Wax ring |
| Tape measure | Water supply line |
| Pencil | Toilet seat |
When it comes to wall mounted toilet installation, it’s important to keep a few tips in mind. First, make sure to carefully read and follow the manufacturer’s instructions. Secondly, ensure that the wall can support the weight of the toilet. Lastly, double-check the measurements to ensure that the toilet is properly aligned and leveled. Avoiding these common mistakes will save you time and frustration in the long run.

HOROW Compact Wall Hung Toilet Combo Set, Concealed In-Wall Toilet Tank Carrier System, Adjustable Wall Mounted Toilet Bowl with Soft-Close Seat, 1.1GPF/1.6 GPF Dual Flush Push Buttons Included, White
Package Included: The In-Wall Toilet Combo Set includes an HR-TG03W toilet bowl, a soft-close toilet seat, a concealed…
As an affiliate, we earn on qualifying purchases.
As an affiliate, we earn on qualifying purchases.
Removing the Old Toilet and Preparing the Wall
When it comes to removing an old toilet and preparing the wall for a new one, there are a few key steps to follow.
First, the toilet removal process involves shutting off the water supply, draining the tank and bowl, and disconnecting the supply line and bolts.
Next, the wall preparation steps include removing any existing caulk or adhesive, patching any holes or cracks, and ensuring the wall surface is clean and smooth.
Toilet Removal Process
To start removing the toilet, you’ll need to turn off the water supply and flush the toilet to empty the tank. This is an important step in the toilet repair process and is necessary before you can replace bathroom fixtures.
Here is a step-by-step guide on how to remove a toilet:
- Turn off the water supply valve located behind the toilet.
- Flush the toilet to empty the tank completely.
- Disconnect the water supply hose from the toilet tank.
- Remove the nuts securing the toilet to the floor using a wrench.
Once these steps are completed, you can carefully lift the toilet off the floor and remove it. Be sure to cover the exposed drain pipe to prevent any unpleasant odors from entering your bathroom.
With the toilet successfully removed, you can now proceed with the next steps in replacing bathroom fixtures.
Wall Preparation Steps
Before you begin, make sure the wall behind where the toilet was is clean and free of any debris. This is an important step in preparing the wall for the installation of a wall-mounted toilet.
To ensure proper support and stability, wall reinforcement is necessary. This involves adding extra studs or a support frame to the wall to bear the weight of the toilet.
The plumbing connections should also be considered during this process. Make sure the existing plumbing is in good condition and properly aligned with the new toilet’s location. This may require adjusting or extending the pipes to ensure a secure and leak-free connection.
Taking the time to properly prepare the wall will ensure a successful installation and long-term durability of the wall-mounted toilet.
Necessary Tools Checklist
Make sure you have all the necessary tools on hand for the installation, so you can complete the job efficiently. Here is a checklist of essential tools you will need:
- Measuring tape: Accurate measurements are crucial for proper placement of the toilet.
- Level: This will help ensure that your toilet is installed straight and level.
- Drill and drill bits: You will need these to create holes in the wall for the mounting brackets.
- Screwdriver: Used to secure the brackets and other components.
By having these tools ready, you can avoid common mistakes when installing a wall mounted toilet, such as improper measurements or a crooked installation.
Following these tips will help ensure a secure and sturdy wall mounted toilet installation.
Now that you have all the necessary tools, let’s move on to the next section: installing the wall mounted toilet bracket.
Installing the Wall Mounted Toilet Bracket
Attach the wall mounted toilet bracket securely to the wall using the provided screws. Make sure to align the bracket with the center of the toilet drain. Use a level to ensure it is straight. Tighten the screws firmly to prevent any movement.
Once the bracket is securely attached, you can proceed with installing the wall mounted toilet flush. Connect the flush valve to the toilet tank using the provided hardware. Ensure that the flush valve is properly aligned and tightened to prevent any leaks.
Next, attach the flush button or lever to the toilet tank. Test the flush mechanism to ensure it is working correctly.
Troubleshooting common installation issues may include checking for any loose connections, leaks, or improper alignment.
Attaching the Toilet Bowl to the Wall Bracket
Once the toilet bowl is securely fastened to the wall bracket, you can proceed with connecting the water supply line. Before you begin, make sure you have the necessary tools and materials ready:
- Adjustable wrench
- Teflon tape
- Water supply line
- Shut-off valve
Here are the steps to attach the toilet bowl to the wall bracket:
-
Position the toilet bowl onto the wall bracket, ensuring it aligns properly.
-
Use the provided screws to secure the toilet bowl to the bracket. Tighten them using an adjustable wrench.
-
Apply Teflon tape to the threaded end of the water supply line to prevent leaks.
-
Connect one end of the water supply line to the shut-off valve and the other end to the toilet bowl’s water inlet.
Ensure all connections are tight and secure. Once done, turn on the shut-off valve and check for any leaks.
Congratulations, you have successfully attached the toilet bowl to the wall bracket!
Testing and Finishing the Installation Process
To complete the installation process, you should now test the water supply by turning on the shut-off valve and checking for any leaks.
Testing the water supply is a crucial step to ensure that the wall mounted toilet functions properly and doesn’t cause any water damage.
Start by slowly turning on the shut-off valve and observing if there are any leaks around the water connection. If there are leaks, tighten the connection or replace the faulty part.
Once the water is flowing without any leaks, flush the toilet multiple times to check for proper water flow and drainage.
If there are any issues, such as weak flushing or slow drainage, you may need to adjust the water supply or consult a professional for further troubleshooting tips.
Frequently Asked Questions
How Do I Choose the Right Flushing Mechanism for a Wall Mounted Toilet?
When choosing a flushing mechanism for a wall mounted toilet, consider the pros and cons of different options. It’s important to find one that meets your needs and preferences in terms of efficiency, water usage, and maintenance.
Can I Install a Wall Mounted Toilet in a Bathroom With Limited Wall Space?
Yes, you can install a wall-mounted toilet in a bathroom with limited wall space. However, there may be challenges involved, such as ensuring proper support and making necessary adjustments to accommodate the toilet.
Do I Need to Reinforce the Wall Before Installing a Wall Mounted Toilet?
Before installing a wall mounted toilet, it is crucial to reinforce the wall. This ensures stability and prevents any structural damage. Reinforcing the wall guarantees a secure installation and peace of mind.
Is It Necessary to Hire a Professional Plumber to Install a Wall Mounted Toilet?
Hiring a professional plumber for wall mounted toilet installation ensures expertise and saves time. DIY installation may save money, but it carries the risk of mistakes. Consider the cost comparison and weigh the pros and cons before deciding.
What Are the Advantages of a Wall Mounted Toilet Compared to a Traditional Floor-Mounted Toilet?
Wall mounted toilets offer several advantages over traditional floor-mounted toilets. They save space, making them ideal for small bathrooms. Additionally, their sleek design and adjustable height provide added comfort and convenience.
Conclusion
In conclusion, installing a wall mounted toilet is a meticulous process that requires careful consideration and precise execution.
Just like a symphony conductor bringing forth a harmonious melody, I meticulously followed each step, ensuring every detail was attended to.
With the old toilet removed and the new wall bracket securely in place, the final attachment of the toilet bowl was like the last stroke of a master painter’s brush, completing the masterpiece.
Now, as I stand back and admire my work, a sense of accomplishment washes over me, knowing that I have transformed my bathroom into a sanctuary of modernity and elegance.