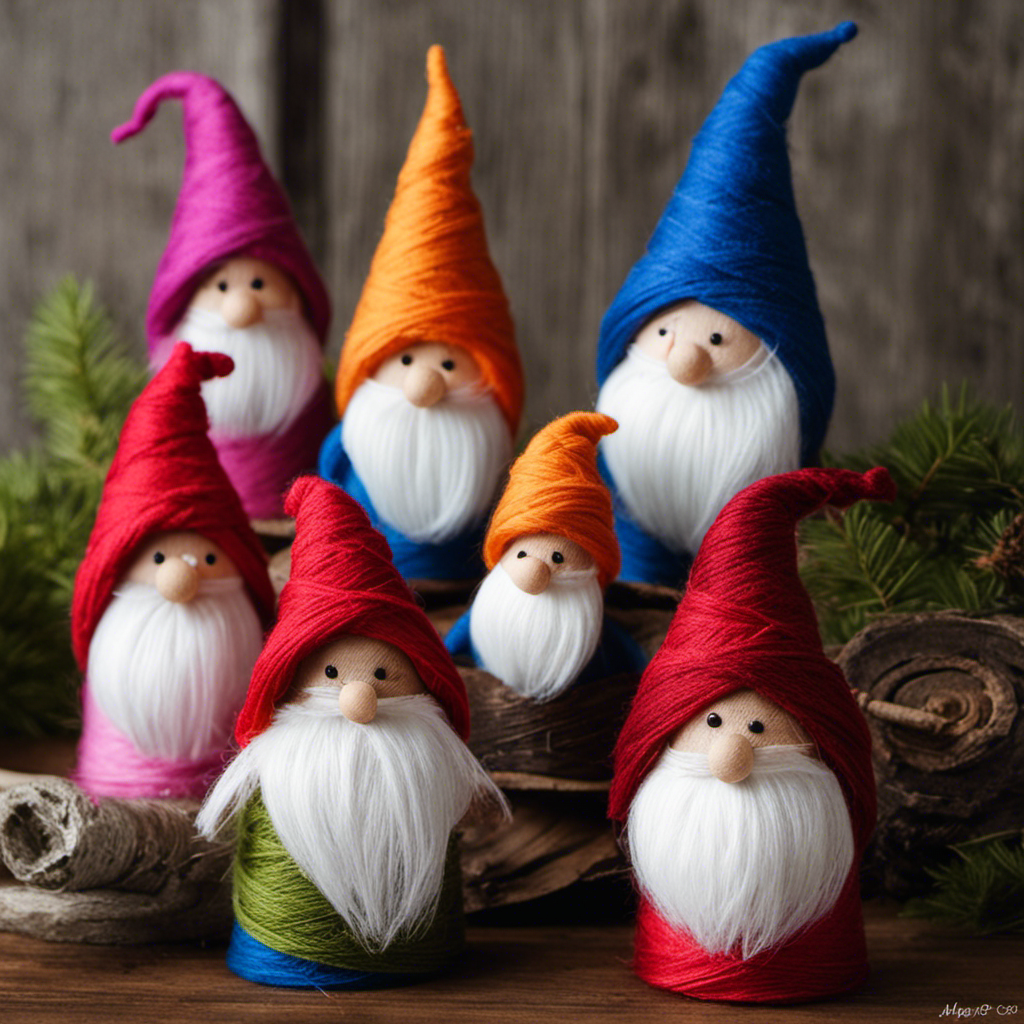

I’m so excited to share with you the magical world of crafting gnomes out of toilet paper rolls and yarn!
Get ready to unleash your creativity as we transform these everyday materials into charming little creatures that will brighten up any space.
With just a few simple steps, you’ll learn how to shape their bodies, fashion their hats, and even add adorable facial features.
So grab your supplies and let’s embark on this whimsical journey together!
Key Takeaways
- Preparing the toilet paper roll is essential for creating the gnome’s body, and alternatives such as paper towel rolls or cardboard tubes can be used.
- Decorating the roll with paint, ribbon, fabric, or other materials allows for personalization and adds a playful look to the gnome.
- Wrapping the roll with colorful yarn adds dimension and texture to the gnome, and switching colors can create patterns or gradients.
- Adding facial features using felt, fabric scraps, buttons, or beads gives the gnome a unique and expressive look, and decorating the clothing with fabric scraps, buttons, and embellishments adds color and texture.
yarn for crafting gnomes
As an affiliate, we earn on qualifying purchases.
As an affiliate, we earn on qualifying purchases.
Materials Needed
You’ll need toilet paper rolls and yarn to make the gnomes. But if you don’t have any toilet paper rolls, don’t worry! There are alternatives you can use, such as paper towel rolls or even cardboard tubes from other household items.
Now, let’s talk about yarn. The great thing about making these gnomes is that you can use different yarn textures to add variety and personality to each one. You can choose soft and fluffy yarn for a cozy gnome, or go for a sleek and shiny yarn for a more elegant look. The possibilities are endless!
Now that you have your materials ready, let’s move on to preparing the toilet paper roll for the gnome-making process.
toilet paper roll craft supplies
As an affiliate, we earn on qualifying purchases.
As an affiliate, we earn on qualifying purchases.
Preparing the Toilet Paper Roll
When it comes to preparing the toilet paper roll, there are two key points to consider: the size of the roll and how to decorate it.
First, choose the right size of the roll depending on your preference and the project you’re working on. Whether you want a standard size or a jumbo roll, it’s important to have the right base for your craft.
Once you have the perfect roll, let your creativity flow by decorating it with paint, ribbon, or even fabric. This step will add a personal touch to your project and make it stand out.
Toilet Paper Roll Size
Toilet paper rolls come in various sizes, so make sure to choose one that is the right size for your gnome project. The measurements of a standard toilet paper roll are approximately 4.5 inches in height and 5 inches in diameter. However, you can also use alternative options if you don’t have a toilet paper roll on hand. Here are a few alternatives to consider:
-
Paper towel rolls: These are larger than toilet paper rolls, measuring about 11 inches in height and 5.5 inches in diameter. They can create a taller gnome with a bigger body.
-
Wrapping paper rolls: These can be cut to the desired size for your gnome project. They are typically longer and thinner than toilet paper rolls, making them ideal for creating a gnome with a slender body.
-
Cardboard tubes: These can be found in various sizes, such as from shipping packages or craft supplies. They can be cut to any length you need, allowing for flexibility in gnome size.
Remember to choose a size that fits your vision for the gnome, and have fun crafting!
Decorating the Roll
Decorating the roll with paint, glitter, and stickers is a fun way to personalize your gnome project. There are various decorating techniques you can use to make your gnome unique. Let your creativity flow and experiment with different colors and designs.
To help you get started, here are some alternative materials you can use for decorating your gnome:
| Material | Description |
|---|---|
| Fabric scraps | Add texture and patterns to your gnome. |
| Ribbon | Tie a bow around the gnome’s neck for a cute touch. |
| Buttons | Glue buttons on the gnome’s body for a playful look. |
| Felt | Cut out shapes from felt and attach them to the gnome for added dimension. |
| Washi tape | Use colorful washi tape to create patterns on the gnome’s clothing. |
felt facial features for gnomes
As an affiliate, we earn on qualifying purchases.
As an affiliate, we earn on qualifying purchases.
Creating the Gnome’s Body
First, I start by preparing the toilet paper roll base for my gnome. I make sure to remove any remaining paper and flatten it a bit to create a stable surface.
Next, I take some colorful yarn and begin wrapping it around the toilet paper roll, starting from the bottom and working my way up. This step not only adds a vibrant touch to the gnome’s body but also helps secure the roll in place.
Lastly, I get creative and add facial features to my gnome. Using felt or fabric scraps, I cut out small shapes for the eyes, nose, and mouth, and then glue them onto the yarn-wrapped toilet paper roll. This brings my gnome to life and adds a personal touch to its appearance.
Toilet Paper Roll Base
Start by cutting the toilet paper roll in half to create the base for your gnome. This simple step will provide a sturdy foundation for your DIY gnome craft. Here’s how you can do it:
- Take a toilet paper roll and measure it in half using a ruler.
- Use a pair of scissors to cut the roll along the measured line.
- You now have two halves of a toilet paper roll that will serve as the base for your gnome.
Creating the base is an essential first step in making toilet paper roll crafts. It ensures that your gnome stands upright and adds stability to the overall structure.
Yarn for Wrapping
Using a colorful yarn of your choice, wrap it around the toilet paper roll halves to add a vibrant and textured look to your gnome craft.
First, gather an assortment of different yarn colors to create a visually appealing design. Choose yarn with varying thickness for added dimension.
Begin by securing the end of the yarn on one end of the toilet paper roll half using a small drop of glue. Then, start wrapping the yarn tightly around the roll, making sure to cover the entire surface.
Switch colors as desired to create patterns or gradients. To add extra texture, experiment with different yarn thicknesses, alternating between thin and thick strands.
Continue wrapping until the entire surface is covered, then secure the end of the yarn with another drop of glue.
The result will be a beautifully textured and colorful base for your gnome craft.
Adding Facial Features
For a playful touch, give your gnome a mischievous smile by attaching a small, curved piece of wire to the face. This will add personality and whimsy to your creation.
Now, let’s move on to selecting the right yarn color.
- Choose a color that matches the theme of your gnome. If you want a traditional red and white gnome, go for those classic colors.
- Consider using variegated yarn for a more vibrant and unique look. The subtle color changes will add depth to your gnome’s face.
- Don’t be afraid to experiment with different colors! Gnomes can come in all shades, so feel free to get creative with your choices.
Once you have decided on the yarn color, it’s time to add accessories to the gnome’s face. This can include items like googly eyes, buttons for a nose, or even a small felt hat. Let your imagination run wild and give your gnome a personality that matches your own!
crafting ribbon and fabric for decorations
As an affiliate, we earn on qualifying purchases.
As an affiliate, we earn on qualifying purchases.
Crafting the Gnome’s Hat
Once you’ve cut out the gnome’s hat shape, it’s time to glue it onto the toilet paper roll. To craft the gnome’s hat, I like to use different crafting techniques and experiment with color choices.
First, choose a sturdy piece of colored paper or felt for the hat. Fold it into a cone shape, making sure it fits the size of the toilet paper roll. Secure the edges with glue or tape.
Next, get creative with decorating the hat. You can add patterns, stripes, or even glitter to make it stand out. Don’t forget to consider the gnome’s personality and style when choosing colors and designs for the hat.
Once the glue is dry, you can move on to adding facial features to bring your gnome to life.
Adding Facial Features
When you’re ready to bring your gnome to life, start by adding facial features like eyes, a nose, and a mouth. These features are what give your gnome its unique personality and charm. Here’s how you can do it:
-
Eyes: You can use small buttons, beads, or even googly eyes to create different expressions. Experiment with different sizes and colors to give your gnome a playful or mischievous look.
-
Nose: Instead of using traditional materials like clay or felt, why not explore alternative materials like small wooden beads or even tiny pinecones? This will add a whimsical touch to your gnome’s face.
-
Mouth: You can create different facial expressions by using yarn or embroidery thread to stitch a smile, frown, or even a sly grin onto your gnome’s face.
By adding these facial features, you’ll give your gnome a unique and expressive look.
Now, let’s move on to decorating the gnome’s clothing and accessories.
Decorating the Gnome’s Clothing
To decorate the gnome’s clothing, you can use fabric scraps, buttons, and other embellishments to add color and texture to their outfit.
Let’s start by choosing different clothing styles for our gnomes. You can opt for a classic red and white striped shirt, or get creative with patterns like polka dots or plaid.
Next, think about color combinations that will make your gnomes stand out. For a vibrant look, pair complementary colors like blue and orange or purple and yellow.
To add texture, consider using fabric scraps with different textures such as velvet, satin, or lace. Cut out small pieces and attach them to the gnome’s clothing using fabric glue or a needle and thread.
Finally, don’t forget to add buttons, ribbons, or even small bows for that extra touch of style.
With these simple steps, your gnomes will have the most fashionable and unique outfits!
Finishing Touches
Now that the gnome’s clothing is beautifully decorated, it’s time to add the finishing touches to make the gnome truly magical.
The first step is choosing the right yarn color for the gnome’s hair. Whether you want a traditional white or gray-haired gnome or a more colorful one, the choice is yours. Consider using a yarn color that complements the gnome’s clothing for a cohesive look.
Next, let’s add some glitter and sparkles to the gnome’s accessories. Take a small brush and apply a thin layer of glue to areas like the gnome’s hat, shoes, or belt. Then, sprinkle some glitter or sequins onto the glue, making sure to cover the surface evenly. The sparkles will give your gnome a touch of whimsy and enchantment.
Lastly, let the glue dry completely before displaying your finished gnome proudly. With its vibrant clothing, carefully chosen hair color, and sparkling accessories, your gnome will surely bring joy and magic to any space.
Frequently Asked Questions
Can I Use Any Type of Yarn for This Craft Project?
Yes, you can use any type of yarn for this craft project. When choosing the right yarn for your gnome project, consider the different types of yarn suitable for crafting.
How Do I Give My Gnome a Unique Hairstyle?
To give your gnome a unique hairstyle, you can try different gnome hairstyles and add accessories to their hair. Get creative with braids, buns, or even tiny hats! Personalize your gnome and make it stand out.
Can I Substitute the Toilet Paper Roll With Another Type of Cylindrical Object?
Sure, you can totally use something else instead of a toilet paper roll! Get creative with alternative cylindrical objects like paper towel rolls, cardboard tubes, or even empty soda cans. The possibilities are endless for gnome-making materials!
What Are Some Alternative Ways to Decorate the Gnome’s Clothing?
There are many creative ways to decorate a gnome’s clothing. You can use different types of fabric to give them unique styles and personalities. Adding accessories like hats, scarves, and belts can also enhance their outfits.
How Do I Make My Gnome Stand Upright Without Falling Over?
To make my gnome stand upright without falling over, I can add weight to its base by using materials like clay or small rocks. Additionally, I can attach the gnome to a stand using glue or a small dowel rod.
Conclusion
In conclusion, making gnomes out of toilet paper rolls and yarn is a fun and creative craft project that anyone can enjoy.
As I followed the step-by-step instructions, I couldn’t help but think about how this simple activity was like bringing something to life.
Just like how we transform an ordinary toilet paper roll into a whimsical gnome, we have the power to transform everyday objects and situations into something magical and extraordinary.
So, let your imagination run wild and start creating your own little gnome world today!