As a DIY enthusiast, I’ve tackled many home improvement projects, but removing a toilet from the floor can be a real challenge. However, with the right tools and a step-by-step approach, it’s a task that anyone can accomplish.
In this article, I will guide you through the process of safely and effectively removing a toilet. From shutting off the water supply to detaching the toilet from the floor bolts, I’ll provide you with the detailed instructions you need for a successful toilet removal.
Let’s get started!
Key Takeaways
- Gather the necessary tools and supplies such as adjustable pliers, wrench, screwdriver, putty knife, and a bucket.
- Shut off the water supply by locating the shut-off valve and turning it clockwise. Flush the toilet to drain the water and use a plunger to remove any remaining water. Soak up the remaining water with a sponge or towel.
- Detach the toilet from the floor bolts by locating the plastic caps covering the bolts and removing them with a flathead screwdriver or putty knife. Unscrew the nuts securing the toilet to the floor bolts. Lift the toilet straight up, being careful not to tilt it, and rock it back and forth to break the wax seal.
- Remove the toilet tank and bowl separately by turning off the water supply valve and flushing the toilet to drain the water from the tank. Disconnect the nuts connecting the water supply line to the tank and remove the bolts securing the tank to the bowl. Lift the tank off the bowl and set it aside. Break the wax seal between the bowl and the floor, then lift the bowl straight up to detach it from the floor.

GIOTOHUN Cat Water Fountain Filter Replacement: 12 Cat Fountain Filter - 12 Pet Fountain Filter - 6 Carbon Filters & 6 Foam Filters - Suitable for GIOTOHUN Stainless Steel Cat Fountain S11
- Compatible with GIOTOHUN Stainless Steel Fountain: Fits GIOTOHUN 2.2L cat water dispenser
- Set of 12 Filters: Includes 6 carbon and 6 sponge filters
- Long-lasting Filters: Suitable for 3-6 months of use
As an affiliate, we earn on qualifying purchases.
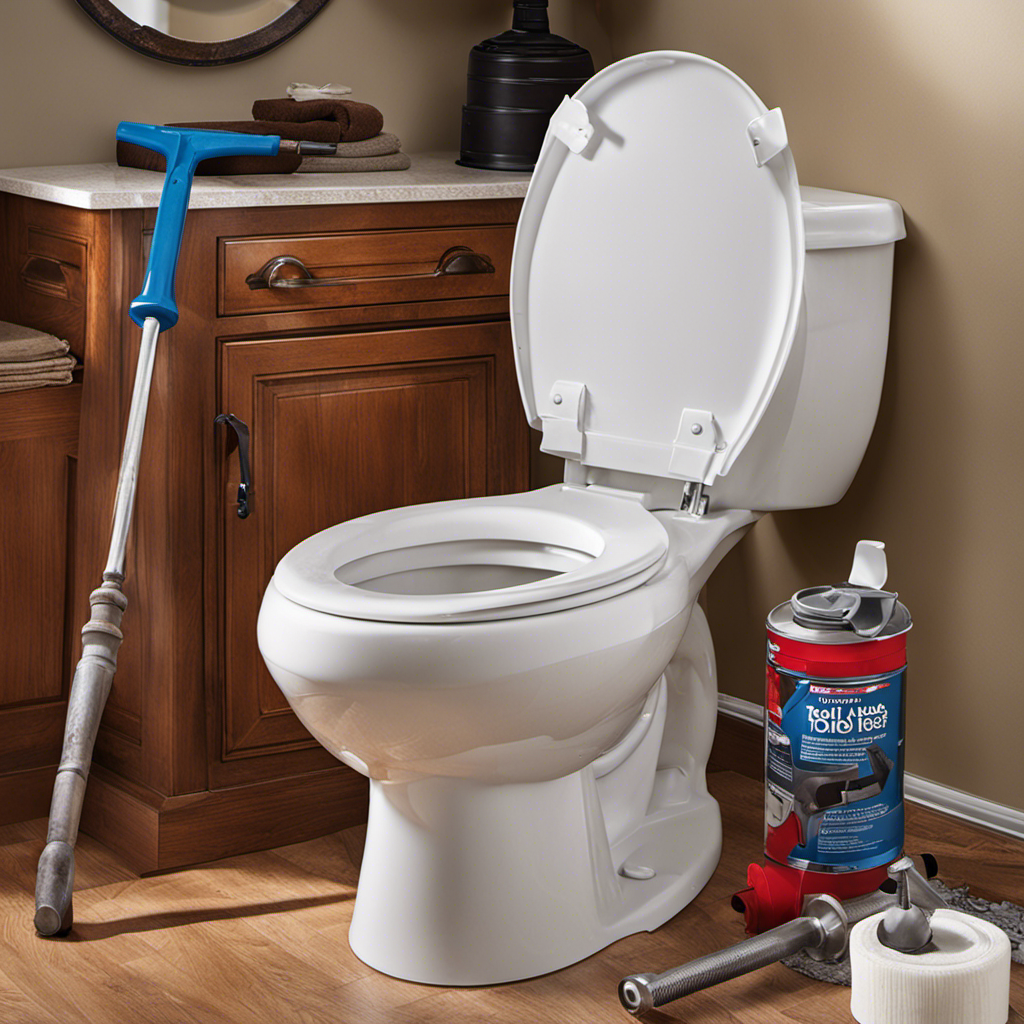
Gathering the Necessary Tools and Supplies
Before you start, make sure you have all the necessary tools and supplies for removing the toilet from the floor.
There are a few alternatives to removing a toilet, such as hiring a professional plumber or using a toilet removal kit. However, with the right tools and a little know-how, you can do it yourself.
Some common mistakes to avoid when installing a toilet include not properly securing the toilet to the floor, using the wrong size wax ring, and overtightening the bolts.
To avoid these issues, you will need a few key tools and supplies. Firstly, you will need a pair of adjustable pliers, a wrench, and a screwdriver. Additionally, you will need a putty knife, a bucket, and a new wax ring for reinstallation.
Having these tools and supplies ready will ensure a smooth and successful toilet removal process.
Shutting off the Water Supply and Draining the Toilet
To prevent any water leakage, make sure you turn off the water supply and drain the toilet before removing it from the floor. This is an important step that ensures a smooth and mess-free process.
Here are a few easy steps to shut off the water supply and drain the toilet:
-
First, locate the shut-off valve, which is usually located on the wall or floor near the toilet. Turn the valve clockwise to shut off the water supply. If you cannot find the shut-off valve or it is not working properly, you may need to shut off the main water supply to your home.
-
Once the water supply is shut off, flush the toilet to drain as much water as possible from the tank and bowl. Use a plunger to help remove any remaining water.
-
To fully drain the toilet, use a sponge or towel to soak up any remaining water in the tank and bowl. Wring out the sponge or towel into a bucket or sink.
-
Check the drainage pipe for any clogs or blockages. Use a plunger or plumbing snake to clear any obstructions.
Following these steps will ensure that the water supply is properly shut off and the toilet is drained, making it safe to remove from the floor.
Troubleshooting common issues with toilet water supply and drainage is essential to ensure a successful toilet removal process.
Detaching the Toilet From the Floor Bolts
Once you’ve shut off the water supply and drained the toilet, it’s time to detach it from the floor bolts.
To begin, locate the plastic caps covering the floor bolts at the base of the toilet. These caps can be easily removed using a flathead screwdriver or a putty knife.
With the caps removed, you’ll be able to access the floor bolts. Using an adjustable wrench or a pair of pliers, unscrew the nuts securing the toilet to the floor bolts.
Once the nuts are removed, carefully lift the toilet straight up, making sure not to tilt it. As you lift, you may feel some resistance due to the wax seal.
To fully detach the toilet, gently rock it back and forth until the wax seal breaks free.
Removing the Toilet Tank and Bowl Separately
When detaching the toilet tank and bowl, you’ll need to disconnect the water supply line and unscrew the bolts securing them together. Here is a step-by-step guide to help you remove the toilet tank and bowl separately:
- Start by turning off the water supply valve located behind the toilet.
- Flush the toilet to drain the water from the tank.
- Use an adjustable wrench to loosen and disconnect the nuts connecting the water supply line to the bottom of the tank.
- Next, remove the bolts that secure the tank to the bowl using a wrench or pliers.
- Carefully lift the tank off the bowl and set it aside.
To remove the bowl, locate the wax seal between the bowl and the floor. Gently rock the bowl back and forth to break the seal. Lift the bowl straight up to detach it from the floor.
Once you have removed the tank and bowl, you can proceed to the next step of removing the wax seal and reattaching the toilet after removal.
Now that the toilet tank and bowl have been successfully removed, it is important to clean and prepare the floor for the installation of the new toilet.
Cleaning and Preparing the Floor for Installation
After successfully detaching the tank and bowl, make sure to thoroughly clean the area on the floor where the toilet will be installed. This step is crucial to ensure a proper installation and prevent any future issues. Start by removing any debris, dust, or dirt using a broom or vacuum cleaner. Next, use a mild detergent or cleaning solution to scrub the floor and remove any stains or grime. For stubborn stains, you may need to use a scrub brush or sponge. After cleaning, inspect the floor for any signs of damage or deterioration. If you notice any cracks or weak spots, it is important to repair them before installing the new toilet. This can be done by filling the cracks with a floor repair compound and allowing it to dry completely. By following these cleaning techniques and addressing any floor repairs, you can ensure a clean and stable foundation for your new toilet.
| Cleaning Techniques | Floor Repair |
|---|---|
| Remove debris, dust, and dirt using a broom or vacuum cleaner | Inspect the floor for cracks or weak spots |
| Use a mild detergent or cleaning solution to scrub the floor | Fill cracks with a floor repair compound |
| Remove stubborn stains with a scrub brush or sponge | Allow the compound to dry completely |
| Ensure the floor is clean and dry before installing the new toilet |
Frequently Asked Questions
How Do I Know if My Toilet Needs to Be Removed From the Floor?
If my toilet is leaking, there are ways to fix it without removing it from the floor. However, if I notice signs like cracks, constant clogs, or a wobbly base, it’s time to replace it.
Can I Remove the Toilet Without Shutting off the Water Supply?
Yes, you can remove a toilet without shutting off the water supply, but it is not recommended. It’s important to shut off the water to prevent potential leaks or water damage.
Is It Necessary to Remove the Toilet Tank and Bowl Separately or Can I Remove Them Together?
It is necessary to remove the toilet tank and bowl separately. This ensures that each component can be properly disconnected and removed without causing damage or leaks. Removing them together could lead to complications.
What Should I Do if the Floor Is Damaged or Uneven After Removing the Toilet?
If the floor is damaged or uneven after removing the toilet, I would first repair the floor by filling in any holes or leveling the surface. Then, I would proceed with installing a new toilet.
Can I Reuse the Old Wax Ring When Reinstalling the Toilet?
I can reuse the old wax ring when reinstalling the toilet, but it is not recommended. There are alternative options such as using a new wax ring or using a waxless seal.
Conclusion
In conclusion, removing a toilet from the floor requires careful preparation and execution. By gathering the necessary tools and supplies, shutting off the water supply, and detaching the toilet from the floor bolts, you can successfully complete this task.
Remember to remove the toilet tank and bowl separately for easier handling. Finally, don’t forget to clean and prepare the floor for installation.
With each step, imagine the satisfaction of a job well done, as you confidently maneuver through this technical process, leaving your bathroom floor ready for a new toilet.