As a seasoned DIY enthusiast, I have encountered numerous household tasks that require careful attention and precision.
Removing a toilet seat may seem like a daunting task, but fear not! In this step-by-step guide, I will walk you through the process with ease and confidence.
Just like a skilled surgeon delicately removes a splinter, we will approach this task with finesse, utilizing the necessary tools and techniques to ensure a seamless removal.
So grab your gloves and let’s get started!
Key Takeaways
- Gather the necessary tools such as a screwdriver and pliers for toilet seat removal.
- Locate the screws or bolts at the back of the seat and unscrew them counterclockwise using a screwdriver.
- Apply pressure on the seat while unscrewing to prevent movement and use lubricant or penetrating oil if the screws are tight.
- Turn off the water supply, locate the bolts at the back of the seat, and loosen the nuts using a wrench or pliers to detach the seat from the toilet bowl.

Clorox Toilet Seat Tightening Kit
INCLUDES: Wrench, bolt grip, and six wiggle-proof washers
As an affiliate, we earn on qualifying purchases.
As an affiliate, we earn on qualifying purchases.
Gathering the Necessary Tools
To remove the toilet seat, you’ll need a screwdriver and pliers. Before you begin, make sure to locate the screws or bolts that are holding the seat in place. These are usually found at the back of the seat.
Start by using the screwdriver to unscrew the screws counterclockwise. If the screws are too tight, you can try using a lubricant or penetrating oil to loosen them. If the screws are stripped or corroded, you may need to use pliers to grip and turn them.
Another helpful tip is to apply pressure on the seat while unscrewing to prevent it from moving around. Once the screws are completely removed, you can lift the seat off the toilet bowl.
Troubleshooting toilet seat removal can be done by ensuring you have the right tools and following these steps carefully.
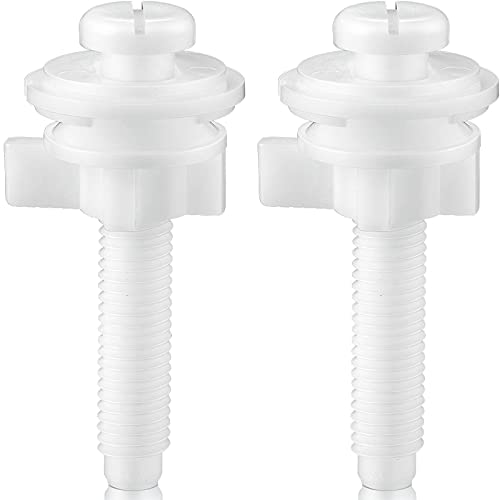
Jetec 2 Pieces Toilet Seat Screws Replacement Kit Plastic Bolts with Plastic Nuts and Washers Parts Kit for Fixing The Top Toilet Seat, White
Sufficient quantity: you will get a toilet seat bolt set, including 2 pieces plastic bolts, 2 plastic washers…
As an affiliate, we earn on qualifying purchases.
As an affiliate, we earn on qualifying purchases.
Preparing the Toilet Seat for Removal
First, you’ll need to ensure that you’ve turned off the water supply to the toilet. This is important to prevent any water leakage during the removal process.
Once the water supply is turned off, locate the two bolts that secure the toilet seat to the bowl. These bolts are usually located at the back of the seat.
Take a wrench or a pair of pliers and loosen the nuts on these bolts. Once the nuts are loosened, you can lift the toilet seat off the bowl. Be careful not to damage the bowl or the surrounding area during this process.
After removing the old seat, you can proceed with the installation of the new seat or perform any necessary maintenance on the existing seat.

Bemis 1500EC 390 Lift-Off Wood Elongated Toilet Seat, Cotton White (Pack of 1)
EASY CLEAN: Designed for your convenience, this toilet seat comes with hinges that easily release the seat for…
As an affiliate, we earn on qualifying purchases.
As an affiliate, we earn on qualifying purchases.
Removing the Bolts or Screws
When it comes to removing bolts or screws, there are a few key points to keep in mind.
First, you’ll want to use the proper technique for loosening the bolts. This may involve using a wrench or pliers to apply steady, even pressure while turning counterclockwise.
Secondly, it’s important to have the right size screwdriver for the job. Using a screwdriver that is too small or too large can strip the screw or bolt, making it more difficult to remove.
Lastly, common issues that may arise when removing bolts or screws include rust or corrosion, which can make them harder to loosen, as well as stripped or damaged heads, which may require alternative removal methods.
Bolt Loosening Techniques
If you’re struggling with a stubbornly tight toilet seat, try using some lubricant to loosen the bolts. Here’s a step-by-step guide on how to do it:
-
Start by gathering the necessary materials: lubricant (such as WD-40) and a wrench or screwdriver.
-
Locate the bolts that fasten the toilet seat to the bowl. These are usually found at the back of the seat, near the hinges.
-
Spray a generous amount of lubricant onto the bolts and let it sit for a few minutes. This will help loosen any rust or corrosion that may be causing the tightness.
-
Once the lubricant has had some time to work its magic, use the wrench or screwdriver to loosen the bolts. Turn them counterclockwise to loosen them.
-
Repeat this process for all the bolts until the toilet seat is loose enough to remove.
Screwdriver Size Requirements
To determine the appropriate screwdriver size for toilet seat installation or replacement, refer to the manufacturer’s instructions or consult a hardware store employee. The size of the screwdriver needed may vary depending on the type of screws used in your toilet seat.
Generally, most toilet seats require a Phillips head screwdriver, which has a cross-shaped tip. The size of the Phillips head screwdriver can range from 0 to 4, with 0 being the smallest and 4 being the largest. It’s important to use the correct size screwdriver to avoid damaging the screw heads or the toilet seat itself.
Once you have determined the correct size, insert the screwdriver into the screw head and turn it counterclockwise to loosen the screws. This will allow you to remove the toilet seat.
Now, let’s move on to discussing common bolt/screw issues that may arise during toilet seat removal.
Common Bolt/Screw Issues
You may encounter common bolt/screw issues during toilet seat removal, such as stripped or rusted screws. To overcome these challenges, here are some DIY troubleshooting tips:
-
Inspect the screws: Before attempting to remove the toilet seat, closely examine the screws for any signs of rust or stripping. This will help you anticipate any potential problems.
-
Apply rust prevention measures: If you notice rust on the screws, apply a rust dissolver or penetrating oil to loosen them. Allow the solution to sit for a few minutes before attempting to remove the screws.
-
Use the correct tools: Ensure you have the right tools, such as a screwdriver or wrench, that fit the screws properly. This will help prevent further damage to the screws and facilitate their removal.
-
Apply gentle pressure: When removing the screws, apply steady and gentle pressure to avoid stripping or further damaging them. If the screws are stubborn, try rocking them back and forth to loosen them.

Houkiper Toilet Seat Repair Wrench, Toilet Seat Fitting Tool 10/13/17mm Universal Anti-slip Toilet Seat Installation Key for Toilet Bowl, Sink, Bathroom, Kitchen Plumbing, 1Pack
【High Quality Material】The faucet installation tool is made of engineering grade ABS, which is sturdy and durable, not…
As an affiliate, we earn on qualifying purchases.
As an affiliate, we earn on qualifying purchases.
Detaching the Seat From the Toilet Bowl
Once you’ve identified the bolts, it’s important to loosen them using a wrench. Start by locating the bolt heads on the underside of the toilet seat. These bolts are usually made of plastic or metal and are threaded into the hinges that attach the seat to the toilet bowl.
Take your wrench and place it on the bolt head, making sure it fits snugly. Turn the wrench counterclockwise to loosen the bolts. You may encounter some resistance, especially if the bolts have been tightly secured. Apply steady pressure until the bolts start to loosen.
Once they are sufficiently loosened, you can continue to unscrew them by hand. Repeat this process for both bolts until the seat is completely detached from the toilet bowl.
Cleaning and Disinfecting the Area
When cleaning and disinfecting the area, it’s important to use a suitable cleaner and follow the instructions on the label. Here are some cleaning techniques and disinfectant options to consider:
-
Start by removing any loose debris or dirt from the surface of the toilet seat using a soft cloth or brush.
-
Choose a suitable cleaner for the material of your toilet seat. For plastic seats, mild soap and water solution works well. For wooden seats, use a wood cleaner or a mixture of vinegar and water.
-
Apply the cleaner to the surface of the seat and scrub gently using a soft cloth or sponge. Pay extra attention to any stains or discoloration.
-
After cleaning, rinse the seat thoroughly with clean water and wipe it dry with a clean cloth.
Once the cleaning and disinfecting process is complete, it’s time to inspect for any damage or repairs needed.
Inspecting for Any Damage or Repairs Needed
To ensure the safety of the area, it’s essential to carefully inspect for any signs of damage or repairs that may be needed.
Before proceeding with any repair or replacement of a toilet seat, it is crucial to assess the condition of the surrounding area.
Start by visually examining the toilet bowl and seat hinges for any cracks, chips, or signs of wear and tear.
Next, check the stability of the seat by sitting on it and applying gentle pressure in different directions. If there are any wobbles or loose fittings, it may indicate the need for repair or replacement.
Additionally, inspect the screws or bolts securing the seat to the toilet bowl and tighten them if necessary.
Reinstalling a New Toilet Seat (Optional)
You can simply attach the new toilet seat by aligning the hinges with the holes on the bowl and tightening the screws.
To reinstall a new toilet seat, follow these steps:
-
Remove the old seat: Start by unscrewing the bolts that secure the old seat to the bowl using a screwdriver or wrench. Lift the seat and carefully remove it from the bowl.
-
Measure and choose a new seat: Take measurements of the bolt hole spacing on the bowl to ensure you select a seat that fits properly. Consider the style and material of the seat that suits your preference and bathroom decor.
-
Align the hinges: Place the new seat on the bowl, aligning the hinges with the holes on the bowl. Make sure the seat is centered and sits evenly on the bowl.
-
Secure the seat: Insert the bolts through the holes on the hinges and the bowl. Tighten the nuts underneath the bowl using a screwdriver or wrench. Ensure the seat is securely attached, but be careful not to overtighten and damage the bowl.
Frequently Asked Questions
Can I Use a Regular Screwdriver to Remove the Bolts or Screws?
Yes, you can use a regular screwdriver to remove the bolts or screws of a toilet seat. However, there are alternative tools such as a wrench or pliers that may make the task easier.
What Kind of Cleaning Solution Should I Use to Disinfect the Area?
I recommend using a bleach-based cleaning solution or a disinfectant spray to effectively kill germs and bacteria on the toilet seat. These options are known for their disinfectant effectiveness and can help ensure a clean and sanitary area.
How Do I Know if There Is Any Damage to the Toilet Bowl After Removing the Seat?
Toilet bowl inspection is crucial after DIY toilet seat removal. Look for any signs of damage such as cracks, leaks, or loose bolts. Carefully examine the entire bowl, both inside and outside, to ensure its integrity and functionality.
Can I Reuse the Bolts or Screws From the Old Toilet Seat?
Yes, you can reuse the bolts or screws from the old toilet seat. However, before reusing them, it is important to check for any rust or damage. Remove rust using a wire brush or replace if necessary.
How Often Should I Replace My Toilet Seat?
I replace my toilet seat every 5 years. Upgrading to a new seat not only improves hygiene, but also adds a touch of freshness to the bathroom. It’s a simple and worthwhile upgrade.
Conclusion
In conclusion, removing a toilet seat may seem like a daunting task, but it can be done easily with the right tools and steps. By following the detailed instructions provided, you can successfully detach the seat from the toilet bowl and ensure a clean and disinfected area.
Remember, ‘out with the old, in with the new’ – it’s time to bid farewell to that old toilet seat and consider installing a new one for a fresh and updated look.
Happy seat removal!