
Did you know that a leaking overflow tube in your toilet can waste up to 200 gallons of water per day? That’s enough to fill a bathtub!
If you’re tired of the constant drip and want to save water and money, you’ve come to the right place. In this article, I will guide you through the step-by-step process of replacing the overflow tube in your toilet.
With a few tools and a little patience, you’ll have a fully functioning toilet in no time. Let’s get started!
Key Takeaways
- The overflow tube is a crucial component of the toilet’s flushing system that prevents water from overflowing out of the tank.
- Regular maintenance is necessary to ensure the proper functioning of the overflow tube.
- Clogs and mineral deposits can reduce the efficiency of the overflow tube.
- Replacing the overflow tube restores optimal functionality and prevents issues such as rising water levels, gurgling sounds, leaks, and constant running noise.
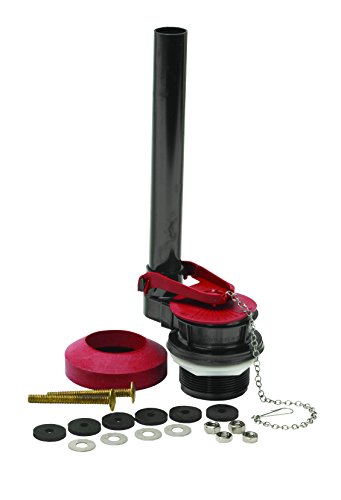
Fluidmaster 507AKP7 PerforMAX Universal High Performance 2-Inch Toilet Flush Valve Repair Kit with Gasket and Bolts
Quick, easy to install
As an affiliate, we earn on qualifying purchases.
As an affiliate, we earn on qualifying purchases.
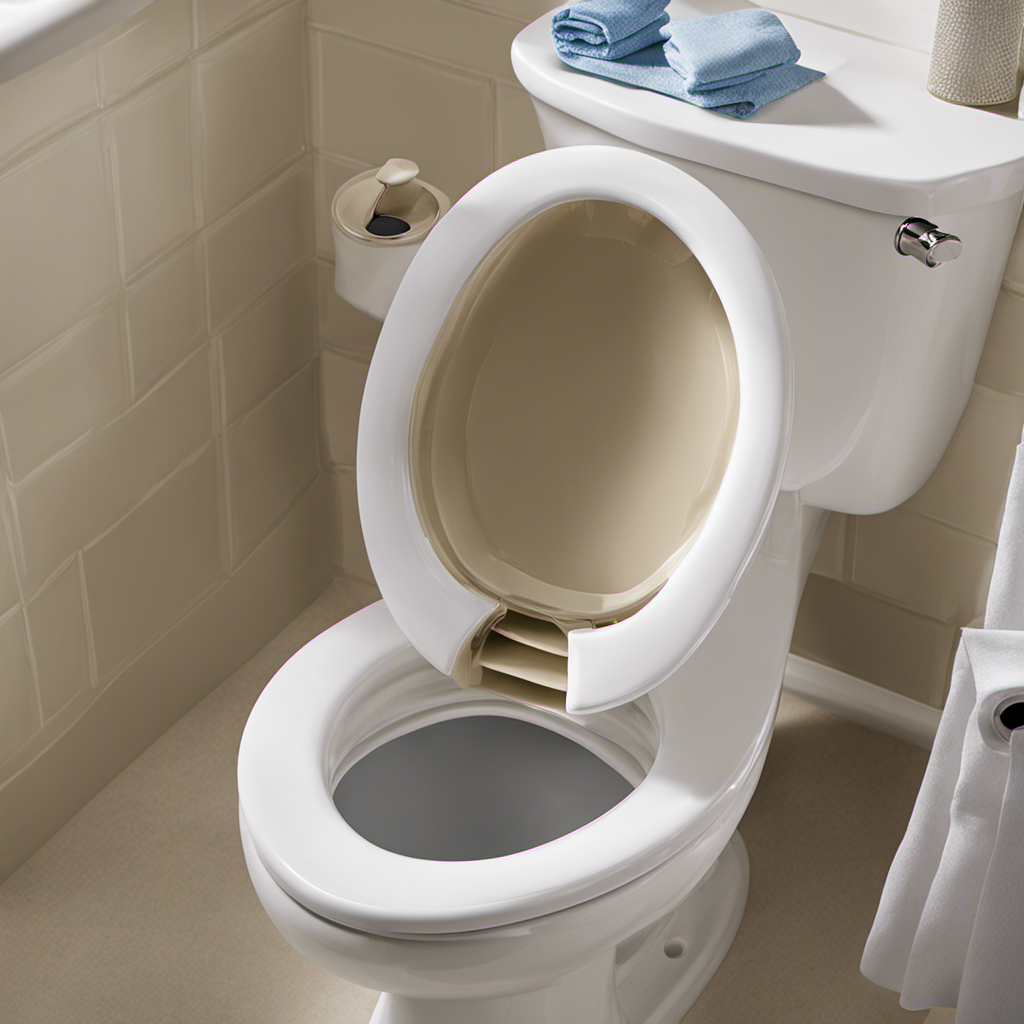
Understanding the Overflow Tube
To understand the overflow tube, you’ll need to know that it’s responsible for preventing water from overflowing out of your toilet tank. The overflow tube is a vital component of your toilet’s flushing system. It ensures that the water level in the tank does not exceed a certain limit, preventing any potential water damage or flooding.
Regular maintenance of the overflow tube is crucial to ensure its proper functioning. Over time, the tube can become clogged with debris or mineral deposits, leading to reduced efficiency. By replacing the overflow tube, you can restore the optimal functionality of your toilet and prevent any potential issues.
The benefits of replacing the overflow tube include improved flushing performance, reduced risk of water damage, and increased lifespan of your toilet. Regular maintenance and replacement of the overflow tube will help to keep your toilet functioning efficiently for years to come.

Fluidmaster Universal Install/Uninstall Toilet Repair Tool
Fluidmaster’s universal install and uninstall toilet tool makes any toilet repair job simple
As an affiliate, we earn on qualifying purchases.
As an affiliate, we earn on qualifying purchases.
Gathering the Necessary Tools and Supplies
When it comes to replacing the overflow tube in a toilet, having the right tools and supplies is essential. In order to successfully complete the installation process, you will need a few key items.
In this discussion, I will outline the essential tools and supplies you will need, as well as provide a step-by-step guide to help you navigate the installation process with ease.
Essential Tools and Supplies
All you need are a few essential tools and supplies to replace the overflow tube in your toilet. Here is a list of the items you will need:
| Tools | Supplies |
|---|---|
| Wrench | Replacement overflow tube |
| Screwdriver | Plumbers tape |
| Pliers | Bucket or towel |
| Adjustable wrench | Silicone sealant |
| Hacksaw |
Now that you have gathered the necessary tools and supplies, it’s important to know some common mistakes to avoid when replacing an overflow tube. One common mistake is not turning off the water supply before starting the replacement process. This can result in a flooded bathroom and potential water damage. Another mistake is not properly sealing the new overflow tube with silicone sealant, which can cause leaks.
To maintain and extend the lifespan of your new overflow tube, here are some helpful tips. Regularly check for any leaks around the tube and make repairs as needed. Clean the tube periodically to prevent clogs and buildup. Lastly, avoid using harsh chemicals or abrasive cleaners that can damage the tube. By following these tips, your new overflow tube will last for years to come.
Step-By-Step Installation Process
First, make sure you have the necessary tools and supplies ready for the step-by-step installation process. You will need a wrench, sponge, replacement overflow tube, and plumber’s tape.
To troubleshoot leaks, start by turning off the water supply to the toilet. Flush the toilet to drain any remaining water in the tank.
Next, remove the old overflow tube by unscrewing the nut at the bottom of the tank. Clean the area around the hole using a sponge.
Apply plumber’s tape to the threads of the new overflow tube and insert it into the hole. Tighten the nut to secure the tube in place.
toilet overflow tube replacement parts
As an affiliate, we earn on qualifying purchases.
As an affiliate, we earn on qualifying purchases.
Shutting Off the Water Supply
To shut off the water supply, you’ll need to locate the water valve and turn it clockwise.
Regular maintenance is important to ensure the proper functioning of your toilet and prevent any issues.
One common problem that can occur is a faulty overflow tube. This tube is responsible for preventing the water in the tank from overflowing and causing damage to your bathroom floor.
If you notice that the water level in the tank is constantly rising or the toilet is making strange gurgling sounds, it may be a sign that the overflow tube is faulty. Other signs include water leaking from the toilet tank or a constant running noise.
It’s important to address these issues promptly to avoid any further damage and costly repairs.
toilet repair silicone sealant
As an affiliate, we earn on qualifying purchases.
As an affiliate, we earn on qualifying purchases.
Removing the Old Overflow Tube
When it comes to removing the old overflow tube, it’s important to follow the proper procedure to avoid any damage or complications.
First, make sure to turn off the water supply and flush the toilet to empty the tank.
Then, using the necessary tools such as pliers or a wrench, carefully disconnect the tube from the toilet tank.
Proper Tube Removal
Before removing the tube, make sure to turn off the water supply to the toilet. This is important to prevent any water leakage while working on the tube replacement.
Once the water supply is turned off, follow these tube removal techniques:
- Disconnect the water supply line from the fill valve by unscrewing the nut connecting them.
- Use a wrench to loosen the nut securing the tube to the overflow pipe.
- Gently pull the tube out of the overflow pipe, taking care not to damage any surrounding parts.
Troubleshooting Tips:
- If the tube is stuck or difficult to remove, try applying some lubricant to the connection points to loosen it.
- If there is any resistance when pulling the tube, double-check that all nuts and connections are completely loosened before proceeding.
Tools Needed for Removal
You’ll need a wrench and some lubricant to help you remove the old tube from your toilet.
When it comes to selecting the right tools for the job, it’s important to choose a wrench that fits securely around the nuts and bolts of the toilet. A adjustable wrench or a basin wrench are commonly used for this task.
As for the lubricant, you can use a silicone-based lubricant to loosen any rust or corrosion that may have built up over time. This will make it easier to unscrew the nuts and remove the old tube.
Troubleshooting methods can also involve inspecting the tube for any cracks or damage before removing it.
Installing the New Overflow Tube
To install the new overflow tube, first, make sure you have the necessary tools and replacement part. You will need a wrench, pliers, a new overflow tube, and a rubber gasket.
Here are some common mistakes to avoid during overflow tube installation:
-
Forgetting to turn off the water supply: Before starting the installation process, it’s important to turn off the water supply to the toilet to prevent any water damage or flooding.
-
Incorrect placement of the rubber gasket: The rubber gasket is essential for creating a watertight seal. Make sure to place it securely between the tank and the overflow tube to prevent any leaks.
Here are some tips for maintaining the new overflow tube:
-
Regular cleaning: Clean the overflow tube periodically to prevent any clogs or build-up.
-
Check for leaks: Keep an eye out for any signs of leaks around the overflow tube and address them promptly to avoid any water damage.
Testing for Proper Functionality
After installing the new overflow tube, it’s important to test for proper functionality to ensure it is working correctly. There are a few testing methods and troubleshooting tips that can help determine if the overflow tube is functioning as it should.
One method is to simply flush the toilet and observe the water level. If the water level rises above the overflow tube and starts spilling into the tube, then it is working properly. Another method is to use a dye test. Add a few drops of food coloring into the tank, wait for a few minutes, and then flush. If the colored water appears in the bowl and not in the overflow tube, then it is functioning correctly.
Here is a table summarizing the testing methods and troubleshooting tips for the overflow tube:
| Testing Methods | Troubleshooting Tips |
|---|---|
| Flush test | Check for leaks |
| Dye test | Adjust water level |
| Clear any blockages |
Troubleshooting Common Issues
If the water level in the tank is too high, it could indicate a problem with the float valve. To troubleshoot common toilet problems, there are several techniques you can try:
-
Check the float valve: Ensure that the float valve is not stuck in the closed position. If it is, gently push it down to see if that resolves the issue.
-
Inspect the fill valve: If the water continues to overflow, the fill valve may be faulty. Check if it is properly adjusted and not leaking. If necessary, replace the fill valve.
-
Adjust the water level: Sometimes, the water level may be set too high, causing constant overflowing. Adjust the float arm or float ball to lower the water level.
-
Check the flush valve: A faulty flush valve can also cause overflow. Inspect the valve seal for any signs of damage or deterioration. Replace if necessary.
Conclusion
In conclusion, replacing the overflow tube in your toilet is a simple yet essential task that anyone can do.
By understanding the purpose of the overflow tube and gathering the necessary tools and supplies, you can easily shut off the water supply and remove the old tube.
Installing the new overflow tube is a straightforward process, and testing for proper functionality ensures a job well done.
If you encounter any issues, refer to the troubleshooting guide for solutions.
Don’t wait any longer, get started on replacing that overflow tube today!