
I’ve got a leaky shut off valve for my toilet and I can’t wait to fix it! In this article, I’ll show you step by step how to replace the shut off valve yourself.
With just a few tools and some patience, you’ll be able to shut off the water supply, remove the old valve, and install a new one in no time.
So, let’s dive in and get your toilet back in working order!
Key Takeaways
- Ensure the water supply is turned off before starting the replacement process
- Use the correct size and type of shut off valve for your toilet, considering factors such as water pressure and valve material
- Troubleshoot common issues before replacing the valve, such as leaks or difficulty turning the valve
- Test the new shut off valve for leaks and proper functionality after installation

Bluevua Official RO100ROPOT 4-Pack Replacement Filter Set, Pack of 1 PP Filter and 1 CTO Filter and 1 RO Filter and 1 PCF Filter
- Complete Filter Set: Includes PP, CTO, RO, and PCF filters
- Easy to Replace: No tools or water shut-off needed
- Long-Lasting Filters: Filters last up to 2 years
As an affiliate, we earn on qualifying purchases.
Tools and Materials Needed
You’ll need a few tools and materials to replace the shut off valve for the toilet.
When it comes to replacing a shut off valve for a toilet, there are some common mistakes that you should avoid.
One common mistake is not turning off the water supply before starting the replacement process. This can lead to a messy and potentially damaging situation.
Another mistake to avoid is using the wrong size or type of shut off valve. It’s important to choose the right shut off valve for your toilet replacement project.
When choosing a shut off valve, consider factors such as the type of toilet you have, the water pressure in your home, and the material of the valve itself.
Taking these tips into account will ensure a successful shut off valve replacement for your toilet.
Step 1: Shutting off the Water Supply
To start, make sure the water supply is turned off before proceeding. Shutting off the water supply is an essential first step when replacing a shut off valve for a toilet.
There are various shut off valve types available, including compression, quarter-turn, and ball valves. Each type has its own advantages and installation requirements.
Before replacing the shut off valve, it is important to troubleshoot common issues such as leaks, difficulty turning the valve, or no water flow. These issues can often be resolved by tightening any loose connections, lubricating the valve, or replacing faulty parts.
Once the water supply is turned off and any issues are resolved, you can proceed with confidence to replace the shut off valve for your toilet.
Step 2: Removing the Old Shut off Valve
First, check for any signs of corrosion or rust on the old shut off valve, as this can make it more difficult to remove. If you notice any rust or corrosion, it is important to take extra precautions to avoid damaging the surrounding pipes.
To remove a rusted valve, start by using a penetrating oil or rust dissolver to loosen the rust. Apply the product to the valve and let it sit for a few minutes to allow it to penetrate the rust. Then, use a wrench or pliers to grip the valve and slowly turn it counterclockwise to loosen it. If the valve is stubborn and won’t budge, you can try using heat from a hairdryer to expand the metal and break the rust bonds. Be careful not to overheat the valve or surrounding pipes. Once the valve is loose, continue turning it until it can be completely removed.
With these tips, you should be able to successfully remove a stubborn, rusted shut off valve.
Now that the old shut off valve has been removed, it’s time to move on to step 3: installing the new shut off valve.
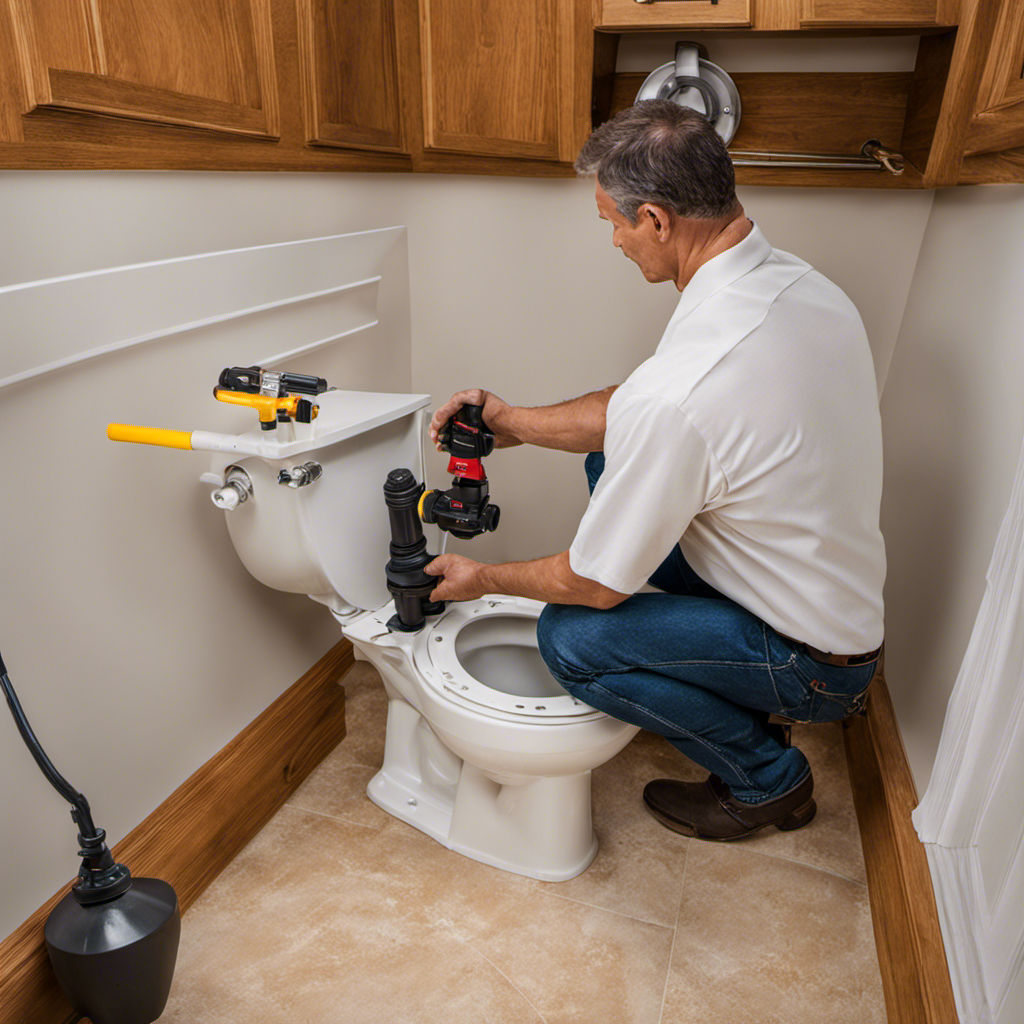
Step 3: Installing the New Shut off Valve
Now that you’ve successfully removed the old shut off valve, it’s time to install the new one. Here are some tips to help you with the installation process:
- Make sure to shut off the water supply before starting the installation.
- Use Teflon tape or pipe joint compound to ensure a watertight seal.
- Tighten the fittings using a wrench, but be careful not to overtighten and damage the threads.
- Check for any leaks by turning on the water supply and inspecting for any drips or water seepage.
- Finally, test the shut off valve by turning it on and off to ensure proper functionality.
Step 4: Testing and Troubleshooting
After installing the new shut off valve, it’s important to test for any leaks or issues with functionality. This step ensures that the replacement was successful and that your toilet will function properly. Here are some troubleshooting tips to help you identify and fix common mistakes:
| Problem | Possible Cause | Solution |
|---|---|---|
| Leaks | Loose connections | Tighten all connections with a wrench |
| No water flow | Blocked water supply line | Clear any obstructions in the supply line |
| Valve won’t turn | Corroded handle or stem | Replace the handle or stem if necessary |
Frequently Asked Questions
How Do I Know if My Shut off Valve Needs to Be Replaced?
If my shut off valve is faulty, there are signs to look out for such as leaking or difficulty turning the valve. To test for leaks, shut off the water supply and check for any water seepage.
Can I Replace the Shut off Valve Myself, or Should I Hire a Professional Plumber?
I can definitely replace the shut off valve myself for the toilet, but hiring a professional plumber has its advantages. It’s important to weigh the pros and cons of DIY versus professional work and avoid common mistakes.
Is It Common for Shut off Valves to Leak After They Are Replaced?
It is not uncommon for shut off valves to leak after replacement. Shut off valve troubleshooting reveals common causes such as improper installation, worn-out washers, or corrosion. Professional help may be needed to fix the issue.
Can I Use a Different Type of Shut off Valve Than the One Currently Installed?
Yes, you can use a different type of shut off valve for your toilet. There are various options available, each with their own pros and cons. It’s important to consider factors such as durability and compatibility with your plumbing system.
How Long Does It Typically Take to Replace a Shut off Valve for a Toilet?
Replacing a shut off valve for a toilet typically takes about 30 minutes. You’ll need a pipe wrench, Teflon tape, and a new shut off valve. Follow the step-by-step instructions on how to install it properly.
Conclusion
In conclusion, replacing a shut off valve for a toilet is a task that can be easily accomplished with the right tools and materials.
Just like a valve controls the flow of water, this process allows you to take control of your plumbing situation.
By following the steps outlined in this article, you can successfully install a new shut off valve and ensure a smooth water supply to your toilet.
Take charge of your plumbing and restore the balance in your bathroom!