I’ve been there – the dreaded moment when you discover a damaged toilet flange in your concrete floor. But fear not! In this article, I’ll guide you through the step-by-step process of replacing a toilet flange in concrete.
With the right tools and materials at hand, you’ll be able to tackle this task with confidence. Say goodbye to leaks and hello to a properly functioning toilet. Let’s get started!
Key Takeaways
- Assess the concrete surface for cracks or deterioration before replacing the flange.
- Clean the surface thoroughly using a scraper, wire brush, and concrete cleaner.
- Gather the necessary tools and materials such as a reciprocating saw, hammer drill, new flange, PVC pipe, and concrete patching compound.
- Follow proper installation procedures to ensure a secure, level, and leak-proof attachment of the new flange.

One N Done Toilet Flange Repair Kit – Toilet Kit For Low or Broken Flange. Toilet Wax Ring Replacement Kit W/Toilet Flange Extender Kit, Easy Toilet Bolts, & Toilet Caps For Bottom of Toilet. (1 Ea.)
Save Time & Money | No wax ring for toilet required. The One N Done toilet flange repair…
As an affiliate, we earn on qualifying purchases.
As an affiliate, we earn on qualifying purchases.
Assessing the Damage
Now, you’ll need to assess the damage to the toilet flange in the concrete.
Start by inspecting the area around the flange for any visible cracks or signs of deterioration. Look closely for any hairline fractures or larger fissures that could compromise the structural integrity of the concrete.
If you notice any cracks, it’s crucial to address them before proceeding with the replacement of the flange. Repairing concrete cracks is essential to ensure a solid foundation for the new toilet flange.
You can reinforce the concrete structure by using a concrete repair compound or epoxy filler. Apply the material carefully, following the manufacturer’s instructions, to effectively seal and strengthen the cracks.
Take your time during this assessment process to identify all necessary repairs and ensure the stability of the concrete before moving forward.
concrete toilet flange replacement
As an affiliate, we earn on qualifying purchases.
As an affiliate, we earn on qualifying purchases.
Gathering the Necessary Tools and Materials
When it comes to replacing a toilet flange in concrete, having the right tools is essential for a successful installation. The key tools you will need include a reciprocating saw, a hammer drill, and a chisel. These tools will allow you to remove the damaged flange and prepare the concrete for the new installation.
Additionally, you will also need a few materials such as a new toilet flange, PVC pipe, and concrete patching compound to complete the replacement process. Gathering these necessary tools and materials will ensure that you are well-prepared for the task at hand.
Essential Tools for Replacement
To replace a toilet flange in concrete, you’ll need a few essential tools.
The first tool you’ll need is a pair of pliers or a wrench to remove the bolts securing the toilet to the flange.
Next, you’ll need a scraper or chisel to remove any old wax or caulk from the flange and surrounding area.
A hacksaw or reciprocating saw will come in handy for cutting through the old flange if necessary.
Additionally, you’ll need a putty knife to clean the area around the flange and a level to ensure the new flange is properly aligned.
Finally, you’ll need a drill and screws to secure the new flange to the concrete.
These tools are essential for a successful toilet flange repair and will make the flange replacement process much easier.
Required Materials for Installation
You’ll need a few essential materials for installing the new flange, such as a wax ring, bolts, and caulk. When it comes to toilet flange installation or repair, these materials are crucial for ensuring a proper and secure fit.
The wax ring is placed between the toilet and the flange to create a watertight seal. The bolts are used to secure the toilet to the flange, keeping it firmly in place. Caulk is applied around the base of the toilet to prevent any leaks or water damage.
These materials work together to ensure a successful installation or repair of the toilet flange. Without them, the flange may not function properly and could lead to water leaks or instability in the toilet.

Flange-Off Toilet Flange Removal Tool
For professional use only to safely remove a toilet flange
As an affiliate, we earn on qualifying purchases.
As an affiliate, we earn on qualifying purchases.
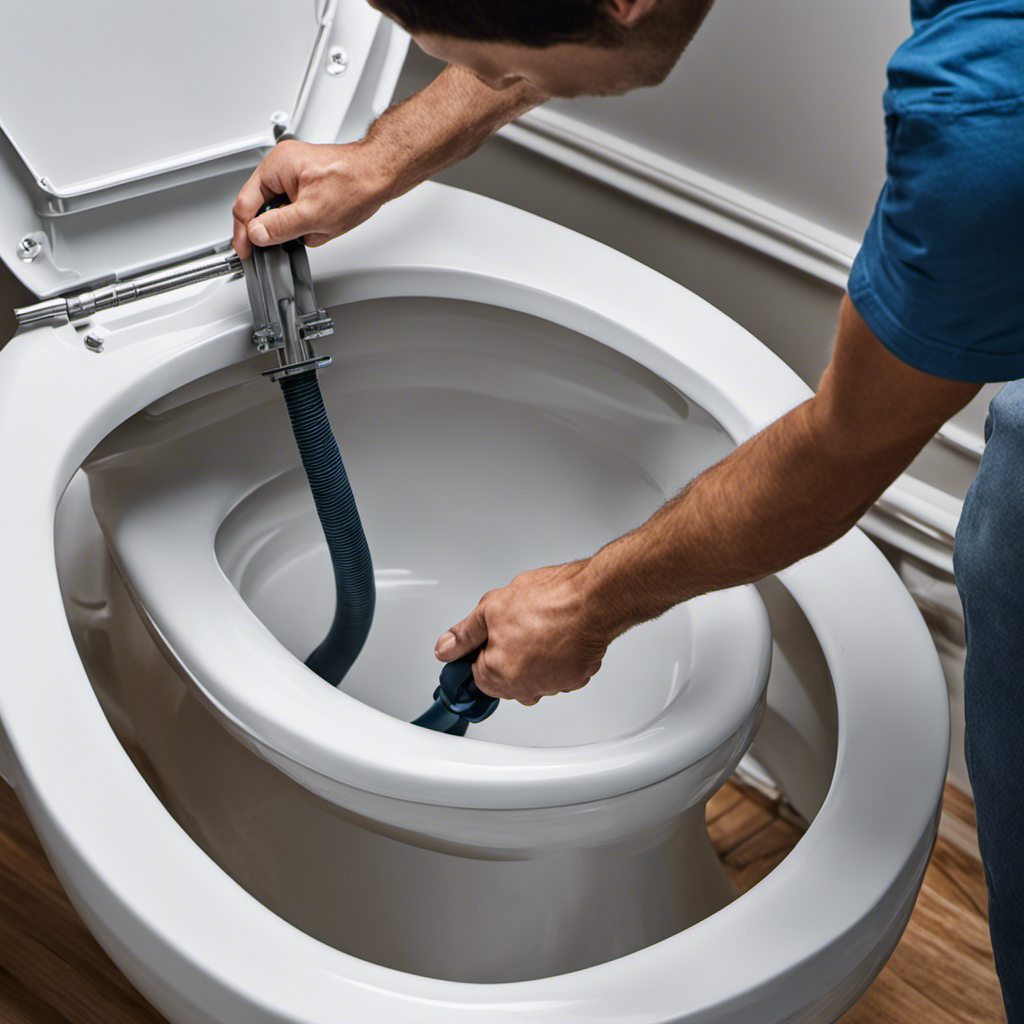
Removing the Old Toilet Flange
When it comes to removing the old toilet flange, there are a few key points to consider.
First, it’s important to determine the best removal methods depending on the type of flange and its condition.
Secondly, one must be prepared to face potential difficulties that may arise during the removal process, such as rusted bolts or a stubborn flange.
Therefore, understanding the most effective removal techniques and being prepared for any challenges will ensure a successful and efficient removal of the old toilet flange.
Best Removal Methods
The best way to remove a toilet flange in concrete is by using a hammer and chisel. This method allows for precise and controlled removal, minimizing the risk of damage to the surrounding concrete. However, it is important to exercise caution and wear protective gear when using these tools.
In addition to using a hammer and chisel, there are other removal techniques that can be employed. These include using a reciprocating saw or a pry bar to loosen and extract the flange. It is advisable to seek professional assistance if you are unsure about the best removal method for your specific situation.
Here is a table summarizing the different removal techniques and their pros and cons:
| Removal Technique | Pros | Cons |
|---|---|---|
| Hammer and Chisel | Precise, controlled removal | Requires caution and skill |
| Reciprocating Saw | Efficient and fast removal | Risk of damaging the concrete |
| Pry Bar | Versatile and easy to use | May require more effort |
In the next section, we will discuss potential difficulties encountered during the removal process and how to overcome them.
Potential Difficulties Encountered
After successfully removing the toilet flange in concrete, there may be some difficulties that arise during the replacement process.
One common difficulty is aligning the new flange with the existing drainage pipe. This can be challenging as the pipe may be slightly misaligned or corroded. In such cases, troubleshooting techniques like using a rubber mallet or applying lubricant to the pipe can help facilitate a proper fit.
Another difficulty that may arise is sealing the flange to the concrete floor. If the flange does not sit flush with the floor, it can cause leaks. To address this, one can use a wax ring or an adjustable flange extender to create a watertight seal.
Additionally, if the concrete is uneven or damaged, it may be necessary to level or repair the area before installing the new flange.
toilet flange repair epoxy
As an affiliate, we earn on qualifying purchases.
As an affiliate, we earn on qualifying purchases.
Preparing the Concrete Surface
To prepare the concrete surface, you’ll need to first remove any debris or old wax ring. This is an important step to ensure a clean and smooth surface for the new toilet flange installation. Here are some concrete repair techniques that can help in preparing the surface:
- Use a scraper or putty knife to remove any loose debris or chunks of concrete.
- Use a wire brush to clean the surface and remove any dirt or grime.
- Apply a concrete cleaner or degreaser to remove any stubborn stains or oil marks.
By following these steps, you can ensure that the concrete surface is ready for the next step of installing the new toilet flange.
Now, let’s move on to the process of installing the new toilet flange.
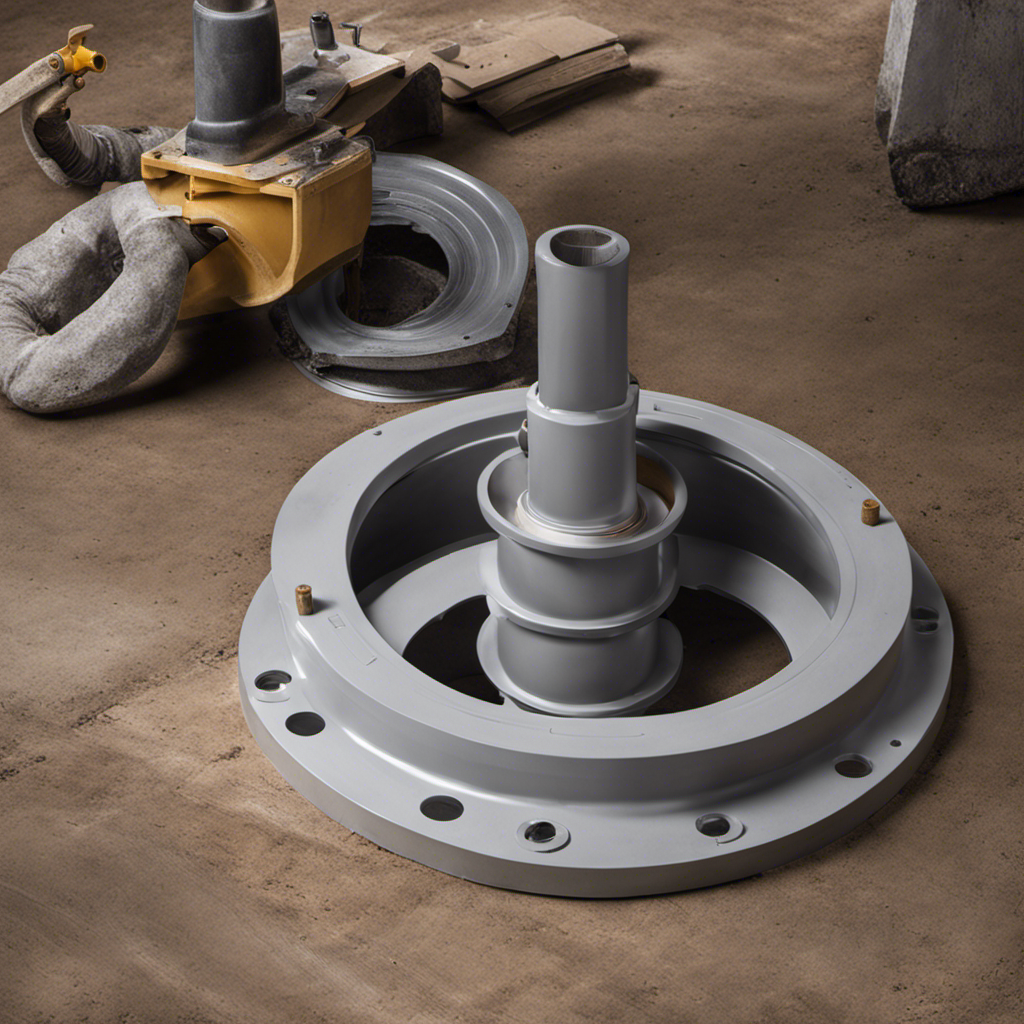
Installing the New Toilet Flange
Now it’s time for me to attach the new toilet flange securely to the floor.
To begin, I will place the flange over the existing drain pipe, aligning the bolt holes with the slots on the flange.
Next, I will insert the bolts into the holes and tighten them using a wrench, ensuring that the flange is firmly attached to the floor. It is important to make sure the flange is level and flush with the surface of the floor to prevent any leaks.
Once the flange is securely in place, I will seal the connections by applying a generous amount of waterproof sealant around the base of the flange. This will create a watertight seal and prevent any water from leaking into the surrounding area.
Securing the Flange to the Concrete
First, make sure you have positioned the flange securely on the concrete surface, aligning the bolt holes with the appropriate slots. This step is crucial to ensure a stable and leak-proof installation.
To secure the flange to the concrete, you will need to use an anchoring technique called concrete screws. These screws are specifically designed to provide a strong and reliable hold in concrete surfaces.
Once the flange is aligned, use a drill and masonry bit to create pilot holes in the concrete. Insert the concrete screws into the holes, tightening them securely with a screwdriver or drill. This anchoring technique will ensure that the flange remains firmly in place, even with regular use and flushing.
Additionally, it is important to apply a waterproofing method, such as silicone sealant or plumber’s putty, around the base of the flange to prevent any water leakage.
- Concrete screws provide a secure and stable hold in concrete surfaces.
- Properly aligning the flange is essential for a leak-proof installation.
- Applying a waterproofing method, like silicone sealant, ensures a watertight seal.
Reassembling the Toilet and Testing for Leaks
After reassembling the toilet, it’s important to test for leaks by flushing and checking for any water seepage around the base.
To ensure a properly functioning toilet, there are a few testing methods you can employ. Start by flushing the toilet multiple times to see if any water escapes from the base. If you notice water seeping out, it’s likely that there is a leak in the wax ring or the flange. In this case, you may need to disassemble the toilet again and recheck the installation of these components.
Additionally, you can apply a thin layer of dye or food coloring to the water in the toilet tank. Flush the toilet and observe if any colored water appears around the base. This can help pinpoint the exact source of the leak.
Troubleshooting leaks is crucial to prevent any water damage or further issues with your toilet.
Conclusion
In conclusion, replacing a toilet flange in concrete can seem like a daunting task, but with the right tools and materials, it is manageable. By assessing the damage and gathering the necessary tools, you can begin the process. Removing the old flange and preparing the concrete surface are the next steps. Once these are completed, you can move on to installing the new flange and securing it to the concrete. Finally, reassembling the toilet will complete the project.
Did you know that a study found that over 20% of toilet leaks are caused by a faulty flange? Taking the time to replace it properly can prevent future issues and ensure a functioning toilet.