Did you know that a leaking toilet can waste up to 200 gallons of water per day?
If you’re experiencing a leak or any other issues with your toilet, it may be time to replace some of its parts.
In this article, I will guide you through the process of:
- Identifying the problem
- Gathering the necessary tools
- Shutting off the water supply
- Removing the old toilet parts
- Installing the new ones
- Testing for any potential issues.
Let’s get started and fix that toilet once and for all.
Key Takeaways
- Troubleshoot common toilet issues such as clogs, leaks, weak flush, constant running, and inadequate fill.
- Gather the necessary tools for toilet repair, including an adjustable wrench, plunger, toilet auger, and screwdriver.
- Shut off the water supply before starting any repair work to prevent water damage or leaks.
- Remove old toilet parts, such as tank bolts and the flapper valve, and clean the area thoroughly before installing new parts.

Fluidmaster 400AKRP10 Universal, All In One, Complete Toilet Tank Repair Kit For 2-Inch Flush Valve Toilets
RESTORES OVERALL TOILET PERFORMANCE: All in one toilet repair kit replaces inefficient fill and flush valves, leaky flappers,…
As an affiliate, we earn on qualifying purchases.
As an affiliate, we earn on qualifying purchases.
Identifying the Problem
First, you’ll need to figure out what’s causing the issue with your toilet. Troubleshooting techniques can help identify common toilet issues.
Start by checking if the toilet is clogged. Use a plunger to try and unclog it, applying firm pressure and creating a seal around the drain. If that doesn’t work, check the water supply valve located behind the toilet. Make sure it’s fully open.
Another common issue is a faulty flapper valve, which can cause continuous running water. Inspect the flapper for any signs of damage or wear.
Additionally, leaks can occur at the base or around the tank. Look for water pooling or dampness.
These troubleshooting techniques will help you understand the problem and move on to gathering the necessary tools for the repair process.

Korky Ultra Standard 2-Inch Universal Toilet Flapper – Long Lasting Rubber – Easy to Install – Made in USA, 100BP
TOILET FLAPPER VALVE FITS MOST POPULAR 2 inch toilet brands including, but not limited to: American Standard, Kohler,…
As an affiliate, we earn on qualifying purchases.
As an affiliate, we earn on qualifying purchases.
Gathering the Necessary Tools
Before you start, make sure you have all the necessary tools for toilet maintenance and repair. Having the right tools can make the process smoother and more efficient. Here is a list of essential toilet repair tools:
| Tool | Description | Purpose |
|---|---|---|
| Adjustable wrench | A versatile tool for tightening nuts | Used for securing connections |
| Plunger | Creates pressure to unclog the toilet | Clears blockages in the drain |
| Toilet auger | A long, flexible cable for clearing clogs | Removes stubborn blockages in the drain |
| Screwdriver | Used for removing and tightening screws | Helps with disassembly and reassembly |
With these tools in hand, you’ll be well-equipped to tackle common toilet maintenance and repair tasks. Now that you have everything ready, let’s move on to the next step: shutting off the water supply.

RIDGID 59787 Model K-3 Toilet Auger with Unclogging 3-Foot Snake and Bulb Head
K-3 TOILET AUGER: Provides fast, efficient, and safe clearing of even the toughest blockages in your toilet and…
As an affiliate, we earn on qualifying purchases.
As an affiliate, we earn on qualifying purchases.
Shutting Off the Water Supply
Now that you have all the necessary tools, it’s time to shut off the water supply. This is a crucial step in replacing toilet parts to avoid any potential water damage or leaks.
To turn off the water, follow these steps:
-
Locate the shut off valve: The shut off valve is typically located near the base of the toilet or on the wall behind it. It may be a lever or a knob that you need to turn clockwise to shut off the water flow.
-
Turn off the water supply: Once you have located the shut off valve, use your hand or a wrench to turn it clockwise until it stops. This will stop the water from flowing into the toilet tank.
-
Flush the toilet: After shutting off the water supply, flush the toilet to drain any remaining water in the tank.

Amazon Basics Plumbing Adjustable Wrench with Soft Grip, Wide Mouth, 6.34 x 2.83 x 0.59 inches (LxWxH)
6 inch (150mm) wide jaw adjustable plumbing wrench with inch/metric measurement scale
As an affiliate, we earn on qualifying purchases.
As an affiliate, we earn on qualifying purchases.
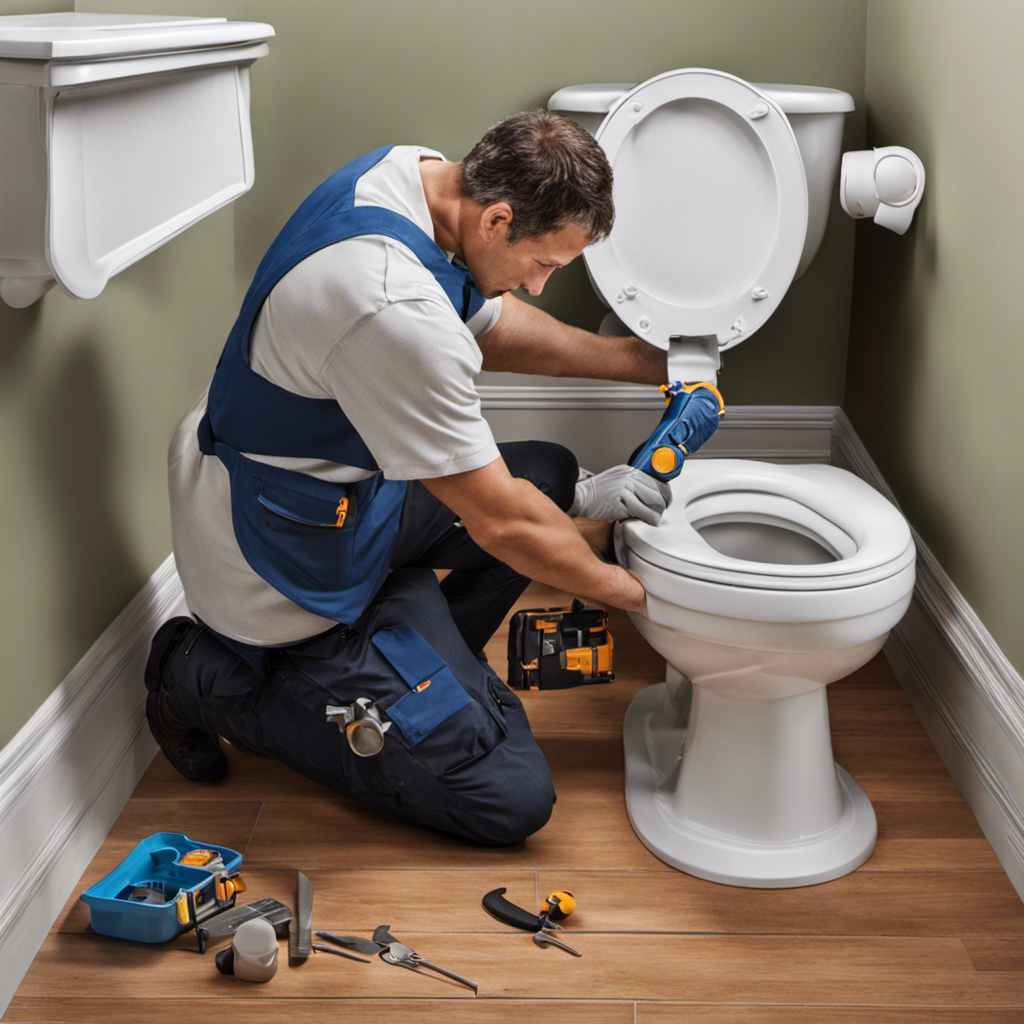
Removing the Old Toilet Parts
To remove the old toilet parts, you’ll need to begin by turning off the water supply. This is an essential step to prevent any water leakage or damage during the process.
Once the water supply is turned off, I suggest wearing protective gloves before starting to remove the old parts. Begin by disconnecting the water supply line from the bottom of the tank using an adjustable wrench.
Next, remove the tank bolts using a wrench or pliers. Carefully lift off the tank and set it aside. To remove rust from the bolts or other areas, you can use a rust remover solution or a mixture of vinegar and water.
Don’t forget to clean the area thoroughly before installing the new toilet parts.
Installing the New Toilet Parts
After you have removed the old toilet parts, it’s time to install the new ones. Proper maintenance and upgrading toilet components are crucial for ensuring a fully functional bathroom fixture.
Here are the steps to install the new toilet parts:
-
Step 1: Position the new components
-
Place the new flapper valve over the flush valve opening.
-
Align the new fill valve assembly with the water supply line.
-
Ensure proper positioning for optimal performance.
-
Step 2: Secure the components
-
Connect the flapper valve chain to the flush lever.
-
Tighten the nut on the fill valve to secure it in place.
-
Ensure all connections are tight and leak-free.
-
Step 3: Test the new parts
-
Turn on the water supply and check for any leaks.
-
Flush the toilet to ensure proper functionality.
-
Make any necessary adjustments for optimal performance.
Testing and Troubleshooting
When it comes to common toilet problems, it’s important to have a set of DIY troubleshooting techniques in your arsenal.
From clogged drains to running toilets, being able to identify and fix these issues on your own can save you time and money.
In this discussion, I will delve into the most common toilet problems and provide you with step-by-step troubleshooting techniques to help you resolve them efficiently.
Common Toilet Problems
One of the most common toilet problems is a constantly running toilet. This issue can be frustrating and waste a significant amount of water. To address this problem, there are a few toilet maintenance tips and toilet repair services that can help.
-
Check the flapper valve: The flapper valve is responsible for sealing the water tank. If it is worn out or misaligned, it can cause a constant flow of water. Inspect and replace the flapper valve if necessary.
-
Adjust the fill valve: The fill valve controls the water level in the tank. If it is set too high, it can result in continuous running. Adjust the fill valve to the appropriate level.
-
Check for leaks: A leaking toilet can also cause constant running. Inspect the toilet for any leaks and fix them promptly.
DIY Troubleshooting Techniques
To address a constantly running toilet, you can try checking the flapper valve and adjusting the fill valve to resolve the issue efficiently. The flapper valve is responsible for controlling the water flow from the tank to the bowl. If it is not properly sealing, water will continuously leak into the bowl, causing the toilet to run constantly. By inspecting and replacing the flapper valve if necessary, you can restore proper functionality to your toilet. Additionally, adjusting the fill valve can help regulate the water level in the tank, preventing it from overflowing and causing the toilet to run. Regular toilet maintenance and repair are essential to ensure optimal performance and prevent water waste.
| Common Toilet Problems | DIY Troubleshooting Techniques |
|---|---|
| Clogged toilet | Use a plunger to unclog the toilet by creating a strong seal and applying firm pressure. |
| Weak flush | Check the water level in the tank and adjust the fill valve to increase the water flow. |
| Leaky toilet | Inspect the wax ring and tighten any loose connections to stop the leak. |
| Phantom flush | Replace the flapper valve to fix the issue of the toilet randomly flushing. |
Conclusion
In conclusion, replacing toilet parts is like performing a delicate dance with your porcelain throne. Armed with the right tools and a little know-how, you can gracefully maneuver through the steps. First, shut off the water supply and remove the old parts with finesse. Then, installing the new parts becomes a precise task, ensuring a seamless connection that will keep your toilet running smoothly. Finally, when you test your handiwork, the satisfaction of a perfectly functioning toilet will leave you feeling like a master plumber.