To install a floating vanity, start by turning off the water supply and removing the old fixture carefully. Measure and mark where you’ll mount the brackets, ensuring they align with wall studs using a stud finder. Attach the brackets securely, making sure they’re level, then position the vanity onto the brackets and tighten the screws. Connect the plumbing tightly and check for leaks. For detailed steps and tips, keep going to successfully complete your project.
Key Takeaways
- Turn off water supply, remove existing vanity, and prepare the area for installation.
- Measure and mark wall for brackets, ensuring they align with studs for support.
- Attach mounting brackets securely, using a level to ensure proper alignment.
- Position the vanity onto brackets, checking for levelness and secure fit.
- Connect plumbing and verify all connections are tight and leak-free before completion.
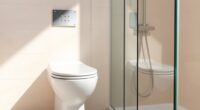
Installing a floating vanity can transform your bathroom into a modern and sleek space, but it requires careful planning and precise execution. Before you start, it’s vital to gather the right tools needed to guarantee a smooth installation process. You’ll need a drill, stud finder, level, measuring tape, screwdriver, pencil, and possibly a wrench. Having these tools on hand helps you work efficiently and reduces the chance of errors. Many DIYers make common mistakes such as not properly locating wall studs, which can lead to unstable mounting and potential damage down the line. To avoid this, use a high-quality stud finder and double-check your measurements before drilling.
Once you’ve assembled your tools, the first step is to turn off the water supply if you’re replacing an existing vanity, and clear the area around your installation site. Carefully remove the old vanity, taking care not to damage the plumbing or wall. When you’re ready to install the new floating vanity, start by measuring and marking where the mounting brackets will go. Use your level and pencil to draw guidelines, ensuring the vanity will sit perfectly horizontal. One common mistake is misaligning the brackets, which results in an uneven finish. Take your time to verify your measurements multiple times—precision here makes all the difference in achieving a professional look.
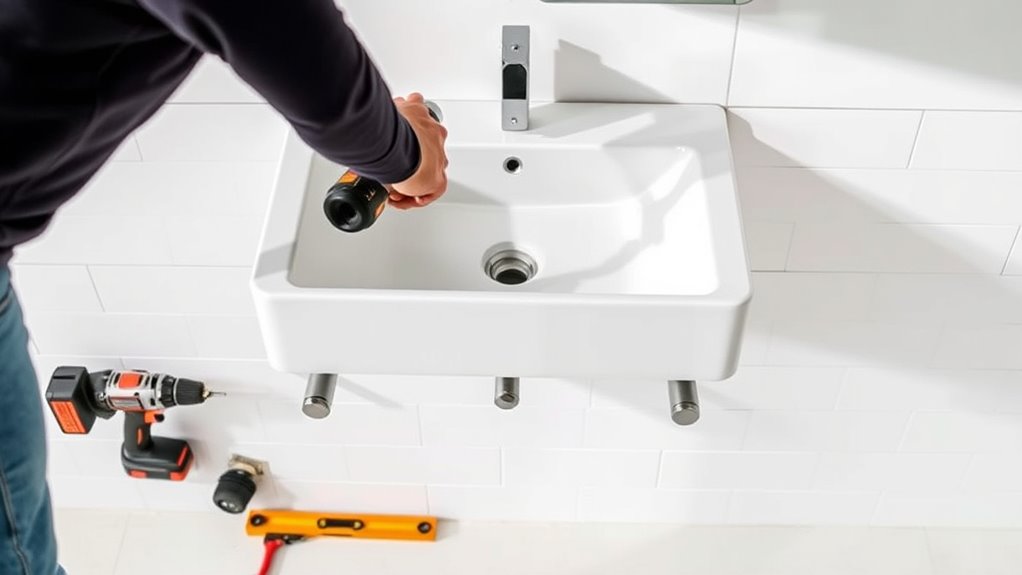
Next, locate the wall studs—this is vital since the brackets will anchor into them for stability. Use your stud finder to pinpoint the positions and mark them clearly. If your vanity’s mounting points don’t align with the studs, you’ll need to attach additional support or use wall anchors rated for the weight of the vanity. Drill pilot holes into the studs at your marked points, being careful not to crack or damage the wall. Then, attach the mounting brackets securely, ensuring they are level and aligned according to your earlier marks. Double-check everything before proceeding.
With the brackets in place, you can now position the vanity onto the mounting system, making sure it sits flush against the wall and is level. Secure it according to the manufacturer’s instructions, tightening all screws firmly but carefully to avoid stripping. Connect the plumbing, ensuring all connections are tight and leak-free. Remember, rushing through these steps or skipping measurements can lead to misalignment, leaks, or unstable fixtures. By taking your time, double-checking your work, and avoiding common mistakes like improper stud placement or uneven mounting, you’ll end up with a floating vanity that’s both stylish and secure, transforming your bathroom into a sleek, contemporary space.

Dowell Universal ADA Vanity Bracket Heavy-Duty Commercial Bracket Floating Medical Support Bracket with Arm Metal Brackets Suitable for Restroom Vanities, Shelving Units & Work Desks – 16.38"-1 Pack
HEAVY DUTY VANITY BRACKETS: Elevate your vanity with our metal vanity brackets. Designed for superior strength. With a…
As an affiliate, we earn on qualifying purchases.
As an affiliate, we earn on qualifying purchases.
Frequently Asked Questions
What Tools Are Essential for Installing a Floating Vanity?
For installing a floating vanity, you need a tools checklist that includes a drill, level, stud finder, measuring tape, screwdriver, and pencil. These tools guarantee precise installation and help you secure the vanity safely to the wall. Always prioritize installation safety by wearing protective gear and double-checking your measurements. With the right tools and safety precautions, you’ll make the process smoother and achieve a professional-looking result.
How Much Weight Can a Floating Vanity Support?
You can’t judge a book by its cover—your floating vanity’s weight capacity depends on wall strength and proper installation. Most vanities support between 50-100 pounds, but heavy-duty models can hold more if the wall can handle it. Always check the vanity weight capacity and verify your wall strength requirements are met. Reinforce the wall if needed to keep everything firmly in place and avoid surprises down the line.
Can I Install a Floating Vanity on Uneven Walls?
Yes, you can install a floating vanity on uneven walls, but proper wall preparation is essential. First, assess the wall’s unevenness and use shims or a leveling compound to create a smooth surface. Then, apply appropriate mounting techniques, such as anchoring into studs or using heavy-duty wall anchors, to guarantee stability. This approach helps distribute weight evenly and keeps your vanity secure, even on imperfect walls.
What Is the Typical Cost of Installing a Floating Vanity?
The cost estimate for installing a floating vanity typically ranges from $300 to $800, depending on your project’s complexity. Think of it as building a foundation for your dream bathroom—an investment in your space’s style and functionality. Installation expenses cover labor, materials, and any necessary adjustments for uneven walls. You’ll want to budget accordingly to make certain a smooth process, making your vanity both beautiful and sturdy.
How Do I Maintain the Floating Vanity’s Appearance Over Time?
To keep your floating vanity looking great, follow regular cleaning routines using a gentle cleaner to prevent dirt buildup and water spots. Wipe down the surface weekly and avoid harsh chemicals. Over time, consider hardware upgrades like new handles or faucet fixtures to refresh its appearance. Keep the area dry and well-ventilated to prevent moisture damage, ensuring your vanity remains stylish and functional for years.

COOLWEST Wall Mounting Installation Kit for Commercial Wall Mount Faucet, G1/2 Backsplash Mount Set for Stainless Steel Commercial Kitchen Prep & Utilty Sink
【Wall Mount Installation Kit】: This faucet installation kit with 1/2 IPS (G1/2) male thread fit with wall mount…
As an affiliate, we earn on qualifying purchases.
As an affiliate, we earn on qualifying purchases.
Conclusion
Now that you’ve successfully installed your floating vanity, you’ve truly brought your bathroom design to life. With each step, you’ve built a sturdy foundation that’s as reliable as a steady heartbeat. Remember, patience and attention to detail are your best tools—like a craftsman shaping their masterpiece. Enjoy your sleek new space, where your efforts shine brighter than a polished mirror. You’ve turned a simple project into a statement piece that’s both functional and stunning.

Franklin Sensors ProSensor Sapphire 9000 Stud Finder with 9-Sensors, Wood & Metal Stud Detector/Wall Scanner, Made in The USA
ACCURATE: More sensors = More accuracy. Conventional stud finders have 1 or 2 sensors. The Sapphire 9000 has…
As an affiliate, we earn on qualifying purchases.
As an affiliate, we earn on qualifying purchases.

Snappy Trap Universal Flexible P Trap Bathroom Sink Drain Pipe Plumbing Kit for Home Improvement, No Leaks, Easy No Tool Installation, 9-13 Inch Flex Hose & 16 Inch Product Length (DK-105 Silver)
【UNIVERSAL BATHROOM SINK DRAIN KIT】This flexible p trap bathroom sink pipe replacement drain kit adapts to 1 ¼…
As an affiliate, we earn on qualifying purchases.
As an affiliate, we earn on qualifying purchases.