
If your Keurig K-Mini Single Serve Coffee Maker isn’t turning on, it can be frustrating, especially when you just want your morning brew. This guide provides clear, safe steps to identify common causes and fix the issue quickly, ensuring your coffee maker works as intended.
Before starting, ensure your coffee maker is plugged into a functioning outlet and that no power issues are affecting your home electrical system.
Key Takeaways
| Check Power Connection | Ensure your Keurig is plugged in securely and the outlet works. |
| Inspect Power Button & Cord | Make sure the power button is pressed and the cord isn’t damaged. |
| Reset & Test | Unplug, wait 30 seconds, then plug back in to reset. |
| Examine for Damage | Look for visible damage or moisture inside the unit. |
| Perform Basic Maintenance | Clean the machine and descale if needed to restore power. |

Keurig K-Mini Single Serve K-Cup Pod Coffee Maker, 6 to 12oz Brew size, with Cord Storage, Perfect for Small Spaces, Black
- Compact Design: Fits spaces less than 5 inches wide
- Adjustable Brew Size: Brew 6-12oz cups with Keurig pods
- Removable Water Reservoir: Add fresh water for each brew
As an affiliate, we earn on qualifying purchases.
Step 1: Verify Power Source
- Ensure the coffee maker is fully plugged into a working electrical outlet.
- Test the outlet by plugging in another device, like a lamp, to confirm it’s providing power.
Step 2: Check the Power Button & Cord
- Press the power button firmly. If it feels stuck or unresponsive, gently wiggle it to see if it registers.
- Inspect the power cord for visible damage, frays, or kinks. Replace if necessary.
Step 3: Reset the Coffee Maker
- Unplug the Keurig from the outlet.
- Wait at least 30 seconds to allow internal components to reset.
- Plug it back in and press the power button.
Step 4: Examine for Damage or Moisture
Check for any signs of water damage or moisture inside the unit, especially around the power area. If you see any, do not attempt to power on until it’s thoroughly dry or inspected by a professional.
Step 5: Perform Basic Maintenance
- Clean the exterior and the area around the power button.
- Run a descaling cycle if needed (see guide on descaling procedures) to remove mineral buildup that might affect electrical components.
The Products in This Guide
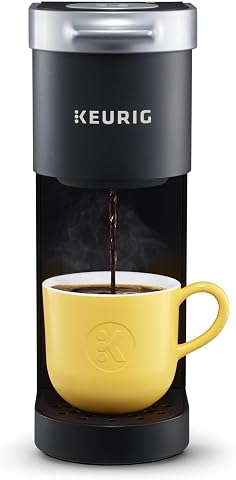
Keurig K-Mini Single Serve K-Cup Pod Coffee Maker
- ✔ Capacity: 6-12 oz
- ✔ Dimensions: Less than 5 inches wide
- ✔ Features: Cord storage, removable drip tray
My K-Cup® Reusable Coffee Filter
- ✔ Material: BPA-free plastic
- ✔ Compatibility: Keurig models
- ✔ Dishwasher Safe: Yes
Keurig K-Mini Single Serve K-Cup Pod Coffee Maker
The Keurig K-Mini Single Serve Coffee Maker is a sleek, space-saving device perfect for small kitchens or offices. When it won’t turn on, these troubleshooting steps can help restore its functionality.
Pros:
- Compact size fits small spaces
- Easy to use and clean
- Fast brewing time
- Removable drip tray for easy cleanup
Cons:
- No on/off button, relies on power connection
- Limited to 6-12oz brew sizes
- No internal water reservoir
Best for: Small apartments, dorms, or office desks needing quick coffee.
Not ideal for: Users seeking a larger capacity or advanced features.
Bottom line: A compact, reliable coffee maker ideal for limited space environments.
My K-Cup® Reusable Coffee Filter
The My K-Cup® Reusable Coffee Filter complements your Keurig, allowing you to brew with your favorite ground coffee. Its design is user-friendly, making it a great addition for coffee enthusiasts who want more control over their brew.
Pros:
- Reusable, eco-friendly
- Compatible with many Keurig models
- Brew your own ground coffee
- Cost-effective over time
Cons:
- Requires ground coffee prep
- May need extra cleaning
- Not suitable for all beverage types
Best for: Those who prefer ground coffee and want to reduce waste.
Not ideal for: Users who prefer pre-packaged K-Cup pods for convenience.
Bottom line: A practical reusable filter for customizing your coffee experience.
Frequently Asked Questions
Why won’t my Keurig K-Mini turn on?
Possible causes include a faulty power outlet, damaged power cord, or internal electrical issues. Follow the troubleshooting steps to identify and resolve the problem.
My Keurig is plugged in but still won’t turn on. What should I do?
Unplug the device, check for visible damage, wait 30 seconds, then plug it back in and press the power button. Also, test the outlet separately.
Is it safe to open my Keurig to check for internal damage?
No, opening the unit can be dangerous and may void your warranty. It’s best to consult a professional if you suspect internal damage.
How often should I descale my Keurig?
Descale your Keurig approximately every 3-6 months, or as recommended, to prevent mineral buildup that can affect performance and electrical safety.
Get Your Brew Going Again
By following these straightforward troubleshooting steps, you can often resolve power issues with your Keurig K-Mini quickly and safely. Regular maintenance and careful inspection will keep your coffee maker functioning smoothly for years to come, ensuring your morning routine stays uninterrupted.
Affiliate disclosure: As an Amazon Associate we earn from qualifying purchases. Prices and availability are accurate as of the time of publishing.