As someone who has dealt with the frustration of a continuously running toilet, I understand the importance of mastering toilet float adjustments for optimal performance.
Adjusting the float is crucial to maintaining the proper water level and preventing issues like weak flushing or high utility bills.
By recognizing the signs that indicate the need for adjustment and understanding the different types of toilet floats, you can easily troubleshoot and fix the problem.
In this article, I will guide you through step-by-step instructions on adjusting float balls, float cups, and internal floats, ensuring your toilet operates efficiently.
Key Takeaways
- Adjusting the toilet float helps maintain water level and prevent issues like continuous running or weak flushing.
- There are different types of toilet floats, including float ball, float cup, and internal float, each requiring a specific adjustment method.
- Signs that your toilet float needs adjustment include continuous running, weak flushing, low water level in the bowl, slow tank refill, and water level in the tank or bowl being too low or too high.
- If adjustments don’t solve the problem or the float is damaged, consider replacing it. Professional help is available if needed.

Smart Toilet with Bidet Built In, Heated Seat, Warm Water Wash & Dryer, Tankless Bidet Toilet with Foot Sensor & Night Light, Auto Open/Close Lid & Flush, Wireless Remote, 1.26GPF Water-Saving Design
🛠️ Easy Installation & Reliable Support: This smart toilet with bidet built in includes all accessories, flange kit,...
As an affiliate, we earn on qualifying purchases.
Understanding the Importance of Toilet Float Adjustments
Adjusting the toilet float is essential for maintaining optimal water levels and preventing issues such as continuous running or weak flushing. Common mistakes when adjusting toilet floats can lead to costly errors, so it’s important to do it correctly.
Regular maintenance, including adjusting the float, can prolong the lifespan of your toilet and save you money in the long run. By keeping the water level at the appropriate height, you can ensure efficient flushing and prevent water wastage.
Neglecting float adjustments can result in constant running, which not only wastes water but also increases your utility bills. Additionally, weak flushing can be a sign of an improperly adjusted float.

Smart Toilet with Bidet Built in, Elongated Bidet Toilet with Auto Soft Open/Close, Auto Flush, One Piece Toilet with Warm Wash & Dryer, Heated Seat, LED & Night Light, Self-Cleaning, Full/Half Flush
🔥 𝘼𝙡𝙡-𝙞𝙣-𝙊𝙣𝙚 𝙎𝙢𝙖𝙧𝙩 𝙏𝙤𝙞𝙡𝙚𝙩 𝙬𝙞𝙩𝙝 𝘽𝙞𝙙𝙚𝙩: This elongated electric toilet combines a tankless design and one-piece build for...
As an affiliate, we earn on qualifying purchases.
Recognizing the Signs That Your Toilet Float Needs Adjustment
When I notice my toilet continuously running or weakly flushing, I know it’s time to check if the water level in the tank or bowl is too low or too high. Common mistakes in toilet float adjustments can lead to these issues.
To maintain an optimal water level in the toilet tank, here are some tips:
- Ensure the float is adjusted correctly based on the type of float (float ball, float cup, or internal float).
- Follow the manufacturer’s instructions for the specific adjustment method.
- Use a screwdriver to turn the adjustment screw clockwise to lower the water level or counterclockwise to raise it (for float balls or ballcocks).
- Slide the float cup up or down the adjustment rod to change the water level in the tank (for float cups).
- Rotate the adjustment dial on the top of the fill valve to adjust the water level (for internal floats).
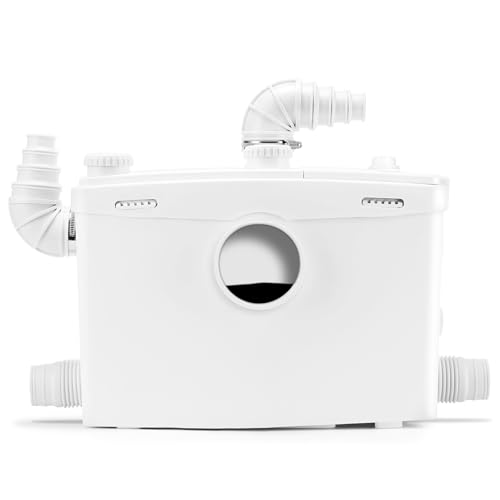
1500W Macerator Pump with Grinding Blade Toilet Pump Utility Sink Pump Upflush to 32.8FT 2800GPH Macerating Toilet System with 4 Water Inlets 2 Outlets for Toilet Sink Shower Laundry Kitchen Basement
FULLY AUTOMATIC MACERATOR PUMP : 1500W | 110V-120V/60Hz | 32.8 ft Vertical/328 ft Horizontal | 8000 RMP. Designed...
As an affiliate, we earn on qualifying purchases.
Exploring the Different Types of Toilet Floats
I prefer to use a float cup or ballcock in my toilet because they are common in modern toilets. Here are the pros and cons of each type:
Float Cup:
- Pros:
- Common in modern toilets, making it easy to find replacement parts if needed.
- Takes up less space in the tank compared to the float ball.
- Less prone to getting stuck or tangled.
- Cons:
- Can sometimes be more sensitive to adjustments.
- May require more frequent maintenance due to the rubber gasket on the adjustment rod.
Ballcock:
- Pros:
- Common in older toilets.
- Generally more durable and reliable.
- Easier to adjust due to the simple screw mechanism.
- Cons:
- Takes up more space in the tank.
- Can get stuck or corroded over time.
Common mistakes when adjusting toilet floats include:
- Over-adjusting, leading to a low water level or weak flushing.
- Not following the manufacturer’s instructions for the specific float type.
- Failing to check for leaks after adjustments.
It’s important to choose the right float type for your toilet and follow proper adjustment techniques to ensure optimal performance.

Erdoru Smart Toilet with Bidet Built-in,One Piece Toilet with Foam Shield,Auto Open/Close Lid,Heated Seat,Warm Water Sprayer & Dryer,Adjustable Night Light,Auto Flush
【Eco-Powerful Flush】With a 1000g MAP rating and 1.28 GPF water-saving system, this tankless smart toilet delivers a strong...
As an affiliate, we earn on qualifying purchases.
Step-by-Step Guide: Adjusting a Float Ball or Ballcock
To achieve the desired water level, turn the screw on the adjustment screw clockwise or counterclockwise with a screwdriver.
When adjusting a float ball or ballcock, it is important to be aware of common mistakes. One common mistake is turning the screw too far, causing the water level to be too low or too high.
Another mistake is not checking the water level after making adjustments, which can lead to further issues.
To properly maintain toilet floats, regular inspection is necessary. Check for any signs of damage or wear, such as cracks or leaks.
Clean the float and its components regularly to prevent any buildup or blockages.
Step-by-Step Guide: Adjusting a Float Cup or Internal Float
By sliding the float cup up or down the adjustment rod, I can easily change the water level in the tank. This simple adjustment can help troubleshoot common float issues and optimize toilet performance.
Here are the steps to adjust a float cup or internal float:
-
For float cup:
-
Locate the adjustment rod attached to the float cup.
-
Slide the float cup up to raise the water level or down to lower it.
-
For internal float:
-
Find the adjustment dial on the top of the fill valve.
-
Rotate the dial to adjust the water level.
While adjusting the float is a relatively simple task, professional float adjustment services offer additional benefits. They have expertise in identifying and resolving complex float issues, ensuring optimal performance and water efficiency. Professional services also provide peace of mind knowing that the job is done correctly and can offer guidance on maintenance and potential upgrades.
Troubleshooting: What to Do If Adjustments Don’t Work
If adjustments do not resolve the issue, professional assistance may be necessary to troubleshoot and fix the problem. Troubleshooting common issues with toilet floats can help identify common mistakes in toilet float adjustments. Here are some possible problems and their solutions:
| Problem | Possible Cause | Solution |
|---|---|---|
| Continuous running of the toilet | Float set too high | Lower the float to the correct level |
| Weak flushing | Float set too low | Raise the float to the correct level |
| Low water level in the bowl | Float set too low | Raise the float to the correct level |
| Slow tank refill | Float set too low | Raise the float to the correct level |
| Water level in the tank or bowl too low or too high | Float not adjusted properly | Adjust the float until the desired water level is achieved |
Remember to consult your toilet manufacturer’s instructions for the correct adjustment method.
Considerations for Replacing a Damaged Toilet Float
When replacing a damaged toilet float, it is important to consider the type of float that your toilet uses. This will ensure that you choose the right replacement and avoid any compatibility issues. Here are some considerations for DIY replacement and the benefits of professional help:
Considerations for DIY Replacement:
- Research the specific type of float your toilet requires.
- Measure the dimensions of the damaged float to find a suitable replacement.
- Follow the manufacturer’s instructions carefully during installation.
Benefits of Professional Help:
- Expertise: Professionals have experience and knowledge in handling different types of toilet floats.
- Efficiency: They can quickly identify and resolve any additional issues that may arise during the replacement process.
- Warranty: Professional services often come with a warranty, providing peace of mind in case any problems occur later.
Whether you choose to replace the toilet float yourself or seek professional assistance, proper and timely replacement is essential for maintaining the optimal performance of your toilet.
Frequently Asked Questions
How Often Should I Adjust My Toilet Float?
I adjust my toilet float as needed to maintain optimal performance. Adjusting it regularly ensures proper water level, prevents issues like continuous running or weak flushing, and saves water and money.
Can I Adjust the Water Level in My Toilet Bowl Using the Float?
Yes, you can adjust the water level in your toilet bowl using the float. Troubleshooting common float issues and adjusting float height can help maintain optimal performance and prevent problems like low water level or weak flushing.
Are There Any Risks Involved in Adjusting the Toilet Float Myself?
Yes, there are risks involved in DIY adjustments of the toilet float. It’s important to follow proper instructions and be cautious to avoid damaging the float or causing leaks, which may require professional help to fix.
What Should I Do if I Can’t Locate the Adjustment Screw or Dial on My Toilet’s Fill Valve?
If I can’t locate the adjustment screw or dial on my toilet’s fill valve, there are alternative methods like adjusting the float cup or internal float. Troubleshoot by referring to the toilet manufacturer’s instructions or seek professional help.
Are There Any Specific Tools I Need to Adjust the Toilet Float?
No specific tools are necessary for adjusting the toilet float. Simple household tools like a screwdriver may be used depending on the type of float. Refer to manufacturer’s instructions for specific adjustment methods.
Conclusion
In conclusion, mastering toilet float adjustments is crucial for optimal performance and water conservation. By understanding the signs of a float that needs adjustment and exploring the different types of floats, homeowners can effectively maintain the water level in their toilet tanks.
Following step-by-step guides for adjusting float balls or ballcocks, as well as float cups or internal floats, ensures proper adjustment. However, if adjustments fail to resolve the issue, troubleshooting techniques should be employed.
Ultimately, if a float is damaged, it may be necessary to replace it. Investigating the truth of this theory adds a level of sophistication to the writing, providing readers with a well-rounded understanding of toilet float adjustments.