When it comes to flushing failures, there are a multitude of reasons why a toilet may refuse to cooperate. From faulty mechanisms to clogged rim holes, the possibilities are vast.
In this article, we delve into the intricacies of toilet troubles, offering troubleshooting tips and solutions to ensure a proper flush. Whether it’s a malfunctioning flapper or a misaligned toilet lift chain, we’ve got you covered.
So, sit back, relax, and let’s get to the bottom of these flushing failures.
Key Takeaways
- The issue of a toilet not flushing when not clogged is often related to problems in the tank or flushing mechanism.
- Specific parts to check and fix include the toilet lift chain, flapper, water level in the tank, and clogged rim holes.
- The toilet lift chain may need to be reattached or replaced if it is loose or damaged.
- The flapper, made of rubber, may need to be replaced if it is damaged, and the type of flushing mechanism in the tank should be identified to find the right replacement part.

Korky Ultra Standard 2-Inch Universal Toilet Flapper – Long Lasting Rubber – Easy to Install – Made in USA, 100BP
TOILET FLAPPER VALVE FITS MOST POPULAR 2 inch toilet brands including, but not limited to: American Standard, Kohler,…
As an affiliate, we earn on qualifying purchases.
As an affiliate, we earn on qualifying purchases.
Common Issues in the Toilet Tank
The most common issues in the toilet tank include problems with the flushing mechanism, such as the chain and flapper, as well as insufficient water levels that affect the flushing efficiency.
One common problem is toilet tank leaks, which can occur due to a faulty flapper or a cracked tank. When the flapper doesn’t seal properly, water can continuously leak into the bowl, wasting water and causing the tank to refill frequently.
Another common issue is a broken or loose chain that connects the trip lever to the flapper. This can prevent the flapper from lifting properly, resulting in a weak or incomplete flush.
Insufficient water levels in the tank can also lead to poor flushing performance, as there may not be enough water to create a strong flow.
Regular maintenance and prompt repairs can help prevent these common toilet tank problems and ensure efficient flushing.

3-Pack Universal Toilet Flapper Chain Replacement Kit – Stainless Steel Lift Chain with Hook & Ring, Fits Most Toilet Tank Handles
Package Includes: 3-packs of stainless steel toilet flapper chains, each pre-attached with a hook and a C-ring for…
As an affiliate, we earn on qualifying purchases.
As an affiliate, we earn on qualifying purchases.
Malfunctioning Flushing Mechanisms
A loose lift chain can be easily reattached or replaced using pliers. When troubleshooting a malfunctioning flushing mechanism in the toilet tank, there are several steps to follow for maintenance and repair.
Toilet Tank Maintenance Troubleshooting Tips:
-
Checking the Lift Chain:
- Locate the small chain inside the tank, known as the flapper chain or toilet lift chain.
- Ensure the chain is securely attached to the flapper, as it helps move the flapper for a flush.
- Use pliers to crimp a new link or replace a damaged chain.
- Adjust the length of the lift chain to prevent it from getting stuck.
-
Checking the Flapper:
- Inspect the rubber flapper for any signs of damage.
- If the flapper is damaged, it needs to be replaced.
- Identify the type of flushing mechanism in the tank to find the correct replacement part.
-
Checking the Water Level in the Tank:
- Insufficient water in the tank can affect flushing.
- Ensure the water supply line is fully open.
- Adjust the fill valve or float ball to achieve the proper water level.
- Follow the manufacturer’s guidelines for setting the water level.

Fluidmaster 400H-002 Performax Universal Toilet Fill Valve High Performance Tank and Bowl Water Control, 1-Pack, Multicolor
Fix noisy, or slow filling fill valves with the quietest, most powerful toilet fill valve available
As an affiliate, we earn on qualifying purchases.
As an affiliate, we earn on qualifying purchases.
Troubleshooting Tips for Tanks With Flappers, Overflow Tubes, and Fill Valves
When troubleshooting tanks with flappers, overflow tubes, and fill valves, it is important to check the water level in the tank to ensure proper flushing.
Start by checking the float valve position and make sure it is adjusted correctly. If the water level is too low, the toilet may not flush effectively. On the other hand, if the water level is too high, it can cause continuous running or overflow issues.
If adjusting the float valve does not solve the problem, the fill valve may need to be replaced. The fill valve is responsible for refilling the tank after each flush, and a malfunctioning fill valve can result in inadequate water flow.
To replace the fill valve, turn off the water supply, remove the old valve, and install the new one according to the manufacturer’s instructions.

KOHLER GENUINE PART 1188998 2" Toilet Canister Flush Valve Kit
KOHLER GENUINE PART
As an affiliate, we earn on qualifying purchases.
As an affiliate, we earn on qualifying purchases.
Failed Parts Inside the Toilet Tank
When it comes to toilet tank repairs and troubleshooting toilet tank issues, there are several failed parts inside the tank that may need attention. Here are three key components to check:
-
Flapper: The flapper, made from rubber, is a common part that can fail. If the flapper is damaged, it needs to be replaced. Identifying the type of flushing mechanism in the tank will help determine the right replacement part. Consider installing the entire flush valve with a kit for a more comprehensive repair.
-
Lift Chain: The lift chain is a small chain inside the tank that helps move the flapper for a flush. If the chain is loose, it can be easily reattached. In some cases, a new link may need to be crimped or a damaged chain replaced. The lift chain can also get stuck and needs to be set to the right length.
-
Water Level: Insufficient water in the tank can affect flushing. Check if the water supply line is fully on and adjust the fill valve or float ball if necessary. The water line mark inside the tank indicates the level needed for maximum efficiency. Consult the manufacturer’s website for guidance on setting the water level.
Identifying and Fixing Problems in the Tank
Identifying and fixing problems in the tank requires checking the lift chain, the flapper, and the water level. The lift chain, also known as the flapper chain or toilet lift chain, is a small chain inside the toilet tank that helps move the flapper for a flush. If the chain is loose, it can be easily reattached or replaced with the help of pliers. The flapper, made from rubber, is another important component that can fail and cause toilet tank leaks. If the flapper is damaged, it needs to be replaced. Checking the water level in the tank is also crucial, as insufficient water can affect flushing. Adjusting the fill valve or float ball may be necessary to ensure the water level is at the right mark. By addressing these key components, you can fix issues with the toilet tank handle and ensure proper flushing.
| Problem | Cause |
|---|---|
| Lift chain is loose | Chain needs reattachment or replacement |
| Damaged flapper | Flapper needs replacement |
| Insufficient water level | Adjust fill valve or float ball |
Checking and Adjusting the Toilet Lift Chain
After identifying and fixing problems in the tank of a toilet, the next step in troubleshooting flushing issues is to check and adjust the toilet lift chain.
The lift chain is a small chain inside the tank that helps move the flapper for a flush. If the chain is loose, it can be easily reattached or replaced using pliers to crimp a new link or replace a damaged chain.
Additionally, the lift chain can sometimes get stuck and needs to be set to the right length for proper functioning. By checking and maintaining the toilet lift chain, one can ensure that the flushing mechanism operates smoothly and efficiently. This preventive measure is an essential part of toilet lift chain maintenance and can help to avoid future flushing problems.
Toilet lift chain maintenance:
- Checking the toilet lift chain
- Reattaching or replacing a loose or damaged chain
- Setting the lift chain to the correct length
Troubleshooting lift chain issues:
- Diagnosing problems with the lift chain
- Adjusting the lift chain for proper functioning
- Preventive measures to avoid lift chain issues.
Inspecting and Replacing the Flapper
Inspecting and replacing the flapper is an important step in troubleshooting toilet flushing issues.
The flapper is a rubber valve located at the bottom of the toilet tank, responsible for controlling the flow of water into the bowl during a flush. Over time, the flapper can become worn or damaged, leading to problems with flushing.
To troubleshoot flapper issues, start by removing the tank lid and identifying the type of flushing mechanism. Once the type is determined, the flapper can be inspected for any signs of wear or damage.
If the flapper is found to be faulty, it should be replaced with a new one. This can be done by purchasing a flapper kit that includes the necessary tools and instructions.
Monitoring and Adjusting the Water Level in the Tank
The homeowner can easily monitor and adjust the water level in the tank to ensure proper flushing. Maintaining the correct water level is crucial for preventing flushing problems. Here are some steps to follow:
- Start by checking if the water supply line is fully on. Adjust it if necessary.
- Inspect the fill valve or float ball and make sure they are functioning properly. Adjust or replace them if needed.
- Look for the water line mark inside the tank. This mark indicates the level needed for maximum flushing efficiency.
- Use the manufacturer’s website or guidance to set the water level correctly.
- Regularly monitor the water level and make adjustments as necessary to ensure proper flushing.
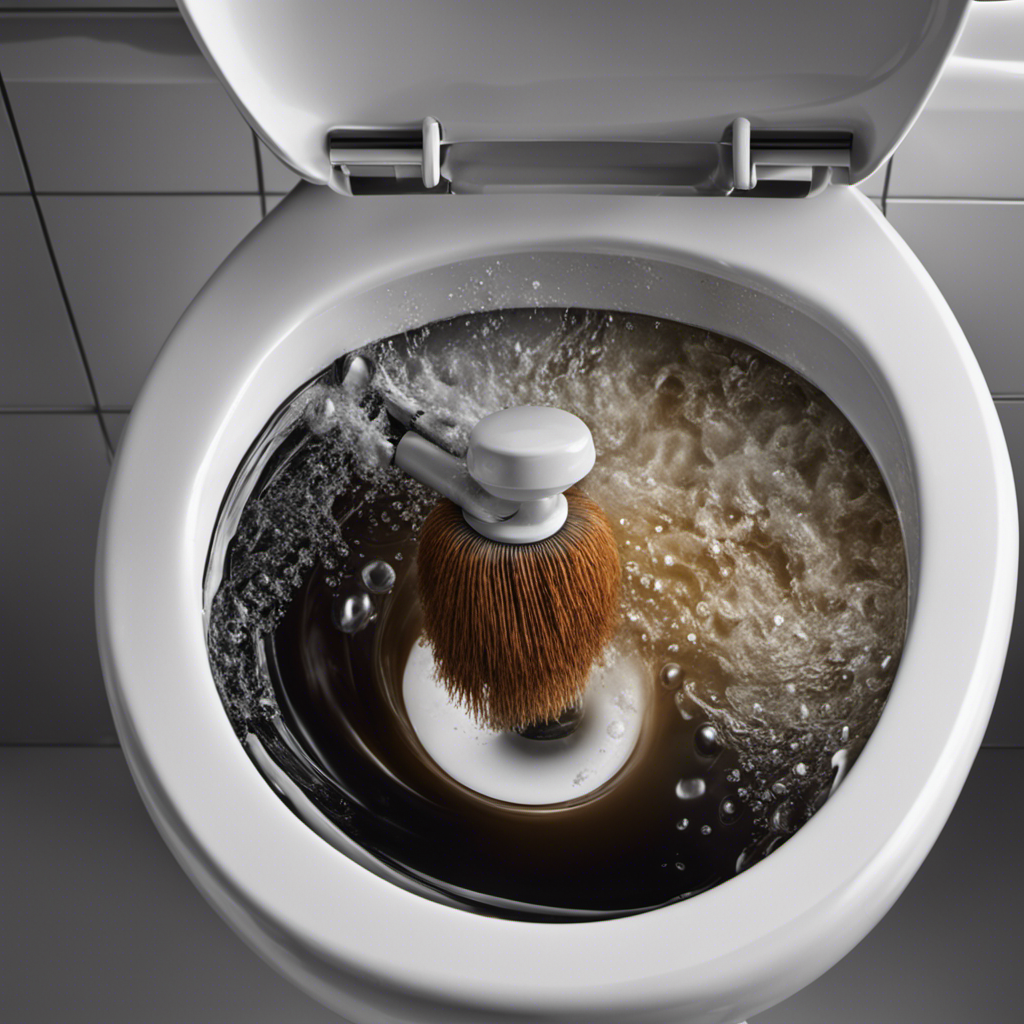
Cleaning Clogged Rim Holes for Improved Flushing
Using white vinegar and a rim brush, homeowners can effectively clean the clogged rim holes to improve the flushing performance of their toilets. Cleaning the rim holes is an important step in maintaining a properly functioning toilet. Over time, mineral deposits and grime can accumulate in these holes, leading to reduced water flow and ineffective flushing.
To begin the cleaning process, homeowners should put on rubber gloves and gather their supplies: white vinegar, a small mirror, a funnel, a spray bottle, and a rim brush. They can then mix equal parts white vinegar and water in the spray bottle and spray the solution onto the rim holes. Using the rim brush, they should scrub the holes to remove any mineral deposits or grime. The small mirror can be used to ensure that all holes are thoroughly cleaned.
Once the cleaning is complete, homeowners can flush the toilet to check for improved flushing performance. Regular maintenance and cleaning of the rim holes will help prevent clogs and ensure efficient toilet operation.
Frequently Asked Questions
How Do I Determine the Type of Flushing Mechanism in My Toilet Tank?
To determine the type of flushing mechanism in their toilet tank, they can start by removing the lid and inspecting the components. They should look for clues such as flappers, chains, or fill valves, and consult the manufacturer’s website for guidance if needed.
What Are the Best Types of Toilet Paper to Use for Proper Flushing?
The best types of toilet paper for proper flushing depend on personal preference. Some individuals may prefer thinner, single-ply options, while others may opt for thicker, multi-ply alternatives. It is also important to consider the environmental impact of different toilet paper options.
Can I Use an Auger to Improve the Flush of My Toilet?
Using an auger can improve a toilet’s flush by clearing blockages in the pipes. It is an alternative flushing method that can be effective in improving water pressure and resolving issues with flushing.
How Do I Clean the Clogged Siphon Jet on My Toilet?
To clean a clogged siphon jet on a toilet, follow these steps: turn off the water supply, remove the tank lid, locate the siphon jet, use a wire hanger or a toilet brush to remove any debris, and flush the toilet to test the jet.
What Are Some Troubleshooting Tips for a Toilet That Won’t Flush?
When a toilet won’t flush, troubleshooting tips can help identify and fix the problem. Checking the toilet bowl’s water level and inspecting specific parts like the lift chain and flapper are essential steps in resolving the issue.
Conclusion
In conclusion, when experiencing a flushing failure in a toilet, it is important to troubleshoot and identify the specific issues within the tank. By checking and adjusting the toilet lift chain, inspecting and replacing the flapper, monitoring and adjusting the water level, and cleaning clogged rim holes, one can ensure proper flushing.
Remember the wise adage, ‘An ounce of prevention is worth a pound of cure.’ Regular maintenance, educating household members on proper flushing techniques, and avoiding flushing non-flushable items can help prevent future flushing problems.
Stay proactive and keep your toilet functioning smoothly.