Hey there, fellow DIY enthusiasts! Ready to conquer the unruly beast that is a running toilet?
Well, fear not! In this guide, I’ll walk you through the steps to tame that watery menace and restore peace to your bathroom.
From identifying the symptoms to inspecting the flapper and adjusting float height, we’ll cover it all.
So grab your tools and let’s dive in, because together, we’ll conquer that running toilet and save the day!
Key Takeaways
- Continuous sound of water running is often caused by a faulty flapper valve or a worn-out float or defective valve.
- Regular maintenance and cleaning of the flapper can help prevent issues caused by debris or mineral deposits.
- Adjusting the float height and chain slack can ensure proper flushing mechanism and prevent water leakage.
- Cracks in the flush valve should be promptly replaced to prevent water seepage and inefficient flushing.

Korky Ultra Standard 2-Inch Universal Toilet Flapper – Long Lasting Rubber – Easy to Install – Made in USA, 100BP
TOILET FLAPPER VALVE FITS MOST POPULAR 2 inch toilet brands including, but not limited to: American Standard, Kohler,…
As an affiliate, we earn on qualifying purchases.
As an affiliate, we earn on qualifying purchases.
Identifying Symptoms
I often find myself struggling with identifying the symptoms of a running toilet. It’s important to know the potential causes so that I can troubleshoot effectively.
The most common symptom is a continuous sound of water running even when the toilet isn’t in use. This can be caused by a faulty flapper valve, which fails to seal properly and allows water to leak from the tank into the bowl.
Another symptom is a constantly refilling tank, indicating a problem with the fill valve. It could be a worn-out float or a defective valve that needs replacement.
Additionally, a toilet that flushes weakly or incompletely may indicate a clogged drain or a problem with the flush valve.

Fluidmaster 400H-002 Performax Universal Toilet Fill Valve High Performance Tank and Bowl Water Control, 1-Pack, Multicolor
Fix noisy, or slow filling fill valves with the quietest, most powerful toilet fill valve available
As an affiliate, we earn on qualifying purchases.
As an affiliate, we earn on qualifying purchases.
Inspecting the Flapper
Inspecting the flapper is crucial to identifying any potential issues with the toilet’s water flow and ensuring its proper functioning. The flapper is a rubber valve that controls the water flow from the tank to the bowl.
Here are three important things to consider when inspecting the flapper:
-
Replacing the flapper: Over time, the rubber on the flapper can deteriorate, causing leaks and a running toilet. If you notice any signs of wear or damage, it’s essential to replace the flapper with a new one to restore proper water flow and prevent water waste.
-
Cleaning the flapper: Sometimes, the flapper can get clogged with debris or mineral deposits, affecting its ability to seal properly. Regularly cleaning the flapper with a soft brush and mild cleaner can help maintain its functionality and prevent any potential issues.
-
Checking the chain: The chain connecting the flapper to the flush handle should have just the right amount of slack. If the chain is too loose or too tight, it can interfere with the flapper’s movement and cause water leakage. Adjust the chain as needed to ensure smooth operation.

Mudder Toilet Handle Chain Stainless Steel Toilet Flapper Lift Chain Replacement Fits Most Flappers(Silver,3 Pieces)
You will receive: 3 pieces toilet flapper chain, each has one hook end and one C-shaped ring end…
As an affiliate, we earn on qualifying purchases.
As an affiliate, we earn on qualifying purchases.
Scrutinizing the Fill Tube
My toilet’s water flow improved after adjusting the chain and scrutinizing the fill tube.
The fill tube is an essential component of the toilet’s flushing system. It connects the fill valve to the overflow tube, allowing water to refill the tank after each flush. However, like any other part, the fill tube can encounter issues that may disrupt its proper functioning. To ensure smooth operation, regular fill tube maintenance is crucial.
Troubleshooting fill tube issues involves inspecting for any clogs or kinks that may impede water flow. Additionally, checking the alignment and length of the fill tube is necessary to prevent water wastage and potential leaks.
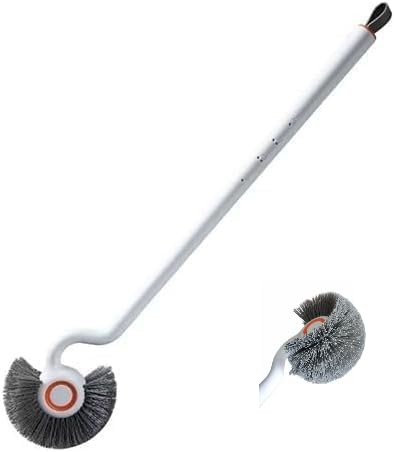
Toilet Bowl Wand Outdoor Aquarium Scrubber with Long Handle, Slim Bathroom Angled Toilet Tank Cleaning Brush, Japanese Rigid Non-Curl Scrub Brush with Curved Bristles, Deep Clean Dead Corner
Thin Angled toilet brush Comprehensive Cleaning: Our toilet brush boasts a unique head design that eliminates dirt and…
As an affiliate, we earn on qualifying purchases.
As an affiliate, we earn on qualifying purchases.
Adjusting Float Height
To ensure proper water level control in the toilet tank, you can follow these steps:
-
Identify the float: Locate the float inside the toilet tank. It’s usually a ball or a cup-shaped device attached to the end of a metal or plastic arm.
-
Adjust the float height: Depending on the type of float, you can either bend the metal arm or twist the adjustment screw to raise or lower the float. The goal is to set the water level about an inch below the top of the overflow tube.
-
Secure the float: Once you have achieved the desired water level, secure the float by attaching a coordinating clip to the arm or screw. This will prevent the float from moving out of position.
Tweaking Chain Slack
When it comes to tweaking chain slack in a running toilet, there are a few key points to consider.
First, adjusting the chain length is crucial for maintaining proper flushing mechanism. By ensuring the chain has enough slack to allow the flapper to fully close, you can prevent water leakage.
Additionally, eliminating chain disconnection is essential to guarantee smooth operation and avoid any potential water flow interruptions.
Chain Length Adjustment
As I adjust the chain length, I carefully ensure that it has the proper amount of slack. Proper chain tension adjustment is crucial for the smooth functioning of any mechanical system that relies on chains, such as bicycles or motorcycles.
Here are three key points to consider when troubleshooting chain issues:
-
Check for excessive slack: A loose chain can lead to poor power transfer, increased wear, and even chain derailment. Make sure to adjust the tension so that there’s a slight amount of vertical movement in the chain, about 1-2 inches of slack is typically recommended.
-
Align the sprockets: Misalignment between the front and rear sprockets can cause the chain to wear unevenly. Use a straight edge or alignment tool to ensure that the sprockets are perfectly aligned, minimizing chain stress and improving overall performance.
-
Lubrication is key: Regularly lubricate the chain to reduce friction and prevent premature wear. Use a high-quality chain lubricant and apply it evenly along the entire chain, wiping off any excess to avoid attracting dirt and debris.
Eliminating Chain Disconnection
I’m making sure to keep the chain tension just right to prevent chain disconnection during operation. It’s a common issue that can lead to leaks and other problems in a toilet. To troubleshoot this issue, it’s important to understand the role of the chain in the toilet’s flushing mechanism. The chain connects the flush handle to the flapper, and when the handle is pressed, it lifts the flapper to allow water to flow into the bowl. If the chain is too loose, it can become disconnected, causing the flapper to stay open and water to continuously run. On the other hand, if the chain is too tight, it can prevent the flapper from closing properly, leading to leaks. To find the right chain tension, refer to the following table:
| Issue | Chain Tension |
|---|---|
| Too loose | Adjust chain length by adding links |
| Too tight | Adjust chain length by removing links |
Examining the Flush Valve
I’ve just discovered a crack in the flush valve. This can be a common issue with toilets that can cause water leakage and a constant running toilet. Troubleshooting this problem requires understanding the water level and the components involved.
Here are three key points to consider:
-
Inspection: Start by turning off the water supply and flushing the toilet to drain the tank. Carefully examine the flush valve for any cracks or damage. A cracked flush valve can lead to water seepage and an inefficient flushing mechanism.
-
Replacement: If you’ve identified a crack in the flush valve, it’s time to replace it. Remove the old flush valve and install a new one. Make sure to follow the manufacturer’s instructions and use the appropriate tools for the job.
-
Testing: After installation, turn the water supply back on and observe the water level in the tank. Adjust the fill valve if necessary to ensure the water level is at the recommended mark. Flush the toilet a few times to ensure proper functionality and check for any leaks.
Replacing if Needed
Can I simply replace the flush valve if it’s cracked, or are there other factors I should consider? When it comes to toilet repair, troubleshooting techniques can help you save time and money. While a cracked flush valve is a common issue, there are a few factors to consider before replacing it. First, check if the valve is the root cause of the problem. A thorough inspection of other components, such as the fill valve and flapper, is necessary. Additionally, ensure that the water supply is shut off before starting any repairs. Remember to follow safety precautions and consult a professional if needed. By employing these troubleshooting techniques, you can confidently tackle toilet repairs and keep your bathroom running smoothly.
| Troubleshooting Techniques |
|---|
| Inspect the flush valve |
| Check the fill valve |
| Examine the flapper |
| Shut off the water supply |
| Follow safety precautions |
Frequently Asked Questions
How Can I Determine if the Running Toilet Is Caused by a Faulty Flapper or a Fill Tube Issue?
To determine if a running toilet is caused by a faulty flapper or a fill tube issue, there are a few troubleshooting steps you can take.
First, check the flapper by adding a few drops of food coloring to the toilet tank and waiting to see if it seeps into the bowl. If it does, the flapper may need to be replaced.
Next, inspect the fill tube for any cracks or leaks that could be causing the issue.
Are There Any Specific Tools I Need to Adjust the Float Height of My Toilet?
To adjust the float height of your toilet, you’ll need a few specific tools. First, grab a screwdriver and an adjustable wrench. These will help you loosen and tighten the necessary components.
Now, let’s walk through the step-by-step process.
Start by locating the fill valve and finding the adjustment screw. Use the screwdriver to turn the screw clockwise to lower the float or counterclockwise to raise it.
How Do I Know if the Chain Slack Is Properly Adjusted?
When it comes to adjusting chain slack in a toilet, it’s important to know if it’s properly adjusted.
To troubleshoot, check if the chain has enough slack to allow the flapper to fully close but not so much that it gets caught under the flapper when it opens.
A common mistake is having too much slack, which can cause the toilet to continuously run.
Ensure the chain has the right amount of slack for optimal performance.
What Are the Common Signs That Indicate a Problem With the Flush Valve?
Well, when it comes to troubleshooting a running toilet, one of the common signs that indicate a problem with the flush valve is water continuously running into the bowl. This can be quite frustrating and wasteful.
However, with some DIY skills, you can easily tame this issue. By adjusting the chain slack properly and ensuring that the flush valve is functioning correctly, you can put an end to the never-ending flow of water in your toilet.
What Steps Should I Follow to Safely Replace the Flush Valve if It Is Deemed Necessary?
To safely replace the flush valve, there are a few steps I follow.
First, I turn off the water supply to the toilet and flush to drain the tank.
Then, I disconnect the water supply line and remove the old flush valve.
Next, I install the new flush valve, making sure it’s properly aligned.
Finally, I reconnect the water supply line and turn the water back on.
It’s important to take precautions and use troubleshooting techniques to ensure a successful replacement.
Conclusion
In conclusion, by following the steps outlined in this guide, you can easily tame a running toilet and save yourself from unnecessary water wastage and costly repairs.
With a little DIY know-how and some simple adjustments, you can put an end to that annoying sound and ensure your toilet is functioning efficiently.
So don’t hesitate to take matters into your own hands and tackle this common household issue. Your wallet and the environment will thank you.