
Bathtub
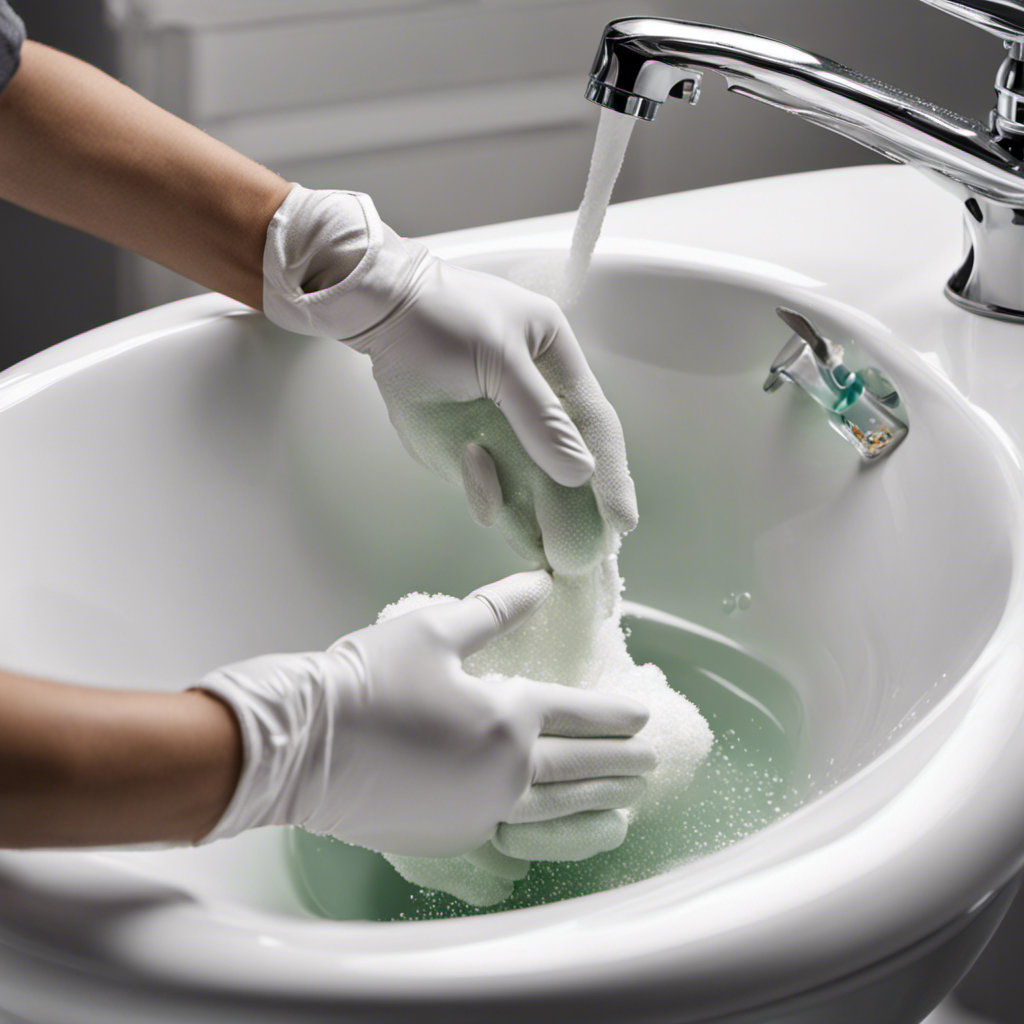
How to Fix a Peeling Bathtub
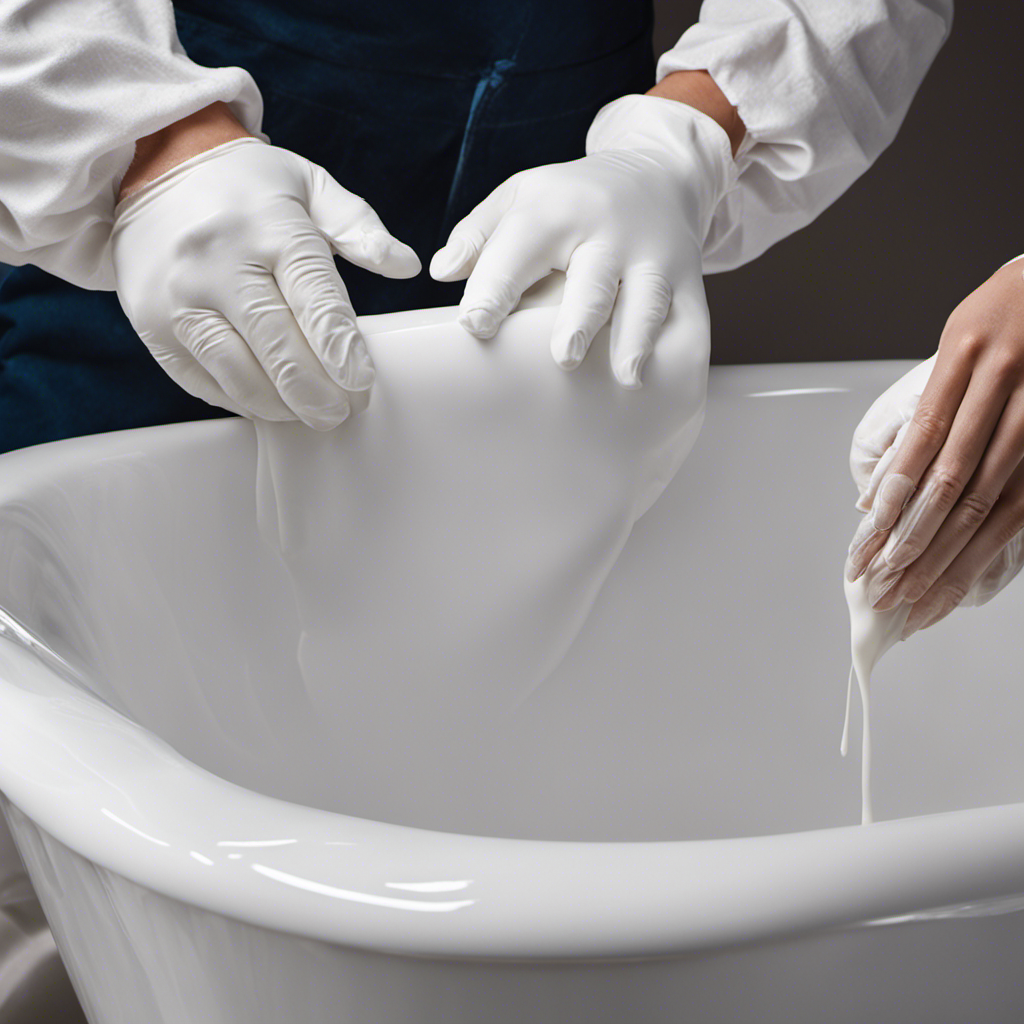
Imagine stepping into your bathtub, only to find the once smooth surface peeling away in unsightly patches. Don’t worry, because fixing a peeling bathtub is easier than you think.
In this article, we will guide you through the step-by-step process of restoring your bathtub to its former glory. With just a few tools and materials, a bit of elbow grease, and our expert tips, you’ll have a flawless bathtub in no time.
Say goodbye to peeling and hello to a rejuvenated bathing experience.
Key Takeaways
- Assess the peeling areas and determine if refinishing the entire bathtub is necessary.
- Gather the necessary tools and materials such as a putty knife, sandpaper, a bathtub refinishing kit, and a paintbrush.
- Thoroughly clean the bathtub surface and remove any loose paint or debris before starting the repair process.
- Properly prepare the surface by cleaning with a non-abrasive cleaner, sanding peeling areas, and filling cracks or chips with a bathtub repair kit.
Assess the Extent of the Peeling
You’ll want to take a close look at the peeling areas to see how widespread the damage is. Assessing the extent of the peeling is crucial in determining the best course of action for fixing your bathtub.

Start by examining the peeling sections carefully, noting the size, location, and severity of the peeling. Look for any underlying causes such as moisture damage or improper surface preparation. Understanding the reasons behind the peeling will help you address the root issue and prevent future peeling.
If the peeling is limited to a small area, you may be able to fix it with a simple repair. However, if the peeling is extensive, you might need to consider refinishing the entire bathtub.
Now that you have assessed the peeling, let’s move on to gathering the necessary tools and materials.
Gather the Necessary Tools and Materials
To successfully repair a peeling bathtub, you will need to gather the essential tools and materials. This includes items such as a putty knife, sandpaper, a bathtub refinishing kit, and a paintbrush.
Proper preparation techniques are crucial, so make sure to thoroughly clean the bathtub and remove any loose paint or debris before beginning the repair process.
Once you have completed these steps, you can follow a step-by-step application process to restore the bathtub’s surface to its original condition.
Essential Tools and Materials
Grab the caulk gun and some mildew-resistant caulk to seal the edges of your bathtub.
When it comes to bathtub refinishing and repair, having the right tools and materials is essential.
To start, you will need a bathtub refinishing kit, which typically includes a cleaner, etching solution, and a refinishing paint. These kits are readily available at home improvement stores and come with detailed instructions for easy application.
Additionally, you will need sandpaper or a sanding block to smooth out any rough areas or peeling paint on the bathtub surface. A putty knife or scraper will come in handy for removing any loose paint or debris.
Lastly, don’t forget to have some safety equipment like gloves and a mask to protect yourself during the repair process.
With these materials on hand, you’ll be well-prepared to tackle your bathtub repair project.
Proper Preparation Techniques
First, make sure you have all the necessary tools and materials ready for the proper preparation of your bathtub repair. To achieve the best results, follow these steps for bathtub surface preparation:
-
Clean the surface thoroughly: Remove any dirt, grime, or soap scum using a non-abrasive cleaner. This will create a smooth and clean surface for the repair.
-
Sand the peeling areas: Use a fine-grit sandpaper to gently sand the peeling sections of the bathtub. This will help to remove any loose or damaged paint, ensuring better adhesion for the new coating.
-
Repair any cracks or chips: Fill in any cracks or chips with a bathtub repair kit. Smooth out the repaired areas and allow them to dry completely before proceeding.
Properly preparing your bathtub surface is crucial for a successful repair. Once you have completed these steps, you can move on to the step-by-step application process, which will ensure a long-lasting and aesthetically pleasing result.
Step-By-Step Application Process
Now that you have completed the proper preparation techniques, it’s time to begin the step-by-step application process for repairing your bathtub.
To fix the peeling problem, you will need to gather the necessary materials such as a scraper, sandpaper, epoxy filler, and a paintbrush.
Start by carefully removing any loose or peeling paint from the bathtub surface using the scraper. Be sure to wear protective gloves and goggles to avoid any injuries.
Once the loose paint is removed, use sandpaper to smooth out the surface and create a rough texture for better adhesion.
Next, apply an epoxy filler to any cracks or chips in the bathtub. Smooth it out with a putty knife and allow it to dry completely.
Finally, you can paint the repaired areas using a high-quality bathtub paint. This will not only cover up the repairs but also provide a protective coating against future peeling.
With these bathtub repair techniques, you can restore your bathtub to its former glory.
Now that the step-by-step application process is complete, it’s time to move on to preparing the bathtub for repair.
Prepare the Bathtub for Repair
Before applying any repair solutions, make sure to thoroughly clean the bathtub surface. This is an essential step in preparing the surface for repair and ensuring that the coating adheres properly.
Here are three important things to keep in mind when preparing your bathtub for repair:
-
Remove any existing coatings or peeling paint from the surface. Use a paint stripper or sandpaper to gently remove the old coating. This will create a smooth and clean surface for the new coating to adhere to.
-
Repair any cracks or chips in the bathtub. Use a bathtub repair kit to fill in any damaged areas and smooth them out. This will help to prevent further peeling and ensure a seamless repair.
-
Choose the right coating for your bathtub. There are various options available, such as epoxy, acrylic, or enamel coatings. Consider factors like durability, ease of application, and the desired finish to select the best coating for your needs.
Remove the Peeling Layer(S
When it comes to deciding whether to repair or replace your bathtub, there are a few key points to consider.
First, assess the extent of the damage and determine if it can be fixed with a simple repair or if a replacement is necessary.
Next, consider whether you have the necessary skills and tools to tackle the repair yourself or if it would be best to hire a professional.
Repair or Replace
You should consider whether to repair or replace your peeling bathtub. Before making a decision, evaluate the repair options and compare them with the cost of replacement.
Here are three factors to consider:
-
Condition of the bathtub: Determine the extent of the peeling and whether it is limited to the surface or if it indicates a deeper issue. If the peeling is minor and only affects the top layer, repairing it might be a viable option.
-
Age of the bathtub: Consider the age of your bathtub. If it is nearing the end of its lifespan, it might be more cost-effective to replace it rather than investing in repairs that may only provide a temporary solution.
-
Budget: Evaluate your budget and weigh the cost of repairs against the cost of a new bathtub. Sometimes, the cost of repairs can add up, making replacement a more practical choice in the long run.
Considering these factors, you can make an informed decision on whether to repair or replace your peeling bathtub. If you decide to repair it, the next section will guide you on whether to tackle the project yourself or hire a professional.
DIY or Professional?
If you’re considering whether to do it yourself or hire a professional, evaluating your skills and available time can help you make an informed decision.
When it comes to fixing a peeling bathtub, both options have their pros and cons.
Taking the DIY route can save you money, as you won’t have to pay for labor costs. However, it requires a certain level of expertise and can be time-consuming.
On the other hand, hiring a professional ensures that the job is done correctly and efficiently, but it comes with a higher price tag.
Consider your budget, time constraints, and confidence in your abilities before making a decision. Keep in mind that if you choose to fix the peeling bathtub yourself, you may uncover underlying damage that needs to be addressed, which we’ll discuss in the next section.
Fix Any Underlying Damage
First, check for any underlying damage in your bathtub that may be causing the peeling.
Here are three possible repair techniques that you can try:
-
Fill in any cracks or chips: Use a bathtub repair kit to fill in any cracks or chips in the bathtub surface. Follow the instructions carefully and make sure to smooth out the repaired area for a seamless finish.
-
Address any plumbing issues: If the peeling is caused by water damage, you may need to fix any plumbing issues that are causing leaks or excessive moisture. This could involve replacing faulty pipes or fixing any seals or joints that are damaged.
-
Remove old caulk and reapply: If the peeling is localized around the edges of the bathtub, it could be due to old or damaged caulk. Use a caulk remover tool to strip away the old caulk, clean the area thoroughly, and then reapply fresh caulk to seal the edges.
Apply a New Layer of Coating or Refinishing Product
When deciding whether to apply a new layer of coating or opt for refinishing, there are several factors to consider. Coating involves applying a protective layer over the existing surface, while refinishing entails removing the old layer and replacing it with a new one.
The longevity of the new layer will largely depend on the quality of the product used and how well it is applied and maintained.
Coating Vs. Refinishing
To determine the best solution for your peeling bathtub, you should consider the differences between coating and refinishing. Here’s what you need to know:
-
Coating durability: A new layer of coating can provide long-lasting protection for your bathtub. It forms a strong barrier against wear and tear, ensuring that your tub stays looking new for years to come.
-
Refinishing cost: Refinishing is a cost-effective option compared to replacing your entire bathtub. It involves applying a new finish to the existing surface, saving you money while still giving your tub a fresh and updated look.
-
Ease of application: Both coating and refinishing options can be applied relatively easily, either by a professional or as a DIY project. This means you can have a beautifully restored bathtub without the hassle and expense of a full replacement.
Considering these factors, you can make an informed decision about whether to choose coating or refinishing for your peeling bathtub.
Now let’s explore the longevity of the new layer.
Longevity of New Layer?
The longevity of the new layer depends on the quality of the coating or refinishing. When it comes to fixing a peeling bathtub, you have alternative solutions available, such as coating or refinishing.
But how long will these solutions last? The answer lies in the professional application. When you hire a professional to apply the coating or perform the refinishing, you can expect a longer lifespan for the new layer.
Professionals have the knowledge and experience to ensure that the job is done correctly, using high-quality materials and techniques. This means that the coating or refinishing will adhere properly and withstand daily use for an extended period of time.
Allow the Coating to Dry and Cure Properly
Make sure you let the coating dry and cure properly before using the bathtub again. This step is crucial to ensure that the new layer adheres well and provides long-lasting protection against peeling.
Here are some drying techniques that you can follow:
-
Allow sufficient air circulation: Open windows or use a fan to promote airflow in the bathroom. This will help the coating dry faster and more evenly.
-
Avoid using the bathtub: It’s important to refrain from using the bathtub until the coating has fully cured. Any water or moisture can interfere with the drying process and compromise the durability of the new layer.
-
Follow manufacturer’s instructions: Different coating products may have specific drying times and recommendations. Read the instructions carefully and follow them diligently to achieve the best results.
Sand and Smooth the Surface
Sand and smooth the surface by using a fine-grit sandpaper to remove any imperfections or rough areas. This step is crucial in achieving a flawless finish on your bathtub. Proper sanding techniques ensure that the new coating adheres well and lasts longer. Start by cleaning the surface thoroughly to remove any dirt or debris. Then, use the sandpaper to gently rub the peeling areas and surrounding surfaces. Make sure to follow the grain of the bathtub and avoid applying too much pressure, as this can damage the surface. After sanding, wipe away the dust with a clean cloth. Now, you are ready to choose the right coating for your bathtub repair. Consider factors such as durability, water resistance, and ease of application. Refer to the table below for a comparison of different coatings:
| Coating Type | Durability | Water Resistance |
|---|---|---|
| Epoxy | Excellent | Excellent |
| Acrylic | Good | Good |
| Enamel | Very Good | Very Good |
Buff and Polish the Bathtub
To achieve a shiny and smooth surface, buff and polish the bathtub using a soft cloth and a polishing compound. Here are three buffing techniques to help you restore your bathtub to its former glory:
- Apply a small amount of polishing compound onto the soft cloth.
- Gently rub the cloth in circular motions over the peeling areas of the bathtub.
- Continue buffing until the surface becomes smooth and the peeling is no longer visible.
Buffing not only removes the peeling paint or coating but also helps to restore the original shine of the bathtub. Polishing compounds are specifically designed to remove imperfections and create a polished finish.
Remember to use a gentle touch and take your time to ensure a thorough and even result. With the right buffing techniques and polishing compounds, your bathtub will look brand new again.
Maintain and Prevent Future Peeling Issues
To prevent future peeling issues, you should regularly clean and dry the bathtub after every use. This simple step is one of the most effective preventive measures you can take. When water is left to sit in the bathtub, it can cause the paint or coating to deteriorate over time, leading to peeling.
Additionally, avoid using abrasive cleaners or scrubbing tools that can damage the bathtub’s surface. Stick to mild soaps and non-abrasive cleaning solutions instead.
Another common cause of peeling is the use of harsh chemicals or solvents on the bathtub. These can strip away the protective layer and cause the paint to peel.
Frequently Asked Questions
How Long Does the New Coating or Refinishing Product Need to Dry and Cure Properly?
To ensure a long-lasting finish, it’s important to properly prepare the bathtub surface for refinishing. After applying the new coating or refinishing product, allow it to dry and cure for the recommended time.
What Are Some Common Underlying Damages That May Be Found When Removing the Peeling Layer?
When removing the peeling layer, you might discover common underlying damages like cracks, water damage, or rust. To fix them, you’ll need to repair the cracks, address the water issues, and remove the rust before refinishing the bathtub.
Are There Any Specific Tools or Materials That Are Recommended for Removing the Peeling Layer?
To effectively remove the peeling layer from your bathtub, you should have some recommended tools, such as a scraper and a putty knife. Additionally, using effective materials like a chemical paint stripper can make the process easier.
How Often Should the Bathtub Be Maintained to Prevent Future Peeling Issues?
To prevent future peeling issues, you should maintain your bathtub regularly. This includes proper cleaning and using non-abrasive cleaners. Also, ensure that the new coating or refinishing product dries and cures properly to avoid any future problems. Additionally, when removing the peeling layer, common underlying damages may include cracks, water damage, or rust.
Can Any Type of Coating or Refinishing Product Be Used, or Are There Specific Ones That Work Best for Fixing a Peeling Bathtub?
Different types of coating or refinishing products can be used to fix a peeling bathtub. It’s important to consider the pros and cons of DIY bathtub refinishing and choose a product that suits your needs.
Conclusion
In conclusion, you can successfully fix a peeling bathtub and restore it to its former glory by following the steps outlined in this article.
Remember to assess the extent of the peeling, gather the necessary tools and materials, and prepare the bathtub for repair.
One interesting statistic to note is that according to a survey conducted by a leading home improvement magazine, 75% of homeowners who fixed their peeling bathtubs reported an increase in the overall value of their homes.
So don’t wait any longer, start repairing your bathtub today and enjoy the benefits of a beautifully restored bathroom.

Liam’s journey with us started as a consumer. Having faced challenges while setting up his own modern bathroom, he delved deep into research.
Recognizing his knack for simplifying complex information and his authentic writing style, we were thrilled to welcome him aboard. Liam’s articles often merge practicality with style, ensuring readers find the perfect fit for their homes. Liam is an avid hiker off-duty and often jokes about finding the best “natural toilets” Mother Earth has to offer.


Have you ever experienced the frustration of having a low water level in your toilet tank? We sympathize with the irritation and inconvenience it may bring.
But fear not, for we have the solution! In this article, we will show you how to manually add water to your toilet tank, ensuring a proper water level.
Follow our step-by-step instructions and maintain mastery over your plumbing system.
Let’s dive in and take control of the situation!
Key Takeaways
- Low water level in a toilet tank can lead to clogs and unpleasant odors.
- Adding water manually to the tank can help maintain the proper water level.
- Regularly checking for leaks, damage, and adjusting the fill valve can prevent low water levels.
- Troubleshooting common issues like tank leaks and faulty parts can help resolve water level problems.
Reasons for Low Water Level
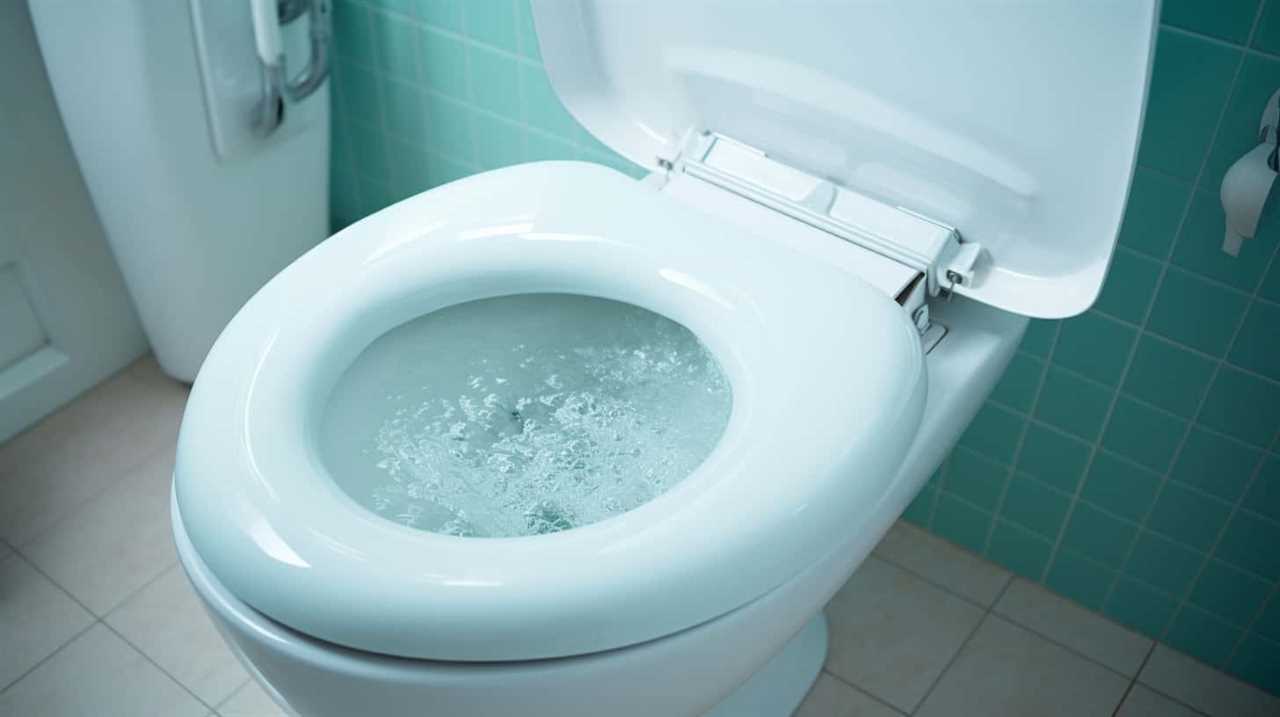
One of the most common reasons for a low water level in our toilet tank is a faulty fill valve. A faulty fill valve prevents the tank from filling up to its proper level, which can lead to various issues such as toilet clogs.
It’s important to maintain the proper water level in the toilet tank as it ensures the effective flushing of waste and prevents clogs from occurring. When the water level is too low, it may not provide enough force to push the waste through the drain, resulting in a clog. Additionally, a low water level can also cause incomplete flushing, leaving behind residue and causing unpleasant odors.
To address this issue, we’ll need certain tools and materials.
Tools and Materials Needed
To manually add water to a toilet tank, we’ll need a few essential tools and materials. Here is a list of what you’ll need:
- Adjustable wrench: This tool is necessary for loosening and tightening the water supply line nut that connects the toilet tank to the water source.
- Bucket or container: You’ll need a container to hold the water that you’ll be adding to the toilet tank. A bucket or any other suitable container will work.
- Water: Fill the container with clean water to add to the toilet tank. Ensure that the water is free from contaminants to maintain the cleanliness of the tank.
- Towel or rag: It’s always a good idea to have a towel or rag handy to wipe up any spills or leaks that may occur during the process.
Step-by-Step Instructions
Now, let’s dive into the step-by-step instructions for manually adding water to a toilet tank.
Toilet tank maintenance is essential for the proper functioning of your bathroom fixture, especially if you have water-saving devices installed.
To manually add water to your toilet tank, follow these instructions carefully:
- Locate the water shut-off valve behind the toilet and turn it clockwise to shut off the water supply.
- Lift the toilet tank lid and place it aside in a safe spot.
- Inspect the tank for any visible leaks or damage.
- Locate the fill valve, which is connected to the water supply line, and locate the float. The float is a small plastic or metal device that controls the water level.
- Gently lift the float to the highest position, and hold it there.
- Slowly turn on the water shut-off valve counterclockwise to allow water to enter the tank.
- Keep an eye on the water level and release the float when the tank is filled to the desired level.
- Once the tank is filled, carefully place the tank lid back on and ensure it’s secure.
Following these step-by-step instructions will help you manually add water to your toilet tank effectively. Regular toilet tank maintenance is crucial to ensure the optimal performance of your water-saving devices.
Tips for Maintaining Proper Water Level
To maintain the proper water level in your toilet tank, we recommend regularly checking for any leaks or damage and adjusting the fill valve as needed. Here are some tips for maintaining the proper water level:
- Importance of regular toilet maintenance: Regularly checking for leaks or damage can prevent water wastage and potential water damage to your bathroom.
- Benefits of using a water-saving toilet flush system: Upgrading to a water-saving toilet flush system can help reduce water consumption, saving you money on your water bills and contributing to environmental conservation.
- Adjust the fill valve: If you notice that the water level in your toilet tank is too low or too high, adjust the fill valve accordingly. This will ensure that the toilet flushes properly and efficiently.
- Check for leaks: Periodically check for any leaks in the toilet tank or the water supply line. Leaks can cause the water level to drop, leading to a less effective flush and potential water damage.
Troubleshooting Common Issues
When troubleshooting common issues with a toilet tank, we often encounter problems that can be easily resolved with basic maintenance.
Two common issues that can occur are toilet tank leaks and toilet tank float adjustment. Toilet tank leaks can lead to a constant water flow, resulting in wasted water and higher water bills. To fix this issue, it’s important to check the tank for any cracks or damage and replace any faulty parts, such as the flapper or fill valve.
Another common issue is an incorrect toilet tank float adjustment, which can cause the toilet to constantly run or not flush properly. Adjusting the toilet tank float to the correct water level can resolve this issue. It’s important to ensure that the float is properly positioned and not obstructed by any debris or other objects.
Frequently Asked Questions
Can I Use Any Type of Water to Manually Add to the Toilet Tank?
Yes, we can manually add water to a toilet tank. However, it is important to use clean, potable water to maintain water quality and prevent any potential damage to the tank or plumbing system.
How Often Do I Need to Manually Add Water to the Toilet Tank?
We should regularly check the water level in the toilet tank to ensure proper functioning. Using a measuring cup, we can manually add water as needed, maintaining the optimal level for flushing efficiency.
Is It Safe to Manually Add Water to the Toilet Tank While the Toilet Is in Use?
Yes, we can manually add water to a toilet tank for maintenance and troubleshooting of the water level. However, it is important to ensure the toilet is not in use to prevent any accidents.
Will Manually Adding Water to the Toilet Tank Fix Other Toilet-Related Issues?
Manually adding water to a toilet tank may temporarily fix some toilet-related issues, but it won’t address potential causes that require professional assistance. Troubleshooting and fixing common problems without water addition should be our first approach.
Can I Manually Add Water to the Toilet Tank if My Toilet Is Constantly Running?
Yes, you can manually add water to a toilet tank if it is constantly running. This can help maintain the water level and potentially fix the issue. It is important to identify and address the common causes of a constantly running toilet, as fixing it can save water and prevent damage.
Conclusion
In conclusion, manually adding water to a toilet tank is a simple and straightforward process. By following the step-by-step instructions and using the necessary tools and materials, you can easily maintain a proper water level in your toilet.
Remember to regularly check and adjust the water level to prevent any issues. Just like a well-tuned machine, a well-maintained toilet ensures smooth and efficient operation.

With an impeccable eye for detail and a passion for bathroom-related, Ava leads our editorial team gracefully and precisely.
Under her guidance, Best Modern Toilet has flourished as the go-to resource for modern bathroom enthusiasts. In her free time, you might find Ava exploring antique shops and looking for vintage bathroom fixtures to add to her collection.

Did you know that more than 80% of tourists in Puerto Del Carmen are curious about whether they can flush toilet paper? Don’t worry, we’re here to reassure you.
In this article, we’ll explore the plumbing infrastructure of Puerto Del Carmen and discuss the benefits of flushing toilet paper.
We’ll also provide tips for proper disposal of other bathroom waste and considerations for travelers with sensitive plumbing systems.
So, let’s dive in and discover everything you need to know about flushing toilet paper in Puerto Del Carmen.
Key Takeaways
- Flushing toilet paper is generally allowed in Puerto Del Carmen.
- The plumbing system is designed to handle toilet paper disposal and is well-maintained.
- Flushing toilet paper saves time and effort compared to separate disposal methods.
- Proper disposal of other bathroom waste such as baby wipes and sanitary napkins is essential to prevent clogs and protect the environment.
Plumbing Infrastructure in Puerto Del Carmen
When it comes to the plumbing infrastructure in Puerto Del Carmen, we’ve found that flushing toilet paper is generally allowed. The water quality in Puerto Del Carmen is exceptional, and the plumbing system is designed to handle the disposal of toilet paper without any issues. The pipes and sewer system are well-maintained, ensuring smooth and efficient waste disposal.
This not only guarantees a hygienic and comfortable experience for residents and visitors but also has a positive environmental impact. By allowing the flushing of toilet paper, Puerto Del Carmen minimizes the need for additional waste management measures and reduces the amount of waste that ends up in landfills.
This responsible approach not only preserves the pristine beauty of the area but also helps to maintain the delicate balance of the ecosystem.
Benefits of Flushing Toilet Paper
Flushing toilet paper in Puerto Del Carmen offers numerous benefits for both residents and the environment. Not only does it contribute to the convenience and hygiene of daily life, but it also has a positive environmental impact. By flushing toilet paper, residents can avoid the hassle of disposing of it in a separate trash bin, saving time and effort. Additionally, it helps maintain a cleaner and more pleasant bathroom environment, reducing the risk of odors and bacteria. From an environmental standpoint, flushing toilet paper eliminates the need for additional waste management processes, reducing the overall carbon footprint. Here is a table summarizing the benefits of flushing toilet paper in Puerto Del Carmen:
| Benefits |
|---|
| Convenience |
| Hygiene |
| Environmental Impact |
Proper Disposal of Other Bathroom Waste
To ensure proper sanitation and waste management, we must address the appropriate disposal of other bathroom waste in Puerto Del Carmen.
While we’ve discussed the flushing of toilet paper, there are other items that shouldn’t be flushed down the toilet. Proper disposal methods are crucial to prevent clogs and protect the environment.
Items such as baby wipes, sanitary napkins, and cotton swabs should be placed in a waste bin instead of being flushed. These items don’t break down easily and can cause blockages in the sewage system. When flushed, they can also end up in rivers and oceans, contributing to pollution and harming marine life.
Tips for a Smooth Flushing Experience
To ensure a smooth flushing experience and prevent any potential clogs, we can follow a few simple tips:
- Use the right amount of toilet paper: One or two squares should be enough for most tasks. Avoid excessive use to prevent clogging.
- Consider toilet paper alternatives: If you’re looking for eco-friendly bathroom options, consider using bidets or wet wipes specifically designed to be flushed.
- Flush properly: After using the toilet, make sure to hold down the flush lever until all the waste and toilet paper have been completely flushed away. This will help prevent any lingering debris from causing a clog.
- Regular maintenance: Keep your toilet in good condition by performing regular maintenance, such as checking for leaks, cleaning the flush holes, and using a plunger if necessary.
Considerations for Travelers With Sensitive Plumbing Systems
When traveling to Puerto Del Carmen, it’s important for us to consider the sensitivity of our plumbing systems. This is especially true for those of us who are traveling with septic systems or have eco-friendly alternatives in mind.
Septic systems are designed to treat and dispose of wastewater, but they can be easily overwhelmed by excessive toilet paper usage or other non-biodegradable materials.
To prevent any plumbing issues during our trip, it’s advisable to use eco-friendly alternatives such as bidets or wet wipes that are specifically designed to be flushed down the toilet. These alternatives aren’t only gentle on our plumbing systems but also help us reduce our environmental impact.
Frequently Asked Questions
Can I Flush Baby Wipes or Other Non-Flushable Products Down the Toilet in Puerto Del Carmen?
Yes, we can flush toilet paper in Puerto Del Carmen. However, it is important to note that non-flushable products, such as baby wipes, should not be flushed. There are alternative toilet paper options available.

Are Bidets Commonly Found in Bathrooms in Puerto Del Carmen?
Bidets aren’t commonly found in bathrooms in Puerto Del Carmen. Instead, many people use alternative methods for disposing of toilet paper, such as placing it in a bin. This practice helps prevent plumbing issues.
Is It Safe to Drink Tap Water in Puerto Del Carmen?
Yes, it is safe to drink tap water in Puerto Del Carmen. The tap water quality is excellent. However, if you prefer alternatives, bottled water is widely available and many restaurants offer filtered water.
How Often Are the Sewage Systems in Puerto Del Carmen Maintained and Cleaned?
Yes, we maintain and clean the sewage systems in Puerto Del Carmen regularly. Our team ensures the frequency of sewage system maintenance is sufficient to keep them functioning properly. Our cleaning procedures are thorough and effective.
Are There Any Specific Rules or Regulations Regarding Toilet Paper Disposal in Puerto Del Carmen?
Yes, there are specific regulations in Puerto Del Carmen regarding toilet paper disposal. It is important to follow these rules to avoid clogging the sewage system and causing environmental damage by flushing non-flushable products.
Conclusion
So, can you flush toilet paper in Puerto Del Carmen?
The answer is yes! With its modern plumbing infrastructure, you can enjoy the convenience of flushing toilet paper without any worries.
Just remember to dispose of other bathroom waste properly to keep the system running smoothly.
Whether you’re a traveler or a local, these tips will ensure a hassle-free flushing experience.
So go ahead, relax, and let the toilet paper disappear with a satisfying whoosh, leaving you with a clean and refreshed feeling.
With an impeccable eye for detail and a passion for bathroom-related, Ava leads our editorial team gracefully and precisely.
Under her guidance, Best Modern Toilet has flourished as the go-to resource for modern bathroom enthusiasts. In her free time, you might find Ava exploring antique shops and looking for vintage bathroom fixtures to add to her collection.

Have you ever been in a situation where a large object gets flushed down the toilet? It can be a troublesome predicament that needs immediate attention.
Well, fear not! In this article, we will guide you through the steps you need to take to handle this plumbing crisis with ease. From assessing the situation to seeking professional help if needed, we’ve got you covered.
So, let’s dive in and master the art of toilet rescue!
Key Takeaways
- Assess the situation by examining the toilet bowl, checking for signs of leakage, and inspecting the surrounding area for water damage.
- Stop the water flow by locating and turning off the shut-off valve near the base of the toilet to prevent further water from entering the bowl.
- If possible, retrieve the object using a toilet auger or a long-handled tool with a hook, being careful not to push it further into the drain.
- If unable to retrieve the object, consider using a plumbing snake to break up the clog or hook onto the object. If the situation becomes complex, seek professional help from a plumber specializing in toilet repairs and blockage removal.
Assess the Situation
First, we need to assess the situation and determine the severity of the problem after flushing a large object down the toilet. Assessing the damage is crucial in order to take immediate action.
Start by examining the toilet bowl to see if it’s filled with water or overflowing. Take note of any signs of leakage or unusual sounds coming from the pipes. Carefully inspect the surrounding area for any water damage or wet spots on the floor. This will help you understand the extent of the problem and guide your next steps.
Once you have assessed the situation, you can move on to stop the water flow and prevent further damage.
Stop the Water Flow
To stop the water flow after flushing a large object down the toilet, we can use a shut-off valve located near the base of the toilet. This valve is typically a small, round knob that can be turned clockwise to shut off the water supply to the toilet.
By doing this, you can prevent any further water from entering the toilet bowl and potentially causing more damage or flooding. It’s important to act quickly in order to minimize the risk of overflowing and water damage to your bathroom.
Once the water flow has been stopped, you can then proceed to assess the situation and determine the best course of action to remove the object and prevent future plumbing mishaps.
Remember to always exercise caution when dealing with plumbing issues and consider seeking professional help if needed.
Retrieve the Object (If Possible)
After stopping the water flow, we can now focus on retrieving the object from the toilet. It’s important to approach this task with caution to avoid causing further damage to the toilet.
First, put on a pair of rubber gloves to protect your hands.
Use a toilet auger or a long-handled tool with a hook at the end to carefully reach into the toilet bowl and try to grasp the object. Gently maneuver the tool around the object, being mindful not to push it further into the plumbing system.
If the object is within reach, carefully lift it out of the toilet. If you encounter any resistance or are unable to retrieve the object, it’s best to stop and call a professional plumber to avoid causing further toilet damage.
Transitioning to the next section, if retrieving the object manually isn’t possible, you can try using a plumbing snake.
Use a Plumbing Snake
Now, let’s move on to using a plumbing snake to retrieve the object from the toilet. A plumbing snake is a handy tool that can be used to unclog toilets and pipes. It consists of a long, flexible metal cable with a coiled end. Here’s how you can use a plumbing snake to tackle the clog and retrieve the flushed object:
| Step | Instructions |
|---|---|
| 1 | Put on gloves and protective eyewear. |
| 2 | Insert the coiled end of the plumbing snake into the toilet bowl. |
| 3 | Slowly rotate the handle of the snake clockwise to feed it into the drain. |
| 4 | Continue pushing the snake further into the drain until you feel resistance. |
| 5 | Rotate the handle counterclockwise to break up the clog or hook onto the object. |
| 6 | Gently pull the snake back out, taking care not to damage the toilet bowl. |
| 7 | Dispose of the flushed object properly and flush the toilet to ensure it is unclogged. |
Using a plumbing snake is an effective DIY plumbing method to retrieve objects and unclog toilets. Remember to follow these steps carefully to avoid causing further damage.
Seek Professional Help if Necessary
If the object can’t be retrieved using a plumbing snake, we may need to seek professional help. In such cases, it’s advisable to contact a plumber who specializes in toilet repairs and blockage removal. Professional plumbers have the necessary tools, expertise, and experience to handle more complex situations. They can utilize advanced techniques like hydro jetting or drain cameras to locate and remove the object safely.
Seeking professional help ensures that the issue is resolved efficiently and effectively, minimizing any further damage to the plumbing system. Additionally, it’s important to learn from the experience and take steps to prevent future accidents. This includes being mindful of what gets flushed down the toilet and considering the use of drain screens or toilet locks to avoid similar situations in the future.
Frequently Asked Questions
Can I Use a Plunger to Try and Retrieve the Object?
Yes, we can try using a plunger to retrieve the object, but if it doesn’t work, we should consider calling a professional plumber or exploring alternative methods to safely remove the object.
What Are Some Signs That the Object May Have Caused a Blockage in the Plumbing System?
If you notice slow draining, gurgling sounds, or water backing up in other fixtures, these are signs that a large object may have caused a blockage in the plumbing system. To prevent this, be mindful of what you flush and consider using a toilet lock.
Can I Use Chemical Drain Cleaners to Dissolve the Object?
We don’t recommend using chemical drain cleaners to dissolve the object. There are alternative methods, such as using a plunger or a plumbing snake, that are more effective and won’t cause further damage. If these methods don’t work, it’s best to seek professional assistance.
Are There Any Potential Dangers or Risks Associated With Using a Plumbing Snake?
When using a plumbing snake, there are potential risks if not used properly. It is important to follow the proper usage instructions to avoid damaging the pipes or causing further clogs.
Will My Homeowner’s Insurance Cover the Cost of a Professional Plumber if Needed?
Yes, homeowner’s insurance may cover the cost of a professional plumber if needed. However, it’s important to consider DIY methods first to avoid potential risks and dangers.

Conclusion
In conclusion, if you find yourself in the unfortunate situation of flushing a large object down the toilet, it’s important to assess the situation calmly and act quickly.
Stop the water flow, try to retrieve the object if possible, and use a plumbing snake if needed. Remember, seeking professional help may be necessary to resolve the issue completely.
Don’t let this mishap send you down the drain like a ship without a captain – take control and tackle the problem head-on.
With an impeccable eye for detail and a passion for bathroom-related, Ava leads our editorial team gracefully and precisely.
Under her guidance, Best Modern Toilet has flourished as the go-to resource for modern bathroom enthusiasts. In her free time, you might find Ava exploring antique shops and looking for vintage bathroom fixtures to add to her collection.


Is Bathroom Tap Water the Same as Kitchen

Is the Bath and Bodyworks

Bio Bidet Bliss BB2000 Review: The Ultimate Smart Toilet [2024]

Marble Shower

Is Bathroom Cleaner

Kohler Innate Smart Toilet Review [2024]

Kohler NUMI 2.0 Smart Toilet Review [2024]

Are Bleach Tablets Bad for Your Toilet

CANEST Smart Toilet Review: The Ultimate Bathroom Upgrade [2024]

What Do You Do When You Flush Your Glasses Down the Toilet

-

 Reviews2 months ago
Best Toilet Air Freshener: Top 10 Picks for a Fresh-Smelling Bathroom [2024]
-
 FAQ - Advanced Bathroom Queries3 months ago
What Size Pipe for Toilet Drain
-
 FAQ - Advanced Bathroom Queries3 months ago
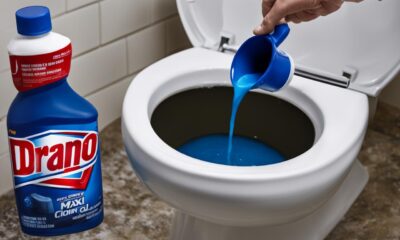
Guide: How to Use Drano Max Gel in Your Toilet
-

 FAQ - Advanced Bathroom Queries1 month ago
Which Countries Use Bidets the Most
-
 FAQ - Advanced Bathroom Queries3 months ago
Why Does My Poop Leave Streaks in the Toilet
-
 Reviews2 months ago
Best Waterless Toilets: Top Options for Eco-Friendly Bathrooms [2024]
-
 Buying Guides2 months ago
What to Do When You Accidentally Flushed Something Down the Toilet
-

 FAQ - Advanced Bathroom Queries3 months ago
How Do Toilets Work in Bali