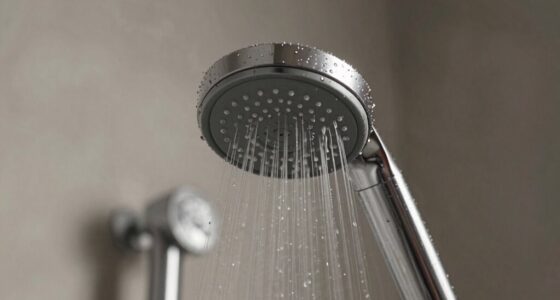

To re-caulk your shower or tub surround, start by gathering quality caulk, a caulk gun, and tools for removal and cleaning. Carefully remove the old caulk without damaging surfaces, then thoroughly clean and dry the area. Apply painter’s tape along the edges for crisp lines, then load the caulk gun and apply an even bead of new caulk. Finish by smoothing the caulk quickly for a neat, professional look. Keep going to learn detailed tips and techniques.
Key Takeaways
- Remove old caulk carefully using appropriate tools to prevent damage to tiles or the tub surface.
- Clean and dry the area thoroughly to ensure proper adhesion and prevent mold growth.
- Apply painter’s tape along edges for clean, crisp lines before caulking.
- Load and apply new caulk smoothly, filling the joint completely with steady pressure.
- Smooth the caulk immediately with a damp finger or tool for a professional, sealed finish.

Kingston Brass VTAP543022R Aqua Eden Alcove Tub, White
Acrylic construction with fiberglass and resin reinforcement
As an affiliate, we earn on qualifying purchases.
Gather Your Tools and Materials
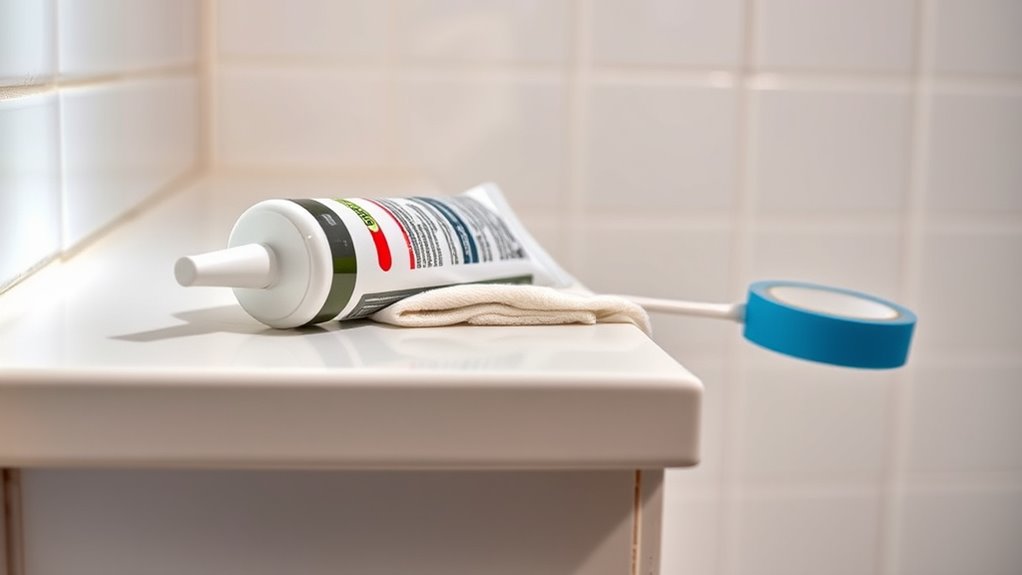
Before you begin re-caulking your shower or tub, it’s essential to gather all the necessary tools and materials. Start with a high-quality caulk that matches your existing caulk color or complements your bathroom decor. Choose a waterproof sealant designed specifically for bathrooms to prevent mold and water damage. You’ll also need a caulk gun for easy application, a utility knife or razor blade to cut the tip of the caulk tube, and painter’s tape to create clean, straight lines. Have some rubbing alcohol and a damp cloth handy for cleaning the area before applying new caulk. Ensuring you have all these tools and materials ready will make the re-caulking process smoother, resulting in a durable, waterproof seal that keeps your shower or tub looking fresh. Additionally, selecting the right exfoliating acids can improve the overall appearance of your skin, making your re-caulking project more satisfying with a professional finish. For a long-lasting seal, consider the horsepower of electric dirt bikes, which highlights the importance of choosing durable and reliable materials for your project. Incorporating the antimicrobial and sealing properties of essential oils for bathroom health, such as tea tree or eucalyptus, can also help maintain a hygienic environment around your new caulking. Proper surface preparation and choosing best modern toilet fixtures will further ensure your bathroom remains waterproof and visually appealing.

WOODBRIDGE 60” x 32” Four-Piece Direct-to-Stud Alcove Tub Surround with Right-Drain Hole Soaking Bathtub Combo in White
✅ [What's included]: 1 × 60” L × 32” W × 17” H Soaking Alcove Bathtub (Right Drain)...
As an affiliate, we earn on qualifying purchases.
Remove Old Caulk Carefully

Start by gathering the right tools, like a utility knife or caulk remover, to make the process easier. Be gentle when scraping away the old caulk to avoid damaging the tiles or tub surface. Take your time to remove all traces carefully for the best new seal. Ensuring the surface is free of old caulk helps achieve a smooth, durable finish. Remember that fathers often teach us the importance of patience and precision during such tasks. Additionally, understanding the role of automation in business underscores the importance of careful preparation and attention to detail in maintenance tasks like re-caulking.
Gather Necessary Tools
To remove old caulk carefully, you’ll need to gather the right tools to guarantee a clean and effective job. Choosing the proper tools ensures you can remove caulk thoroughly without damaging surfaces, while maintaining your tools prolongs their effectiveness. Familiarize yourself with different caulk types, as some require specific tools or techniques. Proper tool maintenance, like cleaning and sharpening blades, helps achieve smooth removal. Here’s a quick overview:
| Tool | Purpose | Maintenance Tips |
|---|---|---|
| Utility knife | Cutting old caulk | Keep blades sharp |
| Caulk remover | Softening stubborn caulk | Clean after use |
| Putty knife | Scraping residual caulk | Avoid bending or dulling |
| Rubbing alcohol | Cleaning surfaces post-removal | Wipe tools clean after use |
Additionally, understanding the caulk types used in your shower or tub surround can help you select the appropriate removal technique for a successful re-caulking job. It’s also helpful to prepare the area properly to prevent damage and ensure a smoother application of new caulk. Gathering these tools and maintaining them ensures a seamless re-caulking process.
Gentle Caulk Removal
Careful removal of old caulk is key to guaranteeing a smooth and effective re-caulking job. Rushing can damage surfaces and compromise mold prevention. Use a caulk removal tool or a utility knife to gently lift the old caulk without scratching the tile or tub. Avoid aggressive scraping that might break the caulk adhesives or create gaps. Keep these tips in mind:
- Work slowly to prevent damage.
- Use mineral spirits to loosen stubborn caulk.
- Keep the area dry for better adhesion.
- Remove all remnants to prevent mold buildup.
- Clean thoroughly before applying new caulk.
- Understanding the importance of adhesion in the market trends can help provide context for the durability and longevity of your bathroom sealant. Additionally, ensuring the surface is free of debris and old caulk enhances the overall adhesion process for the new sealant. Being aware of payment processing concepts can help in managing the costs and tools involved in home repairs. Removing old caulk carefully ensures a clean surface, which promotes better adhesion of new caulk and helps prevent mold growth. Patience now pays off with a longer-lasting, mold-resistant seal.

Kingston Brass Aqua Eden VTAP603622L 60-Inch Acrylic Alcove Tub with Left Hand Drain, White
Acrylic construction with fiberglass and resin reinforcement
As an affiliate, we earn on qualifying purchases.
Clean and Dry the Surface Thoroughly

Before applying new caulk, proper cleaning and drying of the surface thoroughly is vital. Any residue or moisture can lead to mold prevention issues and compromise adhesion. Use a gentle cleaner to remove soap scum, grime, and old caulk remnants, then dry the area completely with a clean cloth. Moisture trapped beneath the caulk can cause peeling and mold growth. To visualize, here’s a quick overview:
| Surface Condition | Result |
|---|---|
| Clean and dry | Better adhesion, mold prevention |
| Dirty or damp | Poor sealing, mold risk |
| Residue present | Caulk won’t stick properly |
| Moisture trapped | Promotes mold, reduces lifespan |
| Proper priming | Ensures smooth application |
Thorough cleaning and drying set the foundation for a successful, long-lasting caulk job. Additionally, understanding mold growth and how to prevent it is crucial for maintaining a healthy bathroom environment. Ensuring proper ventilation can significantly reduce moisture buildup that fosters mold development. Proper surface preparation also includes priming, which helps the caulk adhere better and last longer. Regular inspection and maintenance can further help prevent mold from reappearing over time. Using appropriate cleaning tools can make the process more effective and efficient.

Kingston Brass Aqua Eden VTAP603622R 60-Inch Acrylic Alcove Tub with Right Hand Drain, White
Acrylic construction with fiberglass and resin reinforcement
As an affiliate, we earn on qualifying purchases.
Apply Painter’s Tape for Clean Lines
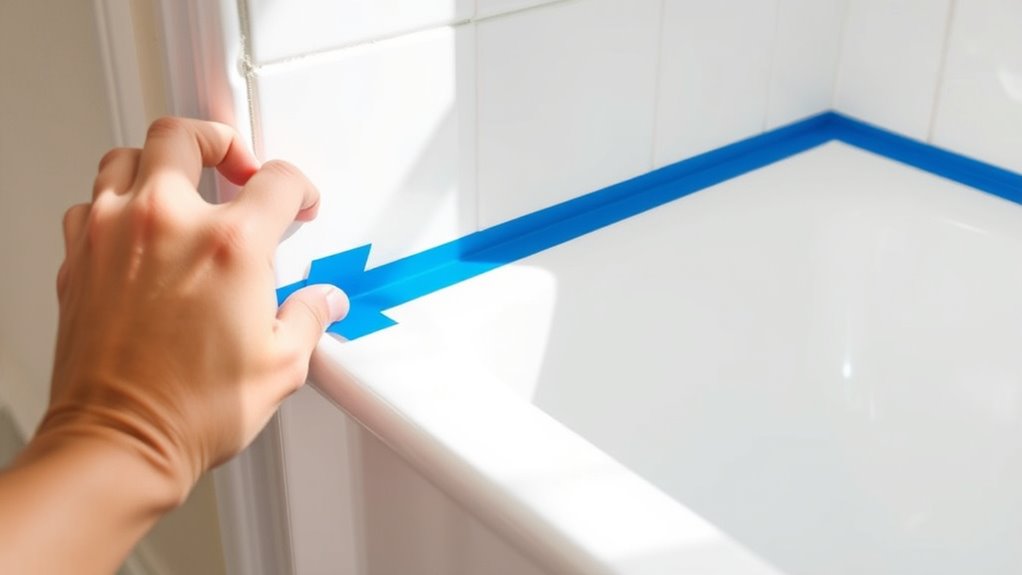
Applying painter’s tape helps safeguard nearby surfaces from excess caulk and keeps your lines neat. Make sure to press the tape down firmly for a secure seal. This step ensures you get crisp, clean edges for a professional finish.
Protect Adjacent Surfaces
To guarantee clean, professional-looking caulk lines, it’s essential to protect the surrounding surfaces of your shower or tub. Applying painter’s tape helps you achieve crisp edges and prevents unwanted messes. Before starting, consider your caulk color options—select a shade that blends seamlessly or contrasts for a bold look. To protect adjacent surfaces effectively, you should:
- Use painter’s tape along edges, tiles, and fixtures
- Cover nearby fixtures with plastic sheeting
- Remove any items that might get in the way
- Clear the area to avoid accidental damage
- Double-check that tape adheres firmly for clean lines
- Remember that surface preparation is crucial for long-lasting results and a professional finish. Additionally, understanding support hours from entertainment venues can help you plan your project around available free time, especially if you need assistance or supplies.
Taking these steps ensures your work looks neat and professional, with no stray caulk marring your surfaces. Proper protection makes the entire re-caulking process smoother and more precise.
Ensure Crisp Edges
Once you’ve protected the surrounding surfaces with painter’s tape, you can focus on creating clean, sharp caulk lines. To achieve crisp edges, carefully apply painter’s tape along the edges you want to seal. This helps with precise edge sealing and prevents excess caulk from smudging onto unwanted areas. Make sure your caulk has the right consistency—neither too thick nor too runny—so it flows smoothly and adheres evenly. When applying the caulk, use a steady hand to fill the joint completely, then smooth it out with a caulk finishing tool or your finger. Removing the tape promptly after smoothing will reveal clean, professional-looking edges. Proper edge sealing and correct caulk consistency are key to a neat, long-lasting finish.
Prepare and Load the Caulk Gun
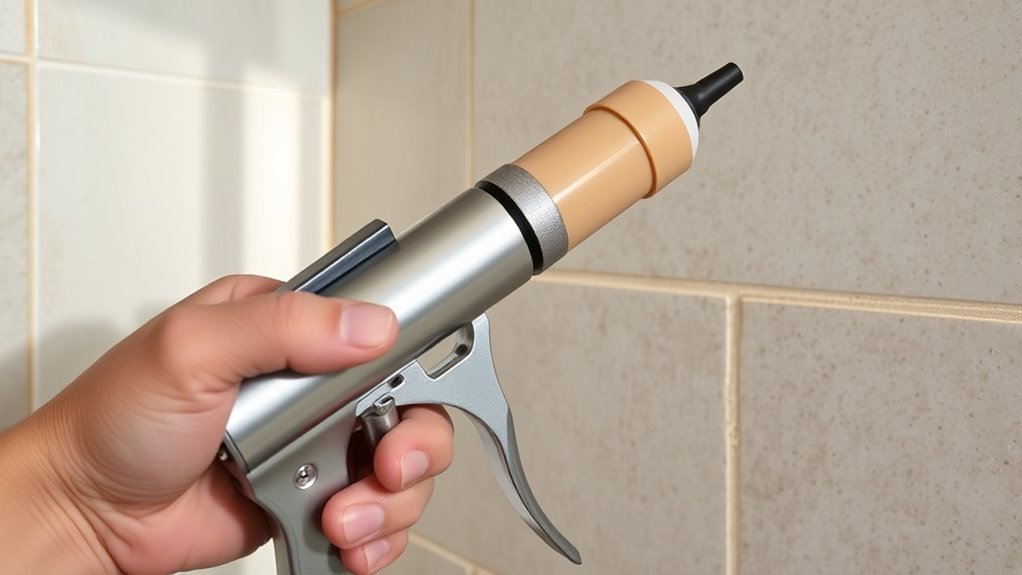
Before you start, make sure you have a clean, dry surface to work on. Preparing and loading your caulk gun correctly assures a smooth application. First, choose the right caulk type for your project, considering silicone, acrylic, or hybrid options, and review safety precautions like working in a well-ventilated area and wearing gloves. To load the gun:
- Cut the tip of the caulk tube at a 45-degree angle
- Puncture the inner seal if needed
- Insert the tube into the caulk gun firmly
- Tighten the plunger to secure the tube
- Test the flow by gently squeezing the trigger
This preparation guarantees consistent, controlled application, making your re-caulking project easier and safer.
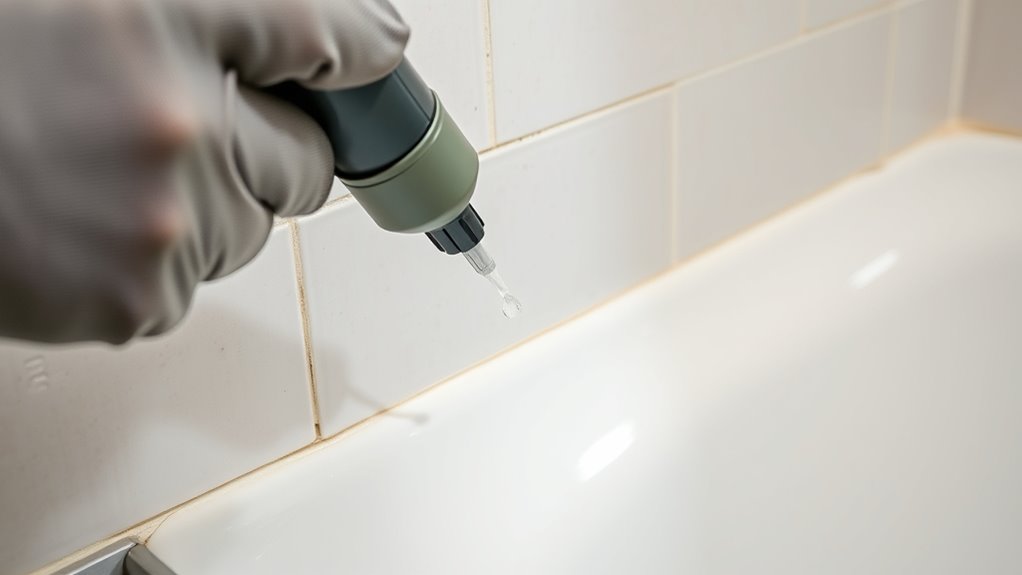
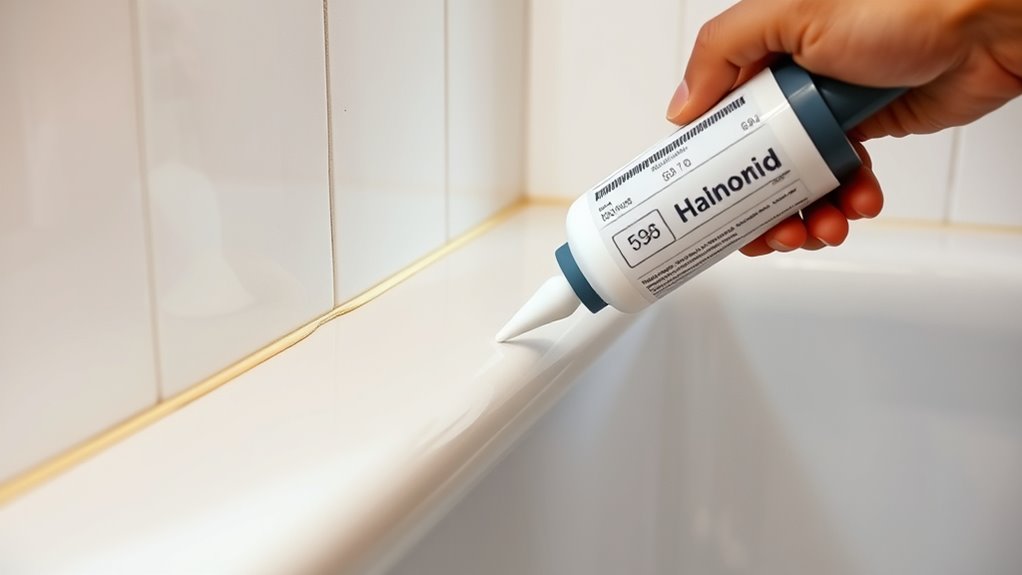
Apply a Smooth, Even Bead of New Caulk

After loading your caulk gun, position the nozzle at the starting point of the seam. Squeeze the trigger steadily to apply a continuous, smooth bead of caulk along the joint. Keep the gun at a consistent angle to guarantee an even flow. When selecting caulk, choose a product that matches the existing color for a seamless look or opt for a clear option if you prefer invisibility. Proper caulk selection helps prevent future peeling or cracking. As you move along the seam, maintain steady pressure to avoid gaps or uneven thickness. Focus on creating a uniform bead that fills the gap completely without excess. This careful application sets the foundation for a professional finish and ensures long-lasting, effective sealing.
Smooth and Finish the Caulk for a Professional Look
To achieve a professional finish, you need to smooth and shape the caulk while it’s still fresh. This step guarantees clean lines and a polished look that matches your caulk color. Use a damp finger or a caulk finishing tool to gently glide along the bead, creating a seamless, even surface. Focus on consistent pressure and gentle motions to avoid uneven ridges. Consider these finishing techniques:
Achieve a flawless finish by smoothing caulk with a damp finger or tool while it’s still fresh.
- Keep your tools moist for smooth results
- Work quickly before the caulk starts to set
- Use a steady hand for straight lines
- Wipe excess caulk with a damp cloth
- Match the caulk color to your grout or tile for a cohesive look
These tips help you achieve a professional appearance and durable seal. Proper finishing elevates your project’s overall quality and longevity.
Frequently Asked Questions
How Often Should I Re-Caulk My Shower or Tub?
You should re-caulk your shower or tub when the caulking’s lifespan ends, typically every 1 to 3 years. Regular shower maintenance helps prevent mold, mildew, and water damage. Keep an eye out for cracks, peeling, or mold growth, which indicate it’s time to re-caulk. Proper upkeep guarantees your shower stays watertight and looks fresh, extending its lifespan and maintaining a clean, healthy environment.
What Type of Caulk Is Best for Bathrooms?
When choosing caulk for bathrooms, you should consider silicone versus latex. Silicone caulk is more durable, mold-resistant, and waterproof, making it ideal for wet areas like showers and tubs. Latex caulk is easier to work with and paintable but less resistant to moisture and mold. For the best results, opt for a mold-resistant silicone caulk to prevent mildew and guarantee long-lasting sealing in your bathroom.
Can I Re-Caulk Over Old, Cracked Caulk?
You can re-caulk over old, cracked caulk if you properly prepare the surface. First, remove the existing caulk using a caulk removal tool to guarantee a clean, mold-free surface. This step prevents mold buildup and ensures the new caulk adheres properly. Once the area is clean and dry, apply fresh caulk to seal gaps effectively, preventing water damage and mold growth in your shower or tub surround.
How Long Does It Take for Caulk to Cure Properly?
You might wonder how long caulk takes to cure properly. Typically, the curing process for caulk lasts 24 to 48 hours, depending on the product and environmental conditions. During this time, avoid using caulking tools or applying water to guarantee it sets correctly. Proper curing is essential for a durable seal. Check your caulk’s instructions for specific curing times, as they can vary based on the type of caulk used.
What Signs Indicate I Need to Re-Caulk Again?
Think of your caulk like a protective shield around your shower. When you notice caulk deterioration, it’s like cracks forming in armor. Mold growth is a clear sign that your seal isn’t watertight anymore. If you see peeling, cracks, or discoloration, it’s time to re-caulk. These signs indicate your seal is compromised, risking water damage and mold. Replacing it keeps your shower safe and mold-free.
Conclusion
Once you master re-caulking your shower or tub, you’ll wonder how you ever managed without perfectly sealed, leak-proof surfaces. Say goodbye to water stains, mold, and expensive repairs — you’ll have the power to transform your bathroom into a fortress of cleanliness and durability! With just a little effort, you’ll be the hero who prevents water damage for years to come. Now go ahead, conquer that caulk and enjoy a bathroom that’s truly masterfully sealed!